“Best DIY Projects of June” Linky Party

June 30, 2012 AT 6:00 pm 14 Comments


It’s the last day of June!!! Is that possible?!!!

I hope you are having a great summer.  Smile

I know you guys have been as busy as me lately, and I cannot wait to see your BEST DIY project of June!

slide


My best DIY project of June would have to be my sister’s laundry room makeover.  We started it four months ago, but we finally finished it in June.

page

Click on the picture to check it out if you missed it.

Now it’s your turn to show me your BEST DIY project of June!


Please remember to follow the party guidelines:

    • Your project MUST be about DIY home decor or home improvement.
    • Only ONE project per blogger, please.
    • Your project needs to be from the month of June, 2012.
    • Please enjoy visiting other great projects by other bloggers and leave some comment love. 
    • Please link back to the party somewhere in your post.  (Only those with a link back to the party will be considered to be featured on my blog.)

button

Thanks for coming to my party!


OPC’S Before and After Series {Enter Your DIY Project to Win!}

June 29, 2012 AT 10:37 pm 2 Comments


It’s summertime, Y’all!  And you know what that means in blogland?!!

It’s time for the One Project Closer “Before and After” series in support for Habitat for Humanity!

This is a great series to be a part of.  I have participated the past two years.  In 2010, I entered my back patio makeover in which we stained our concrete to look like tile.  You can read about it HERE.  I was so excited that our little makeover was one of the weekly winners!


In 2011, I entered my mudroom/laundry room project  and was chosen to be a weekly winner AGAIN!  Better yet, my project was chosen as the BEST OVERALL project for the summer!

Woohoo!!


It was such an honor to be the weekly winner twice, and the overall winner as well.  Each time I received a gift card to the home improvement store of my choice, which was super cool.

But the best part?

Each time I was the weekly winner, a $100 donation was made to Habitat for Humanity in my honor.

I LOVE Habitat for Humanity!!!  It is a great organization that does so much good for those in need. 


One Project Closer is a great site for all of us who love all things DIY!  Fred and Ethan (and their beautiful wives) are always working on a DIY project and love to share their knowledge with their readers.  You should check it out!

They came up with this great “Before and After” series as a way to raise awareness for Habitat for Humanity and support their mission to provide decent, safe and affordable places to live.

Here’s How it Works

If you’re not familiar with the series, here’s the basics: you submit pictures and a story from a home improvement project you worked (no contracted jobs) sometime over the past year.

Every week of the summer (June 20 – September 21), a winner is selected and their story is published online.

Each winner gets a $50 gift card to either Lowes, Home Depot, or Amazon, and One Project Closer makes a donation of $100 to Habitat for Humanity in their honor!

At the end of the Summer, the best submission, as voted on by readers, wins a bonus $150 gift card to one of the three stores above.

This year is different and even more AWESOME because they’ve asked 13 other sites (including Beneath My Heart!) to get involved, each hosting a week, picking that week’s winner, and featuring the Before and After article on their site.

Check out the line up:

Week of: Host:
June 17 OPC’s The Better Half
June 24 Pretty Handy Girl
July 1 Beneath My Heart
July 8 ten june
July 15 Southern Hospitality
July 22 Charles and Hudson
July 29 House of Hepworths
August 5 the space between
August 12 Remodelaholic
August 19 DIY Showoff
August 26 My Blessed Life
September 2 Home Stories A-2-Z
September 9 Bear Rabbit Bear
September 16 Burlap & Denim


Here’s How to Enter

To submit a before and after story, email OPC your submission to [email protected].

Your entry can be in the email itself or attached as a Word document.

Make sure to number pictures in order so it’s easy for them to reconstruct the story, and please attach the pictures as JPEGs even if you also embed them inside the Word document.

Keep in mind that good before and afters include interesting pictures (before, during, and after) and a descriptive story. Here are some great examples from last year.

Alternately, they are letting people enter via a new link party to show off great transformations. Select one of your best makeover projects to share, and don’t be surprised if Jocie pins her favorites to Pinterest.


So ladies, get those projects entered, and good luck!!!

I will be judging next week’s winner and will announce it next Saturday, July 7th!


Favorite “PINS” Friday!

June 29, 2012 AT 9:25 am 12 Comments


Happy Friday, ladies!  I hope you have had a wonderful week.

I am still coming down from my “Haven High.”  Smile

I’ve spent some time on Pinterest this week trying to find inspiration for our master bedroom.

Can I make a confession? 

I’m nervous about decorating my room.

I am struggling with exactly what type of “look” I want in this room.  Plus, I have a VERY limited budget and a LOT of space to fill.  I need to use some of my existing furniture, but will need some new pieces too.  Honestly, it’s a little nerve-wrecking when you know that thousands of readers are following along.  You are the ones that encourage and support me, so I don’t want to let you down.

Do I sound like I’m whining?  Hope not.  Cause I’ve got the greatest “job” on earth.  Smile  I know we will make it all come together eventually.  I need to just focus on one thing at a time.

It’s all good!


So, here are a few “pins” that caught my eye this week…

neutral bedroom

source

I love the headboard in this picture.  Although I will probably be using my black four poster bed in our room.  We do plan on putting a chandelier over the bed, but I haven’t decided what type yet.  I like the way they incorporated tans, grays, and whites in this room.  Don’t ya love that rug?

Traditional bathroom

source

This bathroom is so clean!  I think that’s why I like it so much.  Do you think I could ever have a bathroom this clean with four boys in my house?  Me either.

One thing I love about this picture is that beautiful old door.  I love the privacy glass and the gorgeous crystal knob.  Those little touches make me happy.  I also love that sink.  I am wanting one of those in our guest bath someday.

coastal bedroom

source

So, I like this picture above because of the bed.  I am trying to come up with ways to create extra storage in my boys’ rooms.  I think I have mentioned that before.  This type of be would be perfect for storing clothes or toys underneath.  And I know Cy could make me one of those!  There is something very cozy about that type of bed.  I love the color palette too.

Chocolate Covered Peanut Butter Cheesecake Pops

source

Okay…Yum?!!!

I love anything with peanut butter and chocolate, so this pin definitely caught my eye.  I’m really wanting to make these.


REMINDER…

Tomorrow night, I will be hosting my “Best DIY Projects of June” linky party!


slide

I hope to see you there! Smile


Searching for a Door {and other stuff}

June 28, 2012 AT 2:28 pm 10 Comments


Well, I am so thrilled to finally have air conditioning.  Our air has been out since Memorial Day weekend, and with temps getting up to 100 degrees this weekend, it couldn’t have been fixed at a better time.

Not only did I sleep soundly in the cool air last night, but I also got to sleep in our master bedroom.  Granted, we only have the box springs and mattress in our room, but there is something very fun and exciting about it.  {The air compressor adds a special touch, don’t ya think?}

boys 011

We are slowly making progress toward having our addition complete, but at least we are making progress!  Amen?!

Well, the boys and I headed out to the Habitat ReStore in Lexington to try and find an old door for our master bathroom.

boys 004


See that second doorway back there?  It needs a small door.

boys 012

That’s our private toilet room.  Woohoo!!  I love me a private toilet. Smile  I need a door for that area, and I would love for it to be old with a lot of character.


If we don’t find one, we might make one. I kind of like this type of door.

a200ef180889

source

Except my doors wouldn’t be chalkboard doors.  They would probably look more like barn doors.

I’m not sure if we have enough room to make them sliding doors, but we’ll see. 

The boys and I didn’t find anything at the Habitat Store, but we had a great time.  We ate lunch at McDonald’s, and I got to work on my computer while the boys played in the indoor playground.

Check out this pic!

boys 008

Yep!  All my boys were in there.  They were squeezed in there like sardines.  Cracked me up.  Smile


On a different note…

Do you remember that great little store I share with you last summer?  It’s called House by JSD, and they are located in Lexington.

DSC_0093

This store is filled with so much beautiful goodness that it makes my heart stop!

DSC_01011

It’s filled with things that are definitely my decorating style.

Well, they have applied for a grant to help their business, and they need our votes to win.  Do you mind jumping over there and voting for them?  I know they would appreciate it and so would I.  Smile


Here’s what you need to do to vote:

Visit missionsmallbusiness.com, and on the lower right, click login and support.  You vote through Facebook (it’s so they know real people are voting and not spambots). 

After validating on Facebook, search for HOUSE BY JSD, Lexington, Ky on the bottom of the following page, and click vote!  You can vote for multiple businesses!  As many as you want actually!

Thank you!!!


Masterbath {Turning a Dresser into a Vanity}

June 27, 2012 AT 2:43 pm 42 Comments


I wanted to show you the progress we’ve made in our masterbath.  We are converting an antique dresser into our vanity.


Do you remember the antique furniture piece I got at the Habitat Store for $50 back in September?

haven 009

You can read about my find HERE.

Well, then I showed you some inspiration pictures of turning a dresser into a vanity in this post. We also discussed whether to put one sink or two in our vanity.  Though many of you thought we had to have two sinks in the master bathroom.  Many of you (and me) thought one sink would look best with this piece of furniture. 

I was so excited when one of my readers showed me how she turned the exact piece of furniture into a vanity in her own home.

4116784323_67f4631d69

It really got me excited to see the potential in my little dresser.

Getting a custom cut sink top for our dresser was out of our budget, so we decided to go with a drop-in sink for ours.

The bottom pieces of the dresser were not in the best shape.  They were falling off the dresser.  haven 010

So Cy took those pieces off, applied some PL Adhesive to them, and then nailed them back on to the dresser.

haven 012

He did this on the sides and front of the dresser.

haven 014

haven 015The top of the dresser wasn’t in the best shape, so we sanded it down so we could put a new coat of stain on it.  Cy started sanding the surface with an 80 grit, then a 120 grit, and then finished with a 220 grit for a smooth surface.

haven 019

Cy put one coat of Minwax Walnut stain on the top part of the dresser.  Although the dresser was a cherry dresser, we felt like the Walnut stain matched close enough.

Then we did a light coat of Minwax Walnut stain all over the rest of the dresser.  The top of the dresser got 5 coats of oil-based satin polyurethane.  Cy used 220 grit sandpaper between each coat.

haven 024

He applied only one coat of polyurenthane over the rest of the dresser.

It was looking better already.

bathroom vanity 003

We purchased a drop-in sink from Lowe’s to install into our new “vanity.”

The sink came with a template to cut out to help you fit it into the vanity top.

bathroom vanity 006


Once Cy cut it out, he measured the vanity to make sure the sink bowl would be centered on the piece.

bathroom vanity 007


As you can see, we had to remove the first couple of drawers to make room for the new sink.

bathroom vanity 011

Cy traced the sink bowl template with a pen, pressing hard to create a mark in the wood.

Then he used a drill to create a hole near the cut-out line.

bathroom vanity 015


Next, he started at the hole he had just drilled and used his jigsaw to cut on the line.

bathroom vanity 024

With a steady hand and just a few seconds later, we had a hole for our sink!

bathroom vanity 030


bathroom vanity 031

Cy then had to use his jigsaw again to cut out the wood beneath the top of the dresser where the bowl would sit.

bathroom vanity 035

We placed the sink bowl in the dresser and it fit perfectly.  Smile

Then Cy used a very small bead of silicone caulk to seal the sink around the edges.


bathroom vanity 037

He also had to cut out a little more of the inside of the dresser to make room for the plumbing.


bathroom vanity 039

The top three drawers will not be functioning drawers.  But that is okay.  We will be able to use the bottom drawer, the two sides drawers, and the two side doors.  There is a ton of room in this dresser/vanity!


Stayed tune to see our vanity all decked out with new plumbing and a new faucet. 

I cannot wait!

What do you think about our new DIY vanity?

P.S.  If you are not following me on twitter or facebook, you are missing out on the fun stuff.  Here’s a pic I share of my boys while we were at Lowe’s last night picking out our vanity sink…

539666_10150974990324566_1761713299_nI can’t take them anywhere! Smile


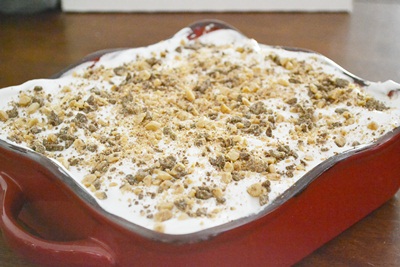
Ice Cream Sandwich {Delicious Summer Dessert!}

June 26, 2012 AT 11:09 am 26 Comments


Here is a delicious and simple summer dessert using ice cream sandwiches!

My friend, Julie, brought this to our ladies Sunday School luncheon.  I told her that it was “blogworthy” and asked if I could share it on my blog.  She said, “Of course!  But I can’t take credit for it because I got the recipe from my friend, Kristen.”

So here is a great recipe that you got from me who got it from Julie who got it from Kristen! Smileice cream sandwich

This is SO, SO simple!

All you have to do is buy the ingredients…

ice cream sandwich

  • Ice cream sandwich bars
  • Whipped topping
  • Hot fudge topping
  • Caramel topping
  • Heath Bits Topping (or the topping of your choice)

Here are the SEVEN easy steps.

Step One:  Layer the ice cream sandwich bars in a 9×12 or smaller dish.

ice cream sandwich


Step Two:  Spread a layer of fudge topping over the sandwich bars.

ice cream sandwich

Step Three:  Add another layer of ice cream sandwich bars on top of the fudge.

ice cream sandwich

Step Four:  Pour a layer of caramel topping on top of the sandwich bars.

ice cream sandwich


Step Five:  Spread a layer of whipped topping over the caramel topping.

ice cream sandwich

Step Six:  Sprinkle Heath Bits topping on the whipped cream.  {You can use oreo toppings, or butterfinger toppings, or whatever you want!}


ice cream sandwich


Place dish in freezer and let it sit for several hours.  I prefer to let mine stay in the freezer overnight before serving.


ice cream sandwich


This dessert is so easy and so delicious!  I hope you give it a try!

What is your favorite summer dessert?


Haven 2012! {A Dream Come True}

June 25, 2012 AT 12:12 pm 32 Comments

Wow!  Ladies, I am still recovering from Haven 2012.

It was very surreal to watch a dream come true this past weekend.  For several years, many of us have been wanting to put together a blog conference just for Home/DIY bloggers.  A year ago, Rhoda took the lead and created our planning team.  For a year now, we have dreamed, planned, skyped, networked, emailed, phone-called, brainstormed, and more to put together Haven 2012.

haven 158

Kate, Sarah, Beth, Rhoda, Me, Chris, and Marian

I love these ladies so much!  Kristi, our blog designer, and Kristin, our event planner, are missing from this photo.  We could not have done this even without them!

To see it come together before our eyes this weekend was beyond words!  We all felt like proud little mamas.  :)

Check out all of the swag bags lined up and waiting to be handed out.

haven 041

We had so many amazing sponsors that helped us fill our swag bags with all kinds of goodies.

Wednesday, the planning team hung out to put together some of the decorations.

haven 044

We all worked together to get the registration table, swag, and décor in order for the big event!

haven 045

We were laughing at how many of these paper balls/lanterns that we had to put together.

haven 046

Rhoda was buried in a sea of them…

haven 047

It took all of us working together to put this event on.

haven 048

Wednesday night we had a “meet and greet” party sponsored by Frog Tape and Oreck to start things off.

Then on Thursday morning, our keynote speakers, John and Sherry from Young House Love, inspired us all and made us laugh a lot.  They were amazing!!!

young house love

They have such a wonderful blog. and it was great to hear their “blog story” of how it all began.  They were so endearing to listen to.  Two words I would use to describe them are “genuine” and “hilarious.”

young house love

I was able to snag a picture with them after they spoke.  This picture cracks me up because it looks like John and I are a couple with our cute little baby and that Sherry is taking a picture with us!  Ha!

There were many great sessions throughout the day on Thursday, and that night we had another mixer sponsored by Rustoleum.  It was so great to see all of these amazing attendees just chatting it up and making new friendships.


haven 061

Friday was full of more great sessions that I loved being a part of.  Kevin and Layla (from The Lettered Cottage),  and Josh did an AMAZING job in their photography class!  I learned so much!

Here’s Kevin talking to some ladies about their cameras.

haven 144

Here’s sweet Layla talking to some ladies about their cameras as well.

haven 145

Now, here are a TON of pictures that I took with some of my favorite ladies.


haven 062

Renee from Living, Laughing, and Loving and Christina from The Frugal Homemaker

haven 064

Tonya from Love of Family and Home


haven 067

Kristin from Favorite Paint Colors

haven 069

Melissa from 320 Sycamore


haven 149

A highlight for me was meeting Tonya from Women Do Everything.  What an amazing life story she has.  So Inspiring!


haven 161

Susie from Susie Harris blog


haven 162

I was thrilled to finally meet Susan from Between Naps on the Porch.  She was one of the blogs that my mom followed, and she told me I should go read her blog.  It was a very special moment for me because I could hear my mom saying, “Traci?  You got to meet Susan?!!”  Yes, Mom.  I did. Smile


haven 164

 Susan from Living Rich on Less


Check out this group of amazingness…

haven 166

Front row:  Sandra (Sawdust and Paperscraps), Roeshel (DIY Showoff), Brittany (Pretty Handy Girl)

Middle row (sitting):  Chris (Just a Girl), Myra (My Blessed Life), Marian (Miss Mustard Seed), Stacy (Not Just a Housewife), Wendy (The Shabby Nest), Me.

Back row (standing):  Gina (Shabby Creek Cottage), Beckie (Infarrantly Creative), Beth (Home Stories A2Z), Rhoda (Southern Hospitality), Sarah (Thrifty Décor Chick), Kate (Centsational Girl)


haven 171

Sandra from Sawdust and Paper Scraps


haven 173

Roeshel from DIY Showoff

haven 177

Myra from My Blessed Life and Marian from Miss Mustard Seed


haven 181

Brittany from Pretty Handy Girl


haven 184

Wendy from the Shabby Nest and Stacy from Not Just a Housewife


haven 185

Tauni from SNAP!


haven 186

Beckie from Organizing Made Fun and Allison from House of Hepworths

It was such a great conference!  And there was a huge sigh of relief when it was over.

Not because it was over, but because it went so well.

Let’s just say we were super tired and feeling a little “loopy.”

We are looking forward to Haven 2013!!!

Hope to see you there!


Favorite “PINS” Friday!

June 22, 2012 AT 1:58 am 5 Comments


Hi, Y’all!

I hope you have had a great week!

I am having so much fun at Haven, and I cannot wait to show you some pics.

But for now, here are some of my favorite pictures from Pinterest.


I fell in love with this blue dresser!

Beautiful dresser.

source

Isn’t it amazing?!

This was one of my favorite pins because I am thinking about arranging Adam and Eli’s beds like these.  I love the extra storage beneath the beds.

twin beds - L shape arrangement

source

I absolutely love this pin!  I’m really loving the color green in décor right now.  And look at that chandelier!

source


If you want to follow me on Pinterest, click on the button below. Smile

Follow Me on Pinterest


Have a blessed day!!!


How to Have Gorgeous Eyelashes!

June 21, 2012 AT 8:18 am 7 Comments


Hey Friends!

I am having a blast here at the Haven Conference!  Wish you ALL were here!

While I am away, I asked my sis, Cyndi,  to guest post for me.  She has a fabulous blog called Walking in Grace and Beauty where she talks about beauty, fashion, and Jesus.

Yes, you heard me right!  Those three things can go together.  :)  She knows where true beauty comes from and that matters most.  I love my sister’s blog, and  I cannot tell you how many wonderful beauty and fashion tips I have gotten from her.

Like today’s post.  I absolutely love this tip about how to have gorgeous eyelashes!

 Take it away, Cyndi!


Good morning ladies! I know most of the time over here on my sister’s blog you ladies talk about DIY on your home. But, today we’re going to talk about some DIY for our eyelashes.

A few weeks ago I read about how to have gorgeous eyelashes and I wanted to share it with you all because it really works. All you need is an eyelash curler, a blow dryer and mascara. I use volume mascara because my eyelashes are very short.

Here’s what you do to have gorgeous eyelashes:

  • With your blow dryer on low heat, blow air on the curler (especially on the rubber part) for no more than 5 seconds. Touch the metal. If it’s hot, let it cool for a few seconds. You don’t want to burn your eyelid.
  • Open the curler, clamp lashes near the roots. Hold for 10-30 seconds. Never curl lashes after you apply mascara — as the mascara dries, lashes can stick to the curler & be torn from the roots.
Just because I want you to see how great this works, I’ve taken pictures (close-up pictures) of my eye. Oh how I wanted to airbrush these pictures!!
These are my eyelashes before curling or using mascara. Not too pretty.


My eyelashes after using the warm eyelash curler. Better.

These are my eyelashes after using the eyelash curler and mascara. Much better!

Okay, I may not have gorgeous eyelashes, but they look much better after using the warm eyelash curler. I’m hooked!

Thanks Sis for letting me hop over here and share some beauty tips with your sweet readers. I love to share about fashion and beauty on my blog, Walking in Grace and Beauty. Sometimes I even share some things I’ve done to my home. :-) You can follow me on my Facebook page, here. I’d love for you to stop by! Have a blessed day!


My Sister’s Laundry Room Makeover REVEAL!

June 20, 2012 AT 6:00 am 43 Comments


I am so thrilled to be sharing with you my sister’s laundry room makeover!

She is super happy with how it turned out, and I love how clean and crisp it looks.

Let’s take a look back at this space, shall we?

Four months ago, her laundry room looked like this…

blissdom 034

Here were some of the plans we had for this room…

blissdom 018

blissdom 019

blissdom 020

blissdom 021

blissdom 029

blissdom 026

So…

1.  We took down the shelves.

2.  Painted the walls.

3.  Installed white cabinets I found at the Habitat store.

4.  And Decorated!

And here is Cyndi’s laundry room now!

laundry&dad's 049

What once looked like this…

blissdom 031

Now looks like this…

laundry&dad's 040


Before…

blissdom 029


After…

laundry&dad's 023


Before…

blissdom 027

After…

laundry&dad's 029


Before…

blissdom 030

After…

laundry&dad's 047

For the cabinets, I found two white cabinets at the Habitat store for $30 a piece.

My Dad and Wayne hung them up against each side of the walls.

window 016

Cyndi took off the brass knobs and added some nickel ones.

Then I stayed all night at Cyndi’s house one Friday and built two shelves between the cabinets for baskets.

laundry&dad's 019

Cyndi’s major request for this makeover was to have a place to hang her clothes to dry.

So I attached a silver towel bar to the bottom of the cabinets for her to hang her clothes on.

laundry&dad's 020

We moved the washer and dryer apart to leave space to hang clothes in the middle.  The washer and dryer also looked better lined up underneath each cabinet.

laundry&dad's 040

I hate that the hot and cold water lines are so visible, but I just couldn’t quite come up with a plan to cover them.  I’ll keep thinking about that. Smile


The accessories above the cabinets are from Home Goods {minus the basket and greenery on the right.}

Cyndi and I just fell in love with that bird print when we saw it, and it was reasonably priced.  It adds a touch of whimsy to the room and really fills that empty space in the room well.

laundry&dad's 060


We went ahead and updated the bathroom that is connected to the laundry room.  Unfortunately, I do not have any “before” pictures of that space, but here are a few “after’s”…

As you can see, you enter the bathroom before you get to the laundry room.

laundry&dad's 048

The bathroom was painted yellow, but we painted it the same color of the laundry room.  (Well, our dad did.)  SmileIt’s called “Urban Putty” by Sherwin Williams.

laundry&dad's 051

We bought some cute prints at Home Goods for above the toilet.

laundry&dad's 071

We pulled in the greens and blues from the laundry room rug.

Cyndi also bought this cabinet at Home Goods for her bathroom.  She stores cleaners and toilet paper in this cabinet.  Plus, the lamp on top of the cabinet makes the bathroom feel extra comfy and home-y.

laundry&dad's 031


Now, instead of leaving the doors closed on the bathroom and the laundry room, Cyndi leaves them wide open!

She loves looking into the laundry room now from her kitchen.

laundry&dad's 076

The chandelier we bought at Home Depot definitely dresses up the space!  And it gives the room a beautiful glow.

And that rug!  Oh, I am so in love with that rug!  It provides the perfect punch of color on the floor.  It truly “makes” the space.

laundry&dad's 015

We got the rug at Home Goods as well.  {Yes, we love us some Home Goods!}

I know I am forgetting some of the details, so if you have a question, just ask!  Smile

What is your favorite part of this makeover? 

I would love to hear it!


Wanna check out my sister’s blog?  Click her button below.


Linking to…
shabby creek cottage
Also, I will be at the Haven Conference in Atlanta, Georgia this week!

because there's no place like home!

If you would like to get updates about the conference and see pictures of some of your favorite Home Bloggers, be sure to follow me on Facebook and Twitter!

Click on the buttons below!


content and images copyright © 2009 - traci, beneath my heart

Designed by Chena Designs Development and Hosting by Evenpar Solutions
Web Hosting By RFE Hosting
Counter
Free Counter