
Organizing the Hall Closet
Hey, y’all!
Well, I started organizing my closet last night, but didn’t get it finished until today. I took some pictures this evening before Adam and Luke’s basketball games, and now I am finally editing my photos and writing my post. Whew!
Even though it has been a hectic 24 hours, I am SO glad to be getting ORGANIZED!!!

This is the second little organization project on this closet in the past two years. I have to show you the other one first.
It cracks me up.
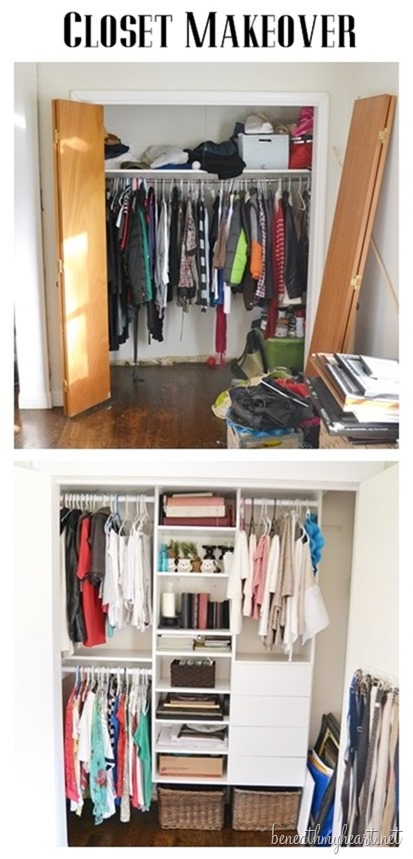
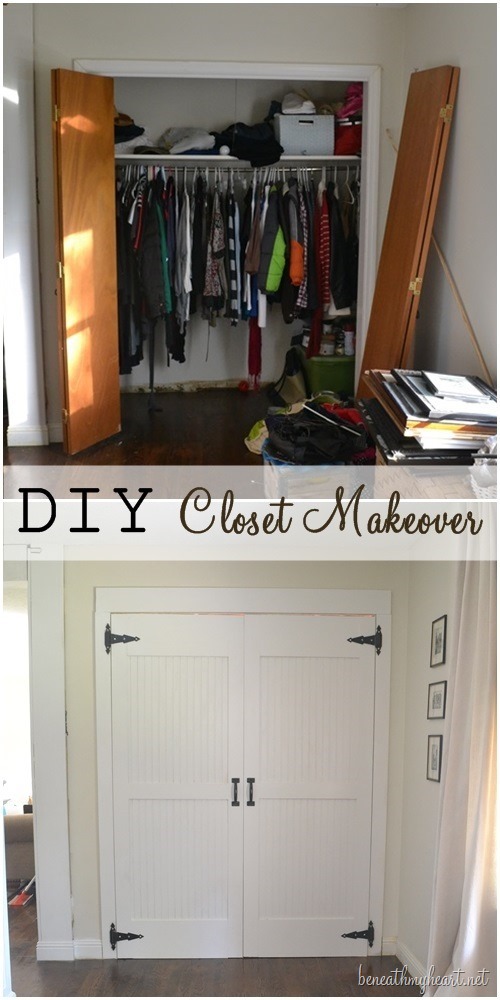
Dude. Look at my closet before. It was a sad situation. You can read about how I organized it HERE.
I also shared THIS POST about how I changed the bifold doors on the closet to these beautiful bead board paneled doors.
This used to be a small closet in one of the bedrooms before we tore the walls down and turned this area into a hallway. You can see where this closet is in respect to my den in the photo below.
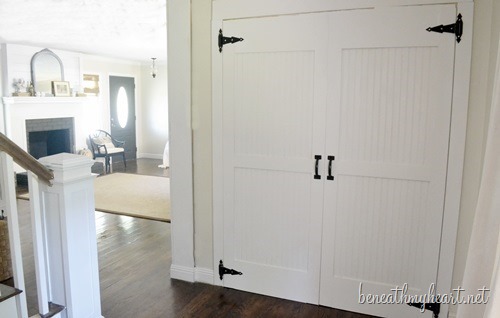
I LOVE these doors! :)
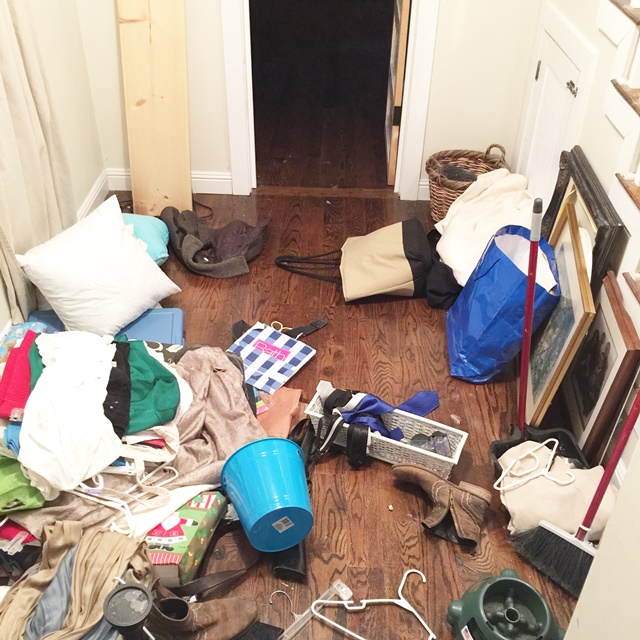
Unfortunately, over the past year, I haven’t been to nice to my closet, and yesterday, it looked like this…
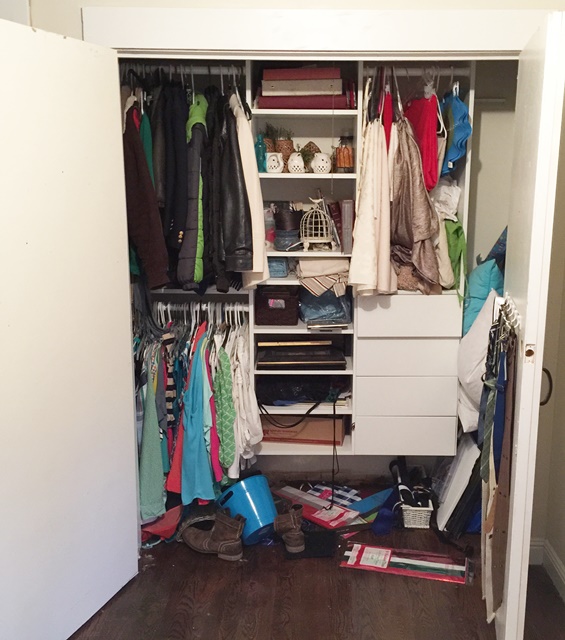
Ouch.
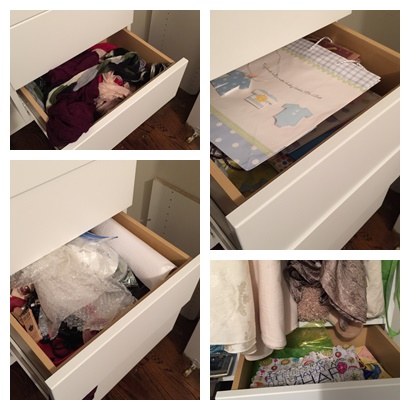
The drawers in the closet needed organizing too!
I followed my organizing system, and Dumped, Ditched, and Divided.
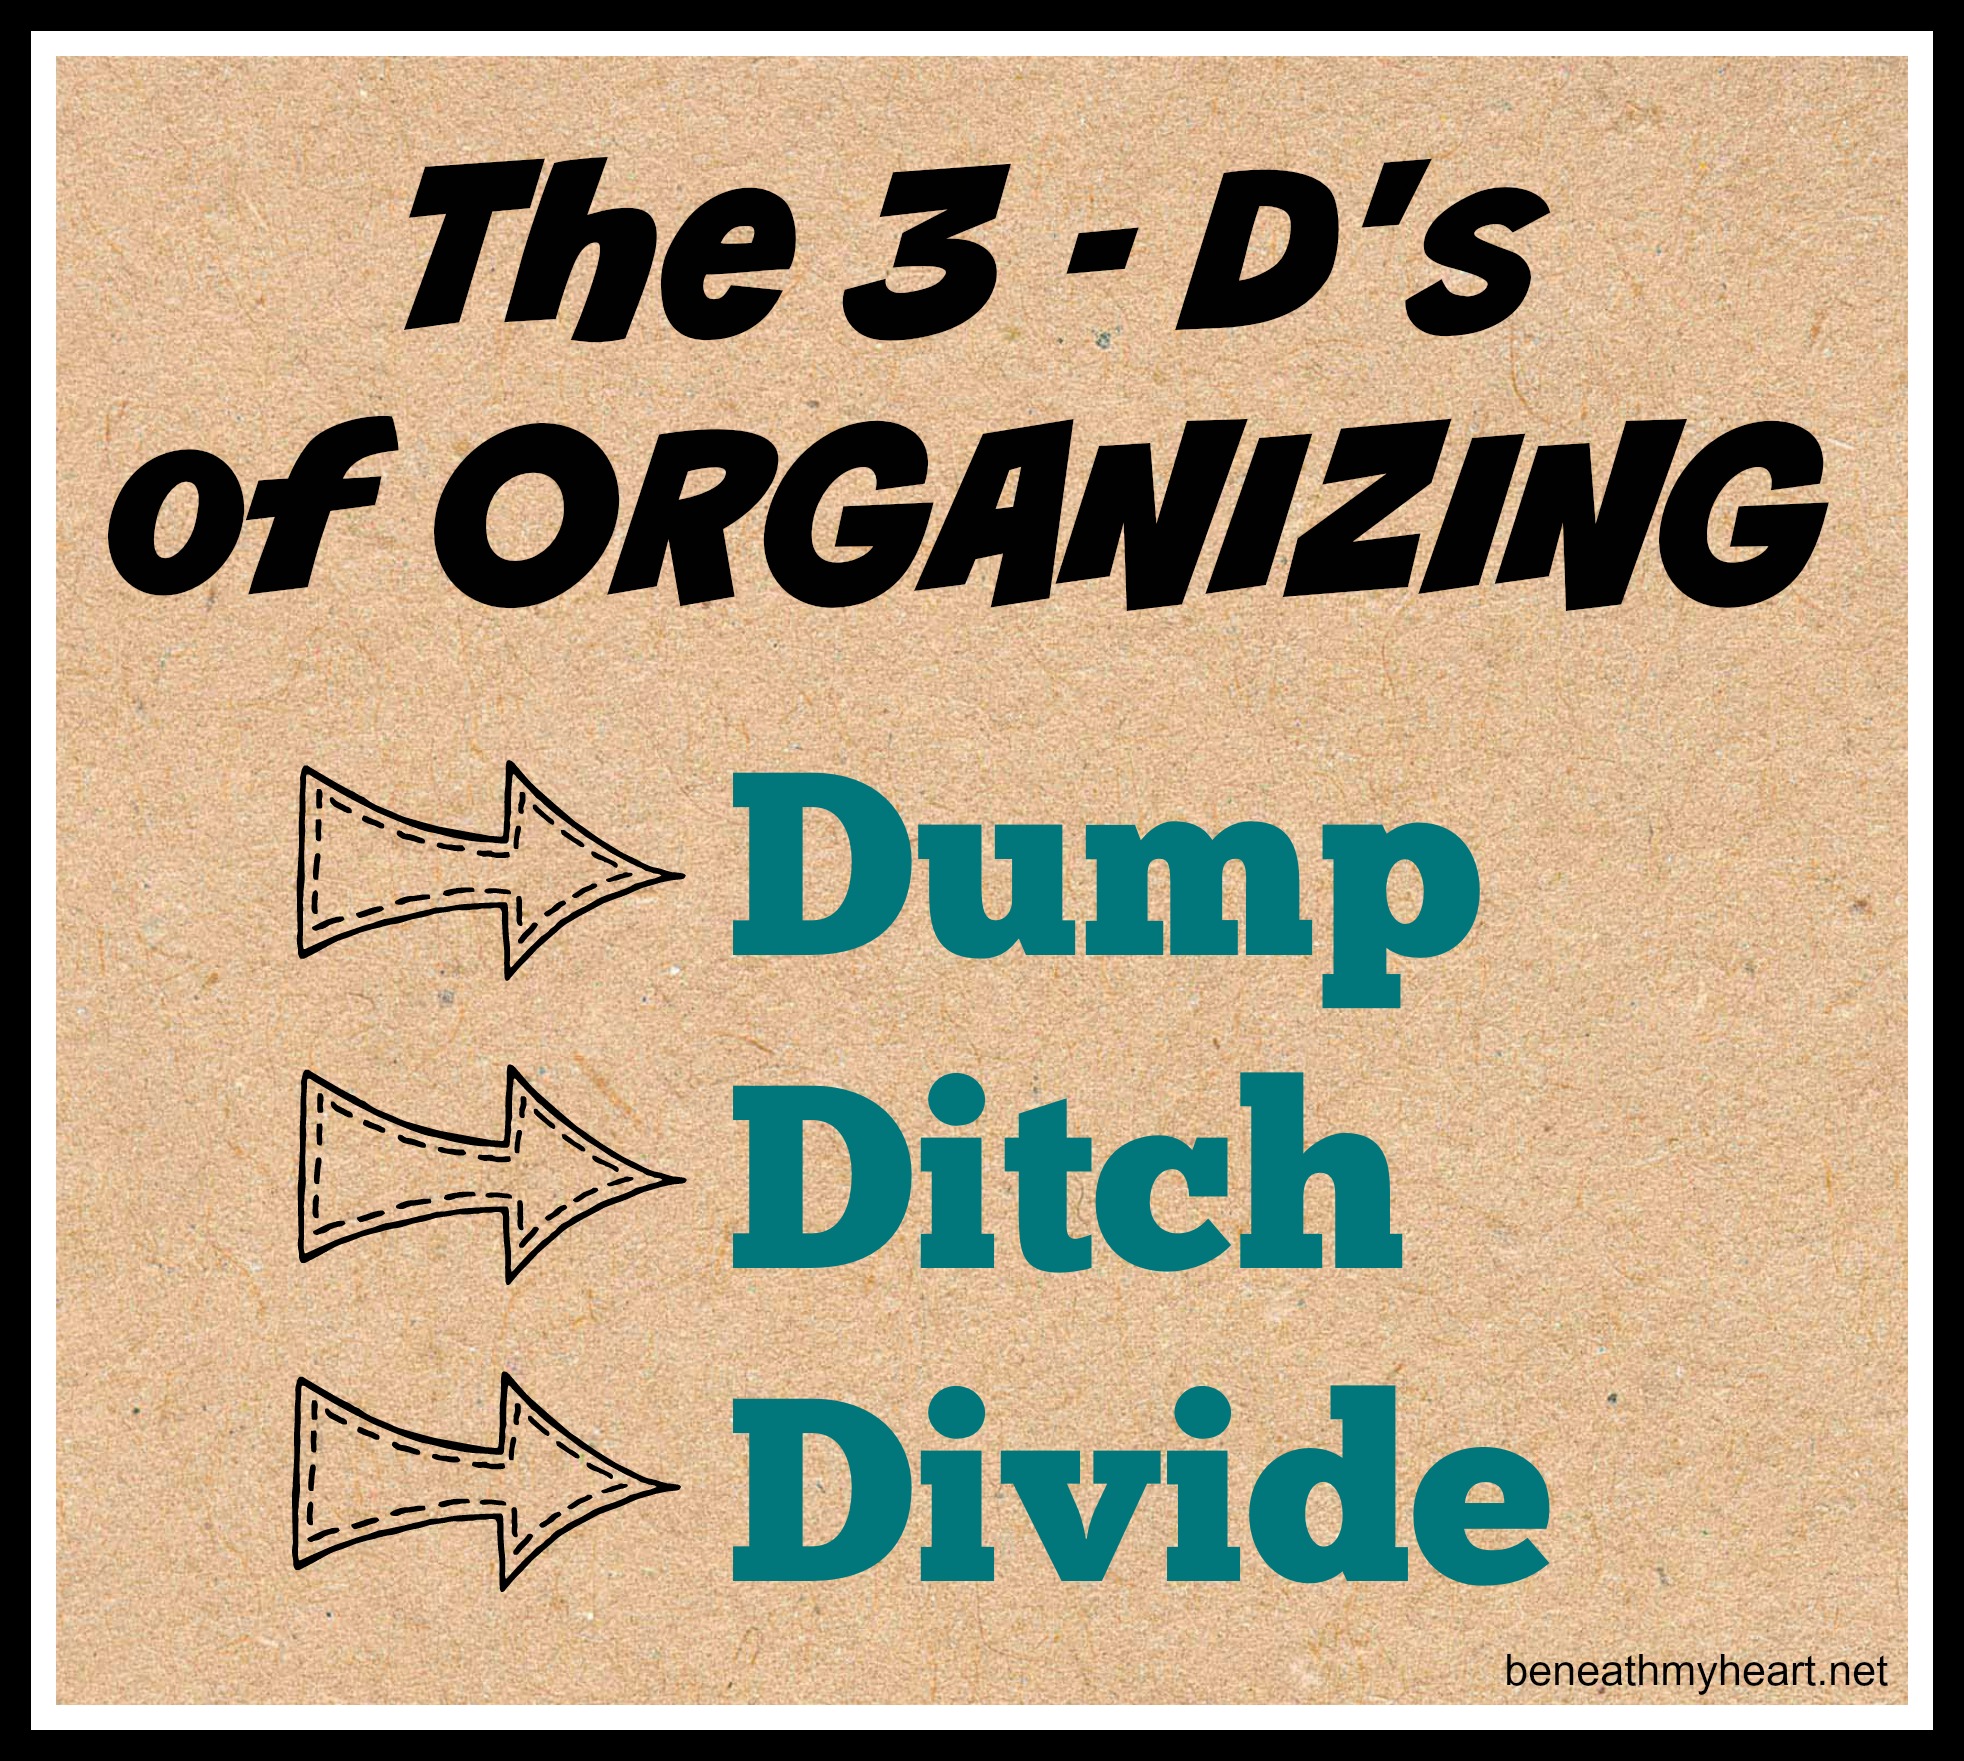
I dumped everything in the closet out in the hallway floor.
This step is messy, but necessary.
Then I ditched the junk, and put the rest in a large bag to take to Goodwill this week.
That part feels so good!
Lastly, I divided all of the remaining items back into the closet where I wanted them.
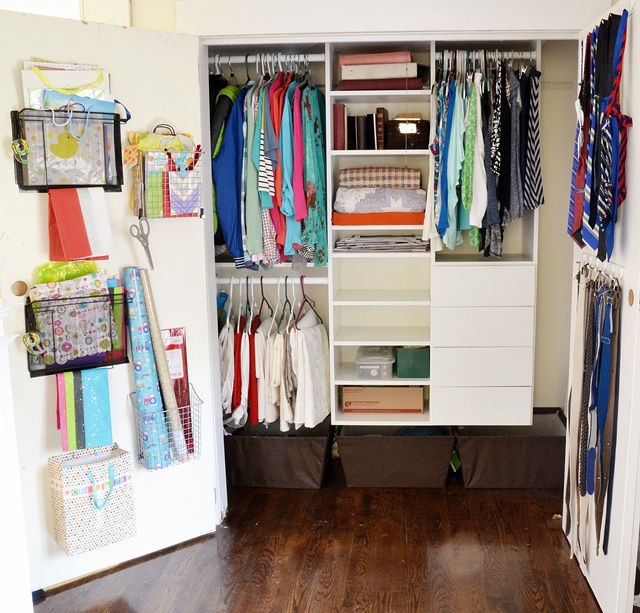
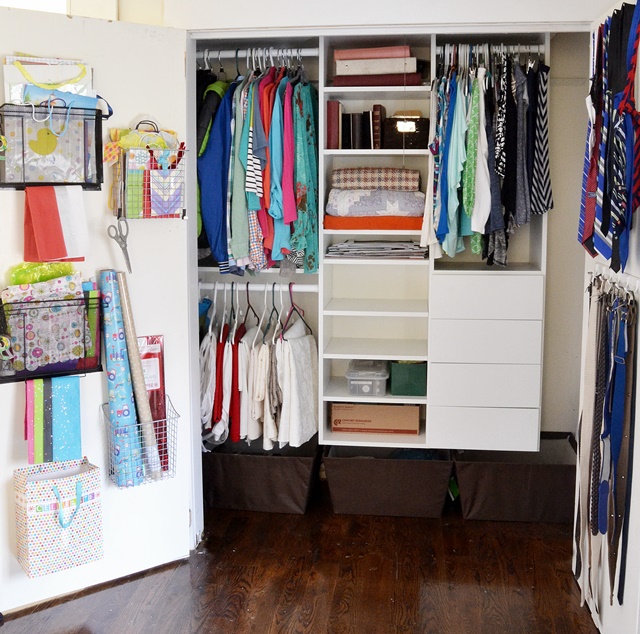
The top two hanging rods hold mine and Cy’s summer clothes.
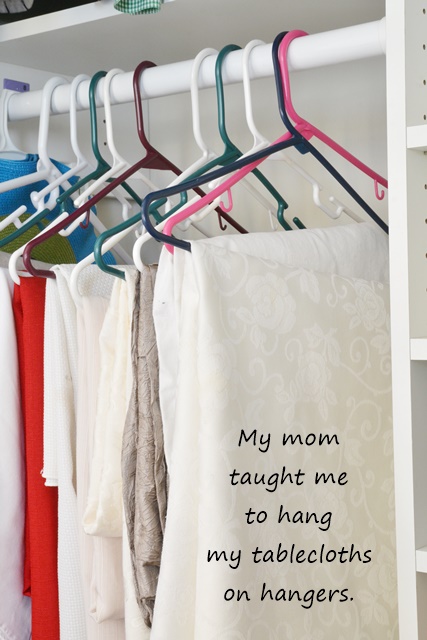
The bottom hanging rod holds my tablecloths.
I also found three cloth laundry baskets to fill up the floor space and create more storage.
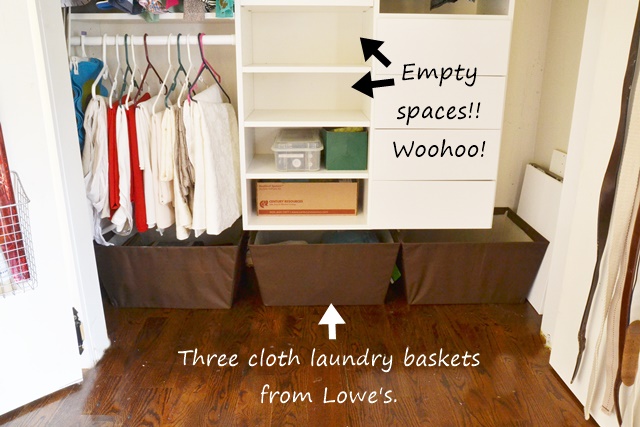
Notice how organizing this closet has created some empty storage spaces for me to use?
I’m still trying to decide what I want to put in those spaces.
I decided to use the middle laundry basket to store extra bed sheets…
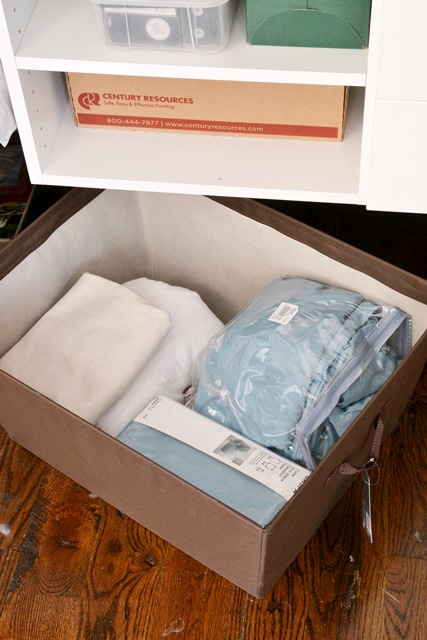
The basket on the left holds some extra pictures that I haven’t hung up in our house yet. And the basket on the right is empty! Yay! More storage space! :)
I added one belt hanger on the right side door last year, but I decided to add another one above it for ties. This is the easiest area to keep track of all of my boys’ belts and ties.
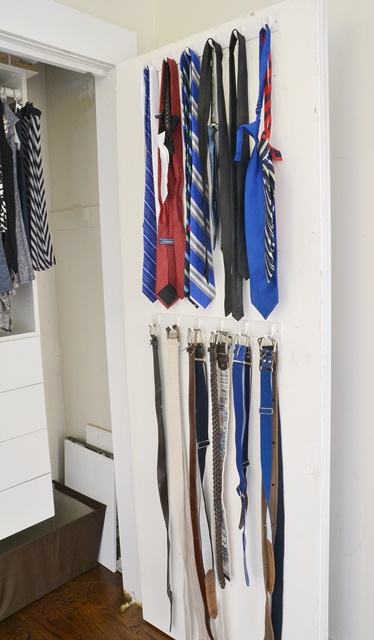
They have a lot more ties and belts that I will be adding to this space.
On the left door, I added a “wrapping station.” I took all of the stuff I had in the drawers and created storage for it on the door.
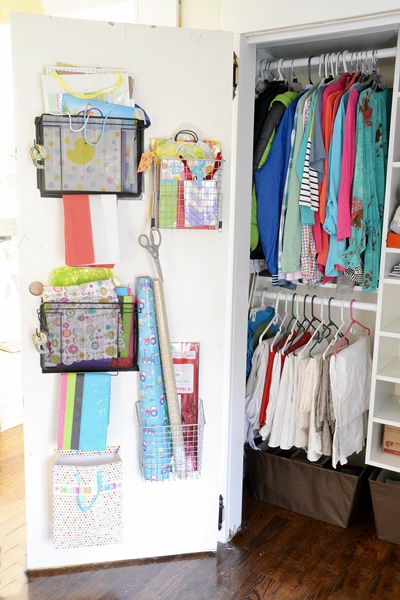
I used this letter tray from Walmart to create storage for my tissue paper and gift bags. But I didn’t use it in the way it was made for!

I attached it flat to the door to create a “pocket” to store things in.
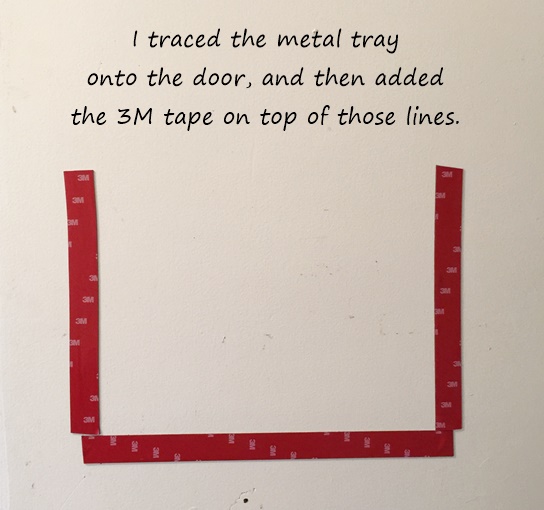
To do this, I simply placed the letter tray where I wanted it on the door, traced the outline with a pencil, attached 3M mounting tape on top of the pencil line, and then attached the letter tray.
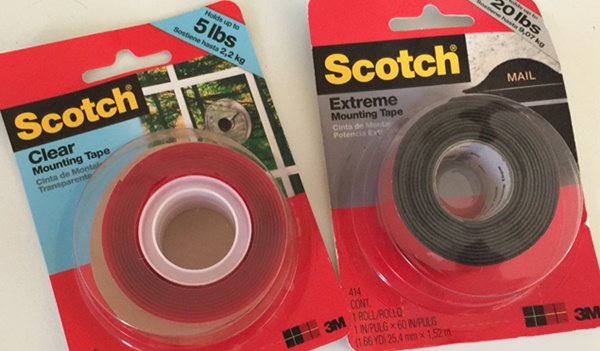
I chose to do this because the letter trays were only $5.00 and the best deal I could find to save some money.
When I peeled the red layer off of the tape, I pushed the letter tray onto the door to stick. Since these baskets will be holding very light items, I knew the tape would be able to hold everything just perfectly!
I loved that the letter tray had a little wire on the bottom of the tray that I could hang my tissue paper on!
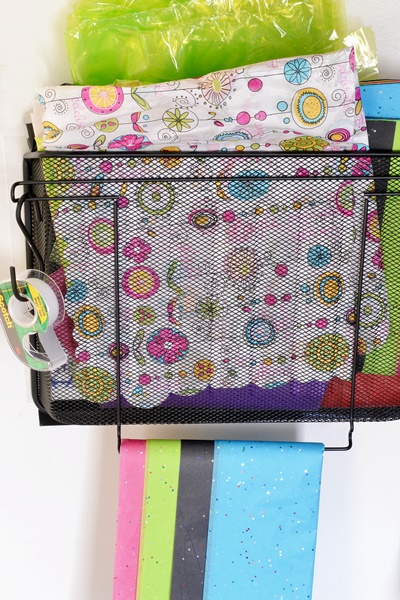
I also used an “S hook” that I already had and hung it on my letter tray to hold my tape.
I found these silver metal baskets at Walmart for $10 a piece. I wish I could find them cheaper, but I couldn’t.
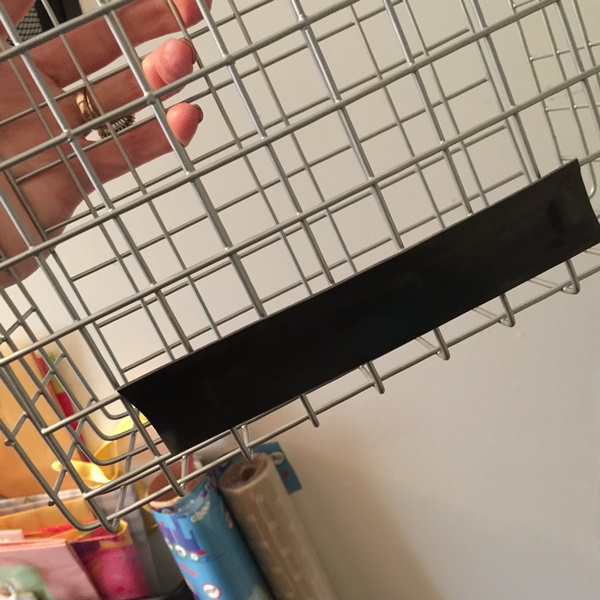
Most “over the door” hanging baskets have metal hooks on top that cannot be removed. I liked these baskets because you didn’t have to use the hooks if you didn’t want to.
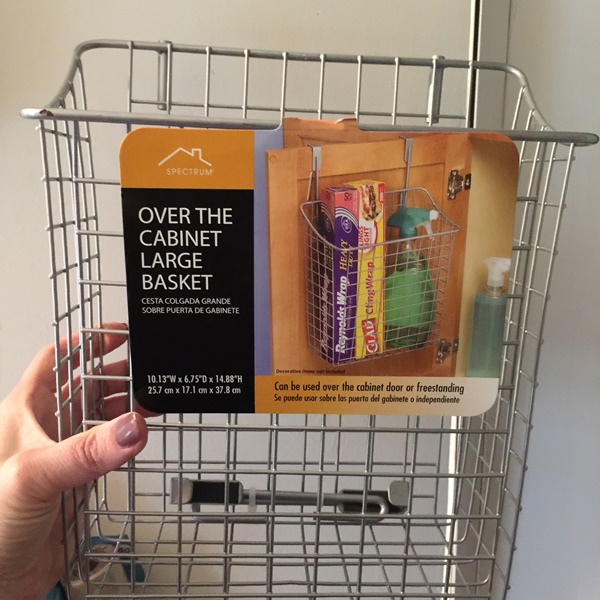
I attached the baskets to the wall with 3M mounting tape…
I used the top wire basket to hold more gift bags, and the lower wire basket to hold wrapping paper.
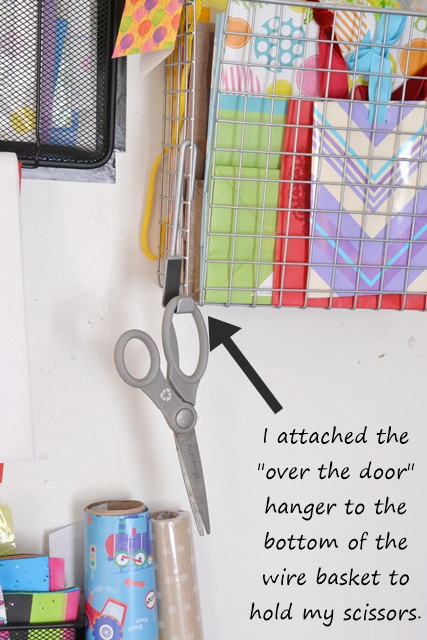
I also attached the “over the door” hooks to the sides of my basket to hold my scissors. Perfect!
Do you see that small “open” gift bag at the bottom of the door? I attached it to the door with some more 3M mounting tape and filled it with all of my self-sticking bows.
I am SO pleased with how my closet looks now.
Most of my drawers are empty now, so I am looking forward to filling them up too and adding some cute handles. I will share that with you when I do.
Do you see that small gap on the right side of the closet with nothing in it?
I am going to get a hanging rod to go in that space and hang my off season dresses in that space.
There you have it! I am so glad to get this project checked off my “to do” list! :)
Come back tomorrow for my Organize Your Heart video post!
If you want to see more inspiration to help you organize your closets, click on the button below.

Love the idea of the wrapping put on the inside of the doors….genius idea on the letter tray.
fabulous ideas! Looks great!
LOVE how you set up your wrapping station. Great use of the wire baskets. And how inventive you are: to attach a gift bag for bows!
Thanks, Terry!
I love what you did with your closet…looks great!!! I used to use ( and still DO) the “three-D ” approach with my organizing. It always looks ‘ worse’ before it gets better !
Thanks, Shelby! Yes, the “storm before the calm” is the worst part of organizing! ;)
Thanks for sharing your closet makeover. I particularly really really like your ingenious way of creating a space for all your wrapping supplies. I have a space under my stairs that I keep my wrapping stuff and so wanted to move it to the back of the door. I’m so going to do this!! Love it!!!
Thank you, Mary!