
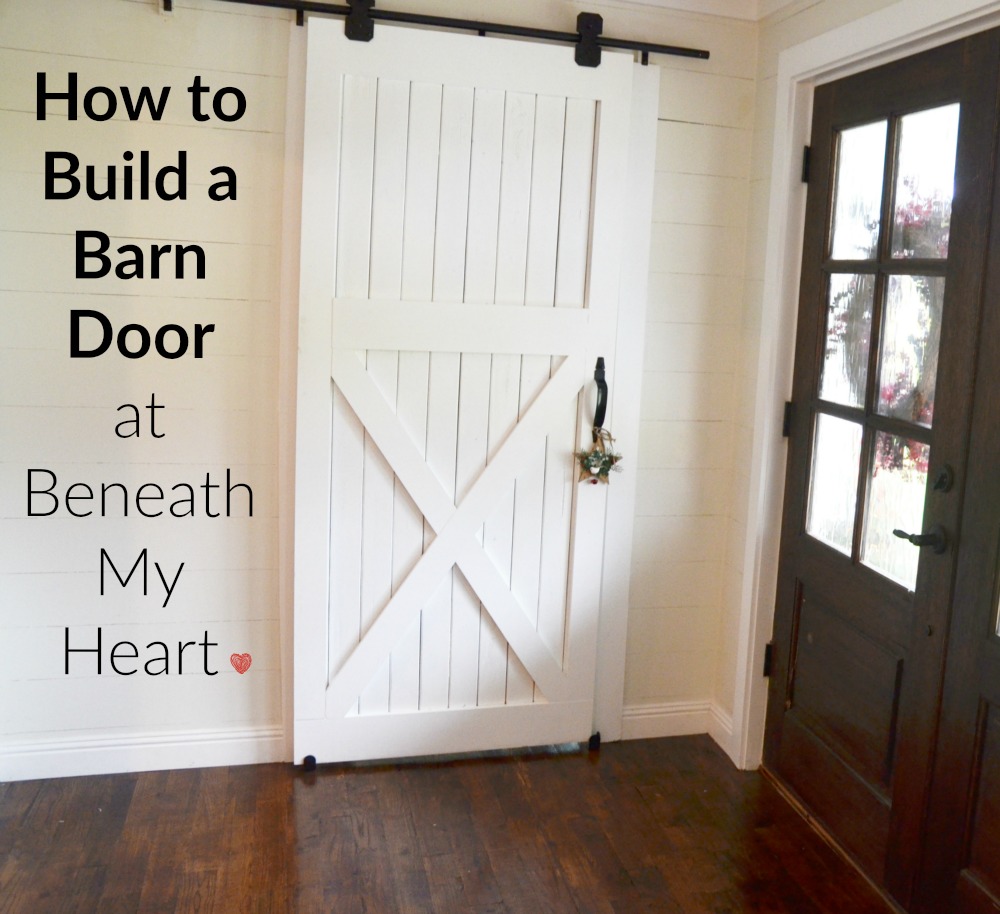
How to Build a Barn Door
Hey friends!
Today I am going to share with you the barn door we made for the mud room in our entry way. Do you remember that room?
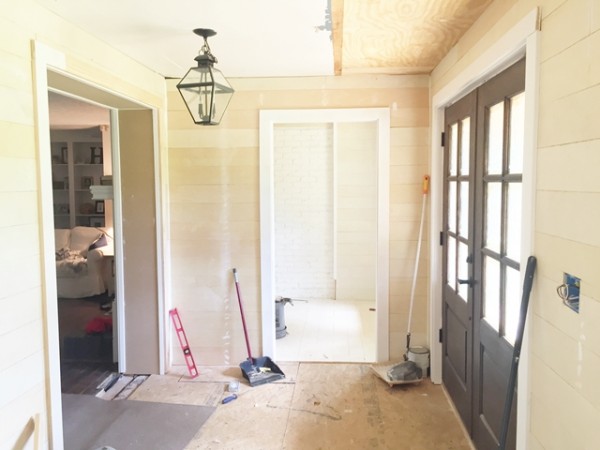
Here is what it looked like when we started building our new front porch….
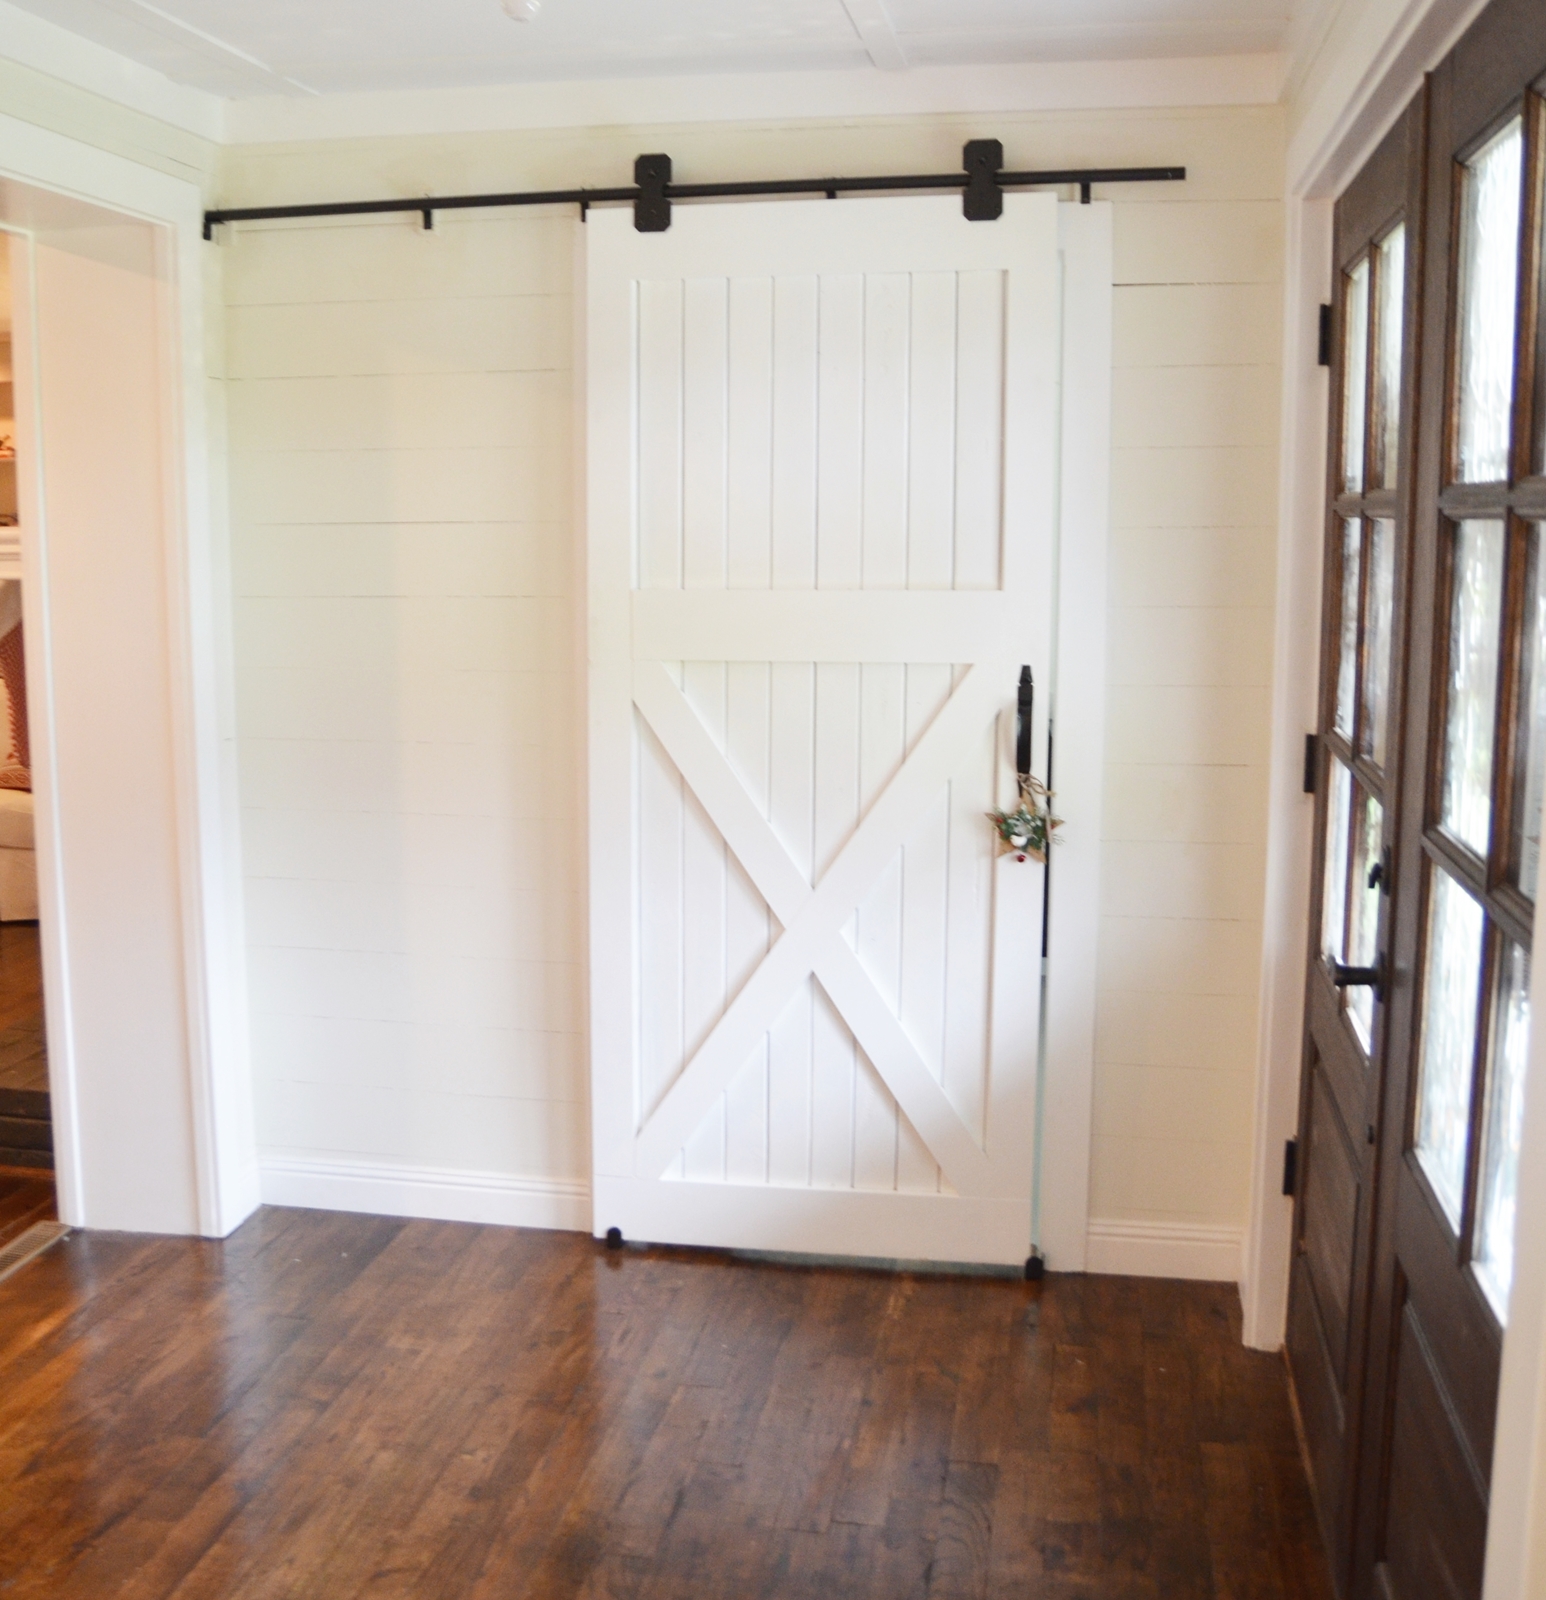
This is what it looks like now…
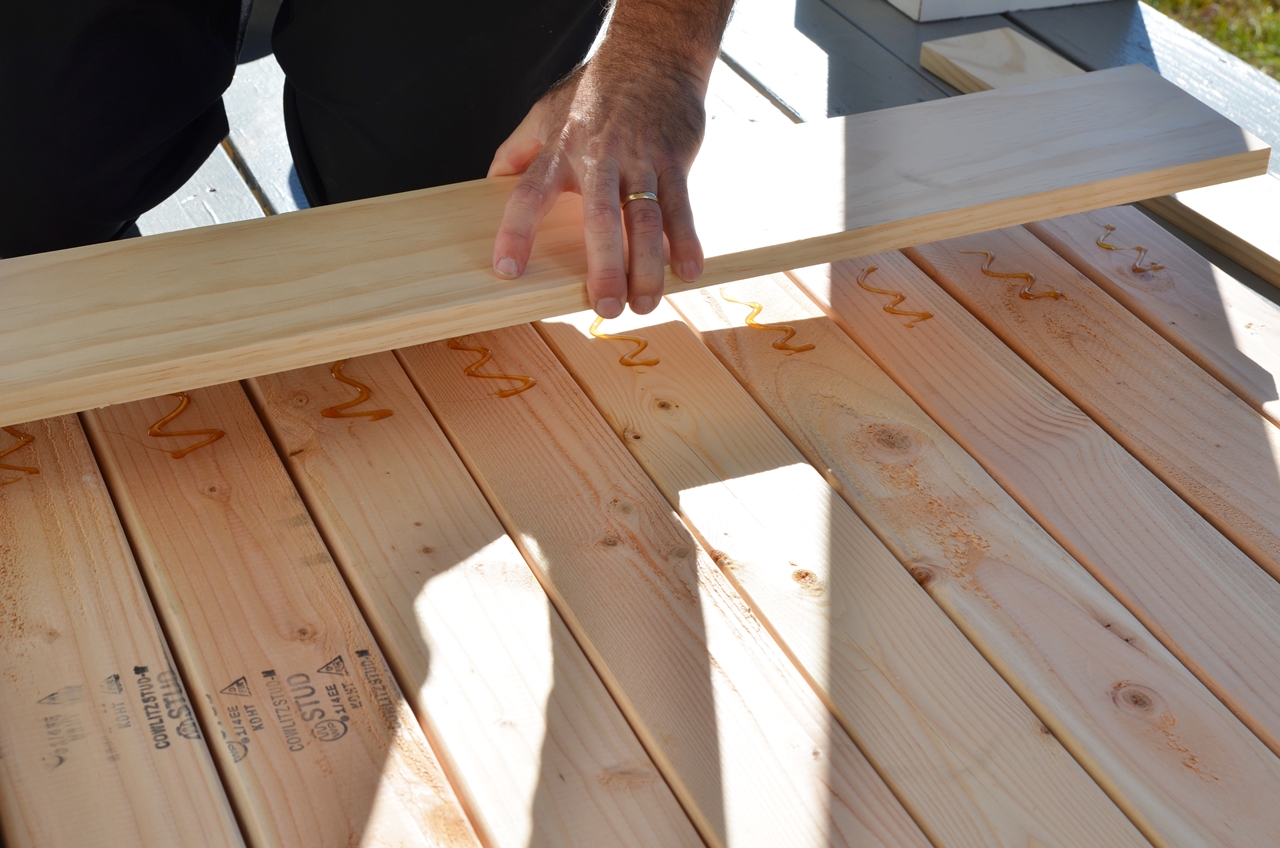
To begin building our barn door we bought 10 2×4’s from Lowe’s for the main structure of the door. Be sure your boards are straight before you buy them. :) You could also use a thinner board, but we wanted our door to be thick and substantial.
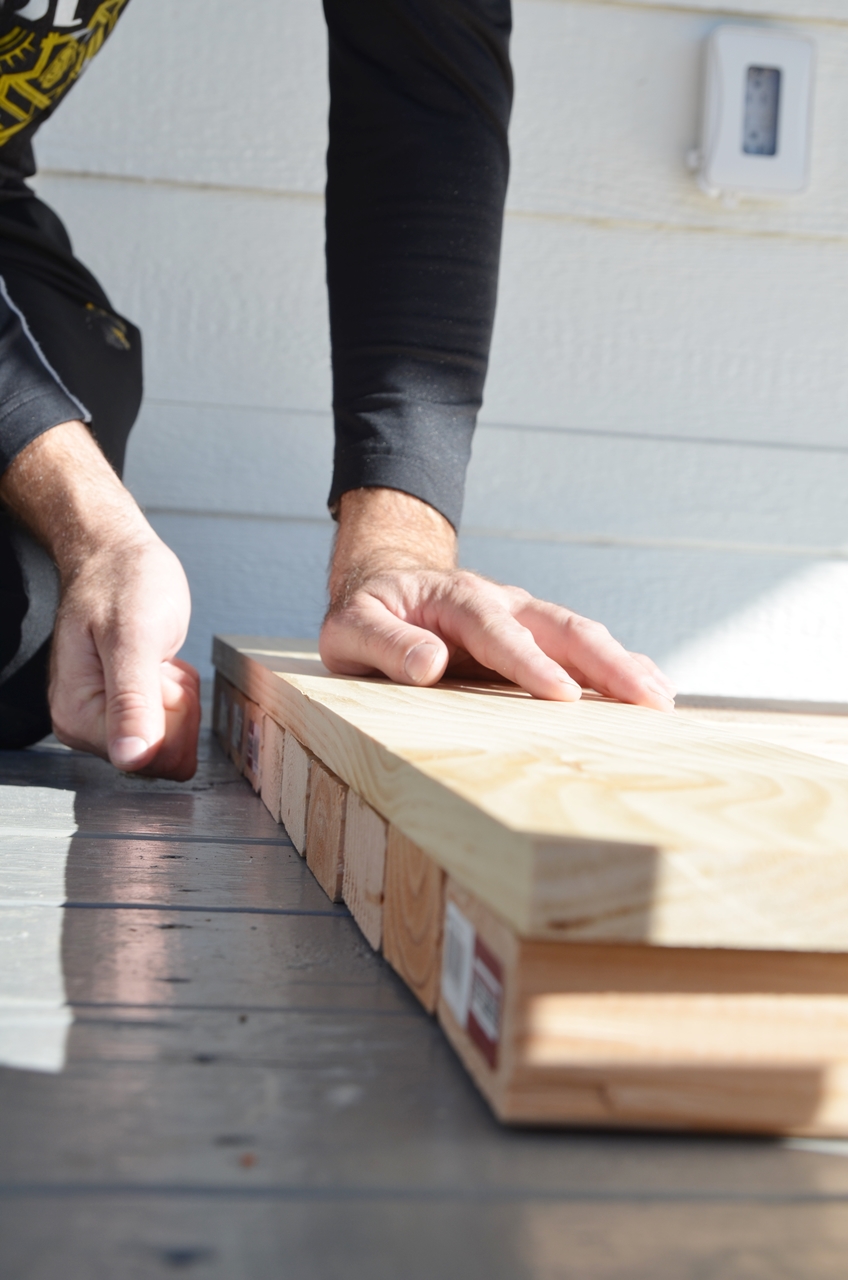
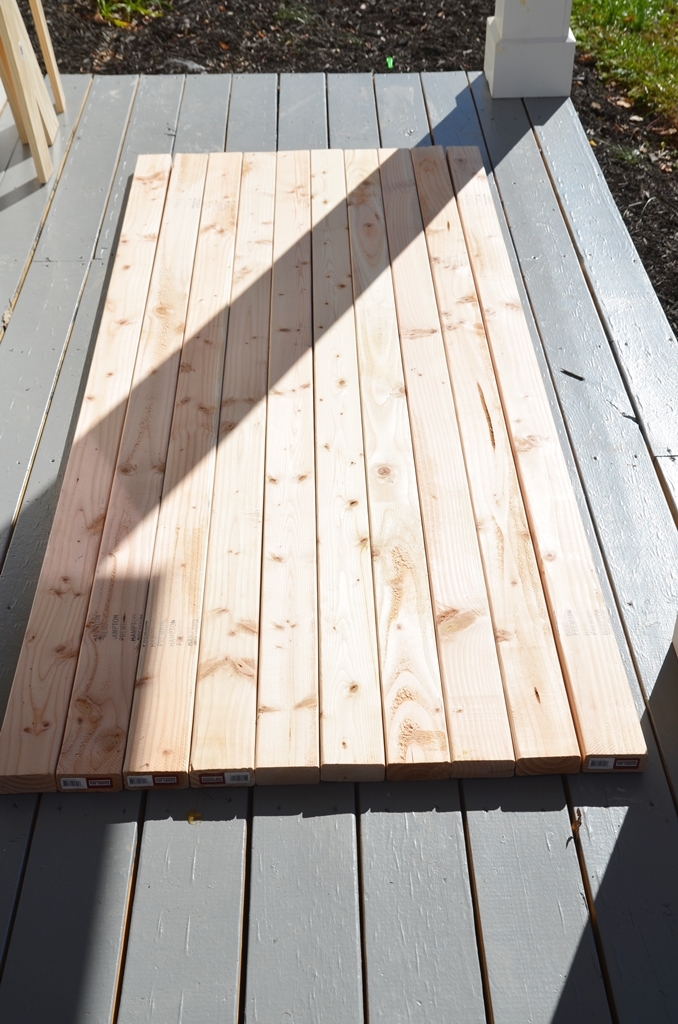 You may need more or less boards depending on the width of your doorway. We cut them the length we needed for the height of our doorway and laid them out flat on our front porch and pushed them as close together as possible.
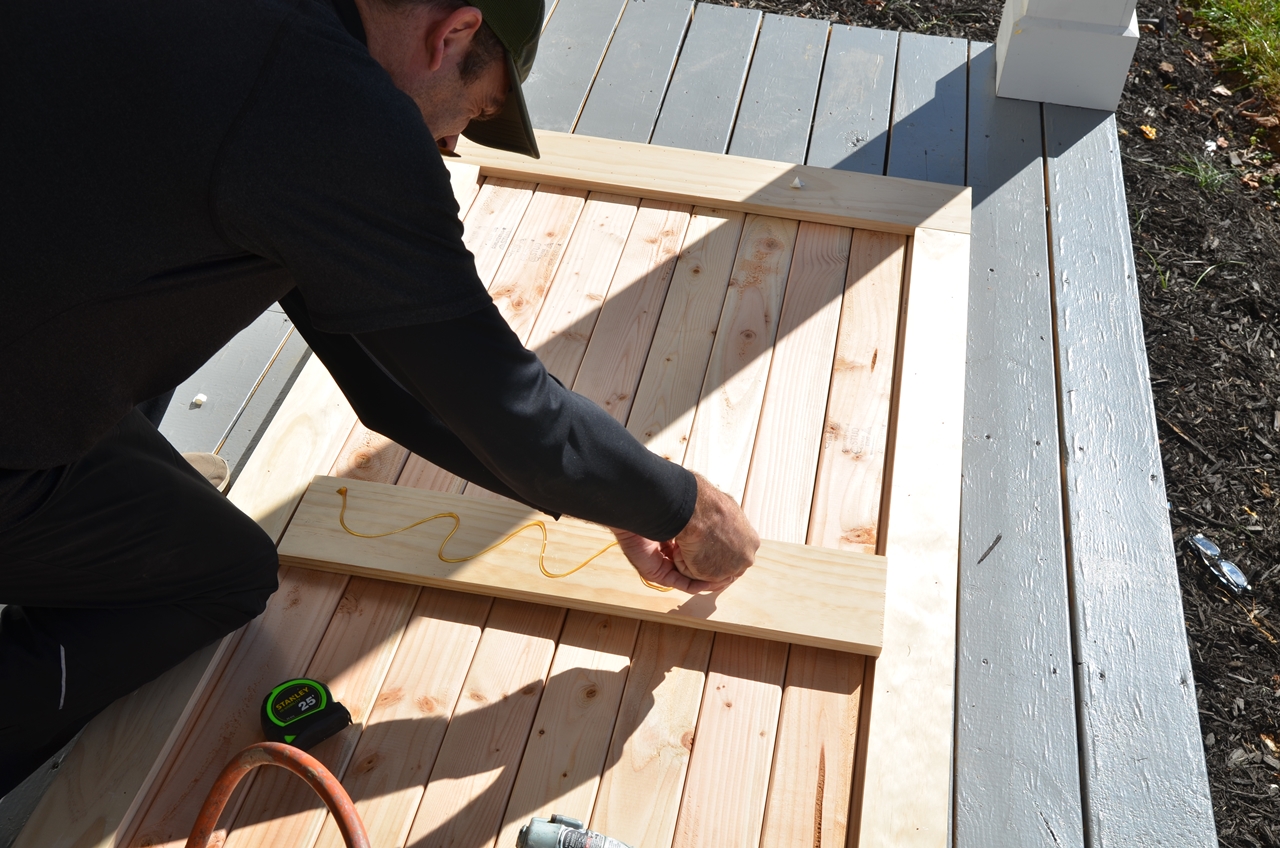
To hold them together, we added 1×4 trim around the edges and for the “X,” and 1×6 for the middle of the door.
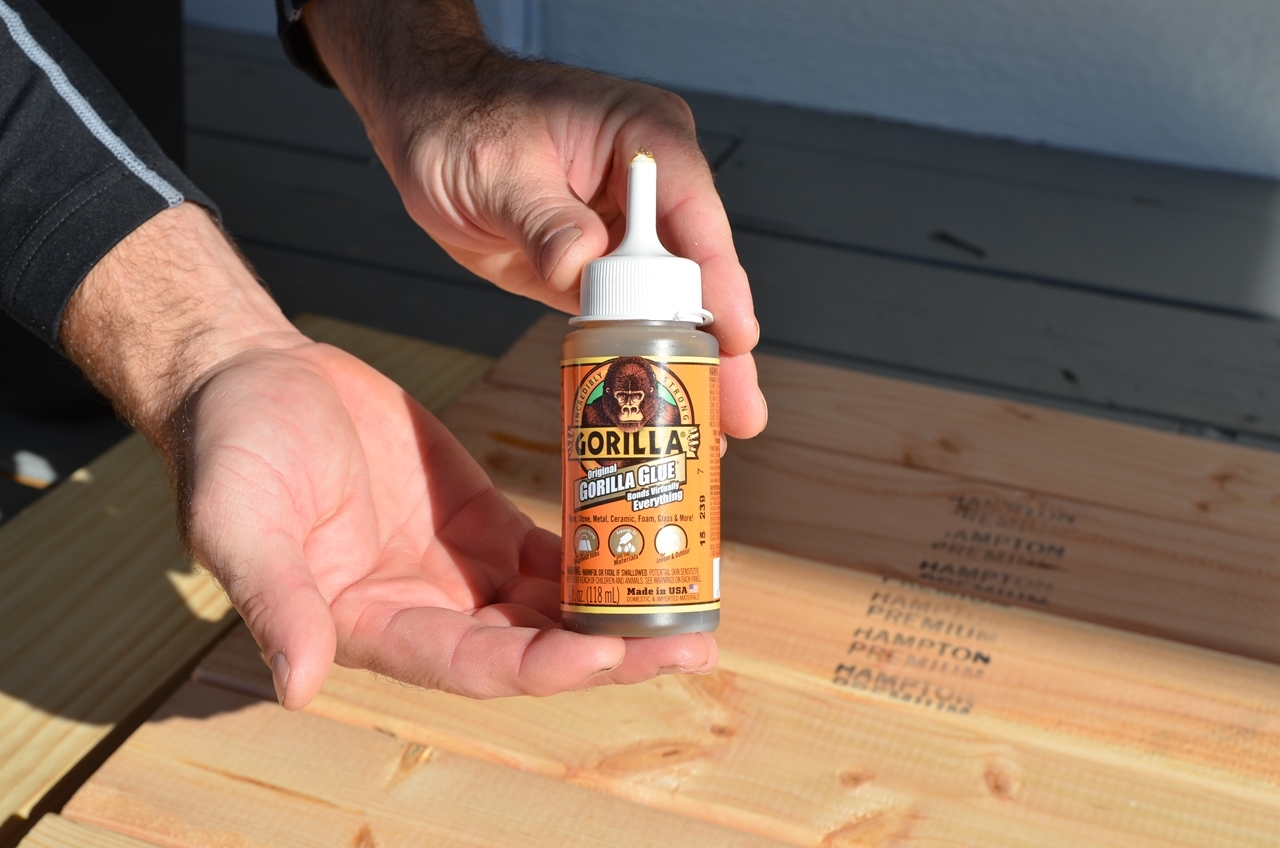
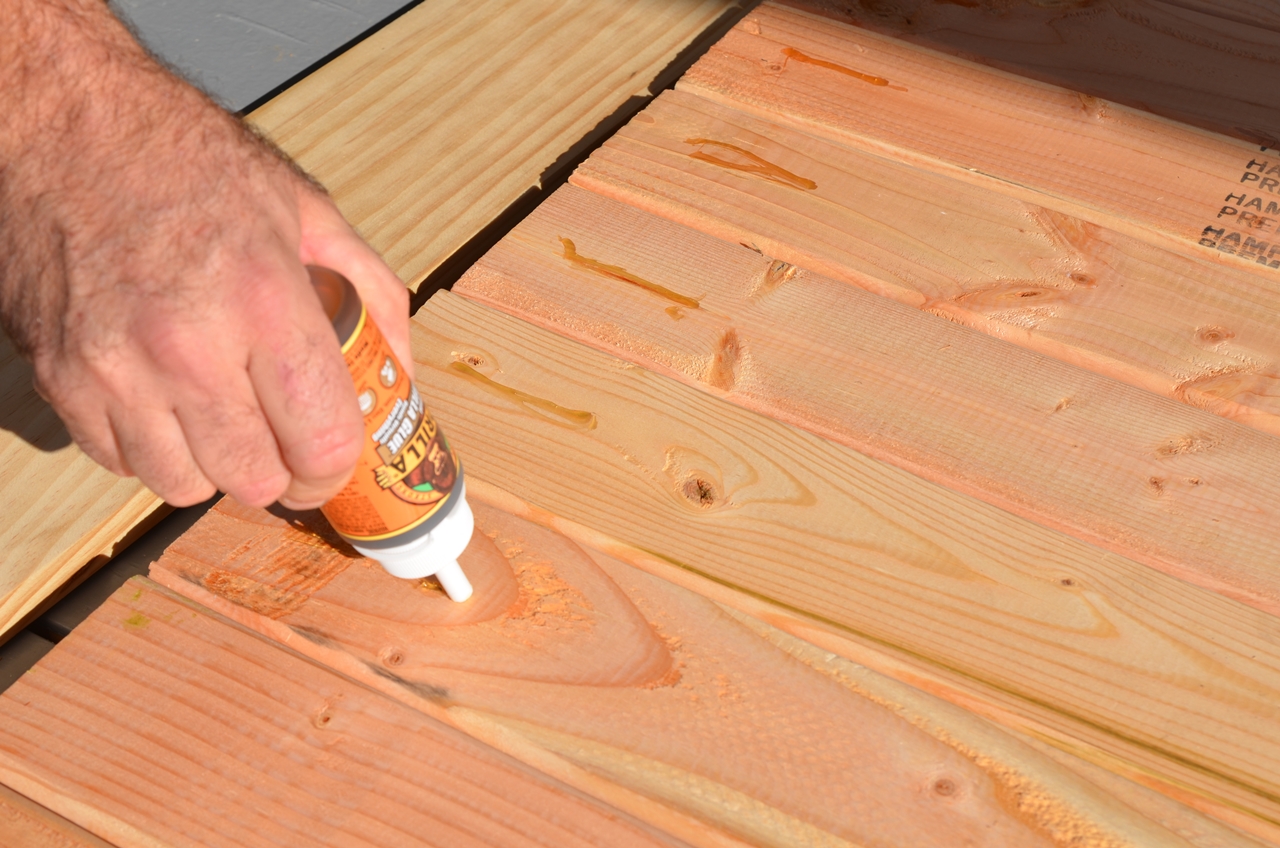
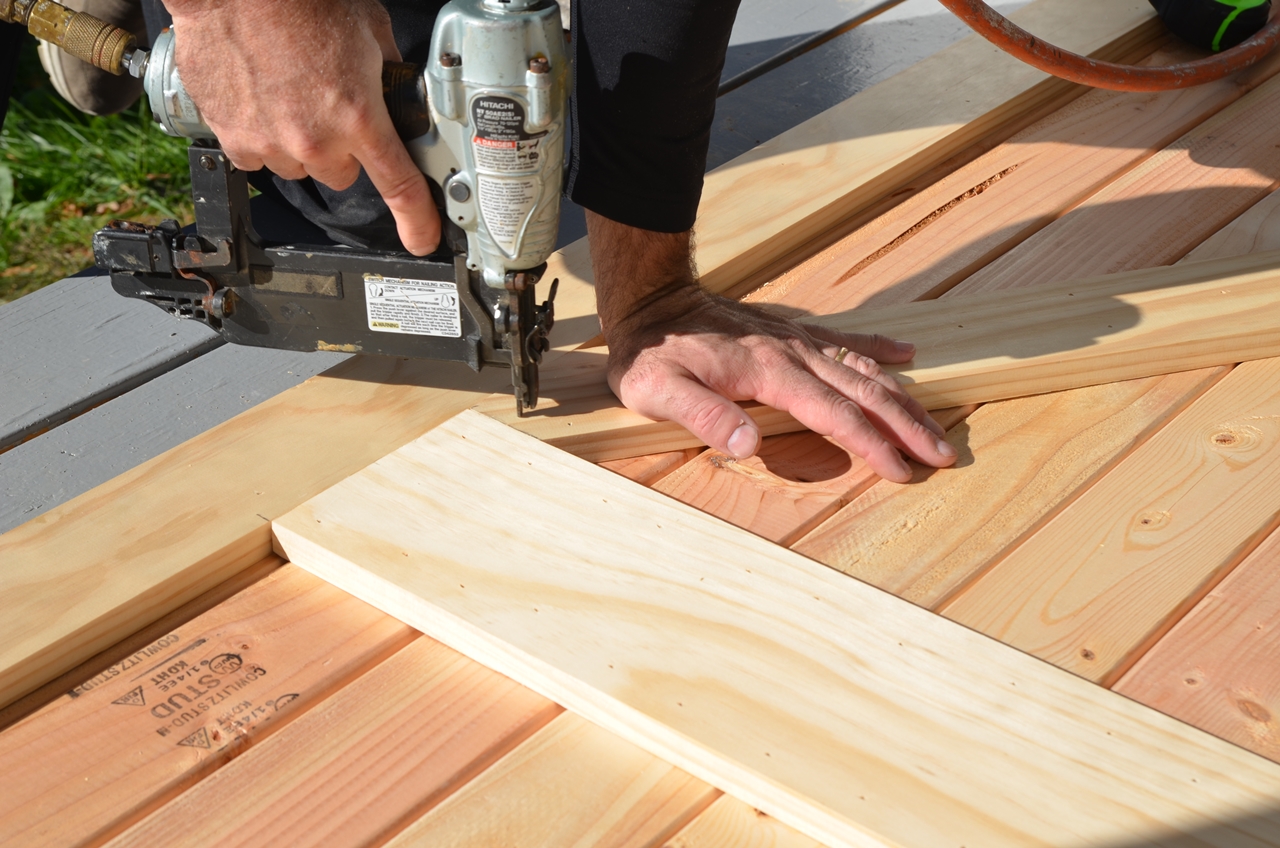
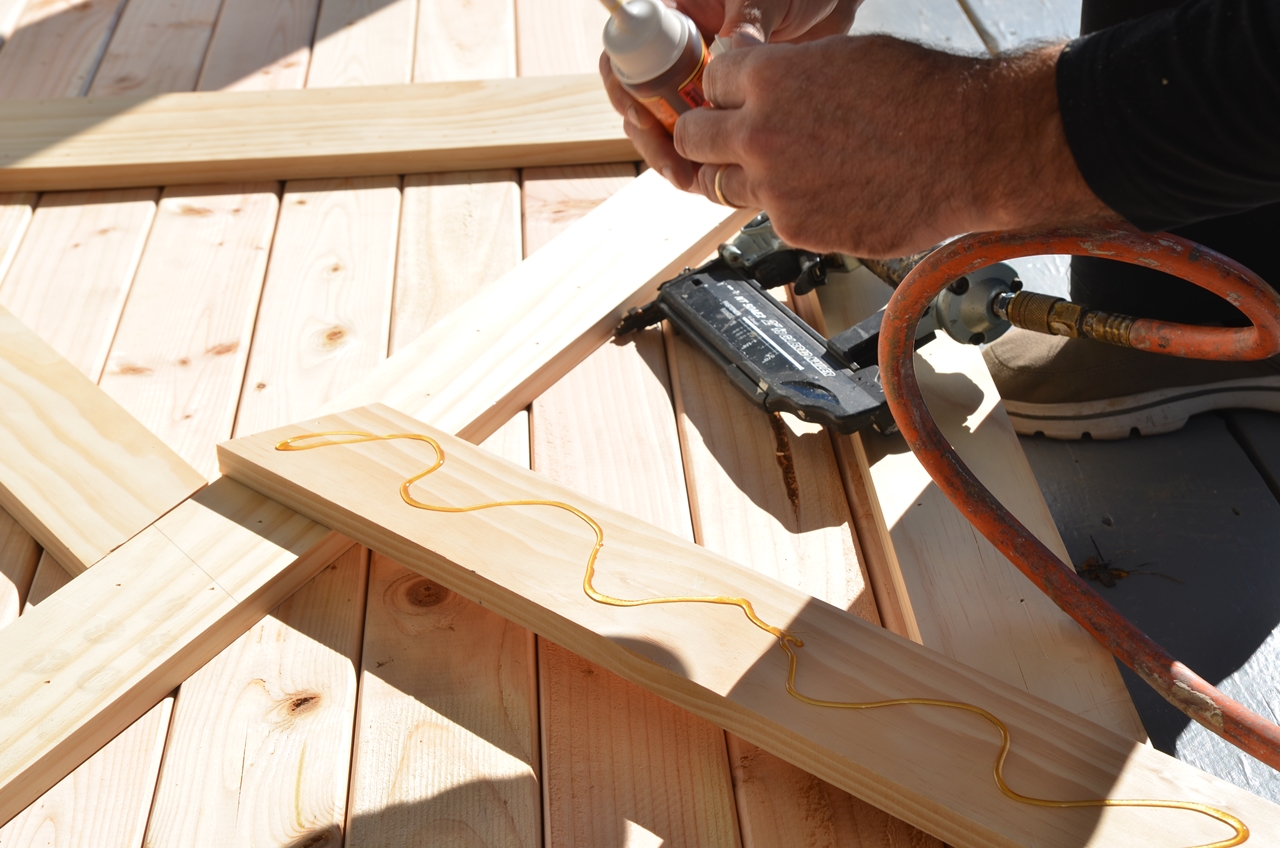
Cy measured and cut the lengths we needed for our trim and then applied Gorilla glue to the boards where we were going to nail the trim on.
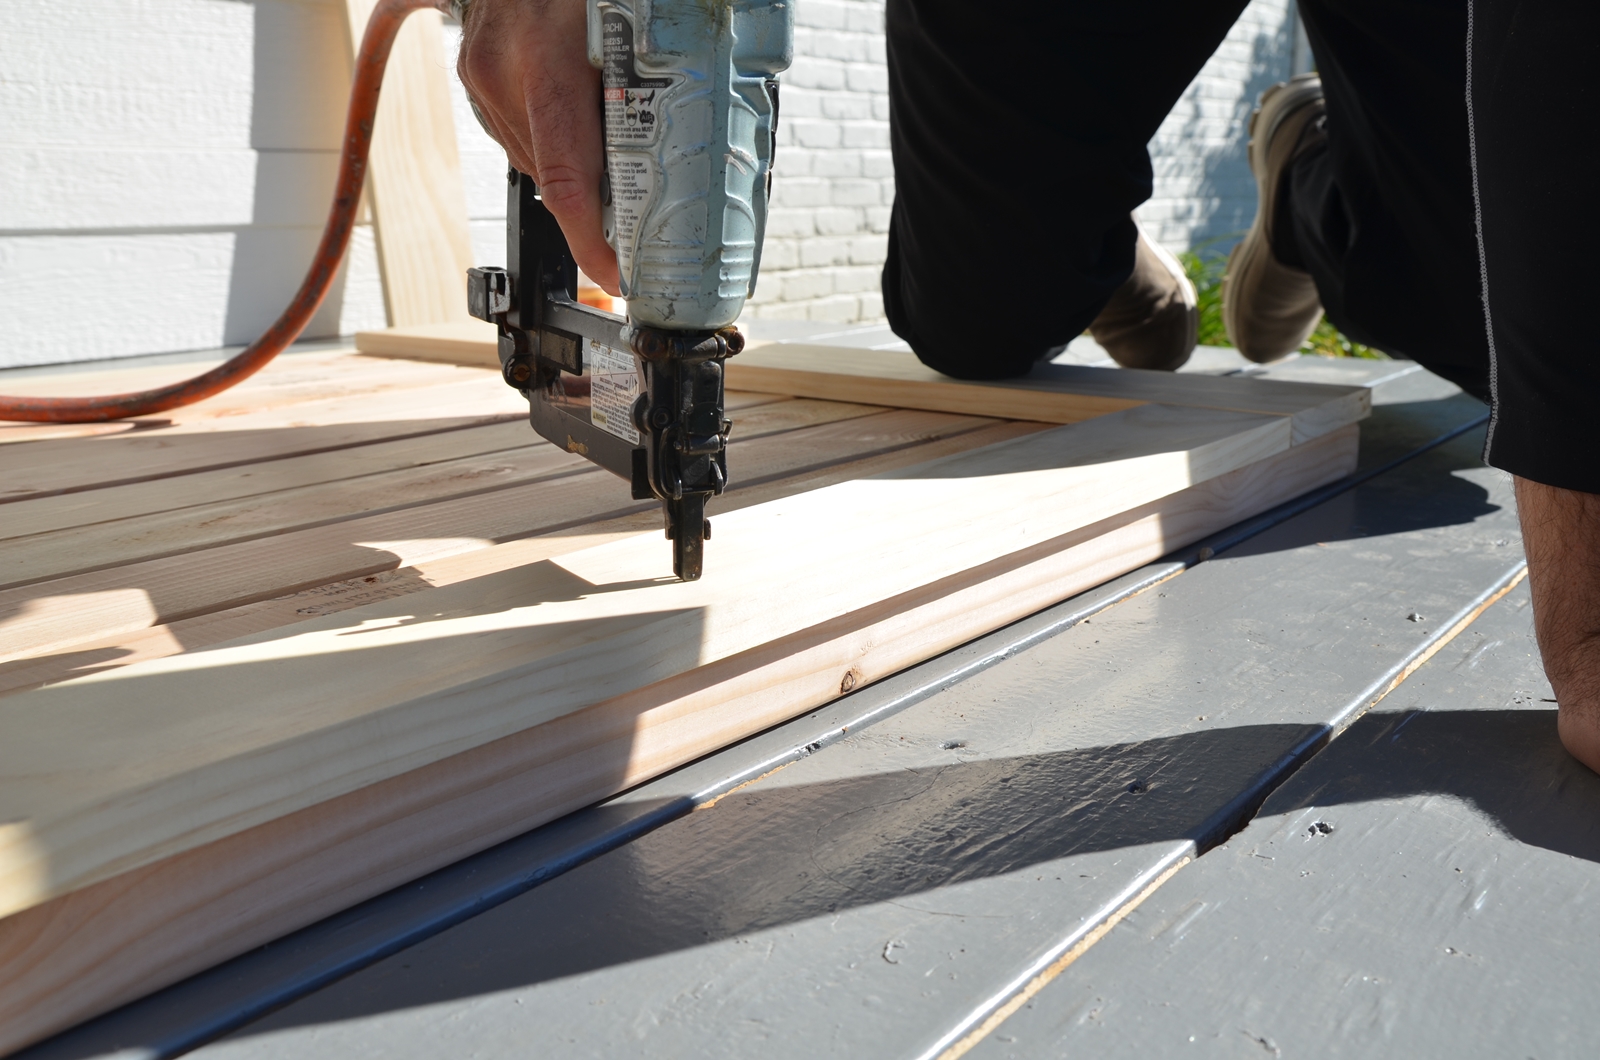
Before nailing the trim to the 2×4’s he made sure the bottom was even.
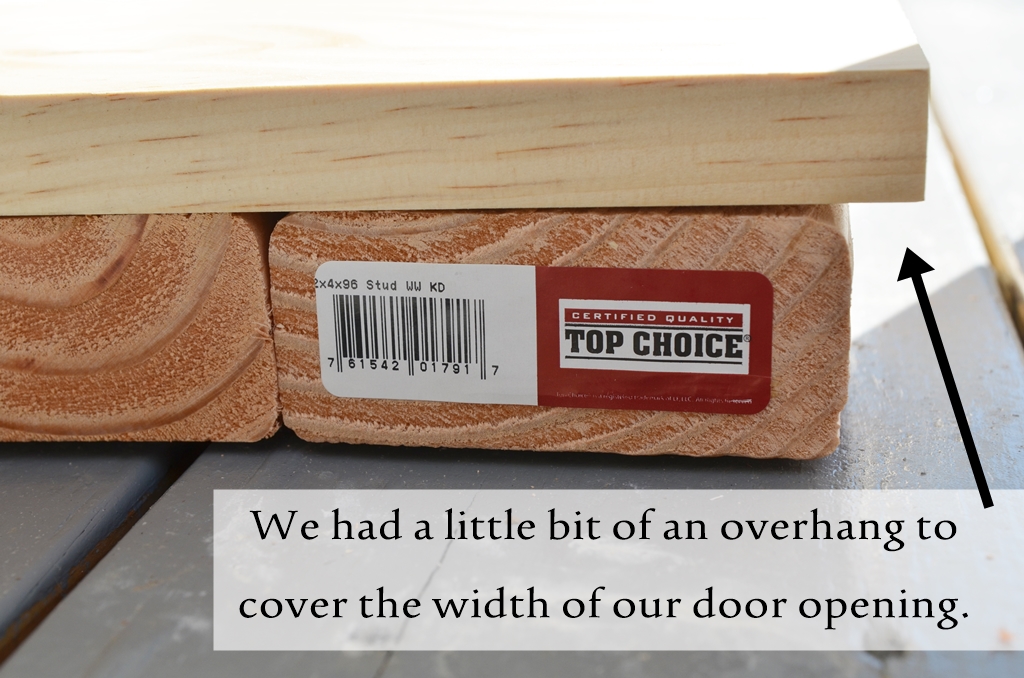
Because the width of the 2×4’s didn’t cover our doorway opening completely, Cy allowed for a little bit of an overhang with the trim pieces so that we could cover the door opening completely.
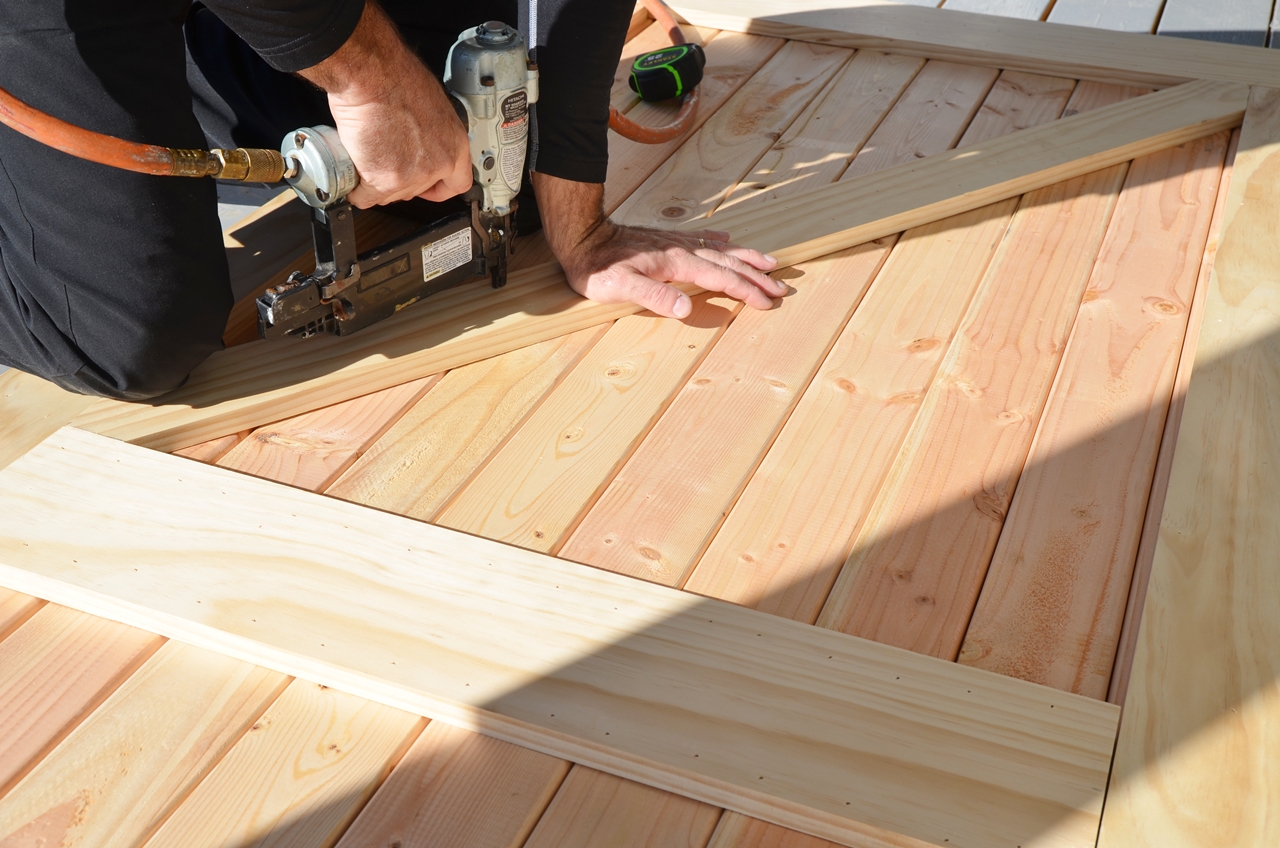
He nailed the outside trim work to the 2×4’s with 18 gauge, 1 3/4 finish nails and his nail gun.
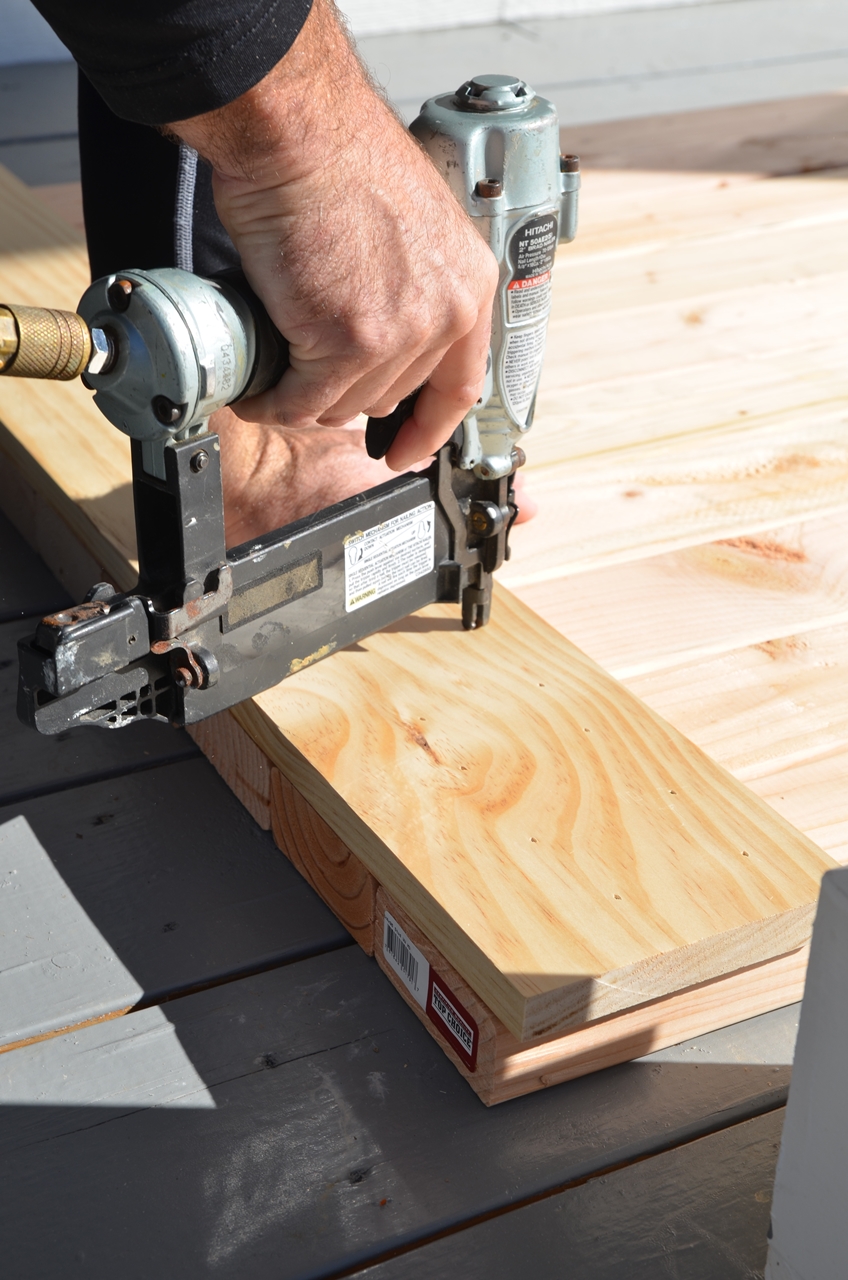
He repeated the process on the top, sides, and bottom.
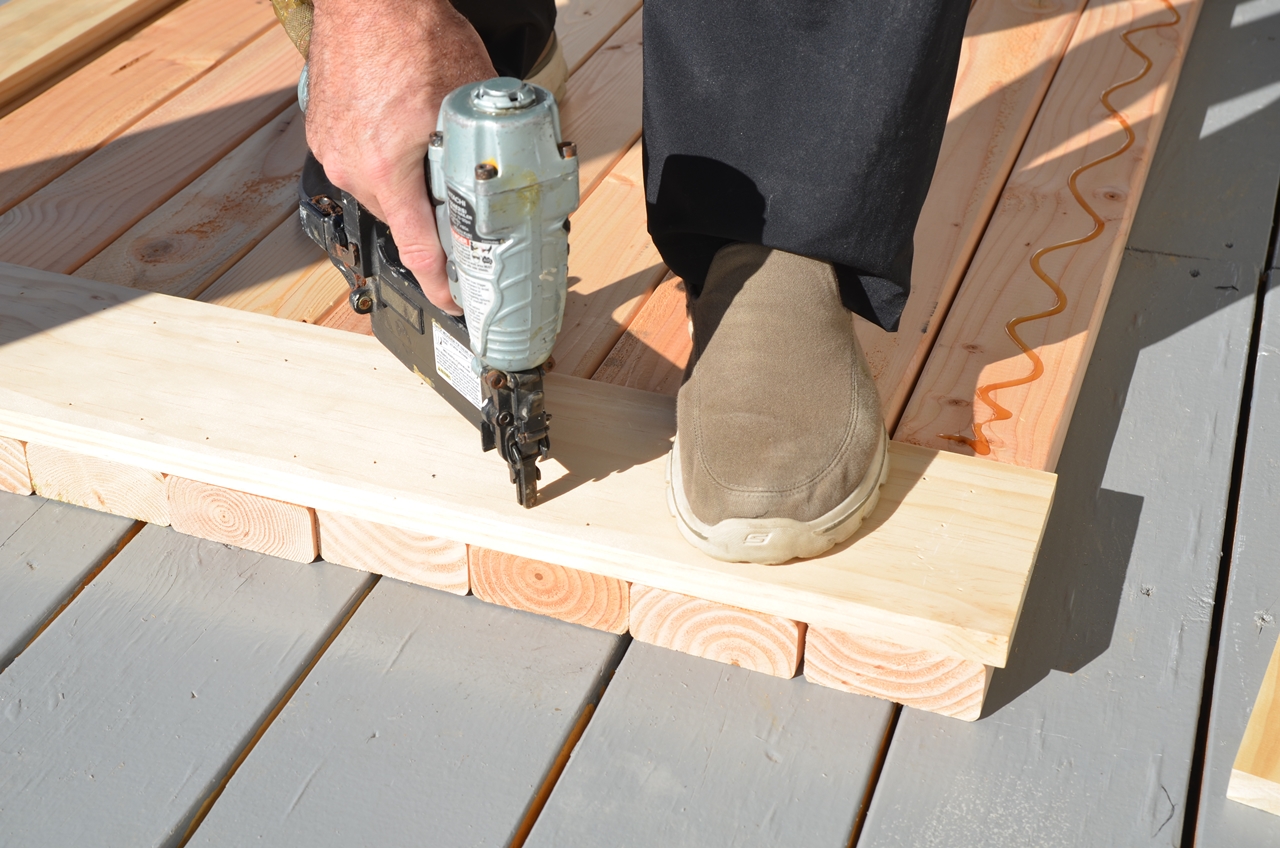
We glued and nailed the 1×6 to the middle of the barn door.
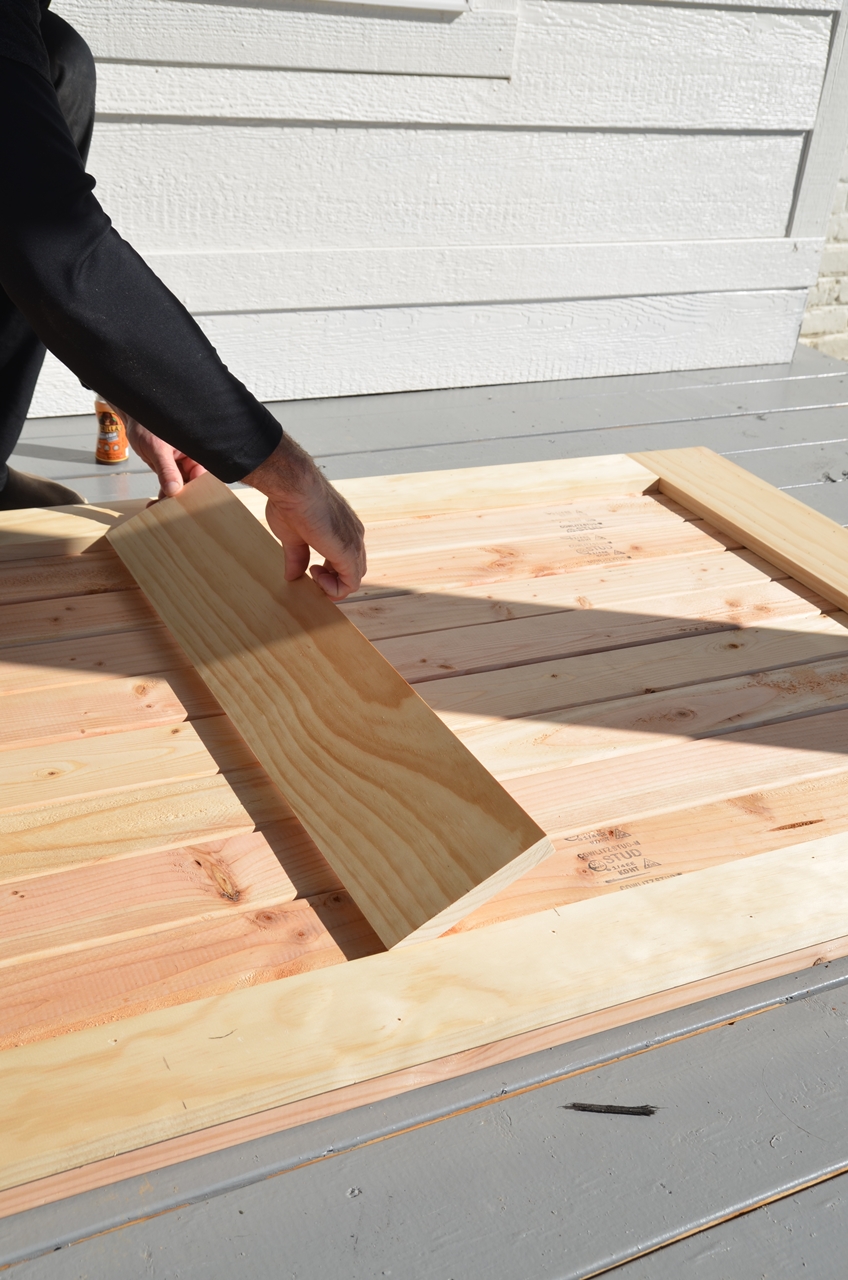
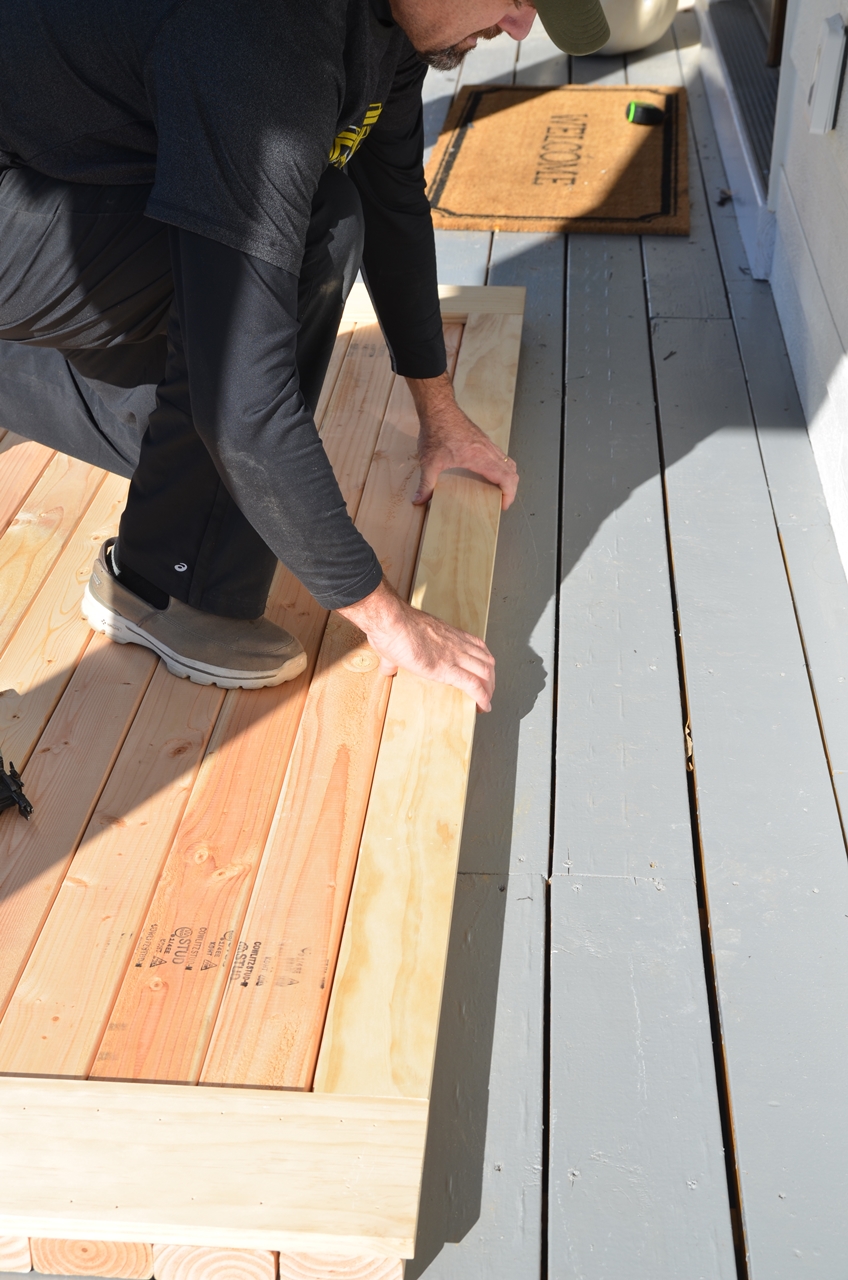
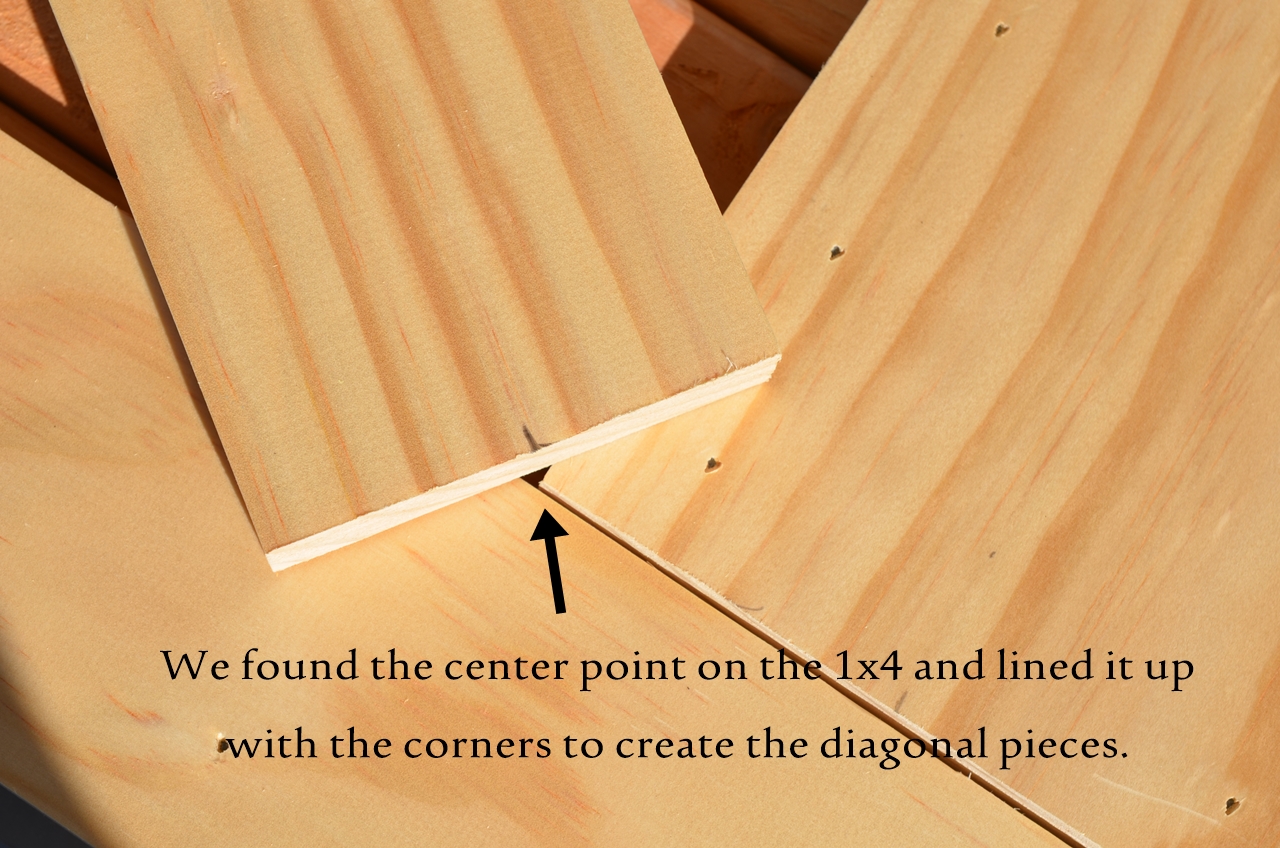
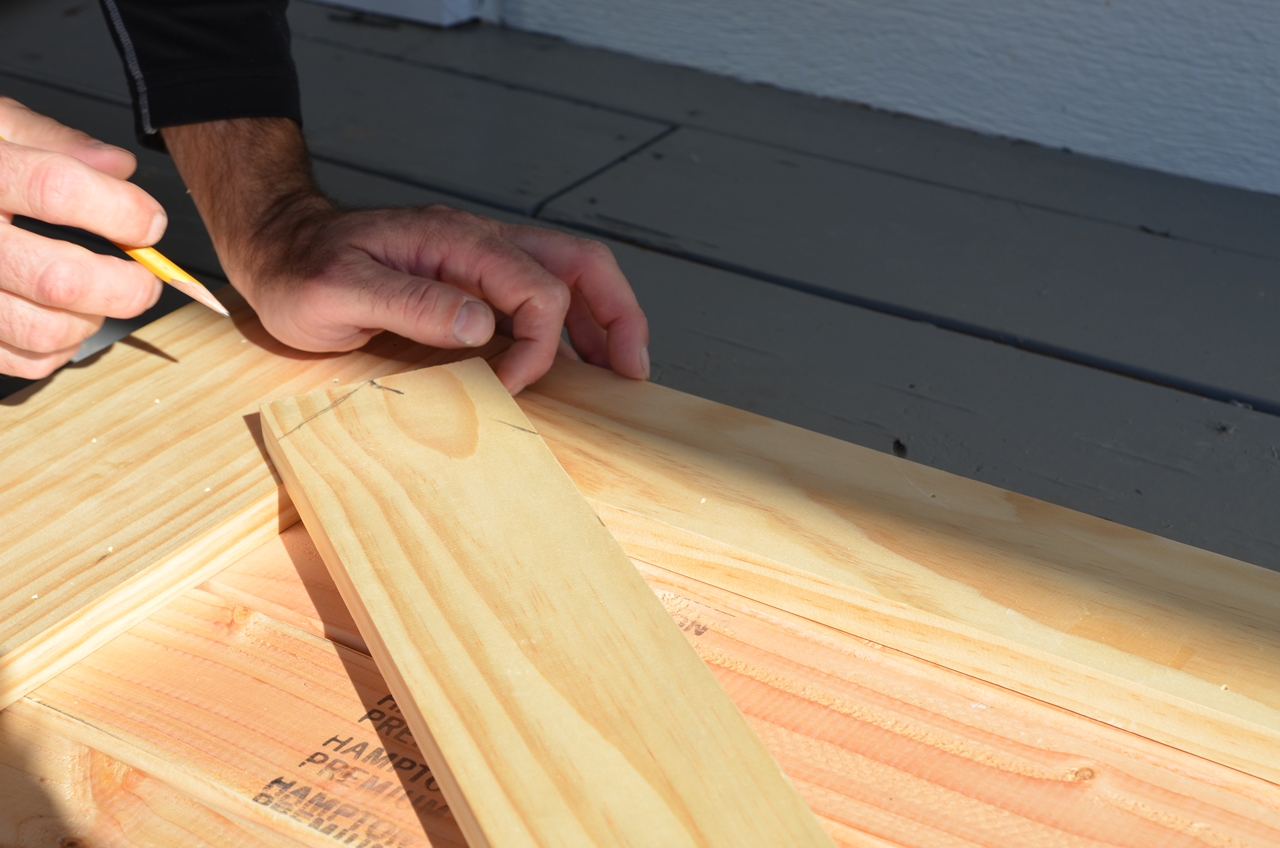
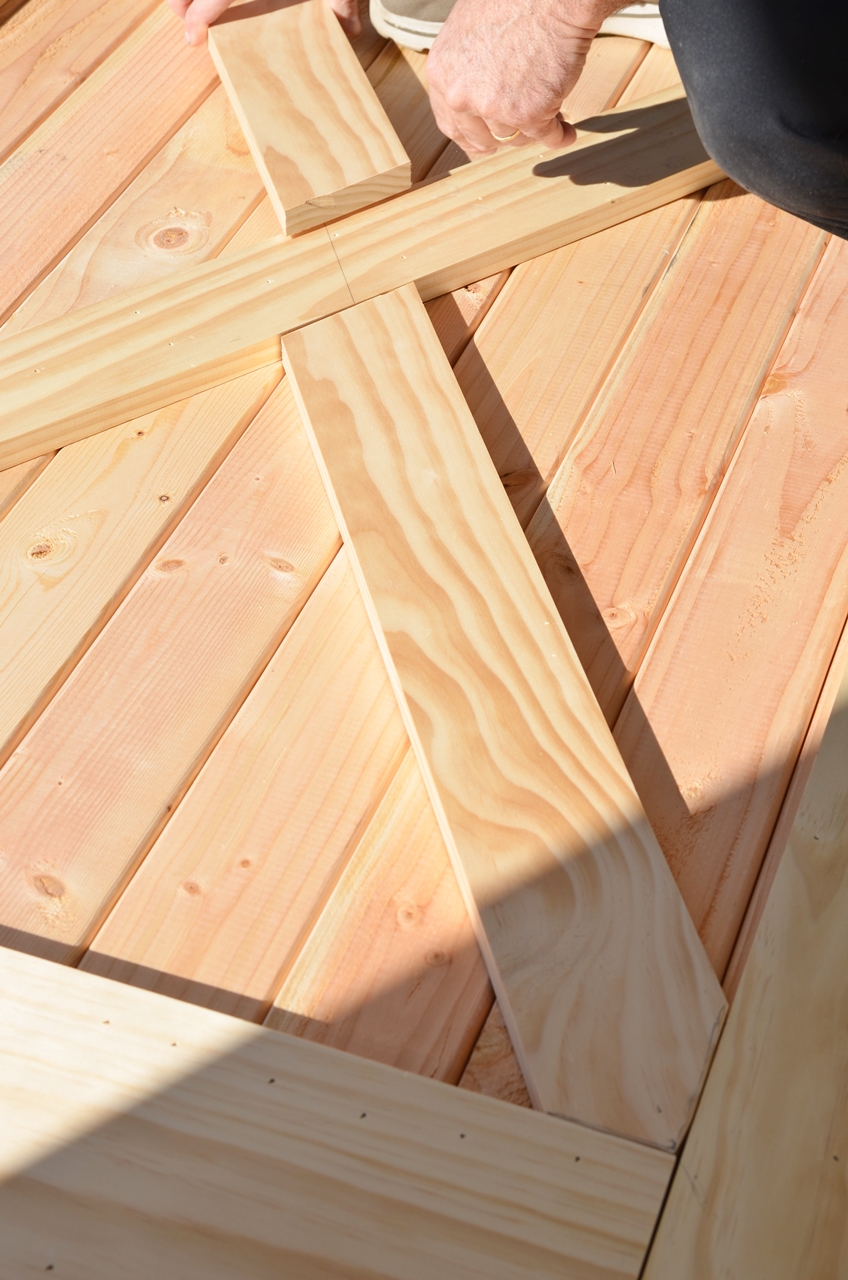
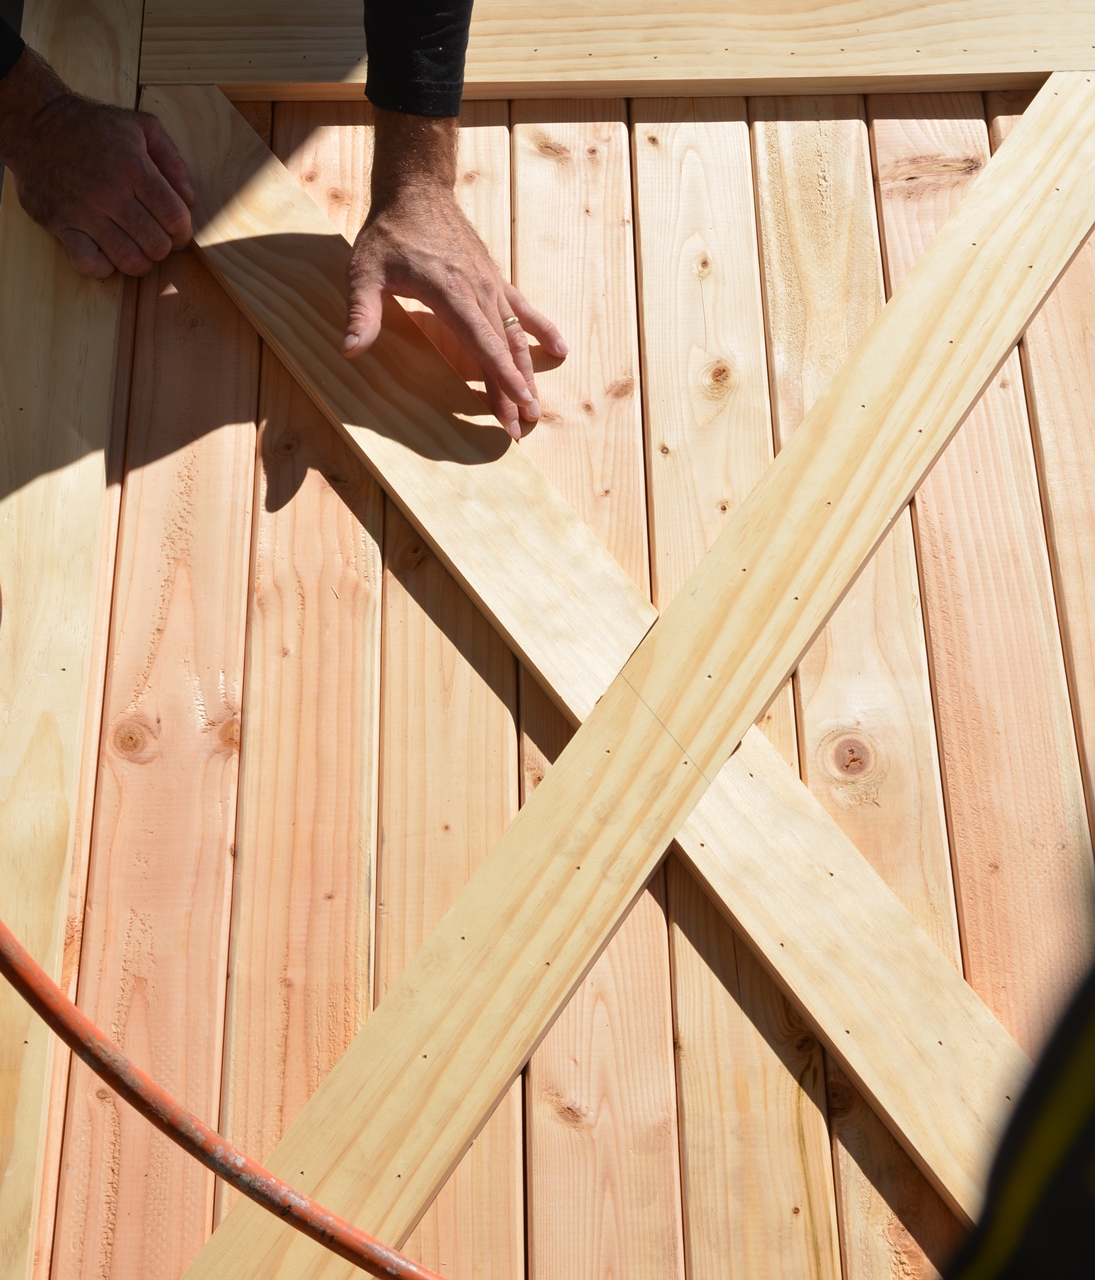
For the “X” at the bottom of the door, Cy cut and measure a board the length of one corner to the other by lining up the middle of the 1×4’s in the corners.
Then he just pencil sketched where he needed to make his cuts. He said he could have used a framing square to be more exact, but he was able to do it this way.
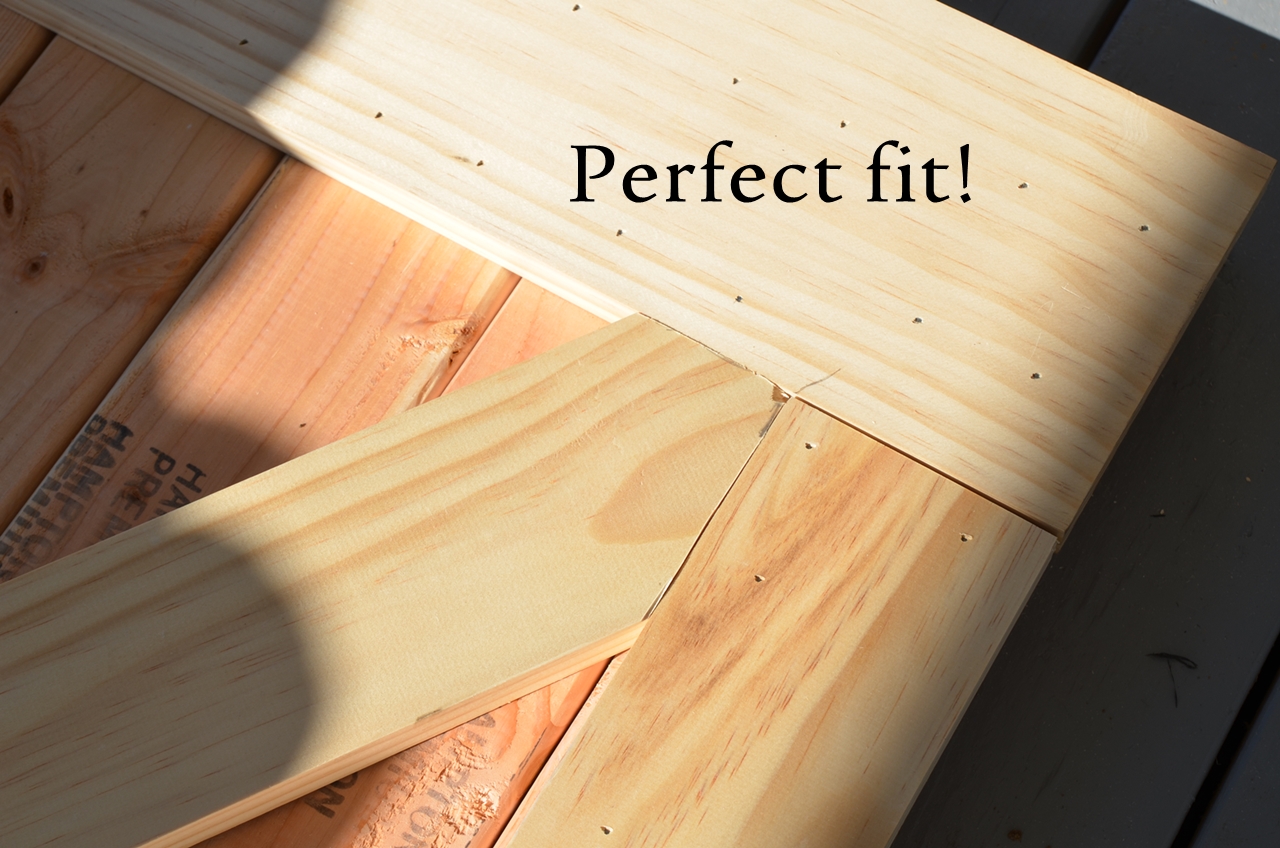
He did a great job because it was a perfect fit!
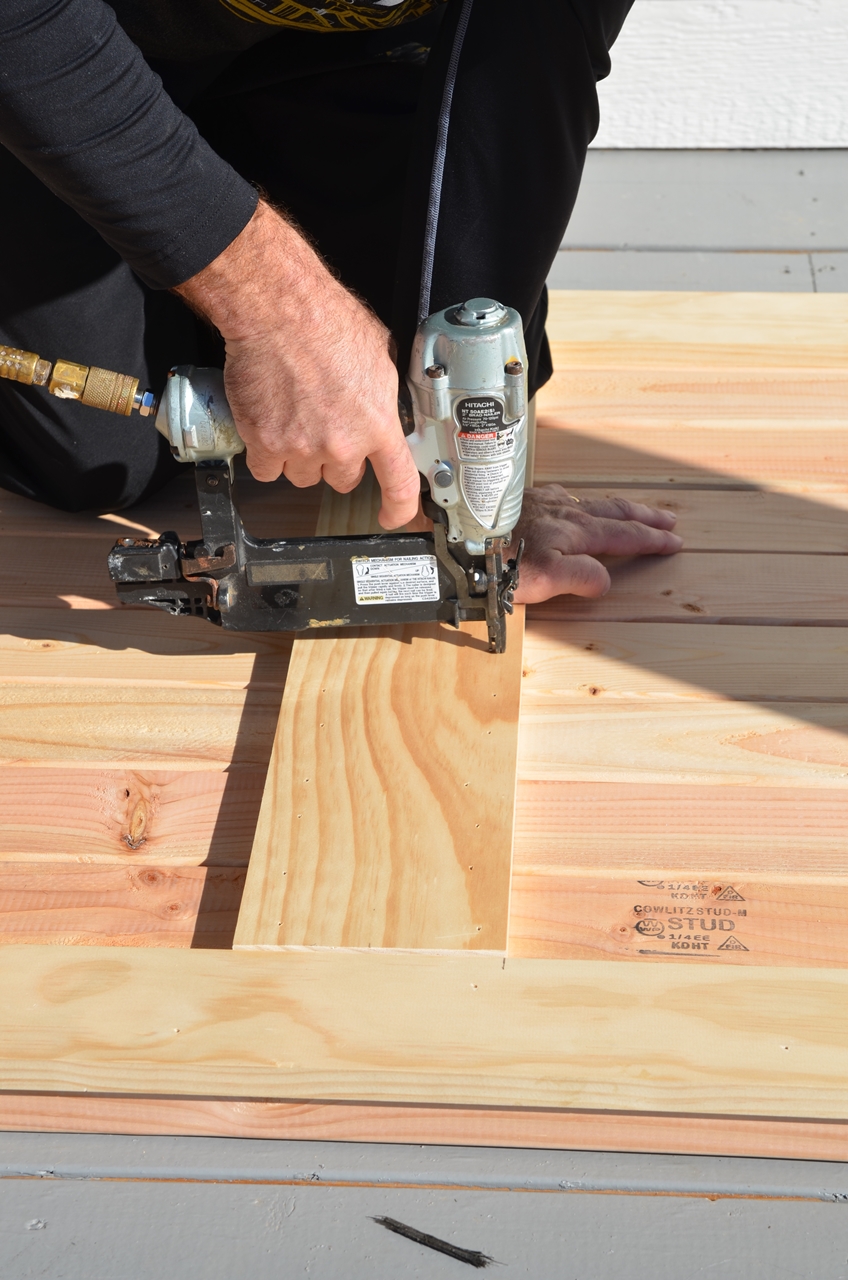
He applied gorilla glue to the back of the first half of the “X” and then nailed it to the door.
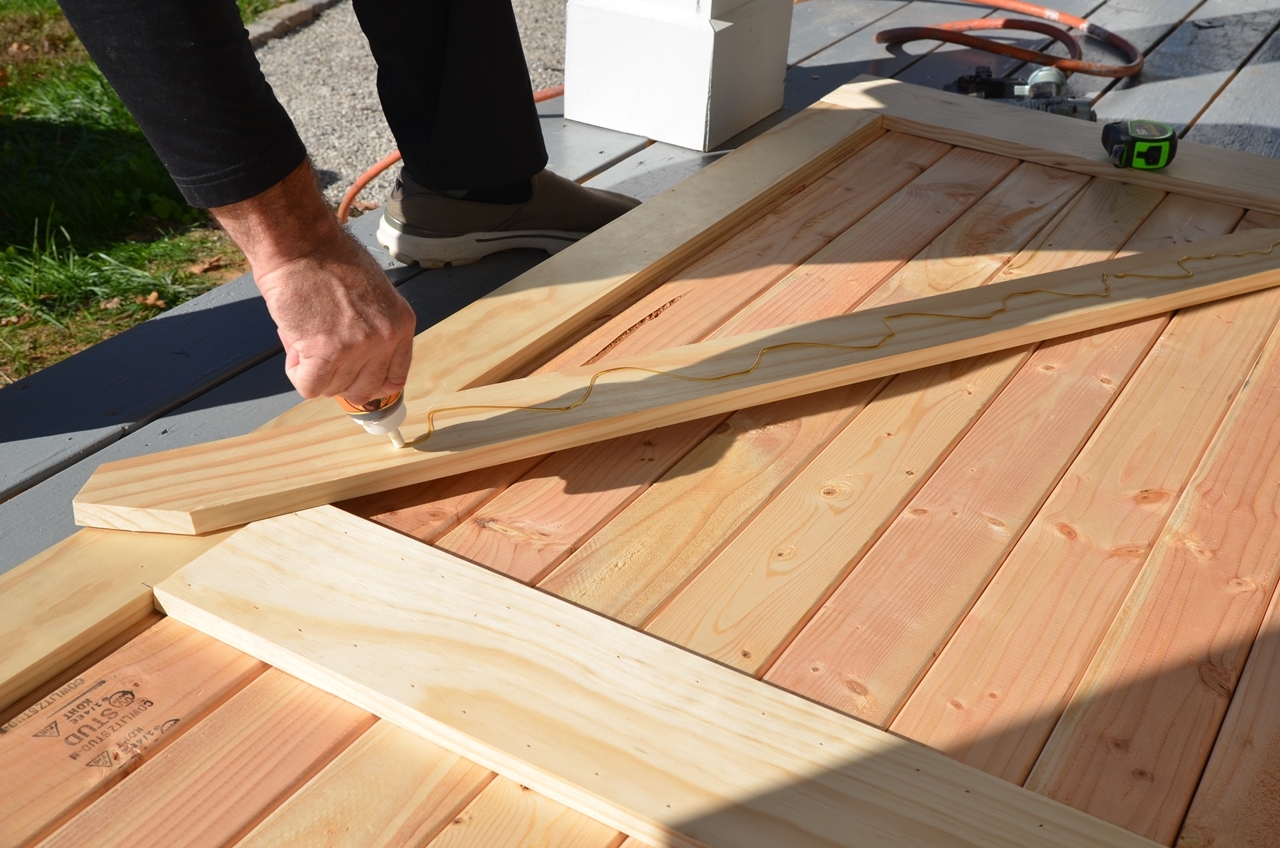
He measured and cut the second board in half so that it would fit as the second leg of the “X.”
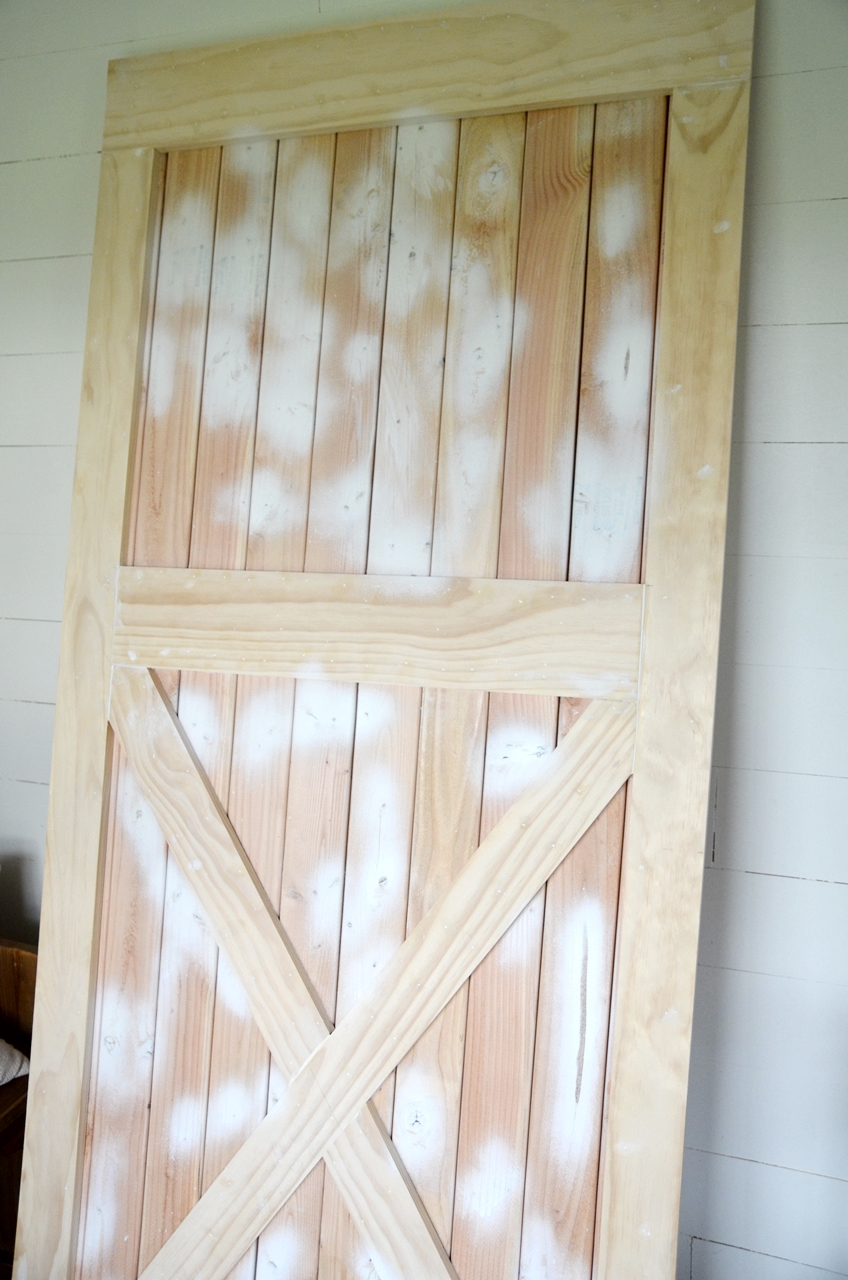
Once the door was complete, Cy sprayed the knots with primer specific for covering pine knots.
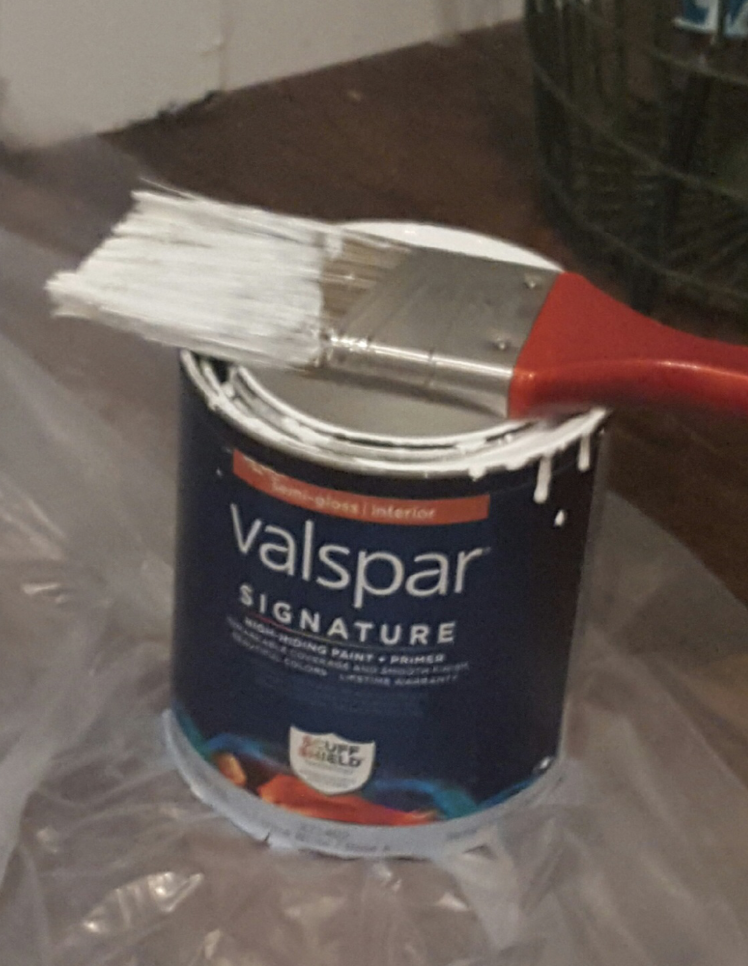
After we primed all of the knots, we painted two coats of Valspar white paint on the door in semi-gloss.
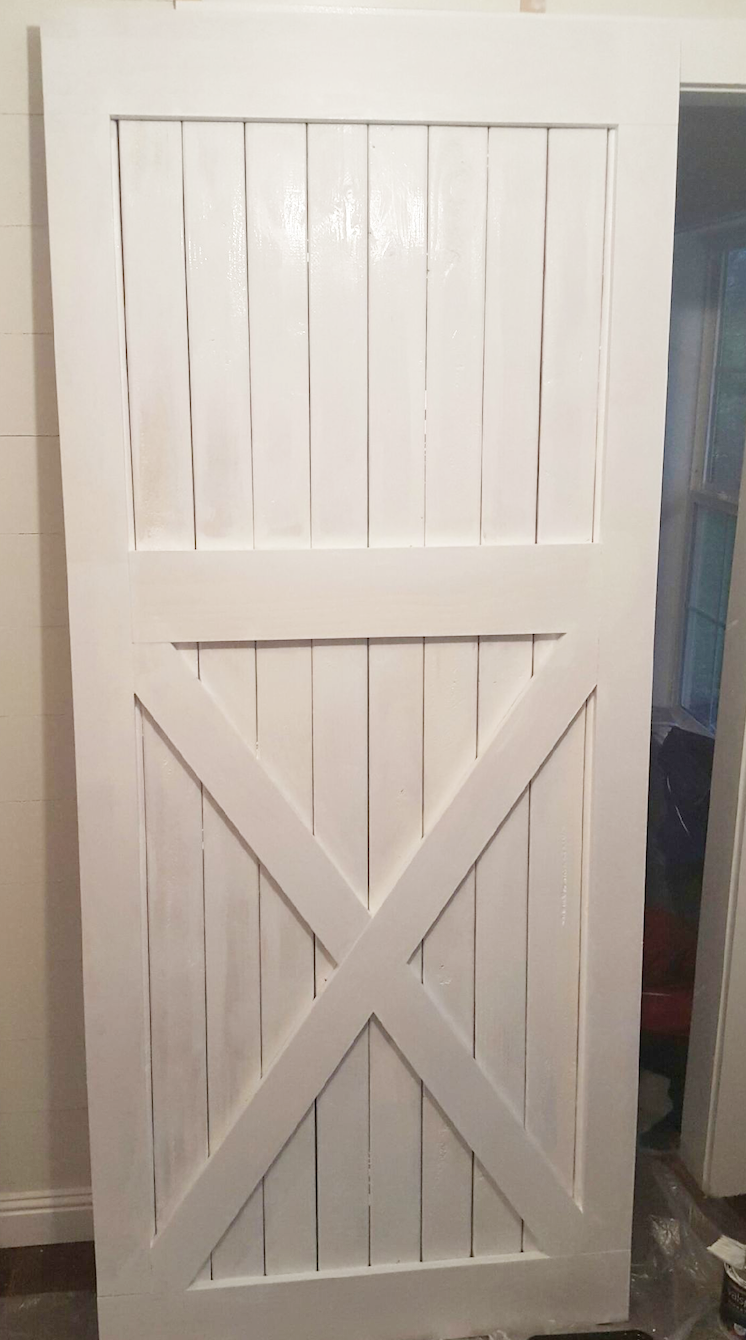
Cy snapped this picture on his phone and sent it to me after he had painted one coat…
We installed our door with a rolling door kit (that I will tell you about in my next post.) And now it looks like this!…
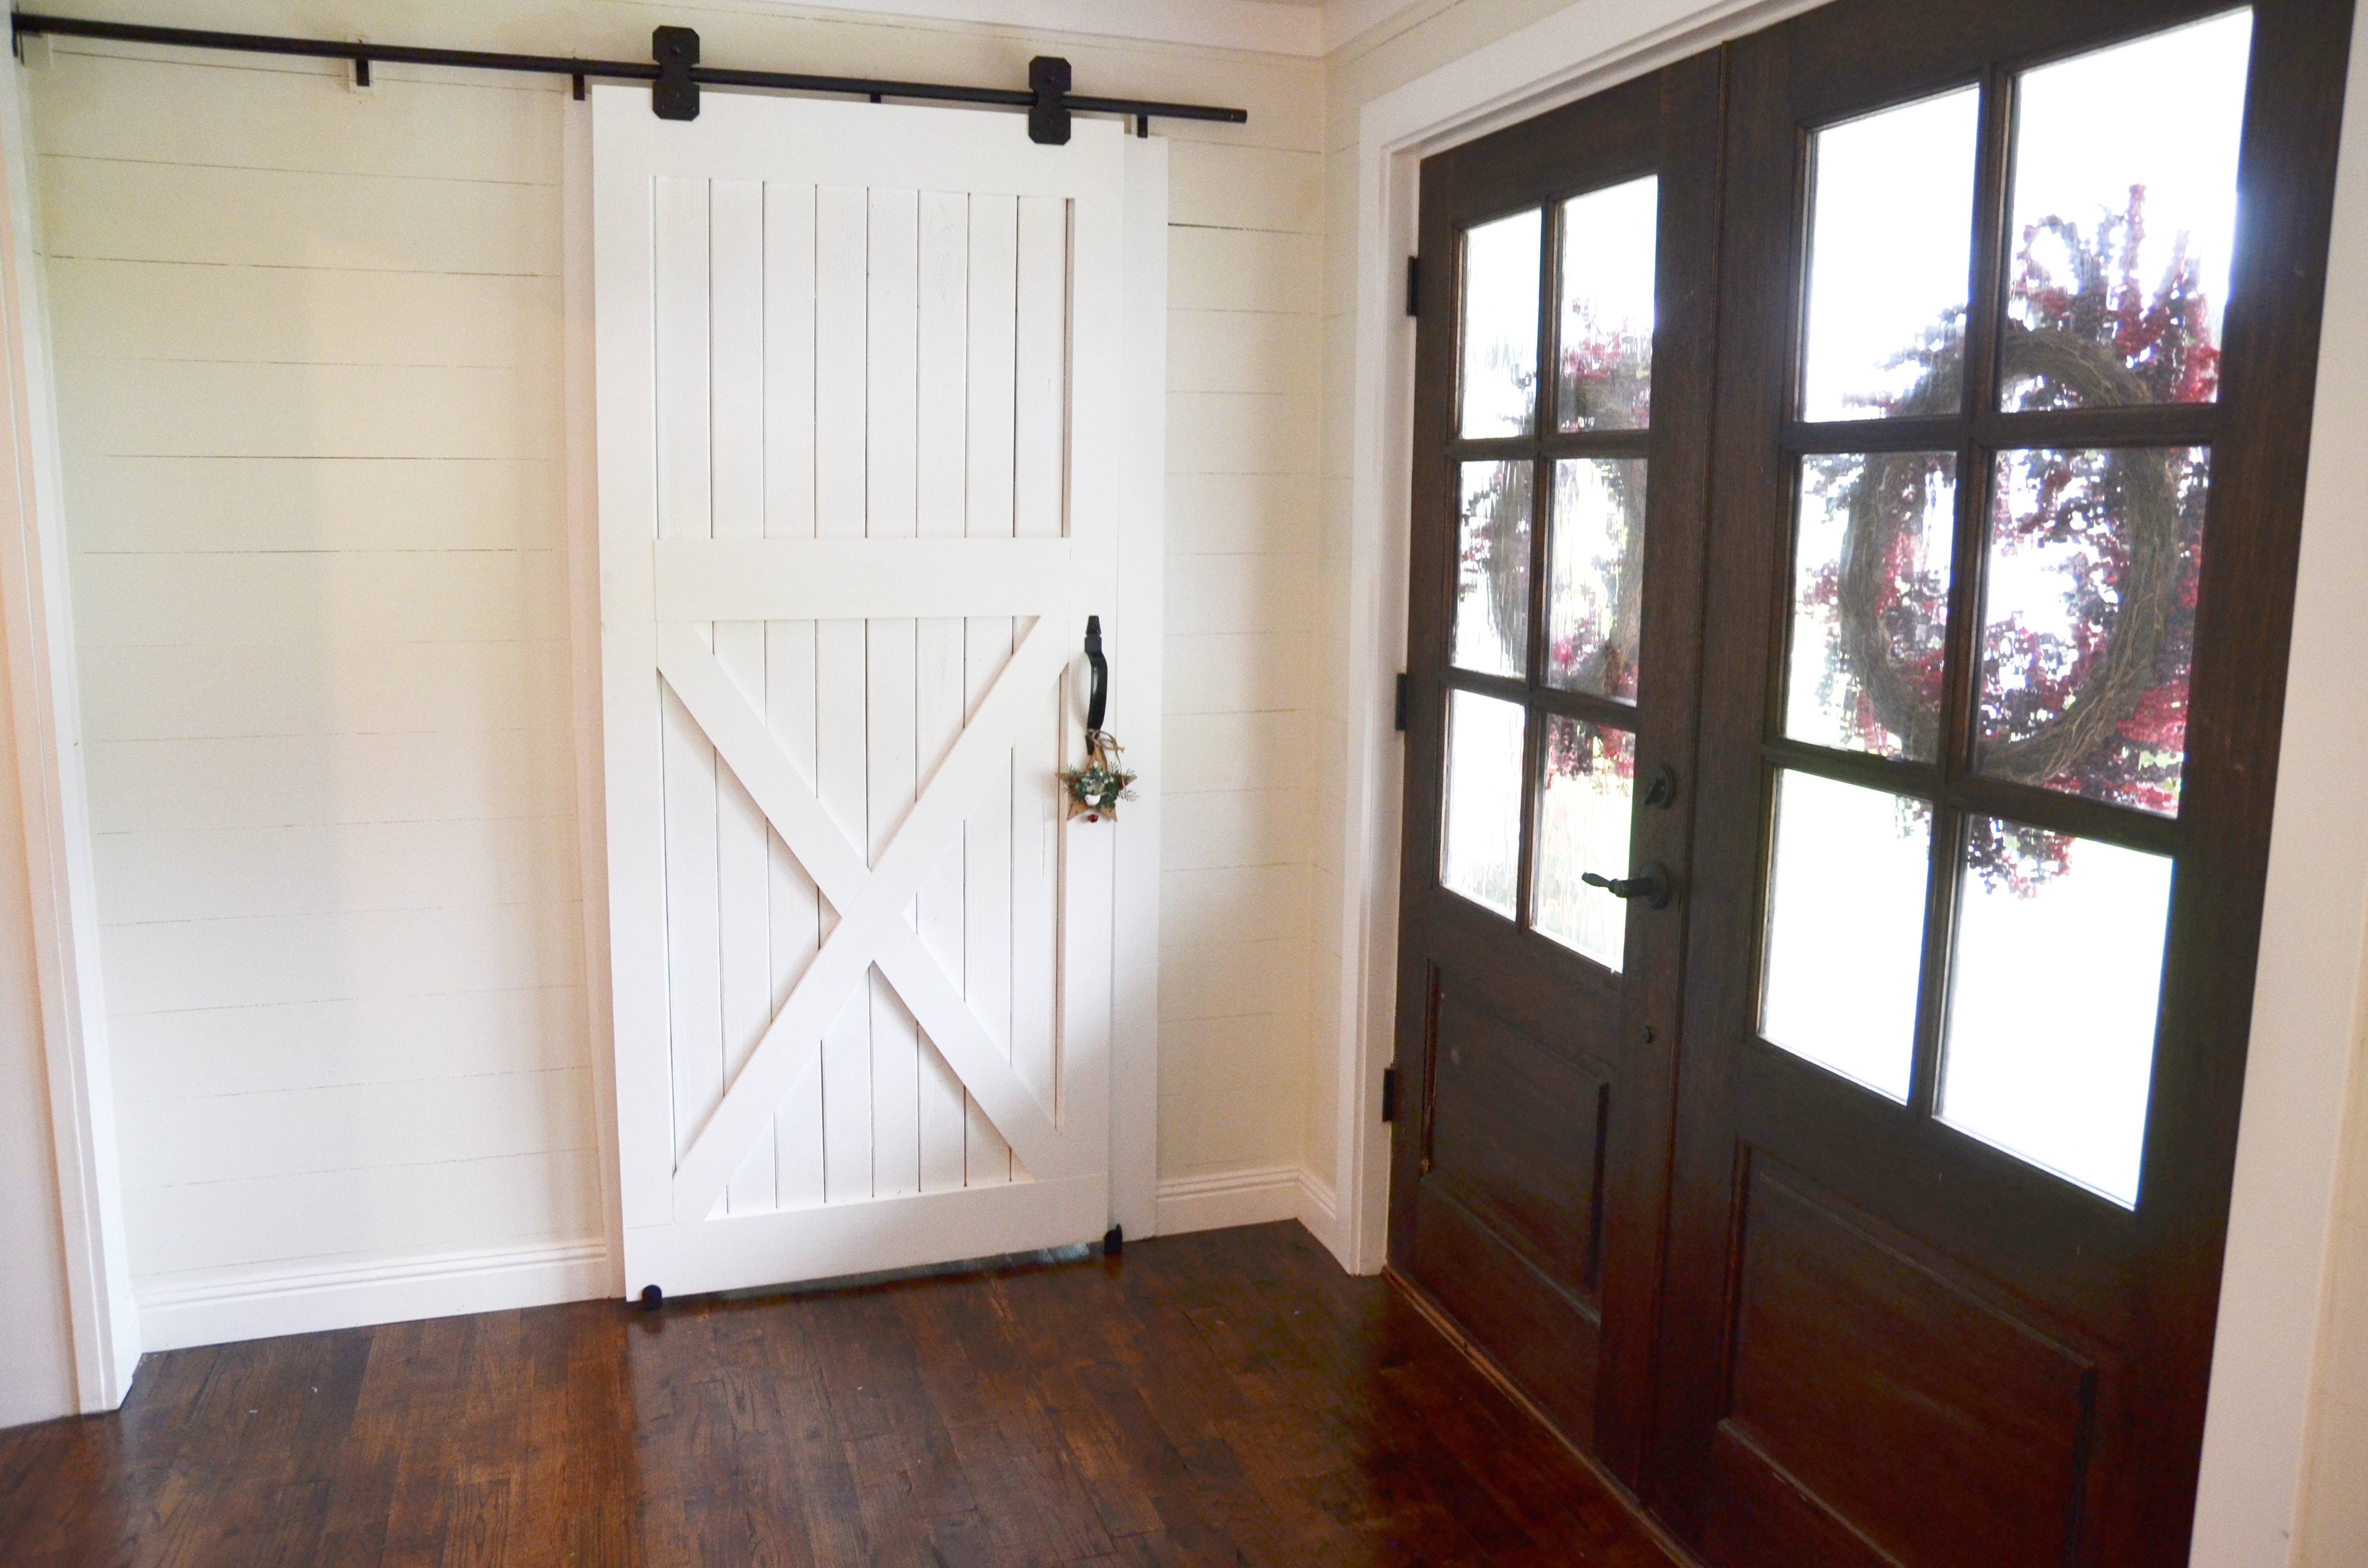
I love it soooo much! It is the perfect door for this space! And I love how I can close it when our mudroom gets a little messy. :)
Here is a peek into the mudroom…
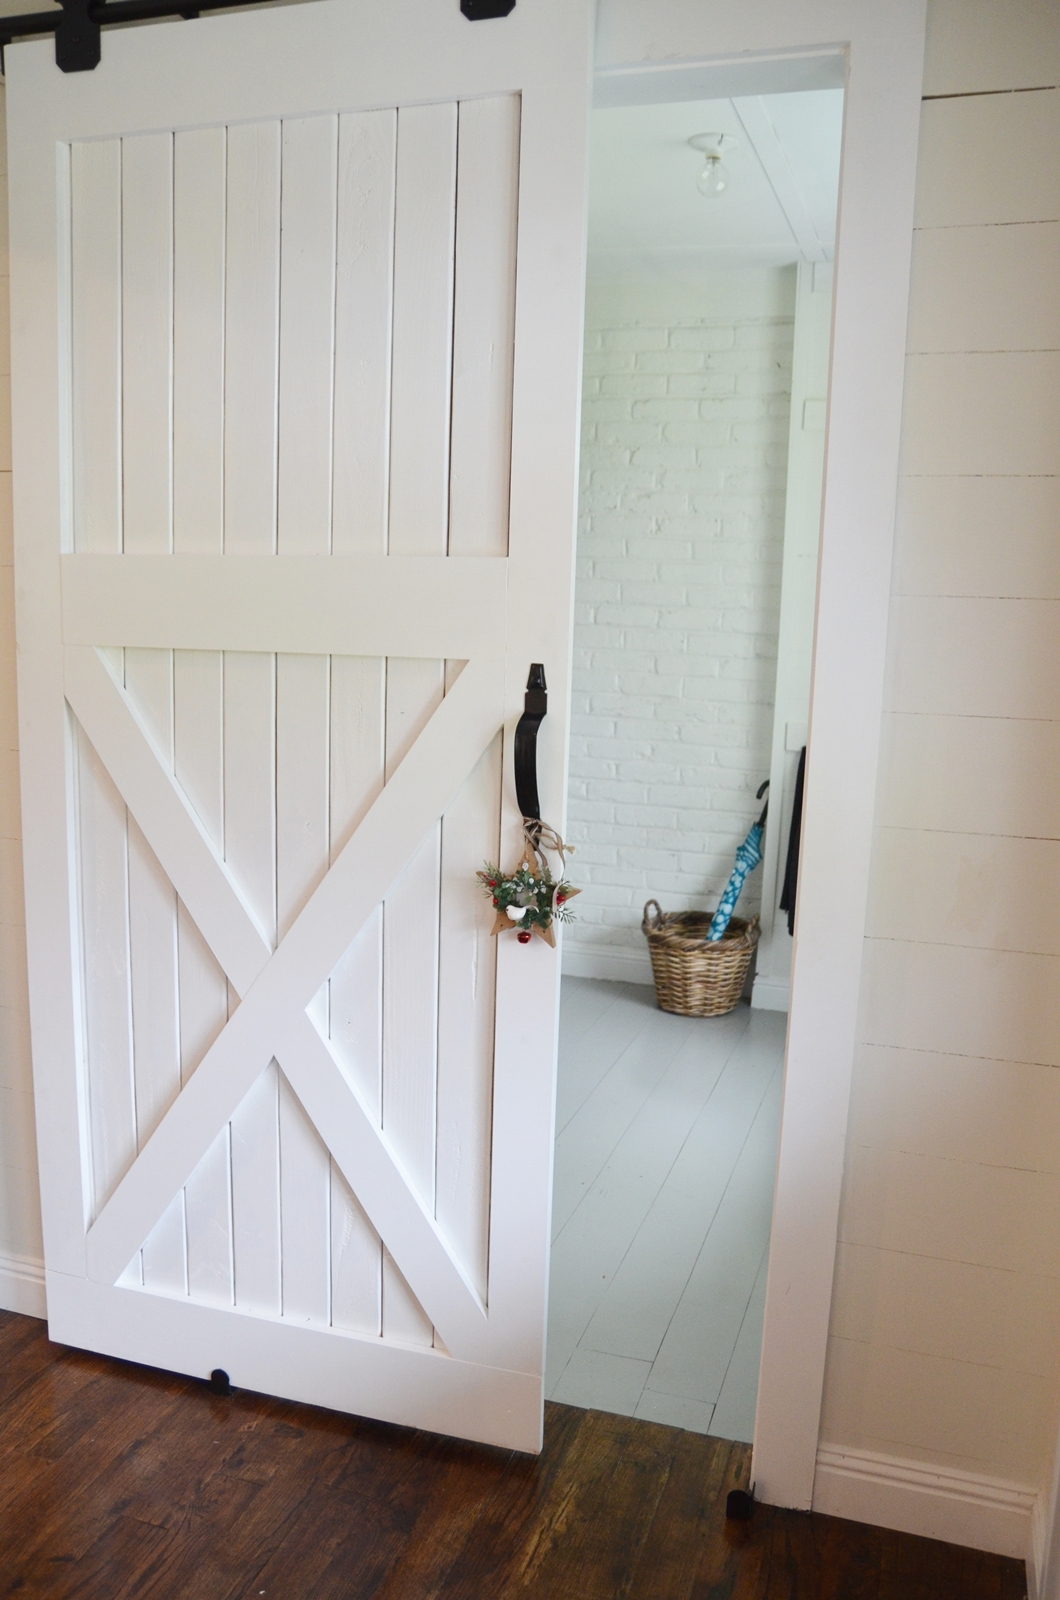
Since this barn door is in our new entry way, and I just finished decorating that space for Christmas, I added a little wooden star ornament to the handle. :)
Love it? Pin it!
I love Cy’s presentation of the glue. He may
have a future on The Price is Right, lol. Seriously though, the door (and the entryway) look fantastic.
That’s hilarious! We thought so too! We have laughed at the pictures a hundred times! ;)
What does the other side of the door look like? Does it look unfinished ?
Hi Kayla!
Yes, we left it unfinished, but you could paint it if you wanted. xoxo
My thoughts exactly. LOL
did I miss the tutorial for the planking on the wall?!?!? :(
No. We didn’t do one, but we just bought sheets of plywood and had them cut into five inch strips to use as paneling for our walls. We just nailed them to the studs, filled the nail holes and painted. Hope that helps a little. :)
I LOVE this post!! This is all i asked my husband for christmas for!! I cant wait to see your next post!!! ( Did you still have overhang on the back of the door? Just wondering)
It looks great! Maybe you’ll do a post soon and show us your mudroom. :)
I will as soon as I get back from our trip. Probably after Christmas though. :)
I would have found reading this more enjoyable if I didn’t have to contend with ads that cover the content. I’ll continue to read your blog because I like it. I just wanted to give you that bit of feedback. Nothing nasty or offensive intended.
Marcia, I appreciate your comment. Thank you for letting me know. I think I may have some ads appearing that shouldn’t be, and I will check on it. thanks again!
Looks great! I’m having trouble with pop up ads taking up half the screen and I can’t get them to go away. Its happen on the last two posts, very frustrating. Just wondering if anyone else is having the same problem.
I’m sorry Bobbi! I shouldn’t have any ads that cover up half of the screen. I will check with my ad guy about this.
Thanks!
Your whole house is beautifu. Y’all are such inspiration. Love your blog.
I still go back back and look at pics of your old house and guest house.
So cool! Thank you!
I love it Traci! And yes, Cy definitely has a future in the advertising business for gorilla glue;) So funny! I can only imagine your conversation through that! But seriously, I’m loving the door and have GOT to find somewhere in my house to do this!! I’m thinking my basement remodel coming! Love it!
Thank you, Betsy. Cy is thrilled with how everyone loved his presentation and is considering quitting his banking job and going to work for Gorilla glue. ;)
I also love Cy’s presentation of the Gorilla glue. I did notice he’s not wearing steel toed boots for his woodworking – ha!! I love the barn door!
Thanks, Bertie! :)
Maybe I should get him some steel toed boots for Christmas?!
xoxo
Love the door! Great directions too. Just wondering if you would share where you purchased the track for the door?
Hi Sharon! I am sharing that info in my next post. Coming soon! :)
The new door looks great :) Really original
Thank you!!
Was curious to know if you did the other side of the door with trim?
No mam! ;)
Could I ask if you could take a pic of the other side?😁 My husband and I have been wanting to do this to our bathroom, but could never find a door we like… Or afford! I love yours, and would love to know what the other side looks like.
If you don’t mind me asking, about what is the cost of the door (wood and rolling kit)?
Hey! Whatd you use for the bottom to keep the door from swinging? Hard to tell exactly but blackish brackets to keep door in line?
I may have missed it but did you mention what materials cost you? Gorgeous door!!!
Hi, I`m from Argentina. We are trying to do the same door(It´s wonderful). Let me ask you, and I hope you understand. In these photos we can see the front part of the door, is the back one exactly the same?
As one side is in a bedroom and the other in a living, both of them have to look really nice.
Hi Amanda! The back of the door does look different. It is just the two x 4’s. If you send me an email at traci@beneathmyheart.net, I can try to snap a picture of it on my phone and send it to you! :). Traci
Hi, thanks for taking a moment to answer my question. We are looking to replicate your barn door as its by far our favorite look on the web. Anyway, in your step by step it states that you used 1×4’s for the trim to frame the door. The pictures look as if the top and bottom part of the frame may be a 1×6 like the middle piece and not a 1×4. Could you please clarify as I want to make sure my door is a proportionate as yours is. Thanks again!!
Hi Dane! Sorry for my late response. Yes, you are correct. The top and bottom Frame pieces are 1×6’s like the middle piece. Sorry about that!