Bookcase turned Yard Stick Coffee Table {DIY Wayfair Challenge!}
I am so excited to share a fun little project I just complete for my boys!
I got an email a while back from Wayfair about participating in their first DIY Challenge. Of course, I said yes!
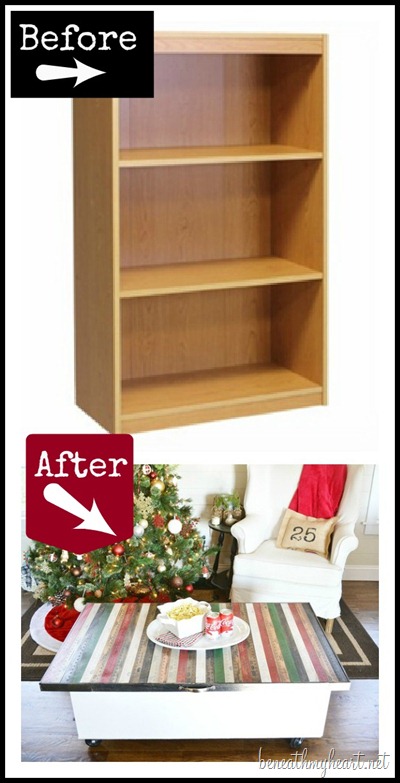
We had to pick one of three products to do a makeover on. I chose this bookcase.
When I first saw it, I planned on still using it as a bookcase, but then I got the idea to turn it into a coffee table for the boys’ soon-to-be playroom.
{When the boys’ move upstairs to their new rooms, we are going to turn one of their rooms downstairs into a playroom.}
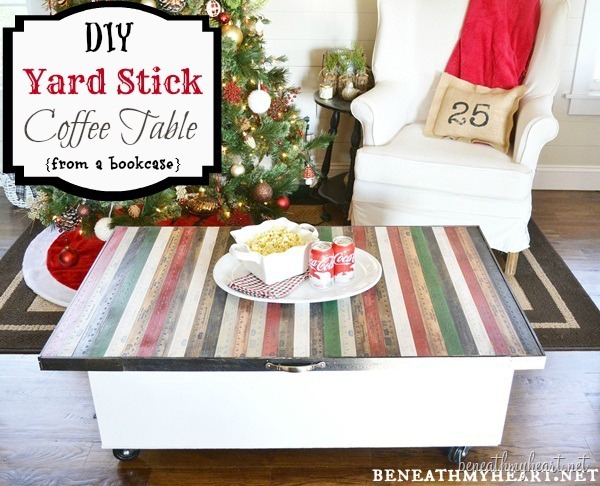
So this is what I came up with!
I just LOVE it!
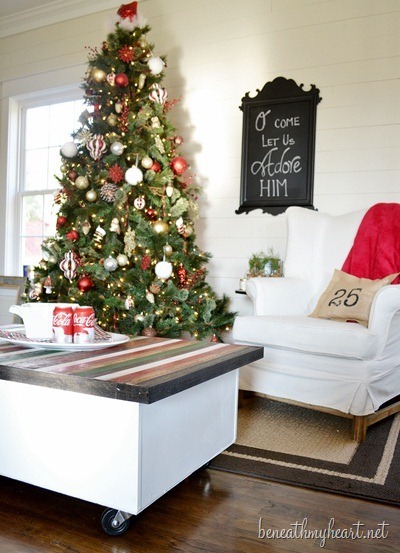
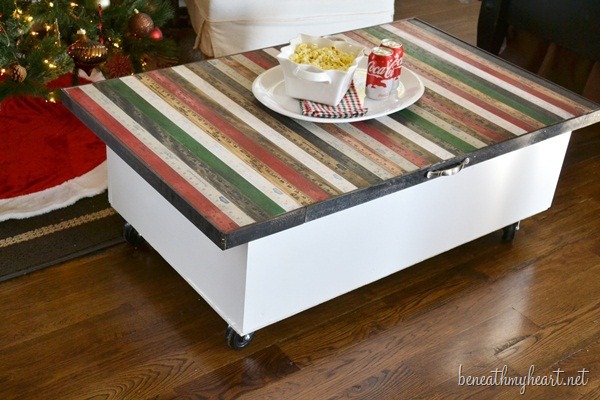
I took the bookcase and created a rolling, yard stick coffee table with it.
I used the pieces of bookcase that came in the box to create the base of the coffee table. I sprayed the whole piece with Kilz spray primer first, and then spray painted the whole thing with white spray paint.
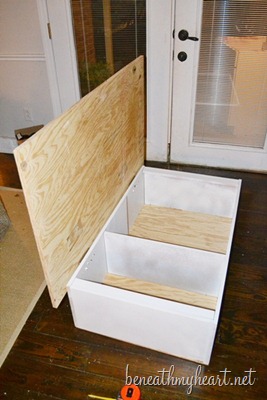
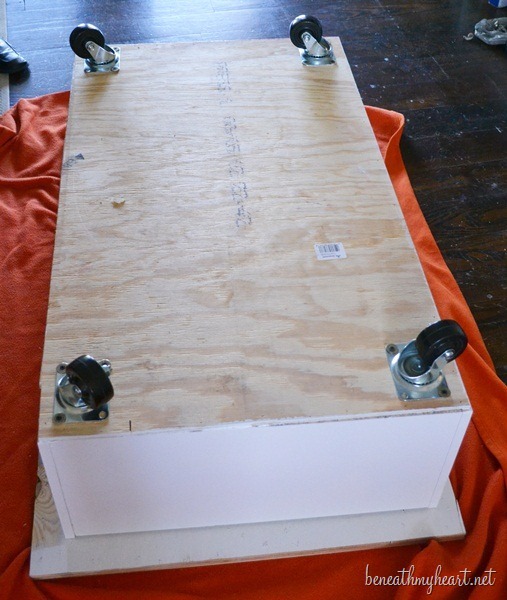
Since the original backing of the bookcase was a little too flimsy, we used a piece of leftover beadboard that we already had for the bottom of the coffee table.
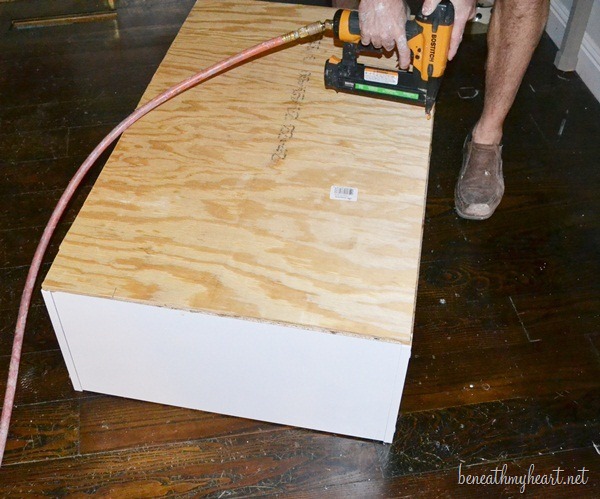
We applied PL Adhesive to the wood and then nailed the board to the bottom of the bookcase.
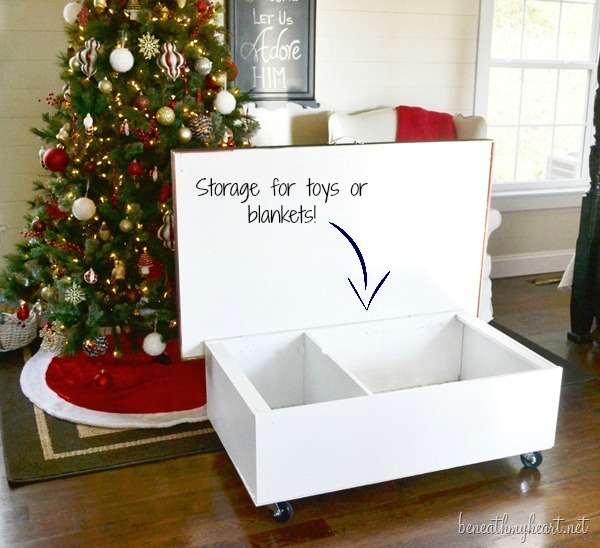
Then we cut a piece of plywood about two inches longer on each side than the bookcase.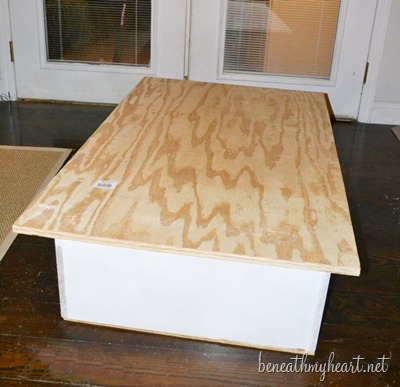
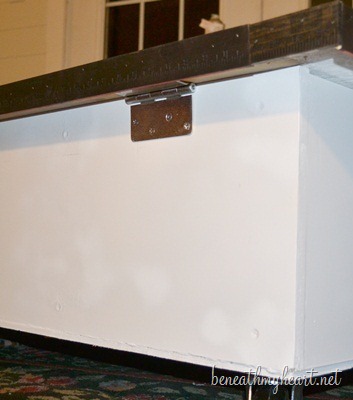
We attached the larger piece of plywood to the top of the bookcase with door hinges.
Now the boys will be able to lift up the table top and use it for storing toys or blankets.
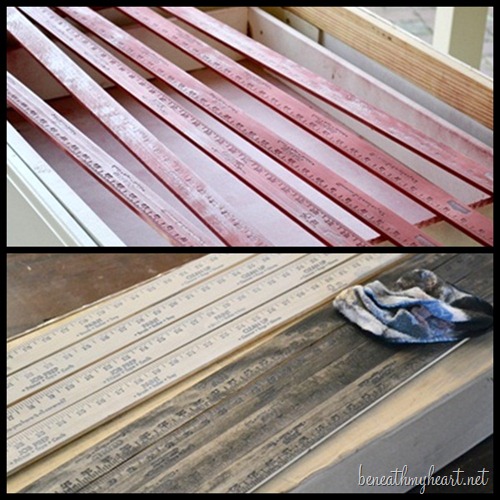
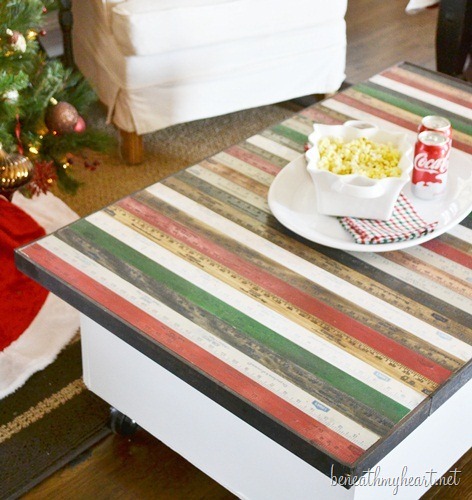
For the top of the coffee table, I bought a bunch of yard sticks for .69 cents a piece and stained or painted them with my favorite colors.
I spray painted some red and used Annie Sloan dark wax on them to make them look aged. I used Ebony stain on some, Walnut stain on others. I also used a gray stain, white spray paint, and green paint on some others. You can use whatever colors you want!
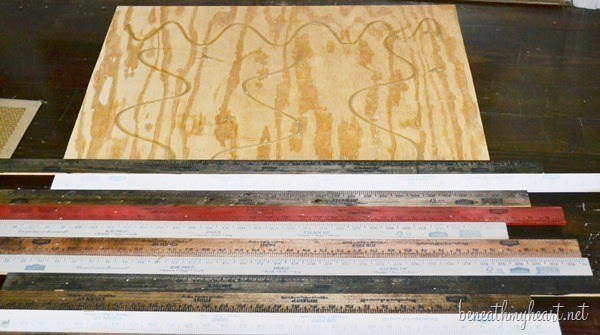
Then I attached the yardsticks to the top of the coffee table using more PL Adhesive and the nail gun.
I staggered my yard sticks because I didn’t want them to look all matchy-matchy.
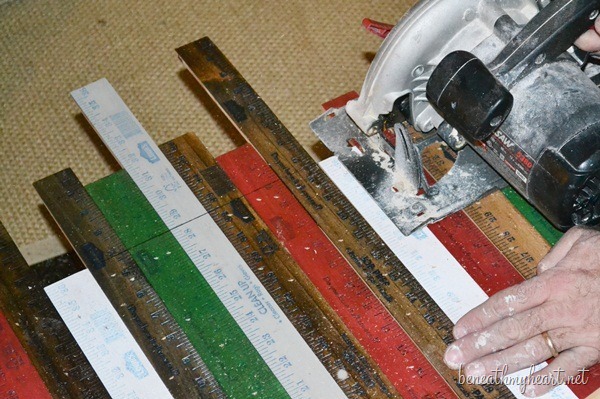
Then we used an electric hand saw to cut the edges of the yard sticks straight.
Next, we added wheels to the bottom of the coffee table.
To cover the raw edges of the top of the table, I stained some yardsticks a little darker with the ebony stain and attached them to the sides with PL Adhesive and a nail gun.
I also added a silver handle to the front so the boys can lift the top of the coffee table easily.
I am so happy with how it turned out!
It’s such a colorful and happy table! Perfect for the boys’ soon-to-be playroom!
And I like that they will be able to easily roll it out of the way if they need more space to play games, like their Wii.
Here is another look at the before and after…
A special thanks to Wayfair for letting me participate in this challenge!! Be sure to follow Wayfair on Pinterest and/or Facebook for news and products.
Disclaimer—Wayfair provided the bookcase and Giftcards.com provided a giftcard to go toward the supplies for this project. All opinions are 100% my own.



This is such a fabulous idea! I love it!
This is gorgeous! I love every little thing about it. Thanks for the inspiration!
I love it Traci!!! Please put one of those safety things on it like toy boxes are required to have to it doesn’t accidentally come down on someone’s head!
That is so stinkin cool Traci! I love so many things about it!
AMAZING!! I LOVE IT! It looks like something that would be in a high end store, and I adore that the boys will be able to use it for storage. You and Cy make an awesome team!!
What a clever team you are your husband are. I love this for the grandkids toys!!
Laurie
I LOVE this!! So creative!! Such a great storage solution too! Great job lady! Pinned, tweeted, & +1’d! :)
Traci, Such a great idea. It is so cute. I’m sure the boys will get a lot of use out of the table. You and Cy are so creative and full of energy.
I love it Traci… I wish I had even just 1/2 of your artisitc flair! :) I love creating stuff like this but after I see these pics. NOT thinking of them on my own and creating them. Thx so much… love your blog, Traci… blessings to you and your sweet family!
Traci–this is probably my favorite thing you’ve done–at least for this week. I just am in LOVE with the rulers on top. I can’t believe the before and after. Belinda…from you know where.
This is such a great idea! You are so creative. Thanks for sharing with everyone.
What a clever idea! It turned out great!
DeDe@DesignedDecor
Traci and Cy you did it again. This is so neat. Thanks for sharing.
That is absolutely the best I have seen. You guys are very creative.
I’ve wanted to make a coffee table using pallets, but this is SO MUCH BETTER!! I love it!
Dear Traci,
That’s darling and so so clever. You did a super job and it is fun to see how you brought this to completion.
Glad you shared with us in blogland.
God bless and may your Christmas Season be pleasant,
d
I absolutely love it, Traci! What a great idea.
Awesome project, Traci! The storage will be a lifesaver and it’s something that will grow with the boys, too. Kudos!
xo Heidi
love it. it’s super cute (even though is for the boys) and the storage is awesome!
I really like this idea and very clever. Who doesn’t need storage? Good Job!God Bless
Totally interesting also extraordinary blog interesting picture gallery. You convey the impression as if you have an implausible knowledge on it and its your gratefulness for giving out and imparting your knowledge and blog with others.
Shower doors surrey
Traci, this is FAB. I love it and y’all did such a beautiful job!!
xoxo,
shaunna
SO cute and creative! JUST LIKE YOU! :-D
That is such a cute idea! Those boys are lucky to have such a creative momma! Great job! I’ve thought about using my old yardsticks in some kind of project but don’t want to cut them. I never thought to buy new ones and make them look old. Duh!
I did not see it, but please tell me you have put a hydraulic hinge on that lid so it does not slam on any fingers. You might consider some air holes too. Kids just are kids!
Loving the finished product…great work!
I missed this! I LOVE how it turned out, so darn cute and functional! Happy new year my dear friend!!
I totally LOVE it! What a great idea for the little guys that visit my home once in a while. Toys out of sight but a really great piece.
|
I love this idea! I’m always looking for different ways to reuse items! Awesome!
original, great idea!
Love this idea of the yard-stick coffee table!! I would like to try this, using an old door as the lid.
We did something similar, only made a bench out of it and store books in it. Put back and 2 side rails on it. Made the board on top the size of a baby mattress.
Love this idea of the yard-stick coffee table! It’s so cute and creative!
This is so cool. Its a great idea for a coffee table. Thank you for sharing it!