Bathroom Makeover Reveal!!
Hey friends! Happy Labor Day!
I wanted to quickly share with you a makeover that Cy did on a client’s bathroom.
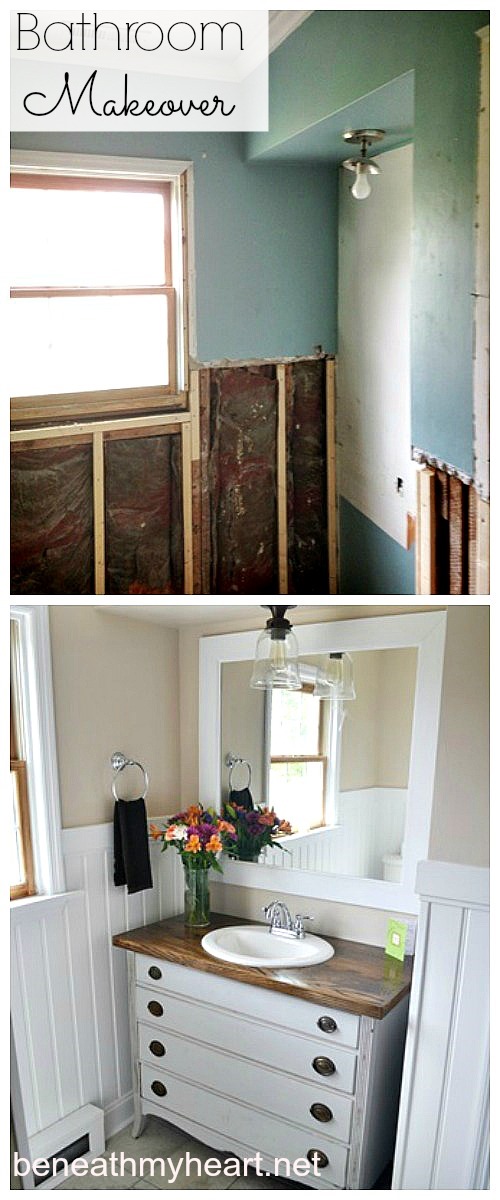
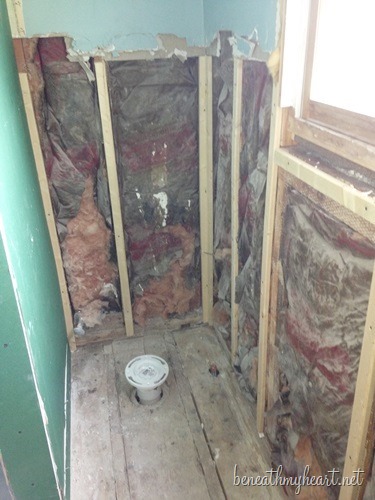
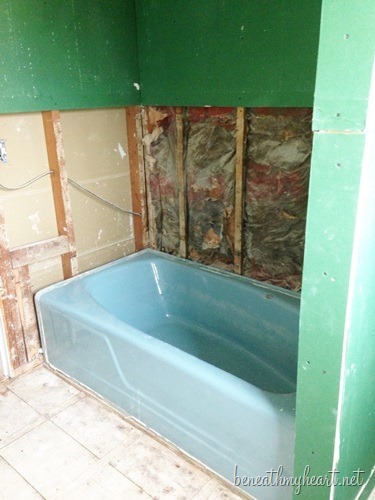
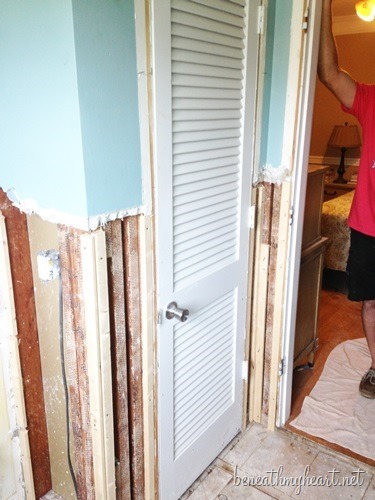
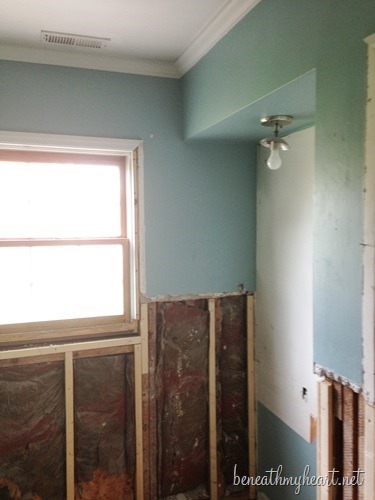
He had already started the demolition process before I could get a before picture, so this is what it looked like when I showed up.
That is where the toilet used to be.
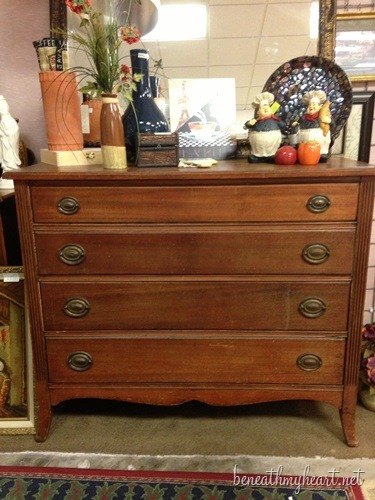
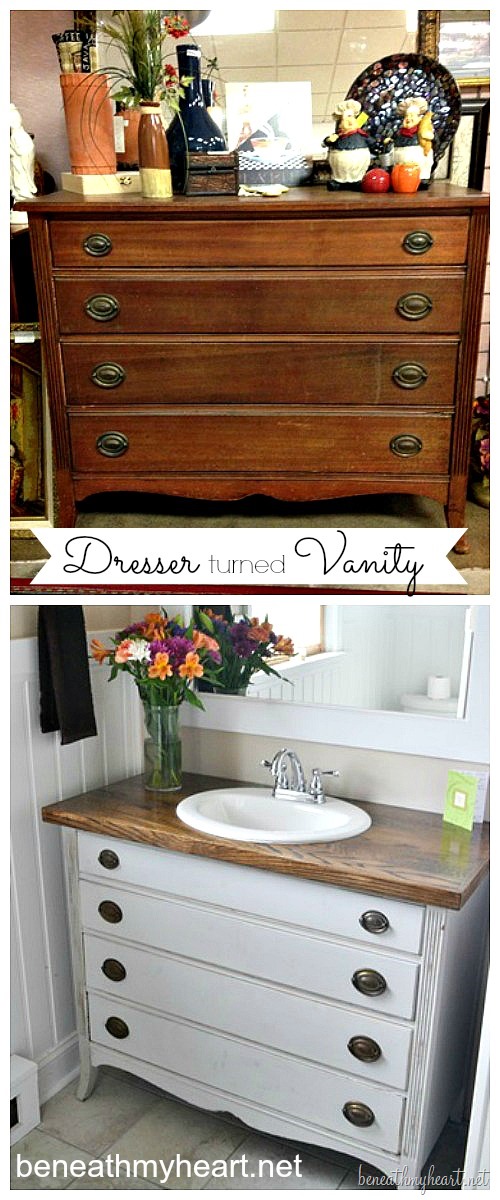
He was going to try to keep and re-do the original vanity, but it was in such bad shape, I convinced him to let me find a piece of furniture I could turn into a vanity.
I found this piece of furniture at our local antique mall for $90 dollars. That was so much cheaper than any new vanity that I would buy at Lowe’s or anywhere else.
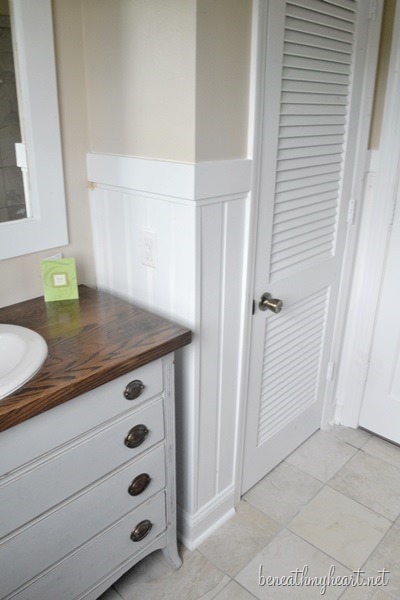
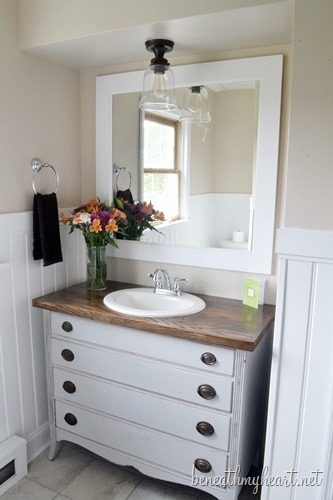
I painted the dresser with Annie Sloan Chalk Paint in Paris Gray. We reused the same hardware because it was perfect. We were planning on keeping the original top on the dresser, but Cy ended up having to replace it.
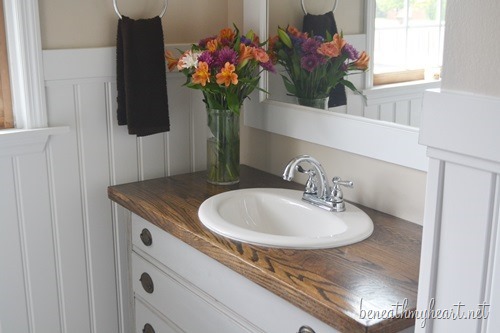
He bought some oak, stained it, and sealed it with poly to create a new vanity top.
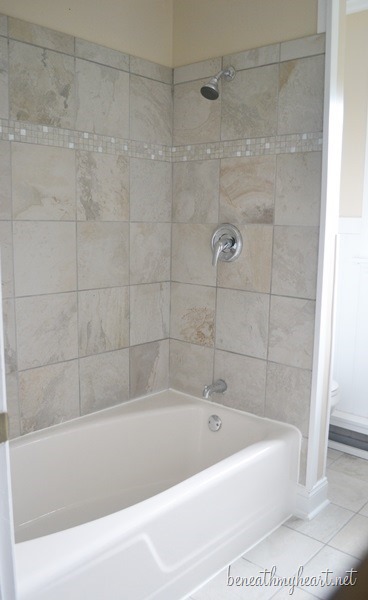
For the bathtub, he used a tub refinishing kit from Lowe’s to cover up the old blue tub.
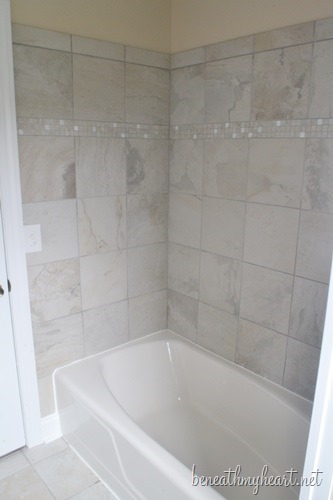
I picked out the tile for the shower and floor. It is from Lowe’s. I will try to get the exact name of this tile and add it to my post today.
We were super pleased with how it looked.
Cy installed bead board all around the room which really made the space look bigger and brighter.
We painted the walls above the bead board a tan color.
Here is what the bathroom looked like before…
Here is the after!
Cy bought the light at Lowe’s, and he built a custom mirror. I think it looks so fresh and lovely!
The clients were on vacation while Cy completed this remodel. The husband wanted to surprise his wife with a new bathroom.
Before they got home, Cy bought some flowers to place on the vanity, a card, and a new brown hand towel.
Isn’t that sweet?!
I love my man. ![]()
He’s working on another bathroom remodel right now, and I can’t wait to show it to you when he is finished!
Have a blessed Labor Day!!
Linking this project to these parties…

The conversion of that piece of furniture is interesting to me. Do the drawers function? and how do you get to the mechanics under the sink???
The top two drawers were retro fitted to allow for plumbing. They can still be used, but only on the sides. The bottom two drawers work fine. You can get to the plumbing by simply removing the drawers. :)
Beautiful job!
Looks amazing!!!
Beautiful makeover! That vanity turned it out so pretty!! LOVE it!
I’m confused – the owners of the house just let you guys do whatever you wanted to it? Nice!
I think it looks beautiful and that tub looks amazing! I cant’ believe you found that dresser for $90! Great job all around!
Yep! Pretty much! :)
Yeah, I was thinking the same thing! As in, I WOULD KILL MY HUSBAND!!! I am way too much of a control freak to let someone else pick out my tile, vanity, etc. That being said, I think it turned out amazing! I actually considered having HGTV redo a room for us and I couldn’t return their call for that very reason of losing control!
Wow, what a transformation – it looks great. You guys are a good team for picking out elements!!!
What a difference! I love it. And that vanity — beautiful!
Thanks, Julia!
What tub refinisher do you recommend? We need to take care of our beige tub.
I know this is an old post, but I would say to anyone “Don’t refinish the tub!” Save yourself the headache and later expense by replacing it at the start! I redid my whole bathroom as well, and needed to change a green tub. It was steel and I swear the house was built around it! I also used the refinishing kit from Lowe’s. I followed ALL the directions for prep work exactly as I was supposed to. Aaaaannnnd…… it looks great until you actually use it. It began flaking off very soon after the room was finished. That is a common complaint according to an employee. I had to take the bottom row of tiles off the wall, which are now of course discontinued, so I have to find a way to fill that in so it looks intentional and not a patch job. Same with the floor. It’s a lot of work and expensive I could have saved by replacing the tub right up front.
I LOVE that bathroom! Beauty in small places!
It looks great. Cy is so thoughtful to add that extra touch for the homeowners wife. You two are something else!!!
Man I wish you lived in California I need two bathroom
Redo’s!!! That came out awesome! Beautiful work!!
great great transformation. What a duo. I have always wanted to do that for a bathroom vanity but have yet to find one with the right dimensions. .
Did you all have any of the KY weather system we saw on the news this weekend??
Hi Brenda!
We had some bad weather, but the really bad stuff was just a few miles north of us. Thank goodness!
love it! I WOULD LOVE TO FEATURE IT, IF THAT WOULD BE OK PLEASE LET ME KNOW
That’s fine with me! Please just include a link back to my blog. Thanks so much! :)
Looks great! i love that Cy added the flowers and a card. Very sweet. That will get him many recommendations. :). I had the same question as the first comment above… How do you get to the plumbing?? You two make. A great team!!
I love how the tub was transformed. Our house was built in the 70’s and one of our tubs is a very similar blue and the other is a mustard color. They are heavy, nice tubs but the colors seriously need to be changed. What product did Cy use for the tub in this bathroom? Thanks! Another job well done Mr. Beneath My Heart!
Love the vanity! Beautiful bathroom!
Another job well done! I love all of the finishes you chose. The bathroom looks so fresh and spa like. I’m sure the client’s wife will be delighted. And the flowers, card and hand towel were a very nice touch.
Wonderful transformation! Wish I could have seen the client’s face when she saw it. I’m sure she was very happy!
What a fabulous job Cy did !!
It looks great Traci, and I love that the husband wanted to surprise his wife!! (And that your husband made it even sweeter with the flowers and card!)
Traci, you and Cy make a great team. Love everything. I have a question about the tub re-do. In our older home we have a teeny tiny master bathroom. The tub and tile around the room are olive green. We got an estimate for a professional to paint (I guess that’s what they do), all of the tile and tub white and it was just shy of 1,400.00. I’ve seen DIY’s for painting it yourself on Pinterest but my concern is chipping. The tub is used everyday and I’m just not sure about the durability. The blue tub Cy re-did looks great and so professional. What are your (or his) thoughts on the durability of the kit he used. I would love to save the money if it’s worth it. Thanks for your in put.
Here is what Cy said, “The kit is a durable product, but it is imperative that you clean the tub very well with the cleaner provided in the kit, and I recommend using 220 grit sand paper and lightly sanding the tub versus using the steel wool provided in the kit. With that said, small nicks will occur with heavy use, so you’ll always want to keep a little touch up brush to touch it up over time. The difference is $100 for one kit vs. $1,400 for someone professional to do it. It depends on how much money you want to spend. And even if a professional does it, you still run the risks of getting a few nicks, but are less likely. Remember when using the kit, the prep, cleaning, and lightly scuffing is as important, if not more important, than the painting.”
Hope that helps a little. :)
Traci
Beautiful! What an amazing transformation!
What was the wife’s reaction when she saw her new bathroom? It looks great!
We weren’t there when she saw it for the first time, but she told Cy later that she loved it. :)
Oh what a team! Again you have turned a sad mess in to beautiful creation. I too would have loved to see the owner when they walked in. Have you heard from them? God Bless
Shirley,
Cy has talked to both her and her husband, and they both love their new bathroom. :) We had an extra soft spot for this couple because they lost their 11 year old daughter December of last year. They are still deeply grieving their loss, and we are praying that this redo was a bright spot for them. Please keep them in your prayers.
This looks so fresh and bright, I love it! Cy did a beautiful job and the dresser is perfect.
Great job well done.
Just perfect! I love your reveals.
Do you have the name of the product you used to refinish the tub? It came out amazing! Mine is an old/ugly pink and I was planning on ripping the whole thing out…this would be much easier! Your bathroom came out amazing!
Please advise the name of the wall color. Thank you
you guys are just so talented! the bathroom is beautiful!
would love to know the paint colors!
Beautiful! Gorgeous! I need you to find me a vanity like that!
The bathroom looks amazing! What other kinds of work does Cy do? We live in Lexington. Also…I knew taking a toilet out couldn’t be that bad. I tried to get my husband to move ours when I painted the bathroom but couldn’t convince him, ha.
Thanks again for letting me feature your bathroom, you can see the post here!
http://westfurniturerevival.blogspot.com/2013/09/revival-monday-127.html
Thank you so much!!
Your husband is a keeper!!! Amazing job…I love that you are using dresser furniture and turning them into vanities! I always wanted to try that, I think it is so creative! Once again…AMAZING JOB!
Such a cute bathroom idea! What do you use for the wider beadboard?
I too am interested in the beadboard…and the floor and top trim board design! I’m just starting a major renovation in the Arts & Crafts style and your awesome rehab seems to celebrate this movement!!!
Hi Susan!
I am glad you like the bathroom makeover. This makeover was done in one of my husband’s client’s home. The tile on the floor is from Lowe’s as well as the beadboard and trim work. Since it was a client’s home, I do not have an installation tutorial on my blog, but I am sure that any carpenter would know how to achieve this look.
Have fun with your renovation!
Traci
What is the wall paint color?
Wow really love the way you turned the old dresser into a bathroom vanity,it really shows what you can do if you put your mind to it.
What I is the name of the tile and where did you buy it?
Hi Traci,
You both have done an amazing job again! You both gave me some pointers a few years ago when I was finishing my mud room and building a bench and your husbands comments were so helpful. I was wondering about the beadboard and trim that I see him use consistently in these bathroom remodels. Is it just the wood beadboard panels from Lowes and is he concerned about the amount of moisture that they will get in the bathroom over time? Also the trim on top and at the outside corners–what does he use? Looks like a 1X3 or 1X4 but I see a smaller piece under that and on the outside corne ??? Thanks for you help again!! I can’t wait to see what you have in store for 2014!! Happy New Year!
Beautiful job! I just LOVE LOVE LOVE the vanity. We’re redoing a bath and I have been looking at vanities on etsy and craiglists with this as an inspiration. :) But my contractor isn’t sure how to make it work. Can you share more advice on reworking the drawers? Thank you so much!!!
Very pretty! You picked a great tan color for the top of the walls. Do you happen to remember what color it is?
Did you find the exact name of the tile from Lowes? Love the finished product.
Yes do you know tile name?
Need your expertise at our home.
Where are you located?
Right outside of Lexington, Kentucky.