
DIY Outdoor Sculpture {Jenna Burger Designs}
Hey friends! This weekend was a tough one as we said goodbye to our little girl. She flew out Sunday and is back in her home country now. I wrote a post about the weekend last night but didn’t get it finished, so I will share it with you tomorrow.
But for today. I have a wonderful guest post from the amazing Jenna Burger! This girl has SERIOUS talent, and I could spend hours looking through her blog, Jenna Burger Design!
(Her interior design work has been featured in a ton of magazines, so be sure to visit her and check her out!)
********************
Hi All! I’m Jenna, Interior Design + Design Blogger of Jenna Burger Design. I am thrilled that Traci has asked me to guest post today and I am going to share something I am truly passionate about… turning trash into treasure!
With the kids off from school, I have been a busy bee this Summer juggling fun activities with them + my design client work load. When I find the time to DIY, especially this time of year, the easier the project, the better.
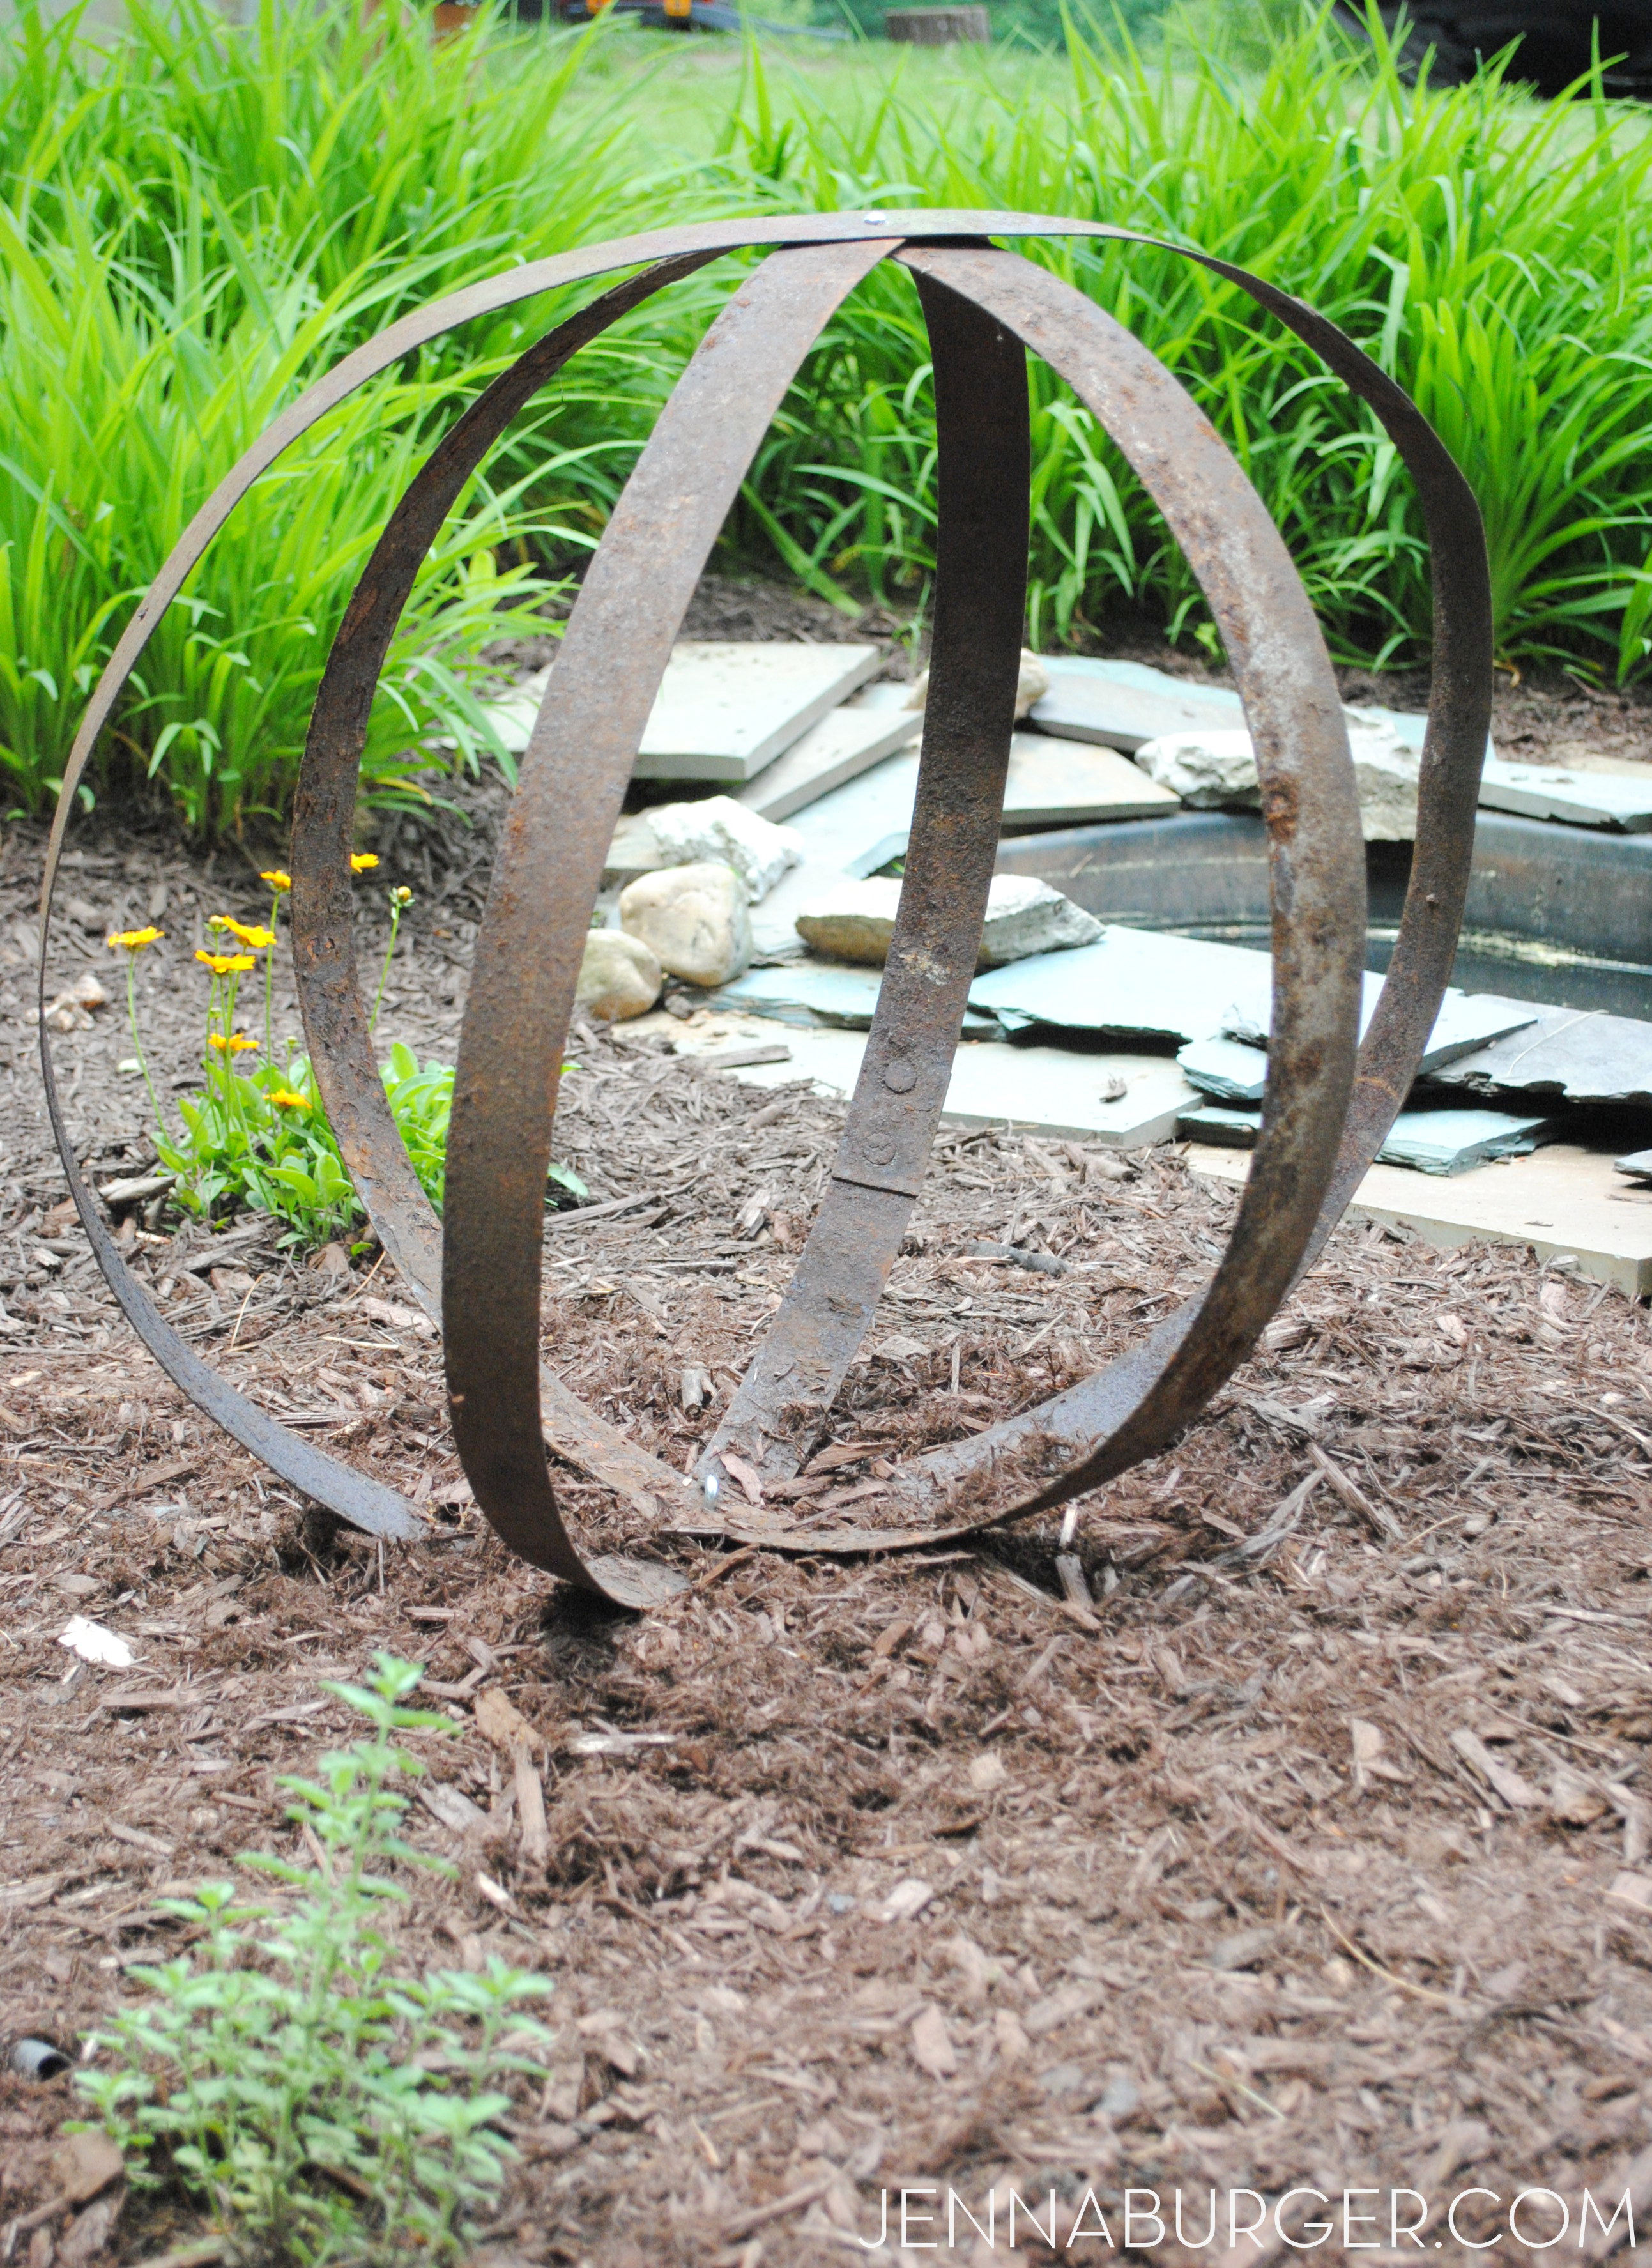
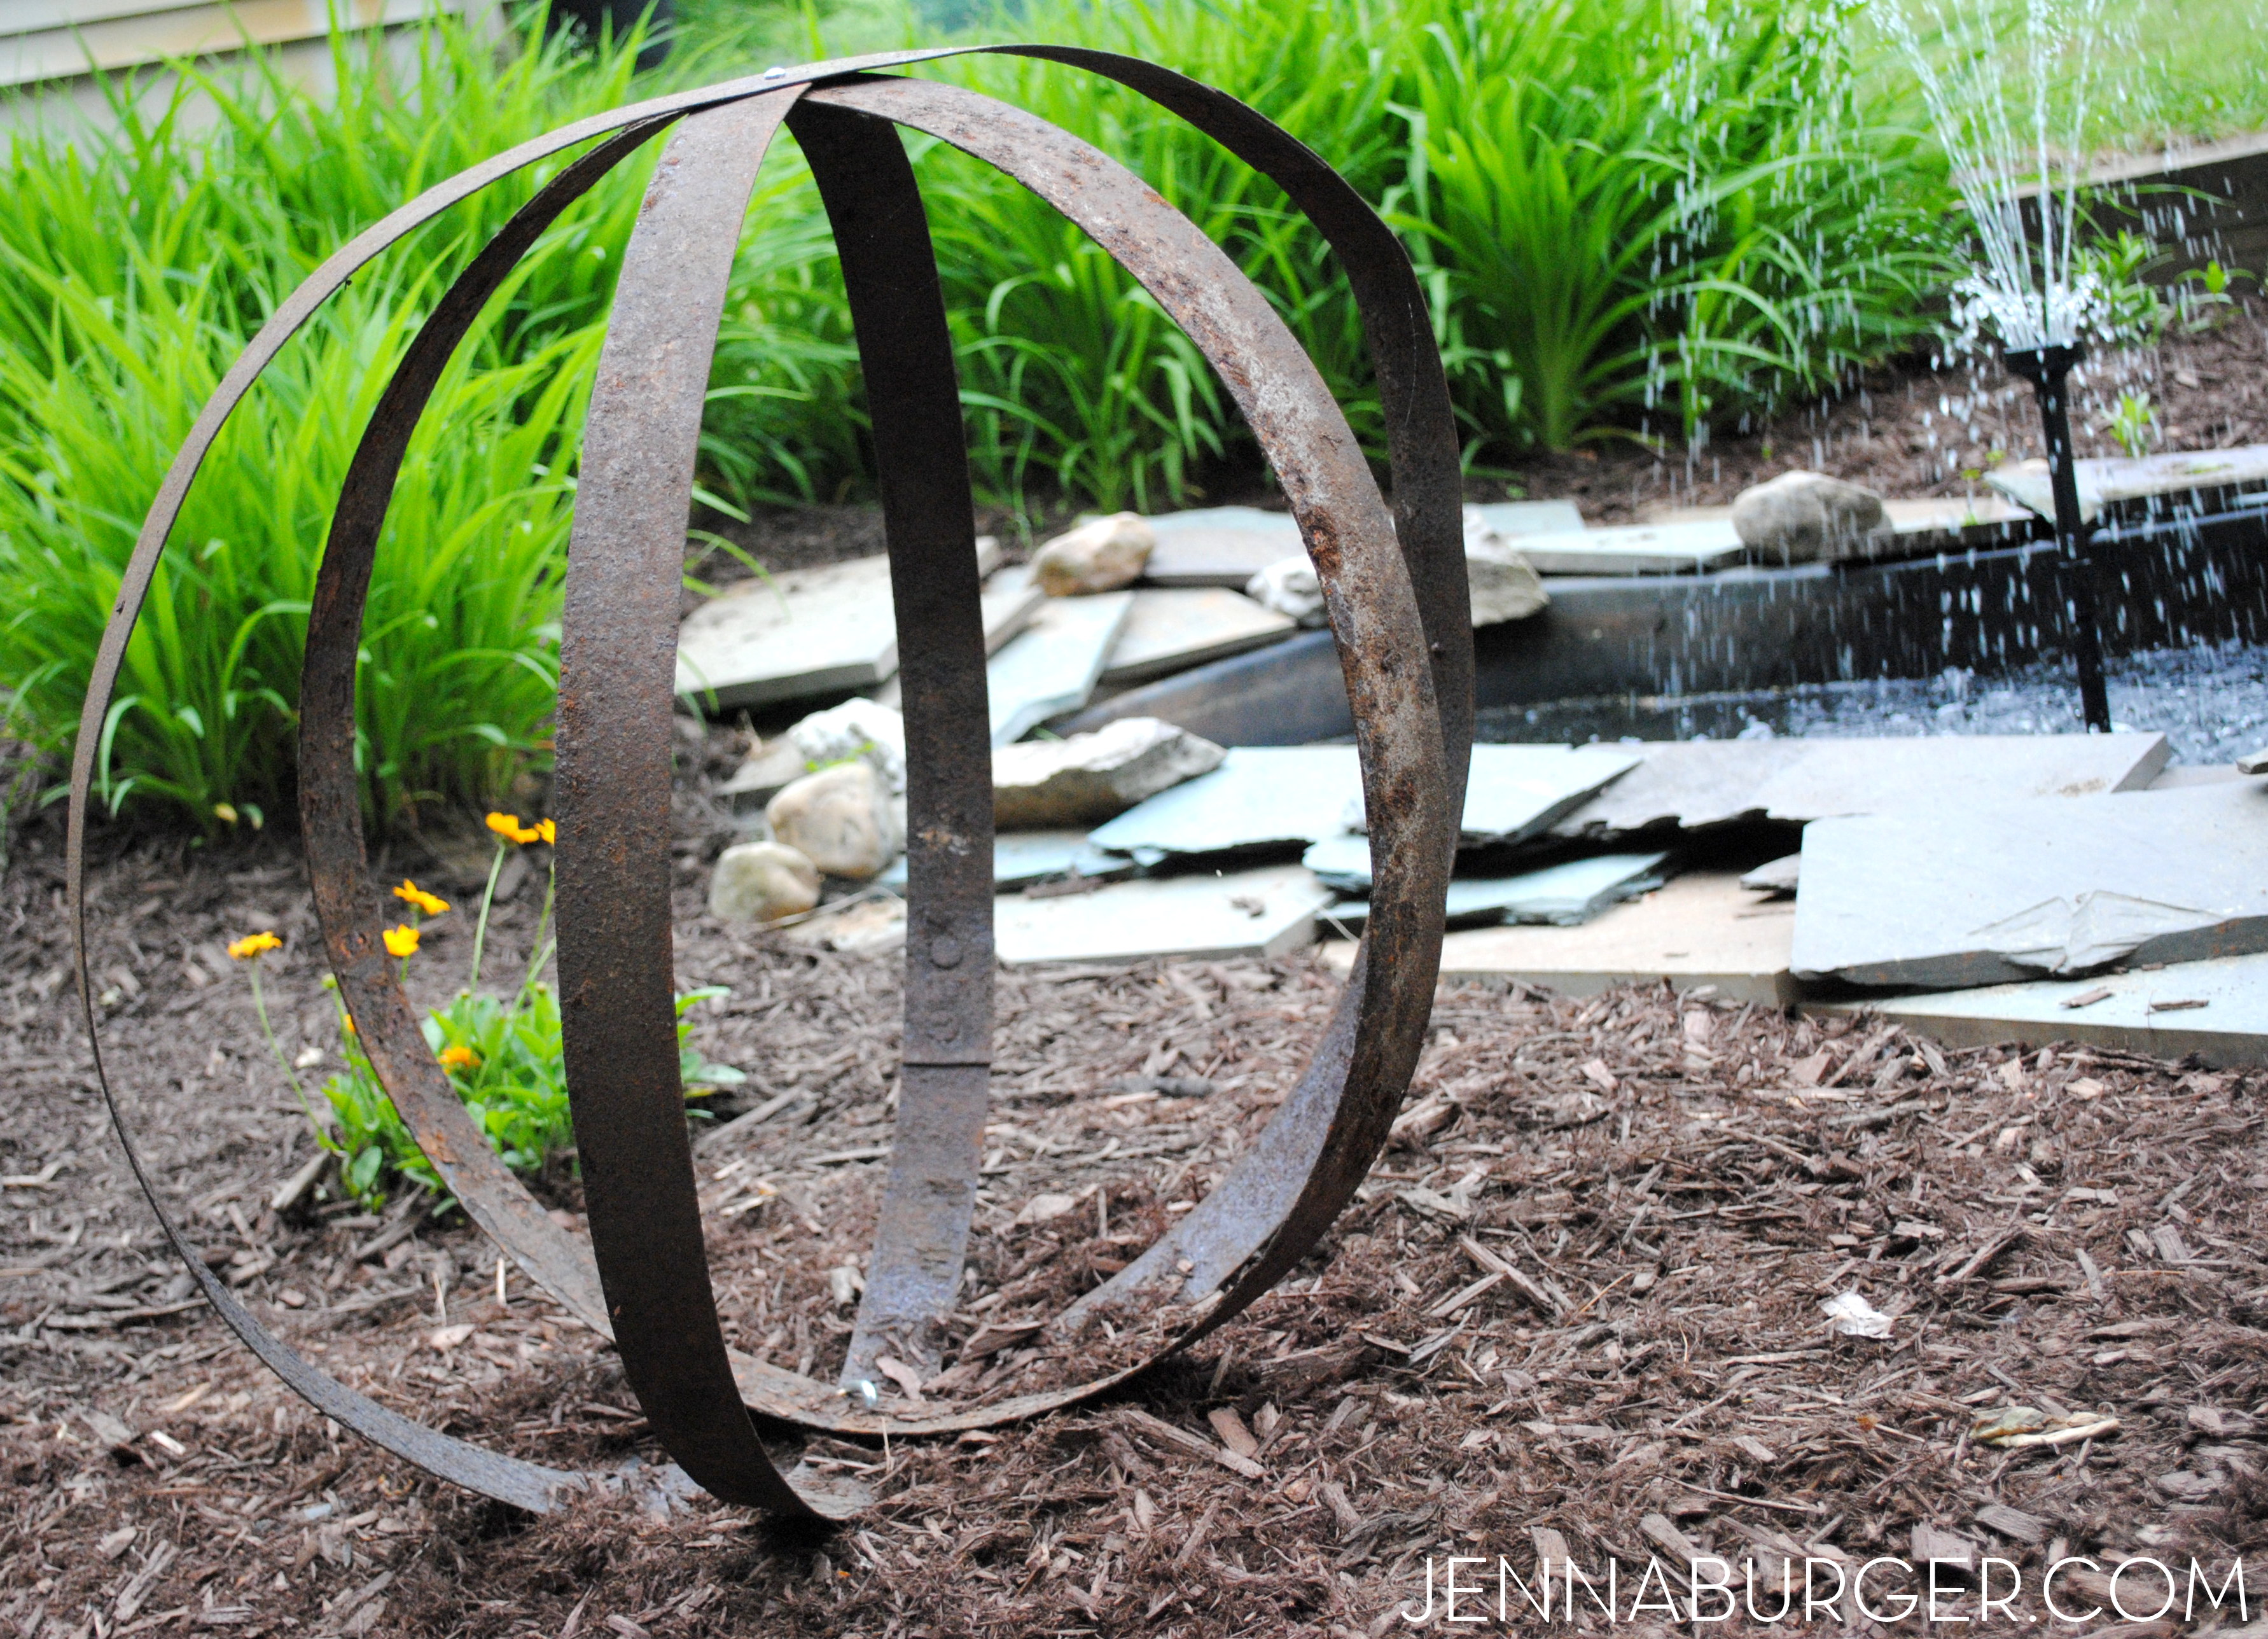
For the project I am going to share with you today, it was simple to create + cost nothing, and the result is a big impact look for my garden. Check out my outdoor sculpture creation using metal straps from an old barrel…

While cleaning out the sideyard to create our new beautiful patio paradise last Spring, I came across this old wood barrel planter sitting in the corner, falling apart, and in desperate need for the trash. When the time came for the barrel to hit the garbage, there was a DIY fairy that sat on my shoulder telling me to keep the corroded metal straps that once, long ago, kept the barrel together.
I had NO IDEA what I would do with them, but in the shed they went… for months… until the revelation hit me… How about making them into a sculpture?? Hmmm… That could work!
There was part of the garden on the sideyard that was bare and instead of planting more flowers, the vacant spot was perfect for my new-found idea.

HOW-TO TURN TRASH INTO A SCULPTURE
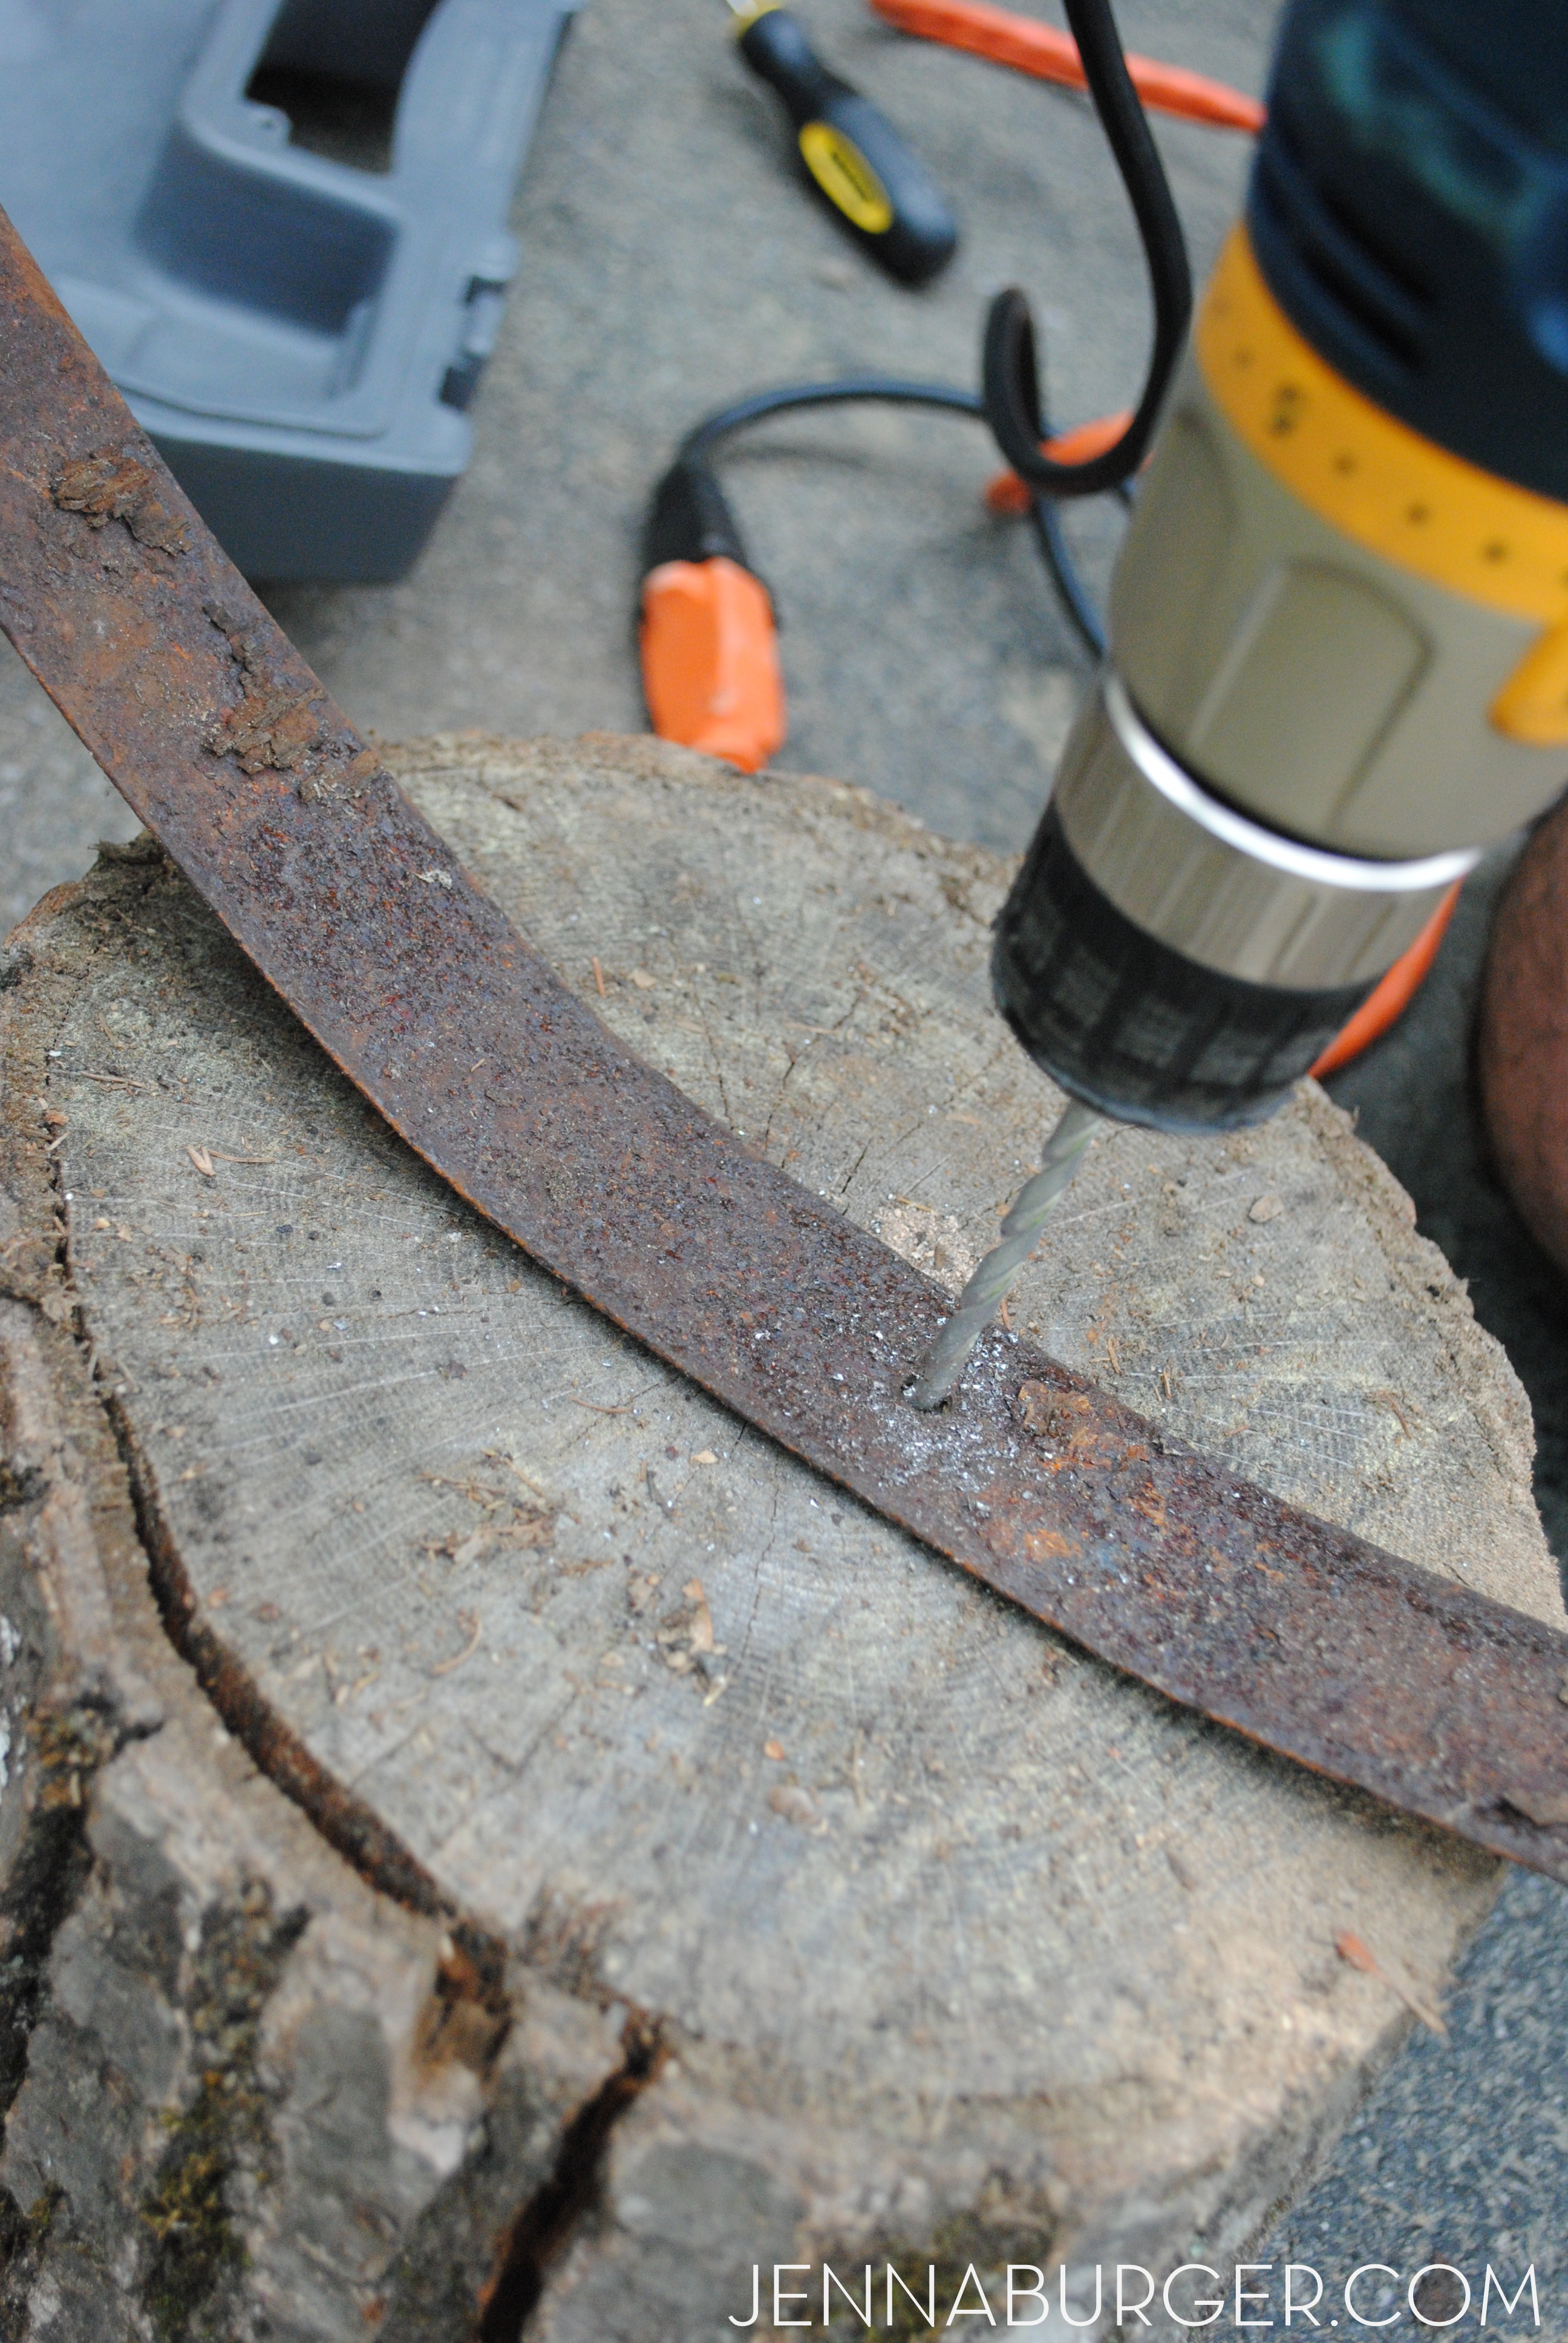
This sculpture took minutes to make – probably less than 10 minutes in all! Using a drill with a metal drill bit, the Mister and I worked together and drilled 2 holes in each ring. The holes were placed directly opposite of each other.
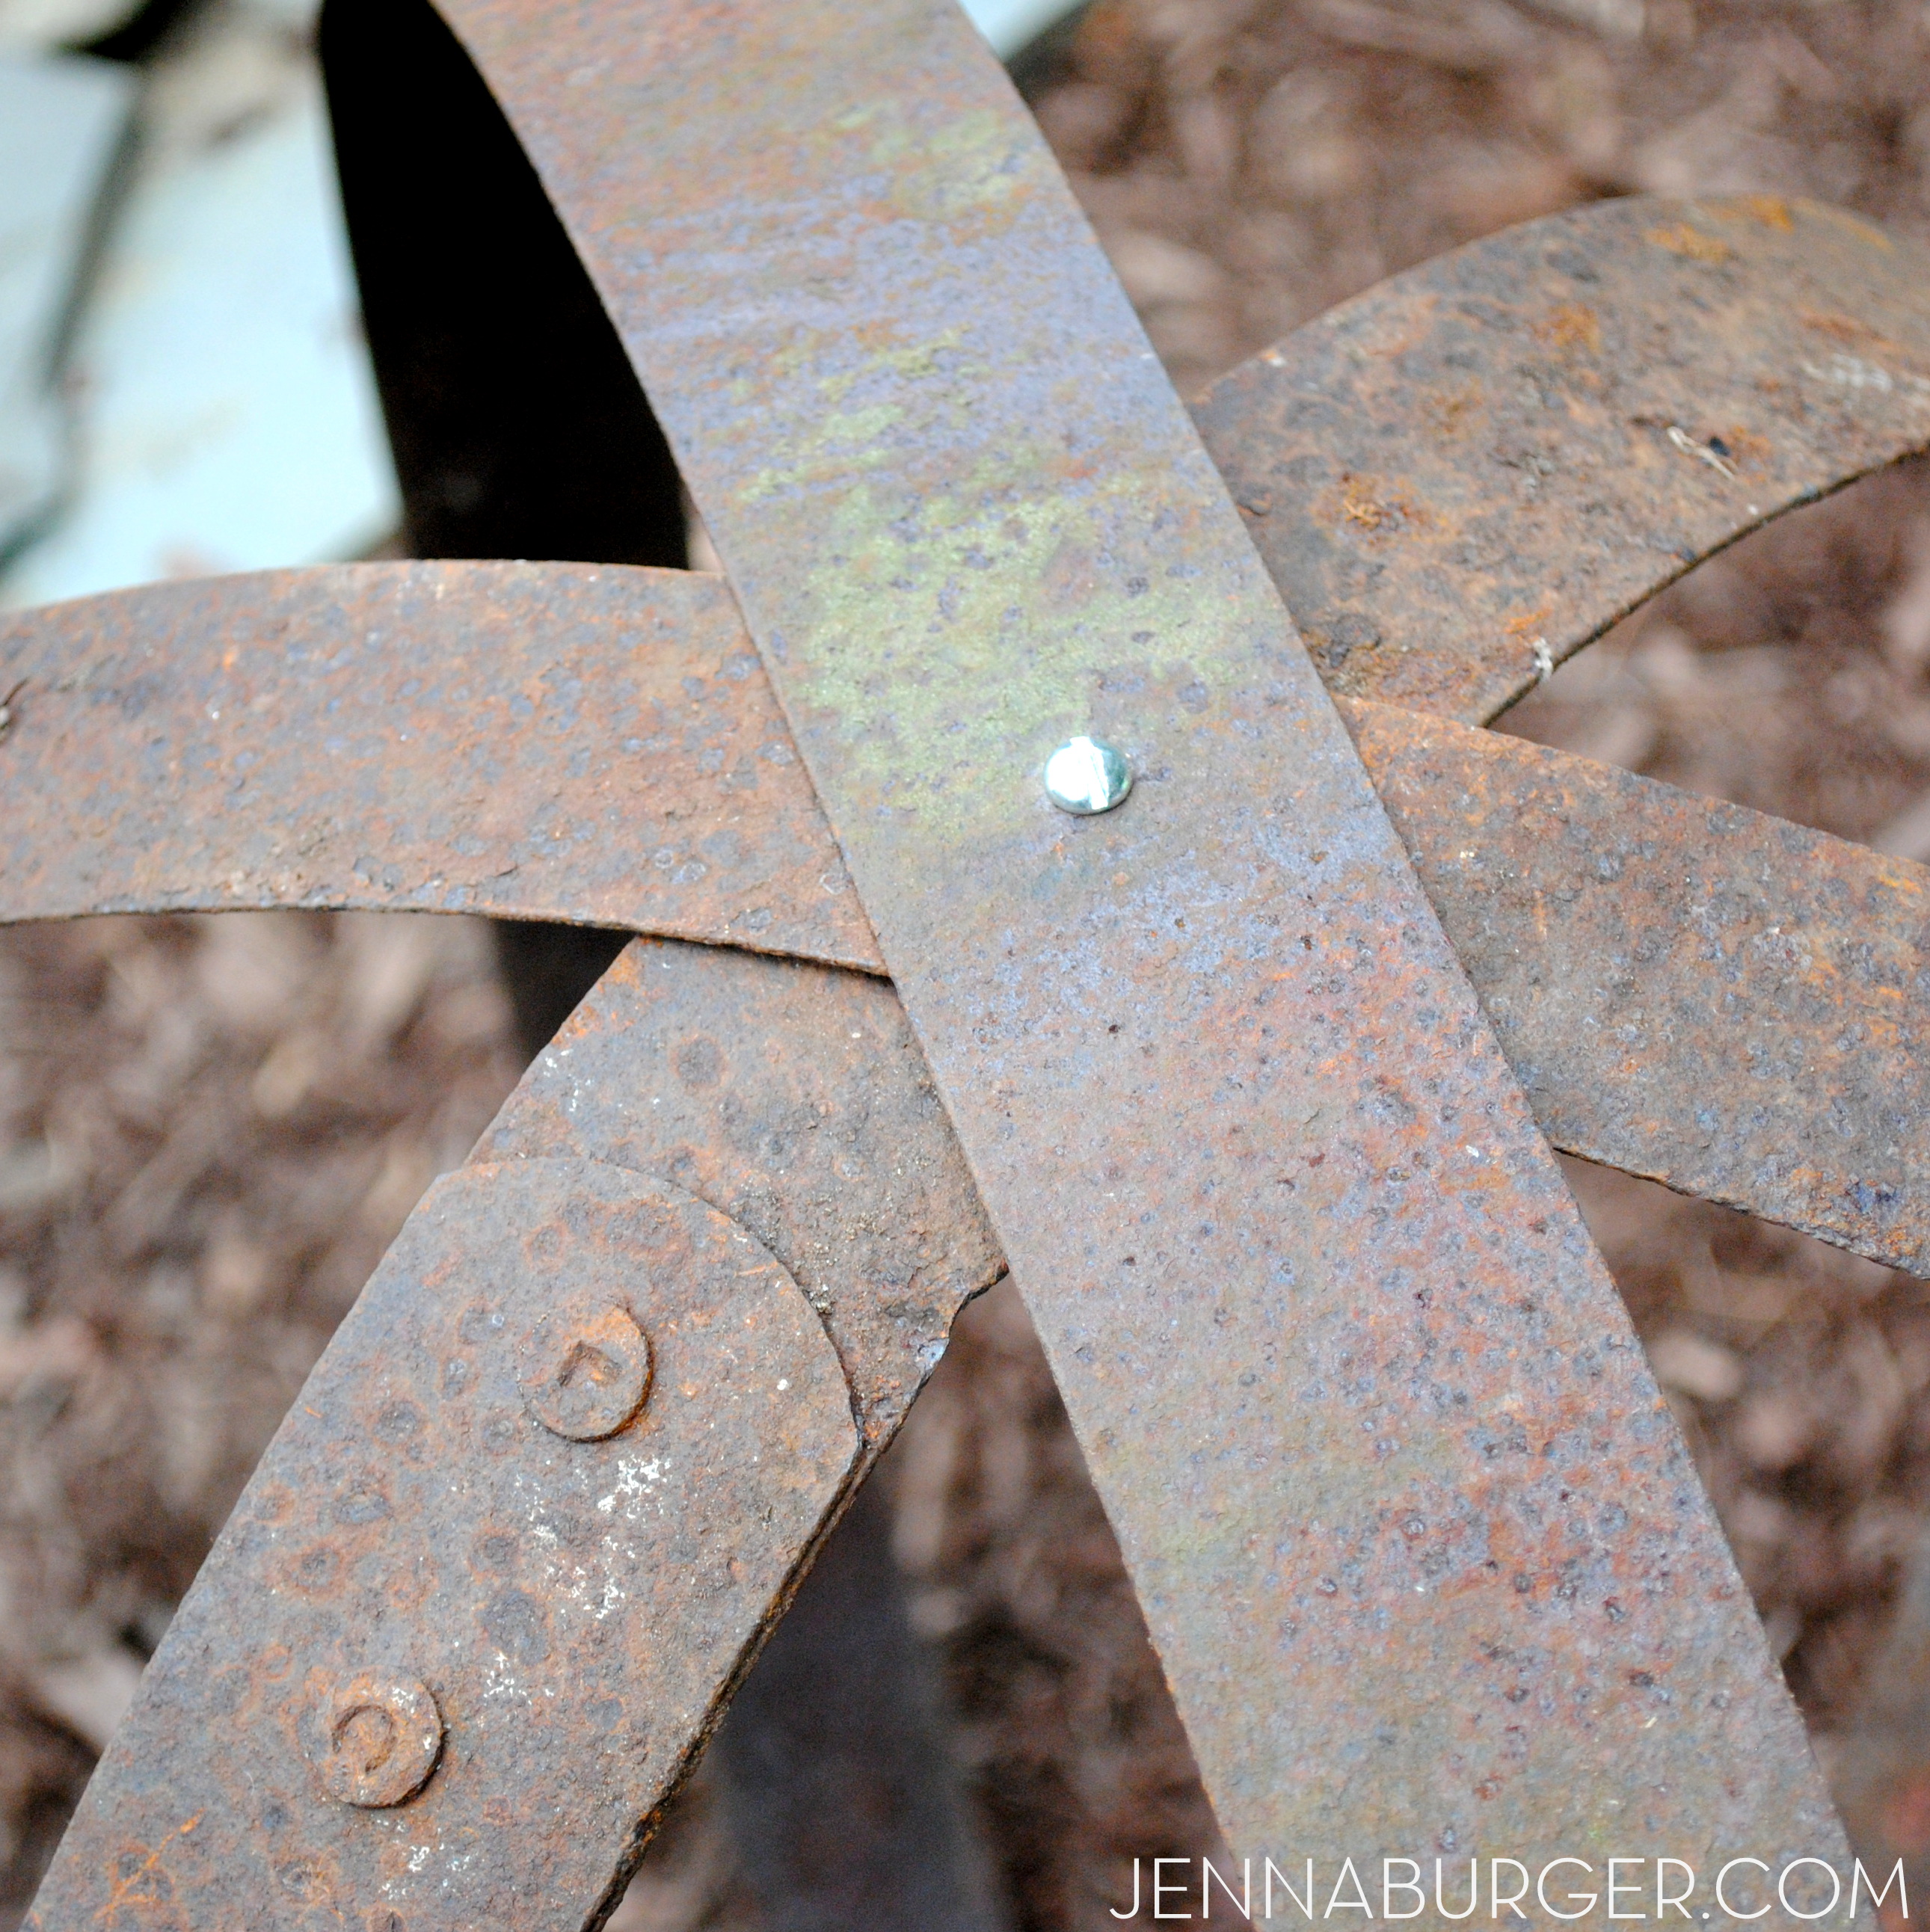
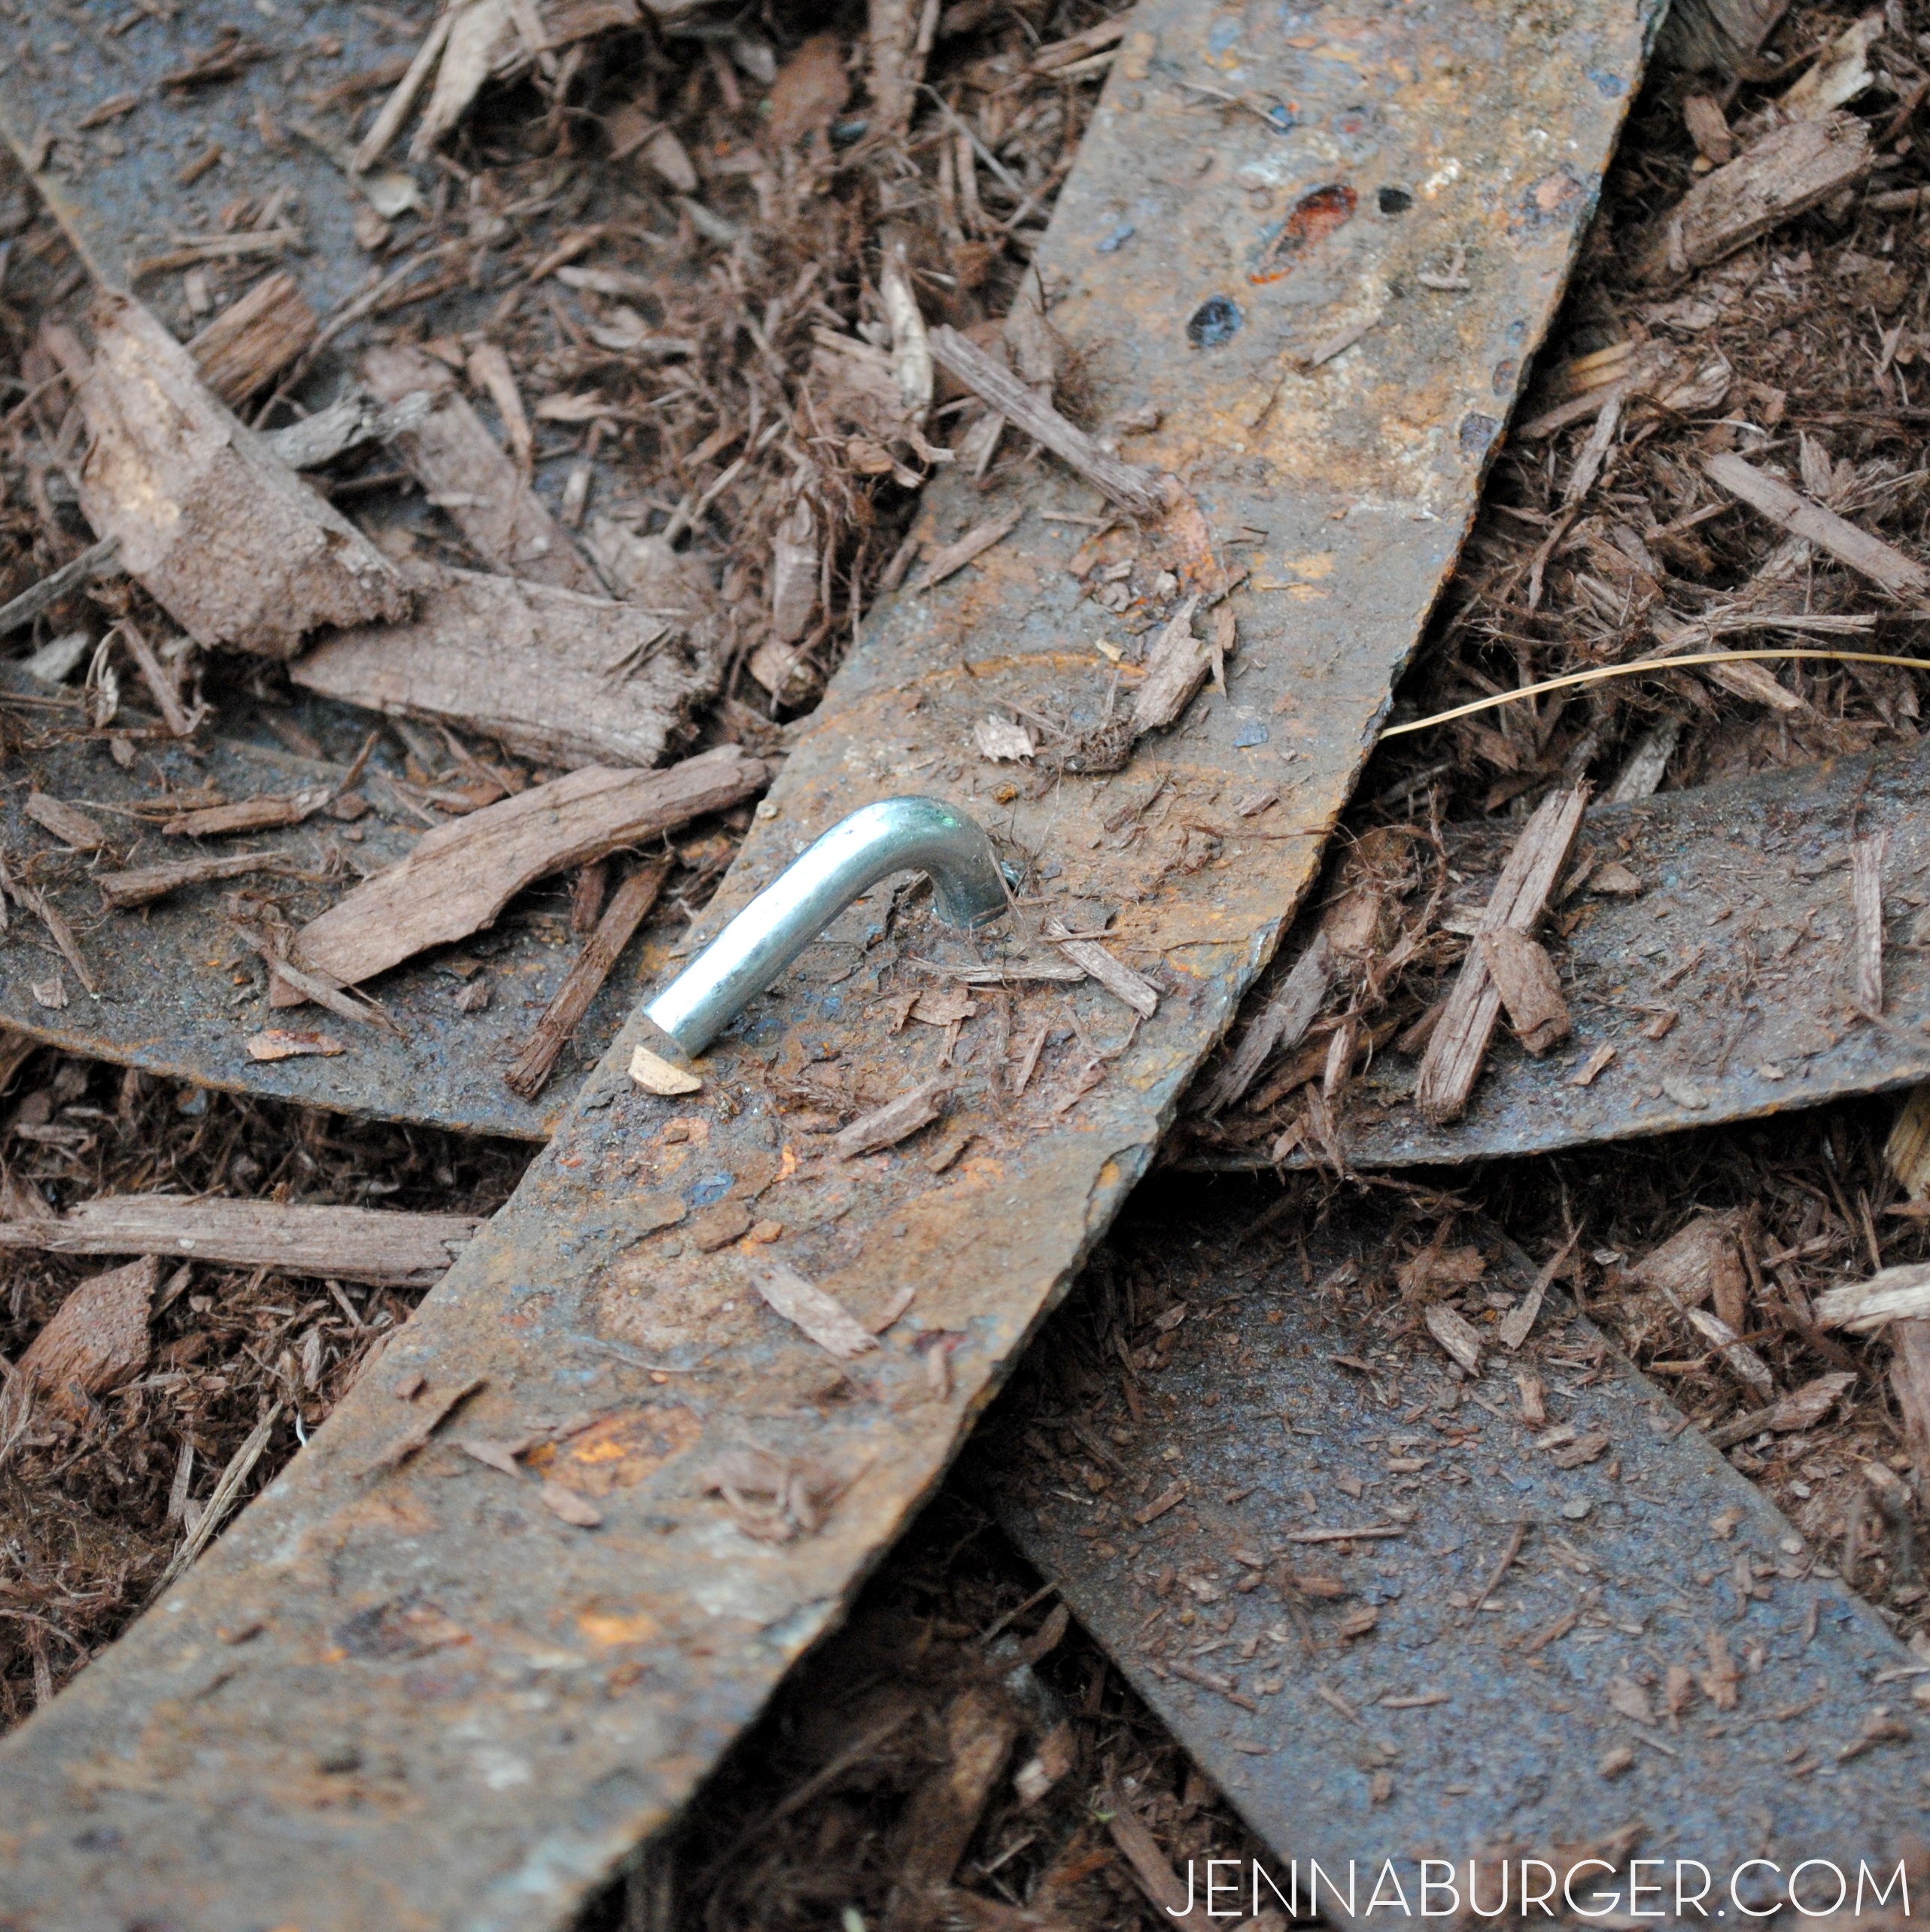
Once all the holes were drilled, we aligned the top and bottom holes of each ring. We secured the rings at the top with a nut and bolt, and for the bottom, we used a 6″ tent stake which went into the ground.
And that was it! I rotated the rings until the positioning was just right, and then sat back to admire this trash to treasure.
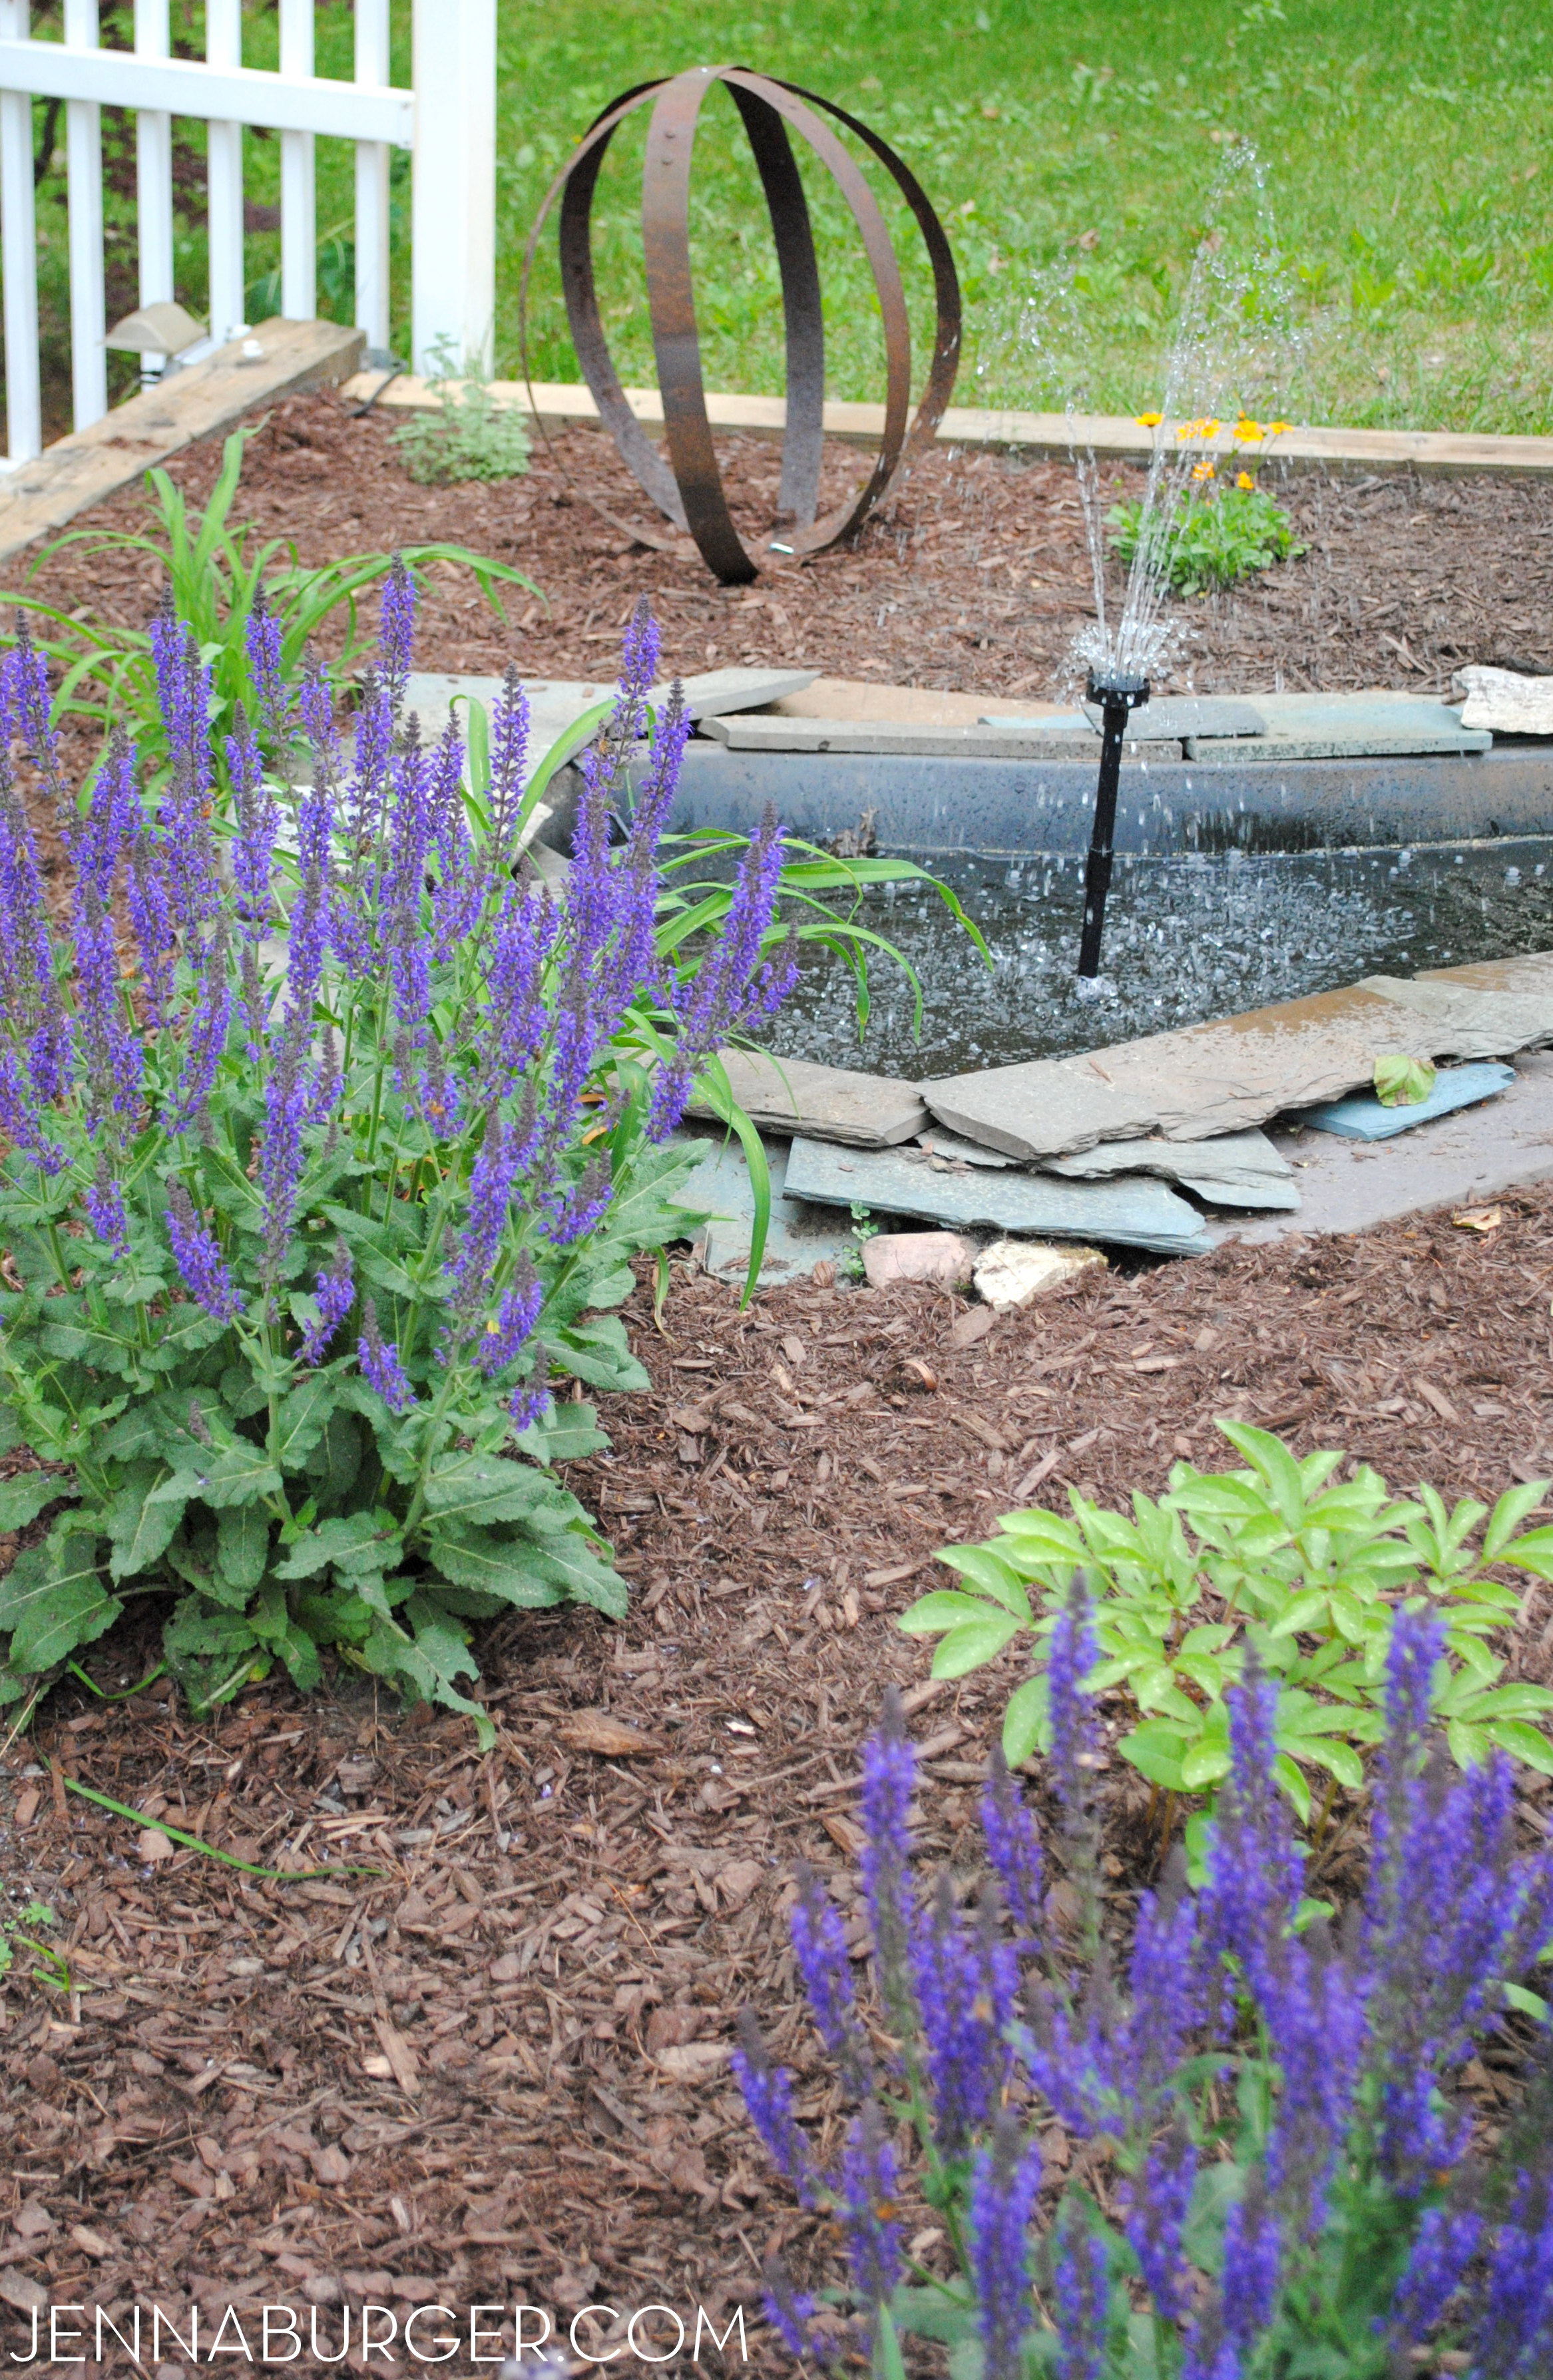

So what do you think? Pretty neat, right!?
What treasures have you made from trash?
Thank you so much for checking out my upcycled trash turned treasure. I hope to have inspired you! For more DIY creations + decorating tips, I would love for you to come visit me at Jenna Burger Design – I have lots of ideas to share!
You can find me on the web here: BLOG – FACEBOOK – INSTAGRAM

Awww, I’m sure it’s hard, but as you know, God’s got this! Sending hugs and prayers your way.
Our prayers are with you and your family as you go through this time. God is there and already has it all worked out in the right way. His timing is always the best, but it sure can be hard to wait can’t it?
Thank you so much Sondra! It is certainly hard to wait!