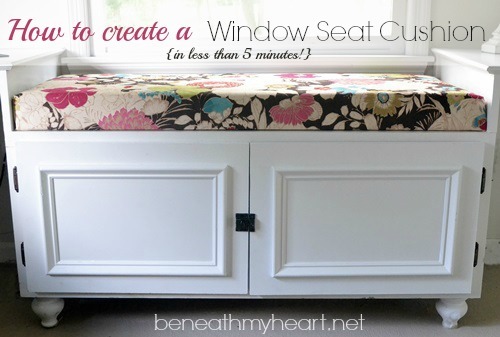
DIY {5 Minute} Window Seat Cushion!
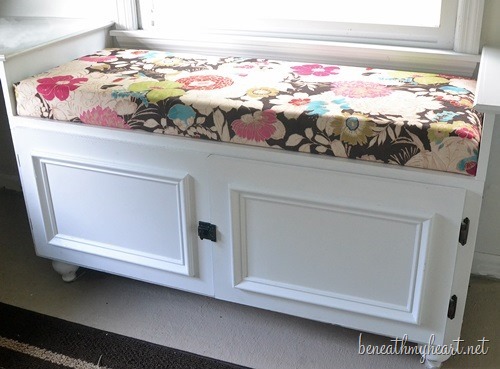
I am so excited to show you how I made the window seat cushions for my office in less than 5 minutes each! This tutorial is so simple that anyone could do it. You only need a few supplies and very little time to create a custom looking window seat cushion for your own home.
I had originally planned on sewing some cushions for my window seats, and I kept putting it off because I knew it would take me a while to do it. So when I saw the idea of using plywood and foam for a window seat online, I knew I had to try it.
SUPPLIES:
- Material of your choice
- foam (the thickness you prefer.)
- 1/2 inch plywood
- staple gun
I picked up my material from Hobby Lobby with a coupon, got my plywood at Lowe’s, and my foam from JoAnne’s Fabrics. I chose a 3 inch foam, but you can use whichever thickness you like best.
How to Make a Window Seat Cushion:
- Purchase the plywood at your local home improvement store and ask them to cut it the size of your bench top.
- Purchase foam and cut it the size of the plywood. (I used a electric meat carver to cut my foam. Super easy!)
- Cut your fabric so that it is about 6 inches longer than the plywood and foam (all the way around.)
- Lay foam in middle of fabric.
- Lay plywood on top of foam.
- Wrap the material around the foam and plywood just like you would a present and staple the material to the plywood.
- Enjoy!
If you try this project or have any questions at all, just let me know in the comments below! Thanks for stopping by!
xoxo
Traci
If you like this project, you may also like….

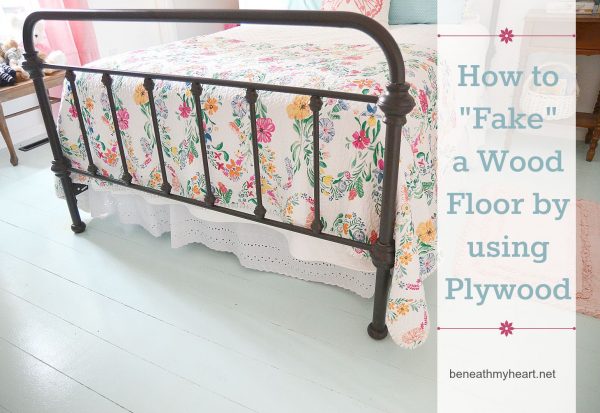
How to “Fake” a Wood Floor by using Plywood


Beautiful! I love the patterned material you picked out. Your office is coming along nicely. Can’t wait to see the full finished room.
Curious, how did the exterior of your home turn out with painting the brick? LOVE your blog!!!!
Using that piece of plywood is brilliant. Gives you a sturdy back to tack the fabric to. I’m going to do this to my mudroom bench. Thanks!
Hi! Great idea just a question….Does the material pull away from the staples and would a glue (fabric) gun work better?
Thank you
Cruzegrl
You are a life saver! We are working on our entry closet and the bench cushion cover was what I was trying to figure out! That is exactly how I will do it. Thank you. I’ll let you know when I post it.
Loving the office craft room!
Thanks so much for sharing the video. I am inspired now to do the same in my entryway. Hope your new job is going well. Look forward to more tutorials!
love the seat cushion Traci – now you started me, and I will make a nice cushion for my existing window bench as well… will send you a photo when it is done. Will not get to it though until
October.
Edith YourChicagoConnection
I really need to try this because the cushions that I sewed for my banquette keep scrunching up when we slide in to sit down. This would completely eliminate that!!!
Beautiful fabric. Brilliant idea… why didn’t I think of this?
You are BRILLIANT!!! I’m in the middle of putting my classroom together, and have a ‘reading nook’ for my kids that I want to make a cushion for…this will work perfectly!!! Thank you for the tutorial :)
Great! So glad this will help! I would try to get a durable and darker material that will hide dirt. Maybe one that is washable? I’ve seen some material at fabric stores that is almost like plastic on top but it is very soft. I think that would be great in a classroom because it would wipe off clean easily.
:)
I love this idea! Thanks so much for sharing! I’ve got it pinned to watch the video when I ‘m ready to make mine. I love how cute and simple this one seems. Have a great day!
Thank you, Brooke!
Thanks so much for the tutorial! I love your window seats! Did you make them, have them made, or purchase them? Thanks!
My husband made my window seats. :)
Just like you to find a great idea to save time. Thank Jonathan for his help.
I wish I would have seen this before I made a no sew cushion for my closet turned mudroom bench. Using the plywood is brilliant. I haven’t secured my material yet so I may get some plywood and give it a try.
What you have shone of your office looks nice. I can’t wait to see the final reveal.
Thank you, Michelle!
Wow I think it’s time for me to get glasses. I just noticed all of my misspelled words. Sorry.
When we moved into our house 11 years ago the cushions on our window seat were made your way by the previous owners. It is easy to do and it made a crisp look. However, after a year I popped the staples off to wash the fabric. Our cushions get a lot of use and they were dirty. After washing, I thought to myself – I don’t want to pry off staples and re- staple every time I wash the cover (the stapling is easy, it’s the prying that’s a killer). So I got rid of the plywood and made regular cushion covers. Well, for one I just used enough fabric to wrap it like a package and pinned it with large safety pins. It doesn’t provide as smooth and crisp a look as stapling but it’s a whole lot easier to wash. Maybe when my kids are grown (like, 12 more years) then I’ll go back to the tight and smooth look!
I totally understand, Kate! :) My window seats are more for looks and storage, so I have told my boys to stay off. :) I’m also hoping that the dark material I chose will have disguise for a few years. By then, I will be ready to change the decor of my office anyway. hee.hee.
Thanks for stopping by!
Thanks for your suggestion. I bought a 2in. thick piece of foam that I have to cut to be 14in.in depth and 60inch wide for a bench seat in my rec room. I bought a piece of fabric burgundy color duck cloth. I didn’t want to use staples and plywood because I want to be able to wash it. I have 3 very young grandkids. So I bought large safety pins and plan to fold the material and attach with large safety pins. I am glad it worked for you. I have the bench filled with games and toys so I will be opening and closing it often. Your outcome inspires me to try it.
If it doesn’t work I can always buy some plywood and staple it. I have done that for chair cushions in the past.
Love your office closet makeover it inspired me to do something similar. Little did I know when I pinned the pic it was yours! Lol I used the brown paint from your mud room in my dining room ! Still love the color. Thanks for the inspiration . Love your blogr
the floral pattern is to die for and it is a quick speedy DIY ;) .. It surely takes a creative mind to come across such brilliant ideas ;)
Love
jessica x
LOVE LOVE LOVE this fabric. I heard you say you got it @ Hobby Lobby but what is the name of the print? I’m willing to take my chances trying to find it love love!!
when i first opened this link I thought it would required sewing, which I CANNOT do! Thank you so very much…..love this & I know I can do it.
Your a life saver.
I have been trying to figure out an easy way to make a window seat cushion for a couple of years. My dogs sit in the window seat all day and they need a sturdy cushion…thank you so much for this idea!!!!!
haha – Traci – I just saw this NOW!! I guess having a baby over the summer will do that to ya ;) Thanks for the shout-out – love your window seat & cushion!!! :)
I love this idea!!! I only have one question though……when you sit on the bench, doesn’t the whole bench seat slide forward??
This is such a great quick fix!11
No it doesn’t. Good question, though! :)
I LOVE this idea because I cannot sew and need a cushion for my hope chest! My only concern is the staples scratching the paint because may slide around a bit. Any thoughts on how I can prevent that from happening? I’m not super crafty and can’t come up with any ideas! Thanks :)
Kristen, I haven’t had any trouble with the cushions slipping, but you could add some carpet tape or something if you wanted to help keep them in place. Maybe? :)
When you are finished hot glue some felt onto the bottom of the cushion to cover the staples. That should do it.
…and I had another thought. After your are done with the felt take some silicone caulk and make some wavy lines on the felt and then let it dry over night. It will keep the cushion from sliding around. Hope that helps! =)
Thanks for the idea! I think I will try glueing that rubbery carpet non-slip stuff on that back…that would cover the staples and prevent slipping!!
I am in the process of make a window seat, but I am confused on the foam for the cushion I am not sure what type to get I want the seat to be firm. Any suggestion of the type of foam and where it could be purchased
Hi Maureen!
You can really use any kind of foam you want. Just depends on how thick or how firm you want it. I got my foam at JoAnne Crafts store. I wanted it pretty thick so I went with 4 inches. And I wanted mine pretty firm. When you go to a craft store that sells material, you should be able to find pieces of foam. Just find the one you like, and it will work! Foam is pretty expensive though, so it helps to wait until it is on sale or you have a coupon.
Love this! Thank you for a great video and information. :D You’re speaking my language when you mention coupons
I am so glad I found your tutorial! I have put off having 3 window cushions made. Now I know how to do it myself :) I was also wondering how I could keep them from slipping off when anyone sits on them… Solved!!
I’m going to work on this next weekend. Yay! And thank you; I can’t wait to get started!
Awesome!! Good luck! I think you will love it!!!
This just solidified my thoughts on doing this in our playroom! One quick tip, don’t know if anyone mentioned it, but you can get 3″ foam pads that are 2ft x 6(?) ft (can’t quite remember the length) at Home Depot for less than $20. Way cheaper than craft stores.
Do you have any tips on cutting the foam to fit? Or I may need more than one piece. Any ideas on how I can do that without it looking funny? Thank you!
I learned, from thriftychick.com , for the foam you can just go and buy one of those foam mattress toppers – much much cheaper!!
Love your video, can you tell me what size of staples you used. Thank you in advance!
So simple! Great tutorial. How did you cut the foam piece to keep the sides straight and clean?
I just used an electric knife from my kitchen! My mom was a professional seamstress and I always saw her cutting foam with her electric knife! :)
Thank you so much for this video on the window seat cushion. I have been needing one for mine and don’t have a sewing machine and now I know I don’t need one and can do this myself. thanks again!
I am curious who made the window benches, or did you purchase them from somewhere. Love the benches as well as the cushion tutorial.
Thank you in advance.
Thank you so much for the video. I made my own bench seat this weekend. Love it some much.
TY for the fabulous video! Do you need to wash the fabric first?
I did not wash my fabric first. :)
Thank you so much for sharing this!! You did a FABULOUS job!! Do you need to wash the fabric first?? The fabric will be used for a kitchen banquette that will see a lot of use. Thank you :)
I did not wash my fabric first, but you could if you wanted to. If it will get a lot of use, try to find a fabric that cleans up easily or try to spray that fabric guard or something similar. :)
Thank you so much! Great idea :)!
Could you share how you built the white storage bench in your pictures?
How much bigger should the fabric be?
Thanks for the info Traci –
My sunroom’s window seat is going to be 18-20″ deep, and about 19′ (feet). I’m exploring 2 methods:
1. building 3 separate cushions – but I wonder how happy/unhappy I’ll be where the sections end/begin
2. building one long 19′ section, being sure not to place the end/beginning of foam at the end/beginning of plywood pieces
Do you have any feedback on doing a very long version of this?
Hi Marion!
I would have to see your space, but I think two or three separate cushions would look fine. I don’t think I would make 19 foot long cushion unless I had a 19 foot piece of plywood.
Hope that helps!
Blessings,
Traci
Omg thank you so much I love this I can’t wait to do this!!!
Just made the cushion for a long bench and love it! Thank you! The hardest part was getting the supplies–I used the throw canvas from Home Depot as my material which made it cheaper ($24 to cover an area of 106″x19.5″ bench). Thanks!!!
Is this comfortable with the plywood? We’ll be using ours in front of tv so want it to be comfy for gaming or watching.
Yes, it is very comfortable. But you want to use a very thick cushion. If not, I think it wouldn’t be as comfortable. :)
My question is where did you get the bench? If you made it I am very interested, looks to be the perfect size for my daughters room.
Having a baby on Thursday and with last few days off before life gets a little busy found this video and made 2 cushions for an outdoor picnic table, saved me a load of sewing and they look great, thanks!!!
Great idea. A couple of questions… I have a long bench and I don’t think there is plywood long enough to cut to size. There is no reason that two separate plywood pieces wouldn’t work, right? Also, the wood on my bench is beautiful but very soft; the only reason I want to do a cushion is because of my dog who keeps scratching the wood when he jumps up (he speeds lol). I don’t want the metal of the staples making any imprints either – any ideas how to prevent that? Do you feel you need an anti slip backing under the cushion?
Thanks,
Patricia
Hi Patricia!
You can totally use two separate pieces of plywood for the bottom. Just be sure to cover them separately. For the staples, maybe you could put some of these felt pads on the bottom of the cushion to make sure the staples don’t scratch the wood underneath. I didn’t have any trouble at all with that, but my bench was made of MDF. Hope that helps! Thanks! Traci
Quick question. So do you screw the plywood seat from the bottom or does it just stay in place because of the way the window seat is built
It just stays in place. :)
Great idea, Traci! This is next up on my next project list. Since mine needs to be dog friendly (as in washable), I think I’ll modify the plan slightly and try velcro on the fabric and the underside of the plywood. Hopefully I can just peel it off and throw it into the washer occasionally. A quick hem around the outer perimeter of the fabric should be the only extra step I need to take to keep it from unraveling in the wash.
I just used the electric knife to cut the foam and all I can say is your idea was brilliant! Sooooo easy! Thanks for the tutorial 😀
Awesome!!