DIY Butcher Block Vanity
Thank you, thank you, thank you for all the sweet comments you left on my post yesterday of my bathroom reveal.
When I hit “publish” on that post, I got kind of nervous that no one would like it. I felt like an awkward junior high school girl hoping her friends would like her new outfit. ![]()

When the comments started rolling in, you just made my day! It felt like I was getting a ton of “high fives,” and I was lovin’ it!
A lot of you asked me questions about the makeover in the comment section, and I will be answering them in some upcoming posts.
I had a lot of questions about how Cy made the vanity, so I am going to do my best to share it today.
We had two things in mind when building this vanity…to save space and to save money.
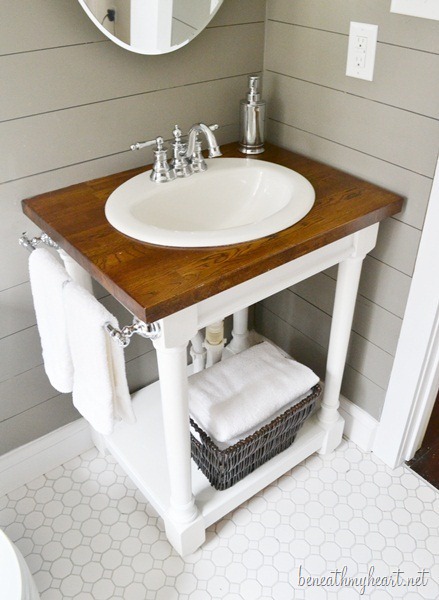
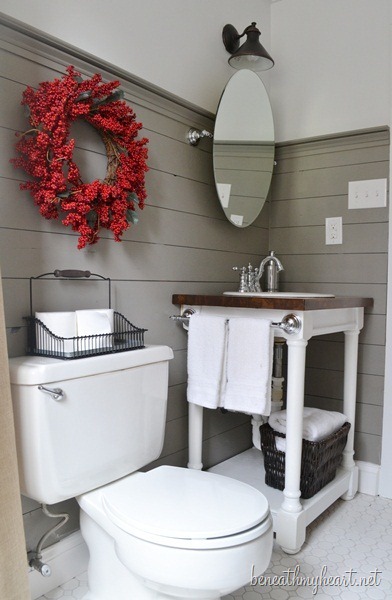
To save some space in the bathroom, I wanted a smaller vanity that was open underneath. I knew it would make the bathroom feel so much bigger not to have a bulky, large vanity cabinet.
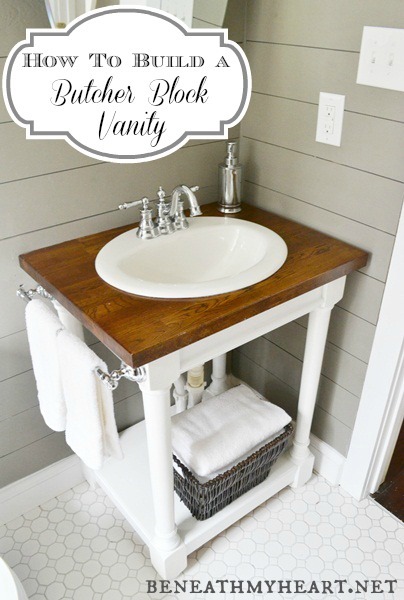
To save some money, we decided to use a leftover piece of butcher block from our kitchen renovation for the vanity top and have Cy build the whole thing.
However, why Cy chose to build this vanity at about 10:30 at night, upstairs in the addition, by the light of a single lamp, I cannot recall.
It was late. He was tired.
Let’s just say this was not one of our best moments as a DIY couple.
I think Cy may have been a little bit annoyed by me and my camera. ![]()
So I apologize for the lighting in these pictures. I had to use my flash because it was late and dark.
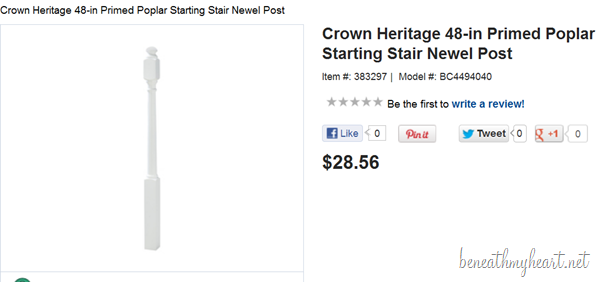
Cy started with four newel posts from Lowe’s.
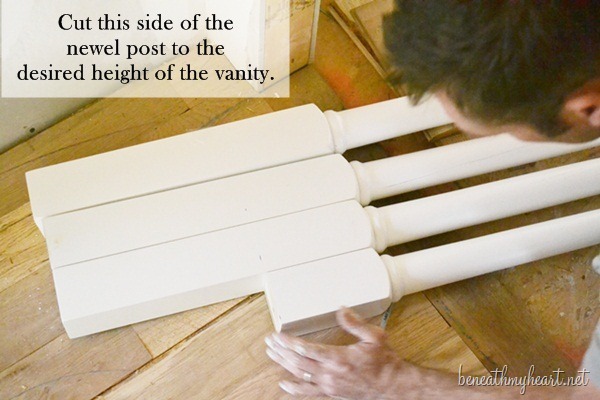
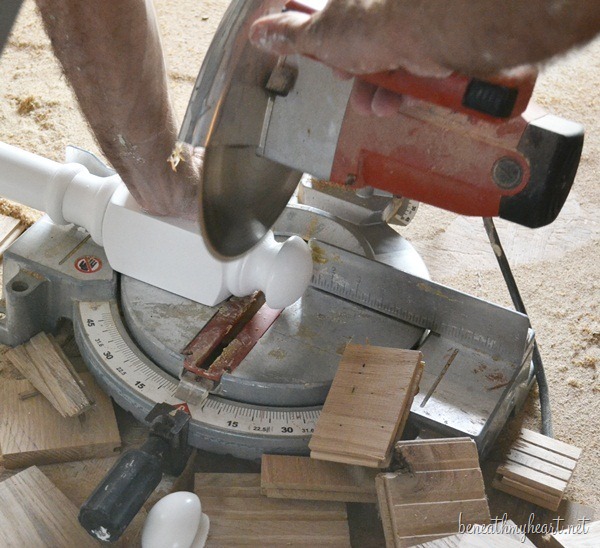
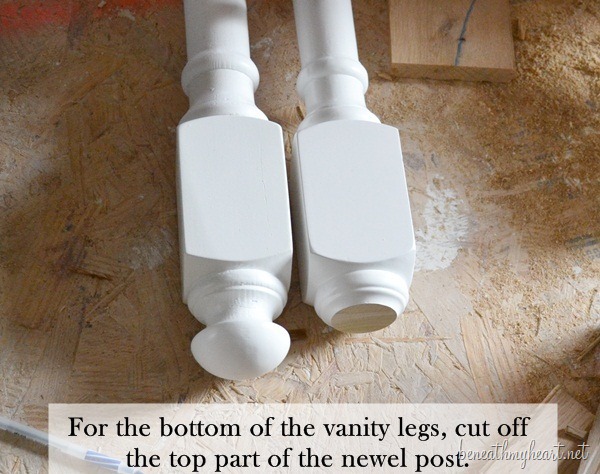
This may be confusing, but he cut off the bottom of the newel posts to be the top of our vanity legs.
Then he cut off the top of the newel posts to be the bottom of our vanity legs. ![]()
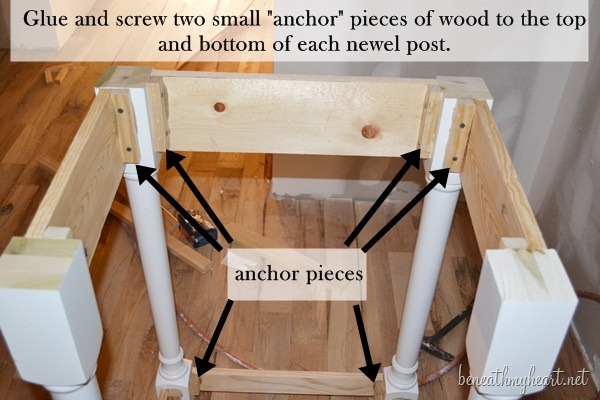
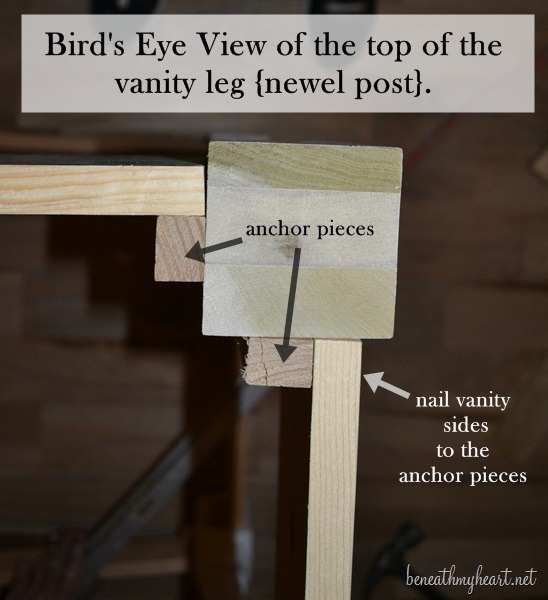
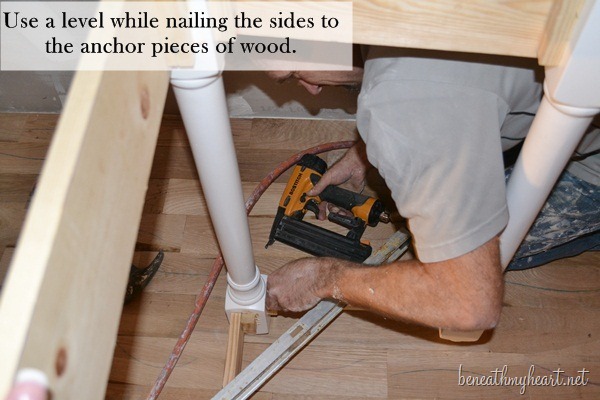
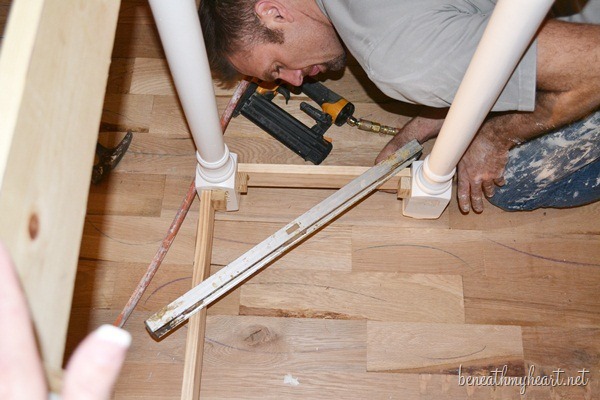
Next, he attached small pieces of wood with glue {PL Adhesive} and screws to be the “anchor pieces” for the wood sides of our vanity.
Once the anchors were attached, he could then nail the vanity sides into them.
Cy ALWAYS adds PL Adhesive to each wood piece before he screws or nails it to the wood.
Cy followed this same process for all four corners of the vanity legs on the top and bottom.
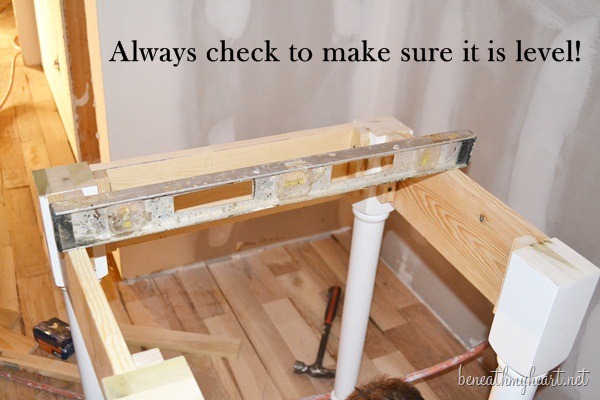
Here is Cy checking to make sure the sides are level.
{INSERT DRAMA}
Remember it’s late? Remember Cy’s tired?
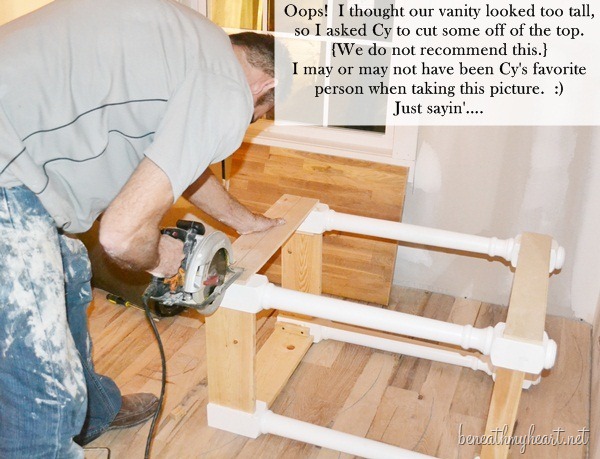
Well, when he was about to add the butcher block top, I told him I thought the vanity may be a little too tall looking. That did not go over very well at that very moment. ![]()
Cy grabbed his hand saw and went to town at sawing off some of the top of the vanity. I was afraid he was going to ruin it or that it wouldn’t look right. We may or may not have been arguing at this point. {wink}
Not a great DIY moment, but hey, it happens!
Fortunately, he was able to make the vanity shorter without shortening my life span.
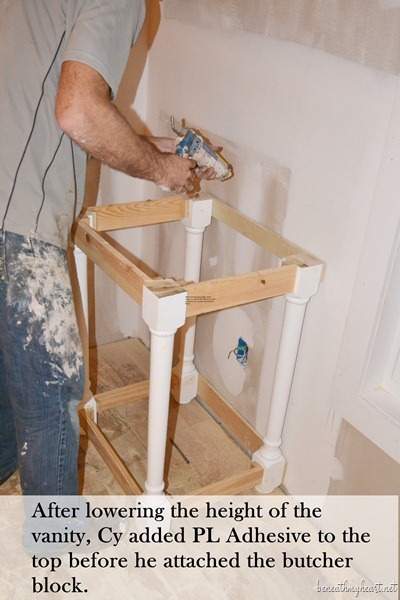
Cy added some PL Adhesive to the top of the vanity before he attached the butcher block.
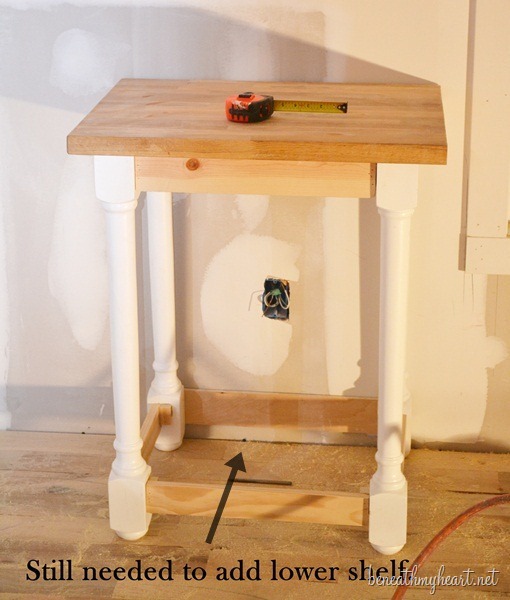
He measured to make sure the butcher block was centered on the vanity.
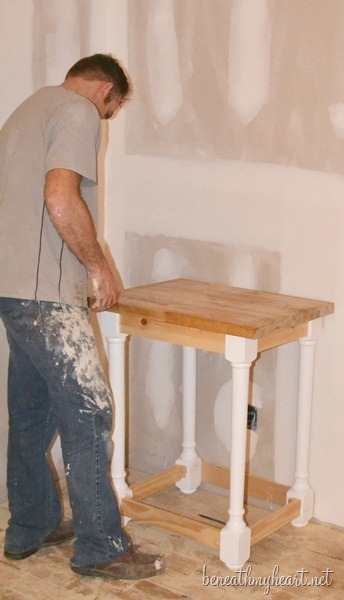 He put a few 2 inch finish nails in the butcher block to secure it to the vanity. We let that sit overnight.
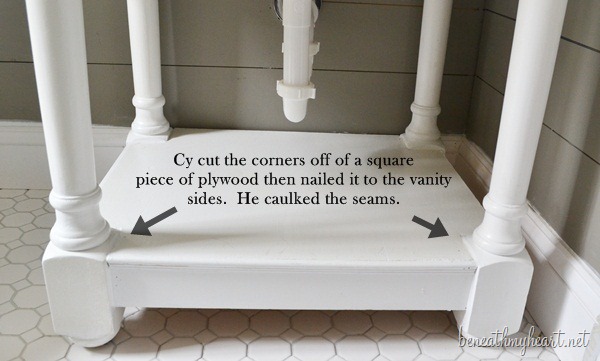
Later, Cy took a piece of 1/2 inch birch plywood and cut out the corners so it would fit on the lower shelf.
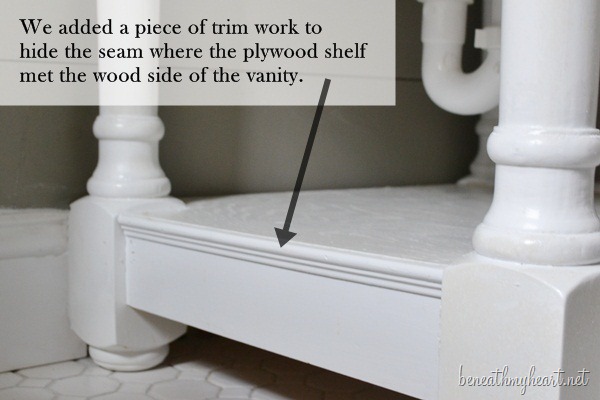
We added a piece of trim around the bottom shelf of the vanity.
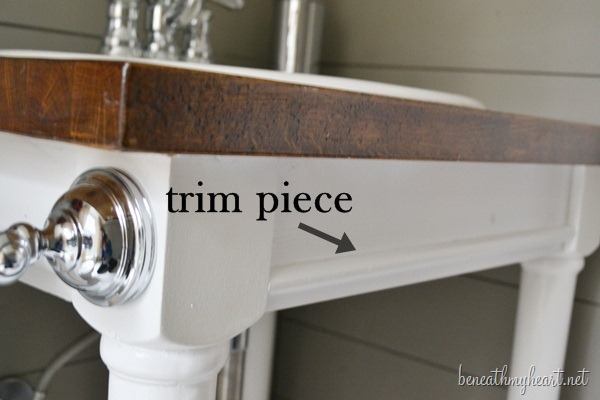
We also thought the sides of the top of the vanity looked a little plain, so to make it look more custom, Cy added another small piece of trim around the sides.
Trim pieces are small but can make a BIG difference on a piece of furniture!
{MISSING SOME PICTURES}
One day while I was out of the house, Cy cut a sink bowl hole in the butcher block and installed the sink. So I was not able to get any pictures of this step.
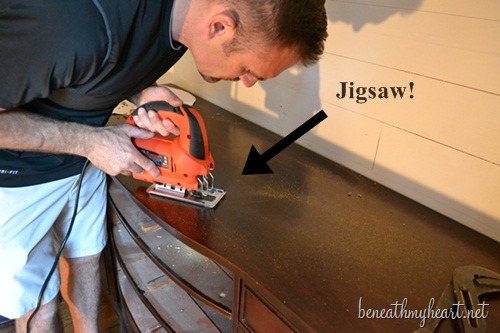
However, most sinks come with a template for the hole that you need to cut out of your vanity top. Cy just centered the sink template on the butcher block and traced around it. Then he drilled a pilot hole on the traced line with a wood bit. He put his jigsaw blade inside the pilot hole and cut out the sink hole.
If you want to see how to do this, you can check out THIS POST when Cy installed a sink in the dresser/vanity for our master bathroom.
Back to the guest bathroom…
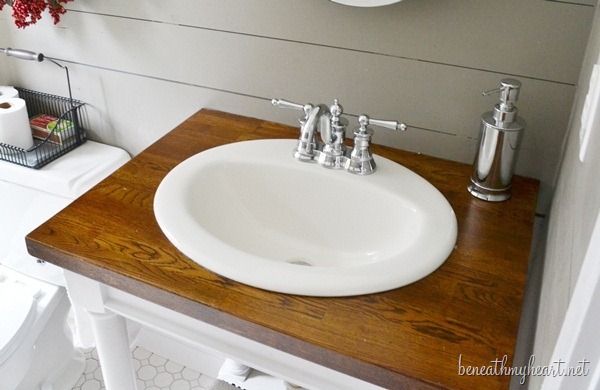
We stained the butcher block a Dark Walnut from Minwax and sealed it with 5 coats of polyurethane in Semi Gloss. He lightly sanded in between each coat of poly.
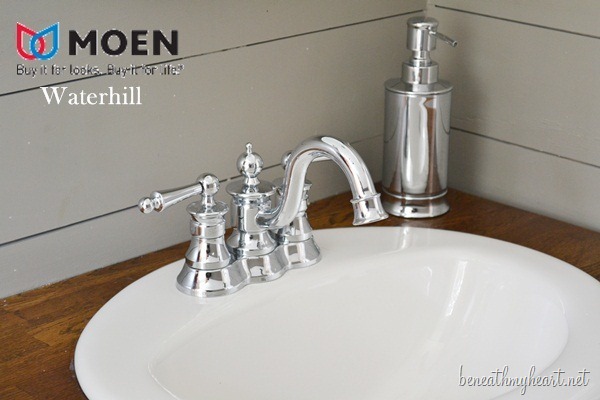
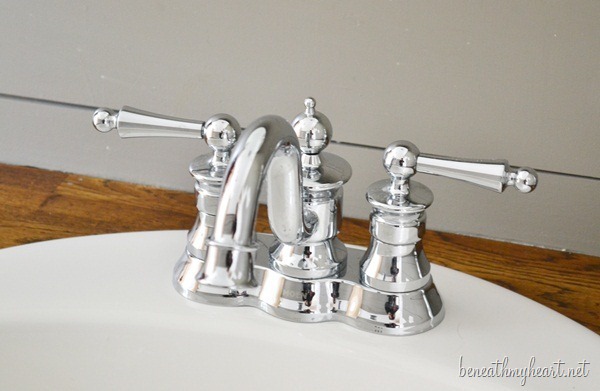
By the way, did you notice my gorgeous Moen faucet?! It is called “Waterhill.”
Moen provided this faucet for my bathroom makeover! I am in love with it! I think the look of this faucet fits perfectly with my cottage bathroom.
I absolutely love the contrast of the shiny chrome against the butcher block and wood walls.
It’s amazing how you can tell that this is a well made product. It’s the nicest faucet we have ever had in any of our homes. You can tell the quality just by touching the handle. Seriously!
Thank you, Moen!
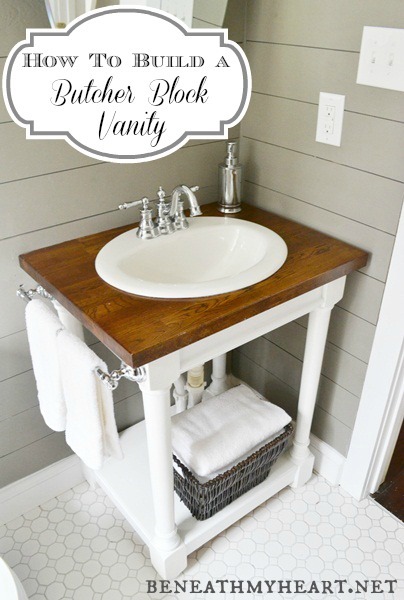
Today, I added a chrome towel bar to the side of the vanity.
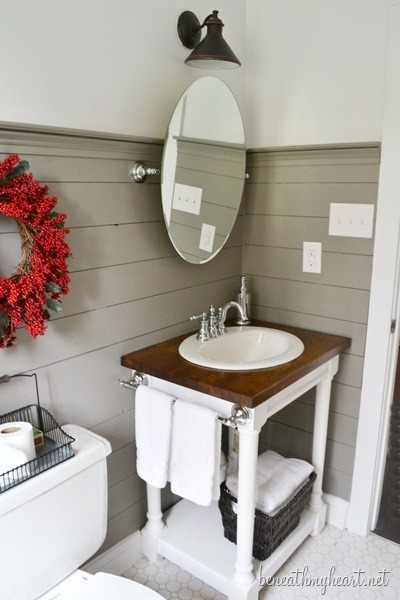
The towel bar is practical because it gives me a place to hang my hand towels, but it also provides a way for me to hide the ugly plumbing beneath my vanity. Love that!
I am thrilled with how the vanity turned out!
Since we had the butcher block left over from our kitchen renovation, it helped to save us some money in this project.
The newel posts we used for the legs cost us about $120.
IF we had had more time to build this vanity, I would have probably frequented the Habitat Store to try and find 4 matching newel posts I could have used for this project. If you don’t want to use newel posts for this project, you could just use four plain, straight wood posts.
So, we could have definitely saved some more money on this project if we had had the luxury of more time to complete it.
But we only had about $150 total in this vanity {not including the sink, faucet, and towel bar.}
I still think that is a great price for a custom built vanity. I love it!
To answer more of your questions about our renovation, I will be sharing a post about our wood planked walls..
I will also be sharing more about our split bathroom shower curtain, AND we will be giving you a complete cost breakdown of our bathroom makeover.
Thanks so much for stopping by, and I hope you have a blessed day!

The room has Tracie written all over it! :)
P.S. Poor, sad little girl up there. Bless her heart!
the whole room is gorgeous! love the DIY vanity!
Thank you so much, Jessica! We are thrilled with how it turned out.
Now to be able to keep it clean…
:)
Traci
I love your vanity. I could not help but think that, with some minor variations, we could use the same directions to build a small kitchen island/prep table for my very small kitchen. Thank you for sharing. I think you may have a prince there!
You absolutely could! I think it would be perfect as an island.
Good luck!
Traci
Gorgeous! Love all the details : plank walls, buther block sink vanity, etc…. The girl in the photo is courageous !
It is beautiful! Thanks for sharing.
I’ve been dying to ask you how you pronounce Cy.
(sigh?) (ky?)
I commented yesterday, but will say again how beautiful it looks! Way to go! Love the faucet too.
It’s pronounced like “sigh.” It’s short for Cyrus. :)
Love it!
Traci- the bathroom looks great! I love the way You make it soo real by sharing things like Cy
Being tired and how you “may or may not have been arguing” at a certain time during the renovation :) so cute …. Love that. Thx for being so honest. You both did a great job. Can’t wait to see what’s next :)
Oh Lisa!
I wish you could have been there. It was not a pretty scene. We laugh about it now, but it was not funny at the moment.
I DO want my readers to always know that things aren’t as perfect as they may look in the pictures. :)
Have a great weekend!
Traci
Completely awesome! Way to go! :)
Thank you so much, Shayna!
Traci
Love it! It’s perfect for your bathroom and so great that you could totally customize it for YOU.
Thank you so much, Lori! We are loving it. :)
Traci
Not sure why you wouldn’t move the plug in…it looks kind of funny right in the middle of the wall and that’s not a convenient spot when you have a blow dryer and a curling iron!
Huh? Where do you suggest I put it? That is where they are normally located in most bathrooms. Right on the side wall by the light switch. I’m confused. I think it is the perfect spot for a curling iron and blow dryer, although it won’t be used for that much since it is really our extra bathroom.
Found this through Centsational Girl and LOVE it. You did an amazing job and just as a reply to the comment about the plug: We have a custom built bathroom that is set up just the way yours is but with a pedestal sink and that’s exactly where they put it. :) Can’t imagine where else it would go??? Again, it’s gorgeous!
…………….we plan to move sometime in the next 4 years. The idea is to buy a old house and make it a “new” old house and doing much of the work. Your tutorial may just come in handy.
Thanks for sharing.
The bathroom is fabulous! Cy is amazing!
Thank you so much!
Awesome! I hope it does!
Traci
lovely project and excelent tutorial! congratulations!
Thanks so much for the step by step photos. It does help me visually a great deal.
As for arguing, you ought to see me and my husband do it in American Sign Language. It can get really funny at times because ASL is not his native language.
As always Cy did a fab job.
Traci, Do you have any idea how lucky you are to have a husband who can and is willing to help with DIY projects? I have to go solo at my house and lots of times it just stinks! I’m with PJ on using the idea for a kitchen island at my cottage. I may actually be able to do it myself! Love the whole finished room. You did awesome!!
Your visuals make everything look easy. Thanks so much. I may tackle building something now! Your bathroom transformation is unbelievable!
The step by step photos will come in handy when we get around to switching out our laundry sink. Thanks Cy and Traci!
Love this space… and what an amazing project, Traci. Loads of bang for the buck!
xo Heidi
Yes I was going to comment but u had 88 by the time I read!! Yes we love this spot. It’s amazing. I cannot believe all you have done to your house. I actually think you were so sweet in junior high. Soon my young friends’ kids will be that age. It’s such a beautiful age that as a mom I thought my girls were never more beautiful! Yes, your post then, was one from beneath your heart. One you created, did not cookie cutter build. How precious in God’s sight that you are married to a husband with skills as Jesus had. That you are creative like God is–you are showing us that you are made in His creative image. And I see your beautiful Mom’s photo who thought you most beautiful at 12 and 13—oh she would be so delighted to turn the handles of your shiny faucets and say,”My dear…you shine for Jesus in your writing just like these pretty shiny, beautiful faucet and towel bar.” God is so good
Gwen,
You are so dear.
What a precious, thoughtful comment.
Thank you so much for making me smile.
xoxo
Traci
It’s gorgeous!! I wish my hubby was a builder. :) Looking forward to the panneling tutorial too!
Jenn
I’ve gotten a few of those “I may not be my husband’s favorite person right now” vibes when we’ve DIYed. He he! It looks lovely. As to the comment above about the placement of the outlet…most are next to the sink and therefore next to the mirror. I’m sure why you wouldn’t have there. And really, it’s on the wall with the light switch so it’s unobtrusive. You want to guess where mine is? Right next to the mirror…literally. I WISH it was by the light switch. Definitely will try to convince the hubby of that when we remodel the bathroom. I can feel some vibes coming on…;-)
It looks phenomenal. Seriously amazing. I want to build one for our guest bathroom immediately.
You two make a great team! The first time I saw Cy ripping off your front porch with his bare hands, I thought what a guy! He’s a keeper! I love the house, I love all the stuff you both have done. I have the brick wall white wash in my bookmark so when I get the courage to do it. I love brick walls but it’s so dark in my room.Keep up the good work.
God bless
Annette
Oh my! I love this and your tutorial is excellent! I have four legs I saved (took forcibly) from an antique table a friend was using for the fire pit (yeah…don’t ask) that I planned to use for a new cabinet base in the 1/2 bath. This may be the way to go! Thanks for sharing that you and Cy have differences when working together. LOL…being single, I have a cat who just makes herself scarce when the going gets touchy!
Those antique table legs sound amazing! So glad you saved them from the fiery pit! :)
Have a blessed weekend!
Traci
Hi Traci
I read all your comments. I had to go back to the picture to see where this ?outlet was.
All I saw was, again, a gorgeous room that you and Cy had redone!!!
Okay, I want to redo my bathroom now! Dying over y’all doing this late at night and it being such a real life moment:)…and I had to go back and look for the outlet, too;)
It all looks so fresh and clean. Love it!
Amanda
nice post :) thank you -http://modernbathroomvaniti.blogspot.com/
Great post! High fives to you and Cy and I absolutely love the jr. high school photo. I am glad I wasn’t sipping coffee at the time, because I laughed out loud. Great work. Fun to see the outcome.
Liz
I am in love with your beautiful vanity and have been planning to do something similar in my master bathroom very soon. I also love that you have the exact same tile on the floor that I am looking at for my remodel too! Love it….:)
Vicky
Life On Willie Mae Lane
oh my goodness this is so great. i love the entire look of the bathroom. you all did an excellent job!
Your vanity is fabulous! Our guest bath is in desperate need of a makeover but we want to do it on the cheap and this is a fabulous solution. Thanks for sharing!
Love it! Love it! Love it! Everything about the bathroom is spectacular! The two curtains were so smart too! I had an idea to disguise the pipes – what about painting them the gray color of your walls so they blend into the back wall? I don’t know, but I thought just maybe it would work. I love the new “old” tile that looks like its from the 1920s and screams cottage!
That’s a good idea about the pipes, Jackie! Thank you. :)
LOVE THIS! It is so beautiful! I am featuring this at somedaycrafts.blogspot.com
Thanks for the complete tutorial, I really like the result! I wish a had a man like this to help me on my projects :P
This might seem like a silly question, but where did you get the butcher block piece?
I really love this vanity and I’m considering doing it in my half bath.
Katie,
We had that piece of butcher block left over from our kitchen makeover. We bought it at IKEA. You can also purchase butcher block at Lumber Liquidators. We just did that for our boys’ bathroom as well.
Hope that helps!
Traci
i stumbled on this vanity on pinterest and i love it!! I was wondering if you had the measurements for it?
Thank you Bobbi
every room is nice and lots of info.we are planning to add second story to our bungalow soon.one question?where did you find that handy husband.;)
What size are the boards for the sides of the vanity? I’m guessing 1×4?
Absolutely STUNNING!! We used that same tile for our master bathroom reno! LOVE IT! Can I ask what color gray you used for your shiplap? I love that color gray! ❤️❤️