A Drop Cloth Slipcover
If you have followed my blog any this summer, you know that I have become a drop cloth connoisseur and have found many uses for this splendid and inexpensive material.
I showed you the drop cloth curtains I made for my kitchen.
You can read more about them here.
And then I promised you I would show you how I made my drop cloth slipcover for my wingback chair.
I finished it the first week of August, but that is the same week that we found out Mom had cancer, and life was put on hold. And though life changed drastically for my family in the weeks to come, those weeks quickly became the most treasured moments of my life.
Mom is the one who taught me how to sew, though I will never be the seamstress she was. She could sew anything…she could sew professionally.
I am not a professional.
WARNING:
If you are a professional seamstress, I would like to suggest that you stop reading this post immediately.
If you chose to ignore my warning, the following may occur:
Headaches, nausea, loss of breath, light-headedness, weakness in the knees, swelling of the ankles, dry mouth, watery eyes, vomiting and diarrhea.
If any of the above symptoms last for more than an hour, please consult your physician.
*******************************
Now for the rest of us….
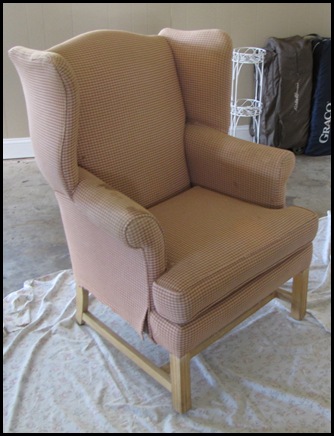
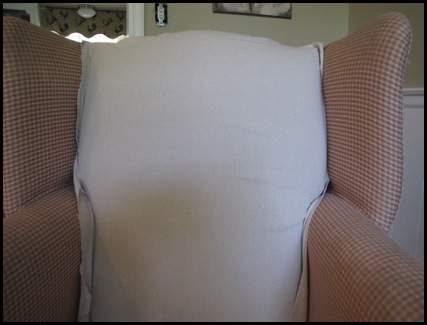
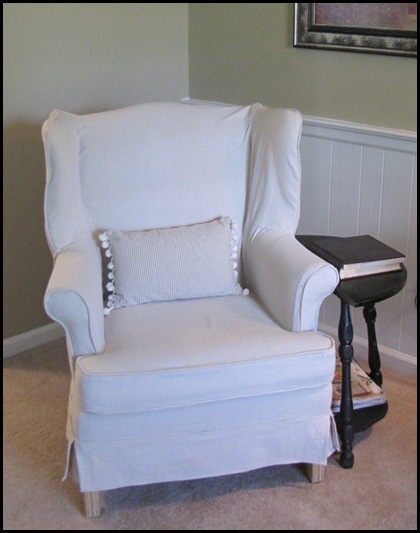
This was the wing back chair that my mom gave me to slip cover. She had been storing it in her basement, but since she wasn’t using it, she wanted to give it to me.
Since drop cloths are so inexpensive, and I like their texture, I decided to use them to slipcover the chair.
I will try to explain how I slipcovered the chair, but please keep your expectations low…
First of all, I look at the chair like a puzzle. The seams on the chair outline each piece of the puzzle.
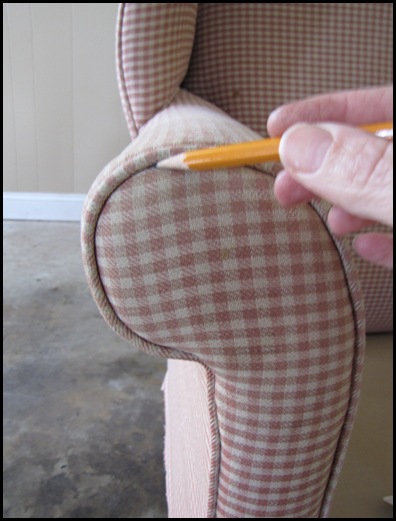
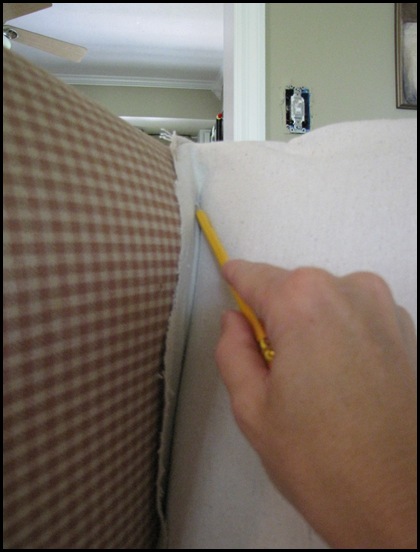
So I take my material and lay it over the piece of the chair I want to make a pattern of, and I use a pencil to draw a line where the seam is.
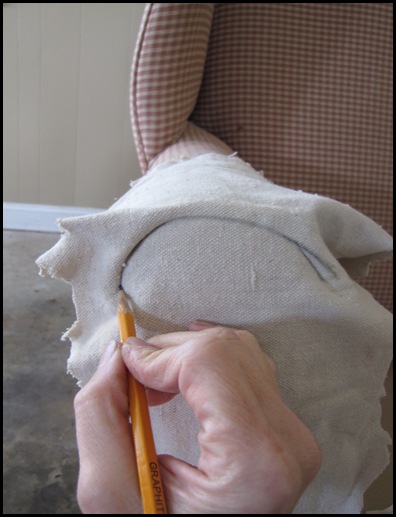 This is how I did it on the front of the arm.
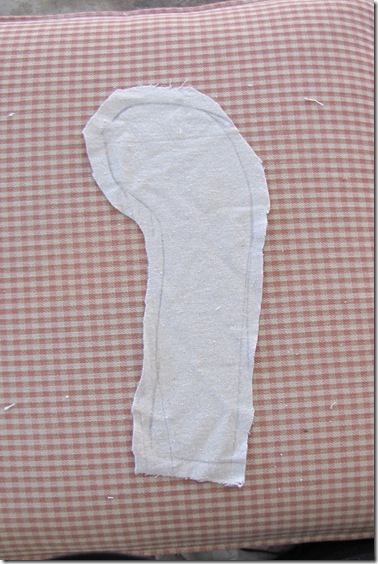
Then I cut about 1/2 inch around the pencil mark for the seam allowance. It doesn’t have to be perfect because slipcovers aren’t perfect. They are supposed to look a little messy!
Then I repeated the same process on the wings of the chair, the front, the back, and so on….
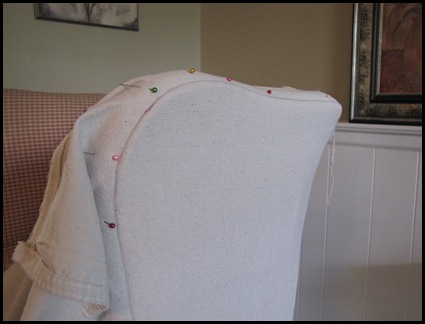
Then I sewed the pieces together to create the slipcover.
I took the slipcover off and on a hundred times checking to see if it “fit” each time I sewed on another piece.
I did use cording on some parts of the chair, but you wouldn’t even have to do that.
(And I forgot to take pictures of how to make the cording. Sorry.)
For the skirt, I just measured across the bottom of the chair to see how wide the skirt needed to be, and I measured down to see how long I wanted it to be.
Then I just cut a rectangular shape using those measurements, cutting about 1/2 inch more around each side for the hems.
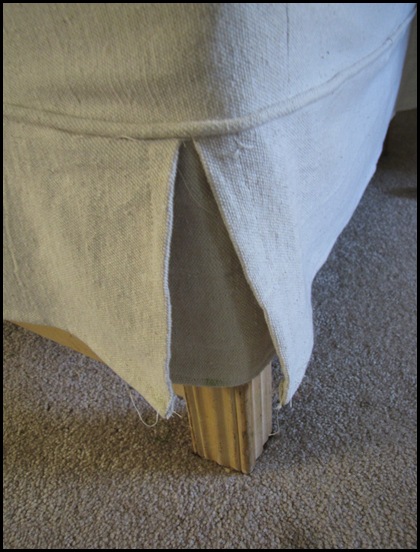
I cut a little flap to go on the corners under the front skirt pieces.
Yes, I haven’t trimmed the thread yet…
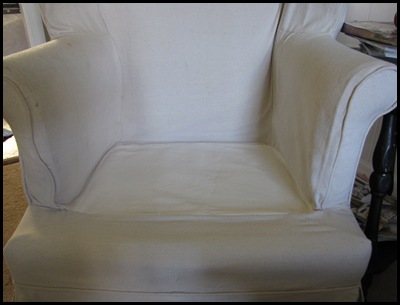
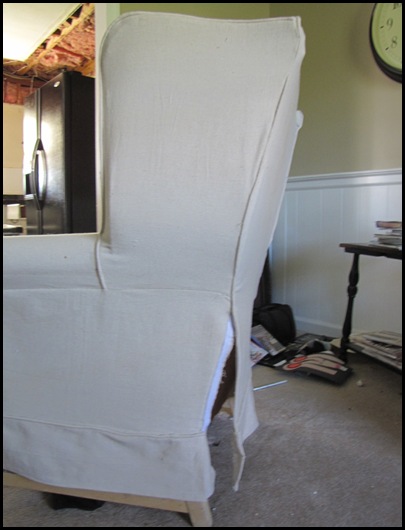
This is what the inside of the chair looked like when I was finished. I just used some leftover white canvas material that I already had for the seat.
I got real fancy-smancy on the back…with velcro!
I put velcro on the back to make it slip on and off easier. (Pay no attention to the mess in the corner or the exposed insulation in our kitchen. Did you hear about my unexpected kitchen renovation? If not, click here.)
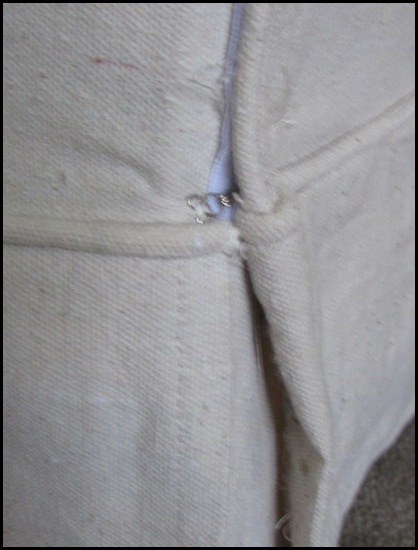
I secured the material even better with an hook and eye.
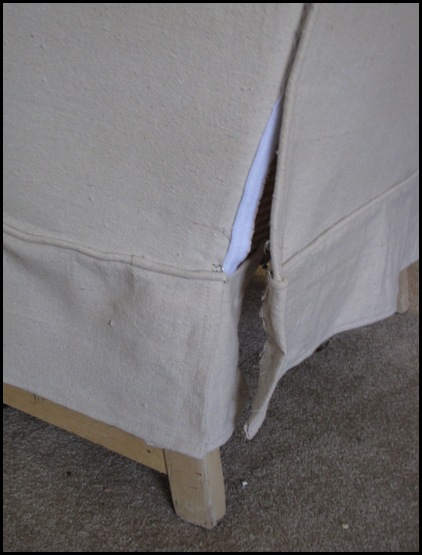
Sorry for the blurred picture.
I didn’t worry about how it looked because this side of the chair is up against the wall!
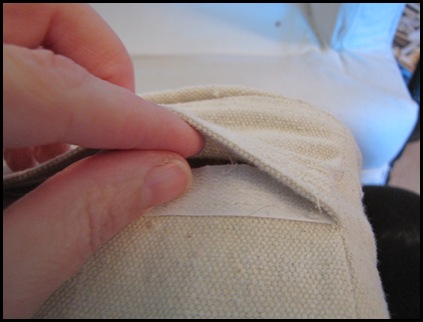
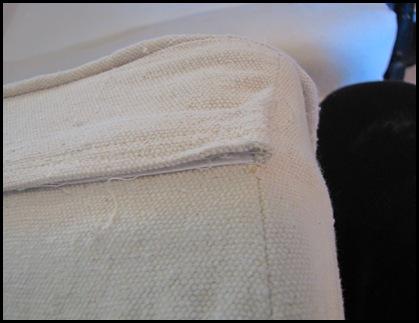
I also used velcro for the back of the seat cushion, instead of a zipper. It’s sooooo much easier. I’m not a zipper-gal.
So, there you have it! Clear as mud????
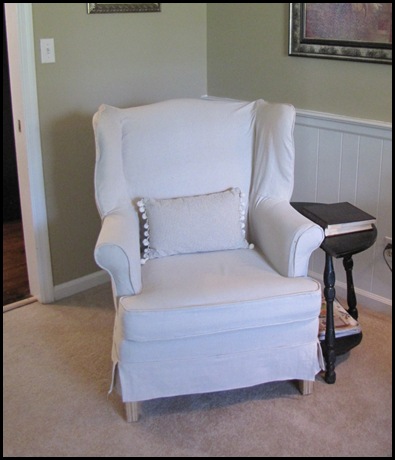
I think it turned out great!
I washed it for the first time today, and it didn’t fall apart! Yeah!
It has actually stayed pretty clean considering the fact that four little dirty boys have been sitting in it for a couple of months.
And if the material gets ruined by one of my boys (which is pretty much a guarantee), I won’t be too upset because it cost me less than $20.00 to create. Minus the HOURS of sweet precious time it took me to make it.
Okay. I would be upset!
*********************************************
I am linking this post to some great blogs, so go check them out!

Metamorphosis Monday at Between Naps on the Porch
DIY day at A Soft Place to Land (Tuesday)
Transformation Thursday at The Shabby Chic Cottage
Blessings,




Wow! Great transformation and how brave of you to tackle that! I strongly dislike my frumpy slipcovered couch, but I'm too afraid to customize it. You are inspiring!!! :)
Have a blessed week!
This turned out great! I have a chair that I would love to make a slipcover for, but the task has always seemed a little daunting. Thanks for the tutorial!
pk @ Room Remix
It does look great!!!
Looks great! I keep toying with the idea of using drop cloths in a room, and I think I might just do it at some point. Your curtains and slipcover look super!
I'm sorry to hear about your mother. My mother battled against cancer so I understand the emotions that you are feeling.
Hope your Met Monday is a happy one…
XO,
Sheila :-)
Seriously great job! I will bookmark this for sure!
Traci, this is wonderful. I love the look of it. You did a fabulous job. I have tried to make slipcovers, and they are really hard. I think yours turned out wonderful. Hugs, Marty
I think that you did a great job! I love it. It really looks nice.
Traci, Wow, this is something that I have been wanting to try for quite some time now. I actually have a paperback Sunset book on making slipcovers, but, honestly, your "show and tell" was much clearer and more helpful than that. I think your chair turned out beautifully and you have inspired me to take a leap and try it….um…that is, after I finish making 4 jumpers for the granddaughters and 5 Christmas stockings. But, I will do this – you will see! Thanks, Linda
Looks fabulous! I have drop clothes washed and ready for all manner of projects….
peace.
that is amazing! thank u for the tutorial!
Traci-great great job. Your explanation is great as well. Thanks for sharing!
Your chair looks really good! That was a good tutorial. I havn't attempted a super complicated chair yet, but now I might be able to! good job.
As always you did wonderful. I love it. You are such in inspiration in all the crafts you do. Wanted to let you know everytime I hear the Alan Jackson song about his mom going to heaven I always think of you and your mom.
tammy
So glad you've shared this. It looks great!
d
Your slipcover turned out wonderful.
All the one again, off again is so frustrating during the sewing process but the end result is great.
I have a couple slipcover under my belt but I always enjoy seeing how others sew theirs. I've learned a few new tricks today and can't wait to use them. Thanks
I am truly impressed! I think the chair looks great! I recently made slip covers for our dining room chairs out of drop-cloths. I have been too afraid to wash them, but you have given me the courage. I am going to double-Downey them in the rinse and see if that softens them up a little. Thanks for your wonderful posts!
I cannot BELIEVE you taught yourself how to make a slipcover. Girl do you know how hard that is? Of course you do (saying "duh" to myself here). Great job – your mother would be proud!
Oh Traci thanks for the tutorial. I'm a self taught sewer and you spoke my language…lol. Your chair looks GREAT!
Gail
I recovered a 50's chair my parents gave me. I used a newspaper to create the pattern in the manner. WIth yours there is one less step which I really like!
The chair looks great, Traci!
http://rayescott.blogspot.com/
Great tutorial Traci. We are supposed to fly out tomorrow but all 4 kids are sick and the airline won't allow us to fly so who knows when we will get back to Florida.
Cheri
Wow! I can't believe you MADE that! I'm so impressed! I think you've just given me the wind-in-my-sails to start back up on the reupholstering project I've been working on. Thank you for sharing this!
Totally Awesome ! You did super well and you are the master of a great tutorial ! I think that if your sewing can make it with four little boys – you sew pretty darn good in my book !
Hugs ~ Kammy
Love it! you did a great job. You say you can't sew professional like your mom did,but you did a wonderful job on this slipcover. Cording and all! I am so impressed. I am starting my wing back chair slipcover this week. I have never done cording..so, I won't have that on mine. I am intimidated enough with just doing the slipcover.
Thanks for sharing your step by step pics. It will definitely help me out when I do mine.
Traci,
You have inspired me so much with your drop cloths! Since you first put the post up regarding this slip cover project, I had to attempt one myself. Thank you for sharing.
Dee Dee
Beautiful job, Traci!! Thanks for the tutorial! It is very clear and truly inspires me. I love your drop cloth curtains too!!
xoxo
Jane
Great job on the slipcover. Professional or not it turned out terrific.
What a great project Traci…and a fab tutorial…very detailed and you make it look easy (we both know, that it is not so easy). I love the drop cloth idea.
you did an A-MAZING job!
I think it's gorgeous. :) I've sewn a couple of things, but I think I'd need major help with something like this. You did a wonderful job! Visiting from Kimba's party. :)
Ahhhhhhhh I LOVE IT! That's amazing. I wish I knew how to sew.
Rachelle
Soo great! I just finished mine too! I wish I would have read about the velcro first! I re-upolstered the chair and then had a seamstress do the cushion covers. No way I could have done them myself! Love it!
Wow – makes me want to jump on Craigslist and find some chairs! You did an amazing job!
Amazing job! Seriously – that's so impressive. I love it. Great job!
this is one of the coolest things yet! I am officially inspired to go get a drop cloth…or 10! LOVE it!
Wow! I am absolutely impressed by this! Good work! I'm very intrigued with the drop cloth too…going to check out your other drop cloth info too, thanks! :)
Happy Met Monday!
http://www.mooreminutes.com/2009/10/walls-wrapped-in-charm.html
Great job! Do you wash the dropcloth before you make the pattern? I have four boys too….and am in need of some WASHABLE slipcovers!
Wow!! That is awesome! I'm super impressed!
That looks great!! I wish I could sew like that. That is my goal this year. I already have a sewing machine so I'm half way there!!
Wow what a great project. I love the idea of using drop cloths! I am very inspired!
I am so impressed. It turned out fabulous!!!
LOOks great!!! I did the same thing on a post about two weeks, ago. Yours looks GREAT!
What a great idea! I am going to have to check out your other dropcloth ideas :)
Ok… I'm so not a zipper gal either… hate them:) I have been avoiding tackleing my first slipcover for some time now but yours turned out so great that I am on it! Starting it this weekend… I can sew but I am sure I will still experience many of the "effects" you mentioned;)… is that normal??!! Way to go girl… It's BEAUTIFUL!!
~Whitney
I'm so impressed and inspired!! I plan to try this. I have 2 older wing-back chairs that no normal slipcover fits. I really don't like the cream fabric with country blue/pink floral pattern. Doesn't go with the rest of my living room. I have 2 childrens dresses to attempt and then on to this!
Thanks for sharing!
This is GREAT inspiration! Since I don't sew, a friend of mine is going to start on mine this weekend.
I had one question…do you know about how much cording you bought and what width?
Thanks!
Sarah
ms_caldwell06@yahoo.com
I love this! Another use for a dropcloth too. I will definitely come back to this post soon. I've been wanting to make covers for dining room chairs and perhaps dropcloth is the right fabric for the project!
you are a professional as far as i'm concerned! fabulous job!
Great job!!!Thanks for sharing!
You did a great job! It looks fabulous!!!
Michelle
I love her!!! You did an awesome job…I drop kicked…I mean dropclothed my chair too…She is so pretty I named her Pearl…Poor Pitiful Pearl…Come by and say Hello to her…:) Meme
WOW, you did an amazing job. I like your techinque of using the pencil around the arm of the chair. That's the hardest thing to do, get a good pattern of unique shaped parts of the chair/sofa. I going to use your technique, thanks a million!
Please, oh please!, consider doing a tutorial for cording! I can't figure it out for the life of me and I think that cording just *finishes* a look so beautifully!
What an amazing chair! Love it! :)
I was thinking about using drop cloth to make a slipcover for our couch, but I was worried it would not be comfortable. Is it scratchy feeling?
Love it. I want one just like it!
love this!
I ran across your site after googling drop cloth slipcovers. I will definitely have to take a closer look see of your site. It looks very interesting!
I do have one question about the drop cloths that I dont seem to see mentioned anywhere on the internet so far is, What weight of drop cloth do you use? I see they area available in 8oz. weight and 12oz. weight? Did you wash the drop cloths in hot water and dry several times before making your slipcover?
I linked to your post at http://www.greengraciehome.blogspot.com on an article on inspirational drop cloth projects. What a great idea!
Love this and will refer to it often when I start my first slip cover! Question – on the skirt, it looks like you have 2 layers of fabric – one straight and one with the corner flaps? Is that how it is really? If so, how and why did you do 2 layers instead of just 1?
I can’t thank you enough for posting this. I just found out today that I’ll be renting a two bedroom home for me and my two kids. Well since I’m divorced and don’t get paid alot, my furniture is all used and ugly lol. I want to slipcover them and fabric is not cheap. Hence my google of drop cloth slipcovers. I love your blog, I am so bookmarking this and breaking out my sewing machine. Hopefully mine will be done by the time I have my housewarming party. Thank you!!!!
Dear Traci,
My own dear mother passed away suddenly from a heart attack on June 17th, 2008, just short of her 79th birthday. The only comfort that I had on that terrible day was from the dear Lord himself. My hope of seeing my mom again was in the assurance that she also had a relationship with her Savior and I did not lose her, our contact has just been broken for a short time. Just like you and your precious mother, Wanda.
So dear lady, the story is that I found your web site a few weeks before your mom passed away. I had been thinking about purchasing the Ballard Cafe Shelving as I had been a fan of Ballard’s style a very long while but I just did not want to spend the money so I started to surf the web for some kind of ideas for shelving-you guessed it-I found you!
I was praying for your mom and you and your family but from my own experience I knew that as
believers we are privileged to go freely before his throne of grace and pour out our requests, but that we also must pray for His will to be done and He wanted my mom and He was ready for your mom too! I just now am able to share this with you and let you know that I shared your pain and loss. Another dear sister in Christ shared a message from another persons “home going” at her own mother’s memorial.Here is an excerpt:
When our loved one dies, it’s as if they are on a ship, leaving port and disappearing over the horizon. And those of us left on the dock watch sadly and say, “There she goes.” And when the ship goes over the horizon we mourn because our loved one seems to be gone completely, because we can’t see her any more.
But, when the ship disappears over the horizon to us, it is just appearing to those at another port. And there are loved ones and fellow believers standing on the dock there who have already made the same journey. They are watching expectantly, and when the ship comes over the horizon and approaches, they cheer and say joyously, “Here she comes!”
Someday we shall be re-united with our dear ones just like the last stanza of one of my favorite hymns:
Beyond the sunset, O glad reunion,
With our dear loved ones who’ve gone before,
In that fair homeland we’ll know no parting.
Beyond the sunset forever more.
Sorry for such a long message but thank you Traci for your wonderful blog. I am inspired to start one myself to share the bitter sweet journey of inheriting my parents home and doing most of the renovations myself with help from time to time from friends. I am a never married, single lady and I would like to share a journey that you have had a part of-wild isn’t it?
You and your dear family are already special to me!
In His Love,
Denise
this is the most touching thing I have ever read, I have forgotten about renovating my furniture and will begin to mend my relationships. thankyou.
I was so happy to find your post. I’ve been thinking about making a slip cover using a drop cloth for a long time. After seeing your instructions I think I’m ready. Thank you so much.
Debby! I’m sure it will look great – be sure and post a pic of the completed DIY!
These are absolutely the BEST slipcover instructions I have seen yet and I’ve been researching this DIY project for quite some time. I’m now going to take the plunge and tackle my own chairs – I love the lines but the material is outdated.
Thanks so much for sharing these instructions.
Mish
Great job! And great, easy-to-follow instructions and illustrations. My recommendations would be to buy really great shears and 2 drop cloths and double up the pattern cutting. You can repeat or change fabrics, but you will always have a pattern and never have to re-measure again. If it’s sturdy furniture that you’re going to hang onto for a while, it’s worth the time and effort to cut 2. Great inspiration – I’m going to go shopping for drop cloths. Thanks!
Oh my goodness. I know this post was probably years ago – but I have done the same thing sooo many times. It started with covering my daughter’s carpet to paint her house. We stood admiring the drop sheet fabric. Since then it has curtained many houses, slip covered heaps of sofas and arm chairs for kids and relatives. When you have a lovely but tired sofa, but soon work out that fabric by the metre to cover it is going to cost as much as a new sofa……… Drop sheets are the go.
Love your work!