New “Tile” Patio Floor Reveal!
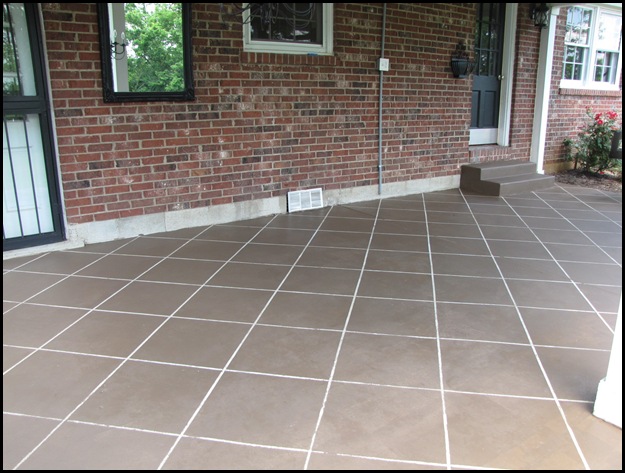
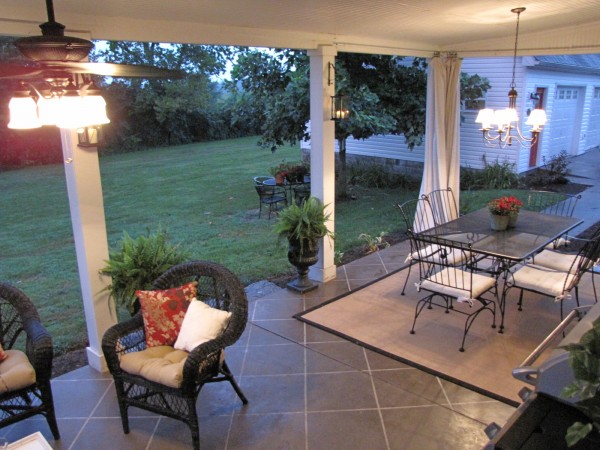
Well, we finally finished staining our concrete patio to look like tile!
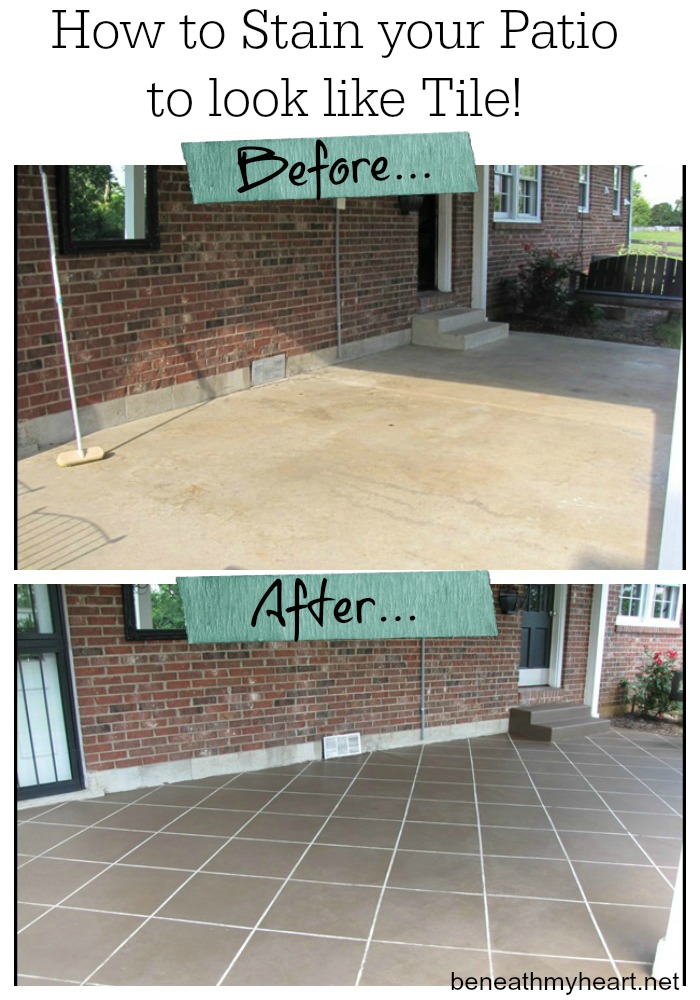
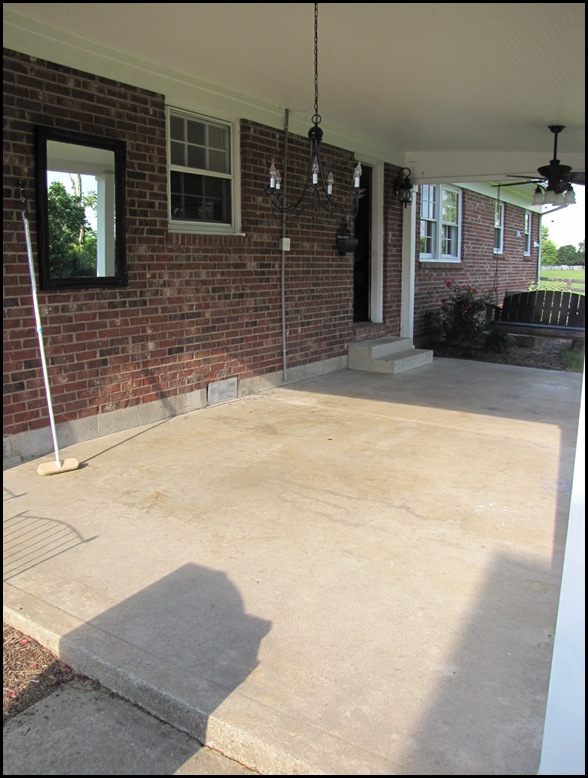
This was is what our concrete patio looked like before.
Dull and dirty.
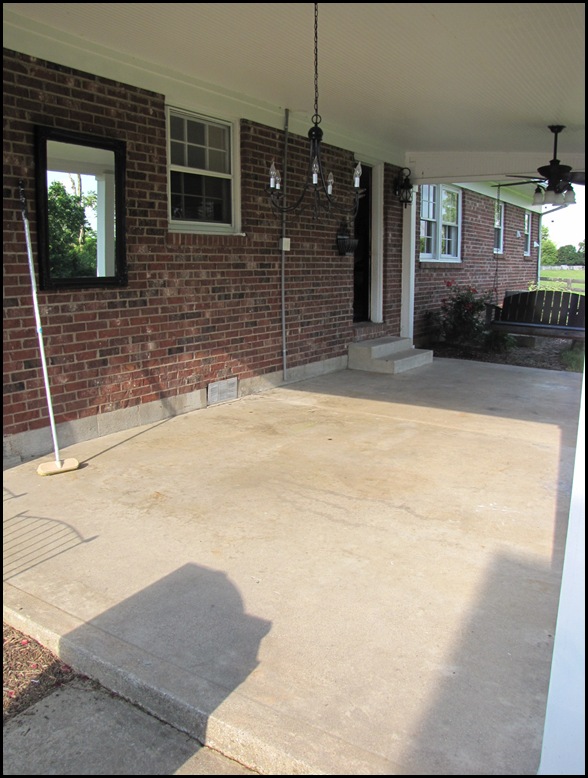
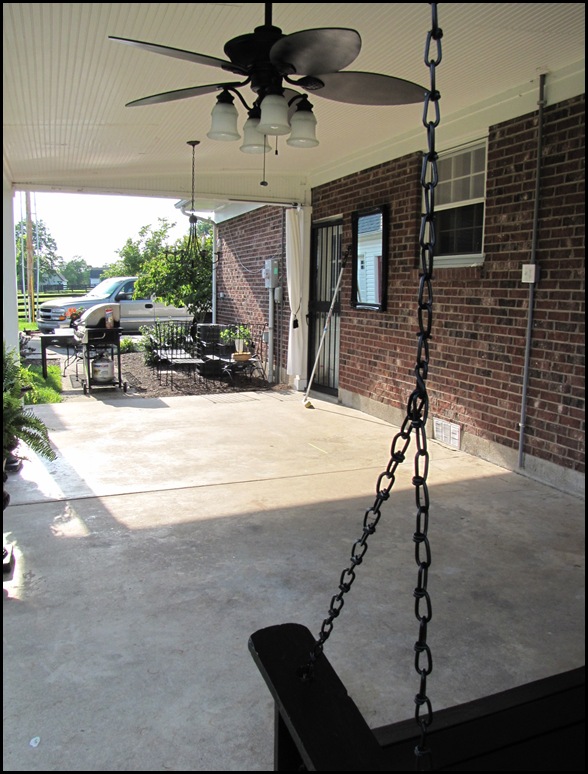
So I wanted to tile it, but we couldn’t afford it.
My friend, Richella, suggested that we stain the concrete to look like tile. This seemed like an option that we could afford, so we went for it.
Here are the main steps to staining concrete.
1. Clean the concrete.
2. Stain the concrete.
3. Seal the concrete.
Not bad, huh?
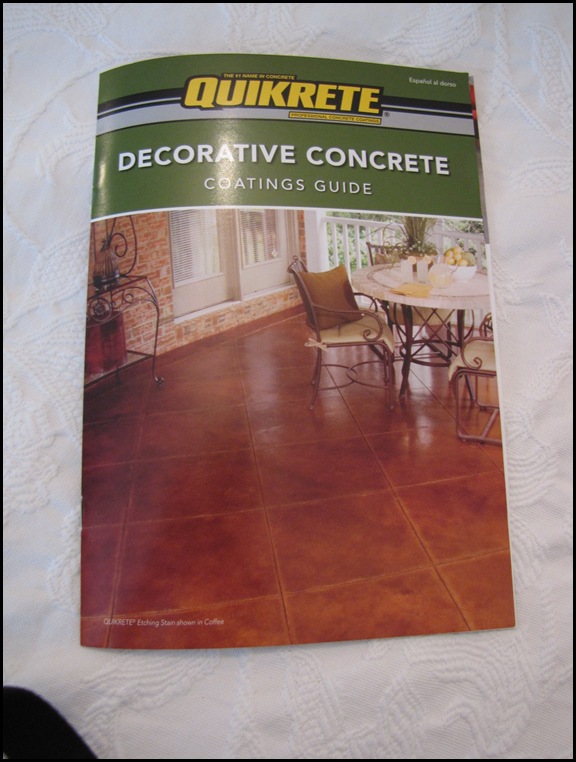
We used Quikrete products from Lowe’s for this project.
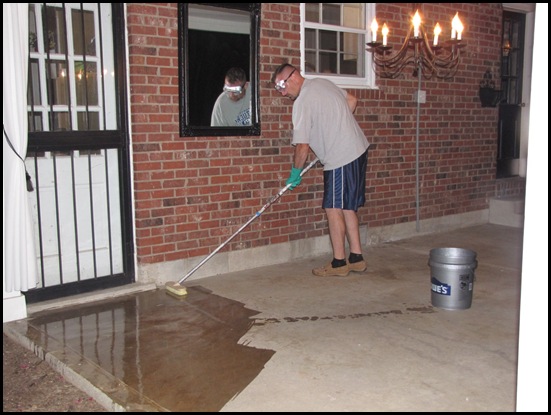
However, my hubby insisted that Muriatic Acid would do the same thing. It would clean the concrete and open up the pores for staining. Since we already had some of it, we used it instead.
WARNING: Muriatic Acid is extremely dangerous!!! You do not want to get this on your skin!
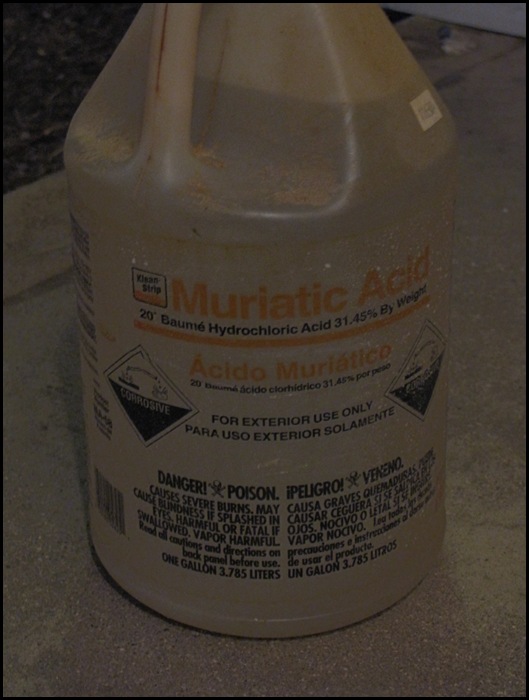
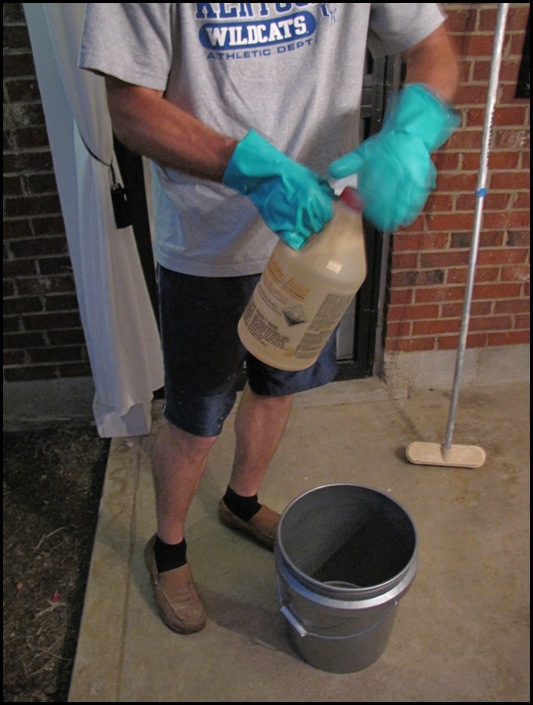
If you use Quikcrete BondLok to clean the concrete, just be sure to read the directions carefully.
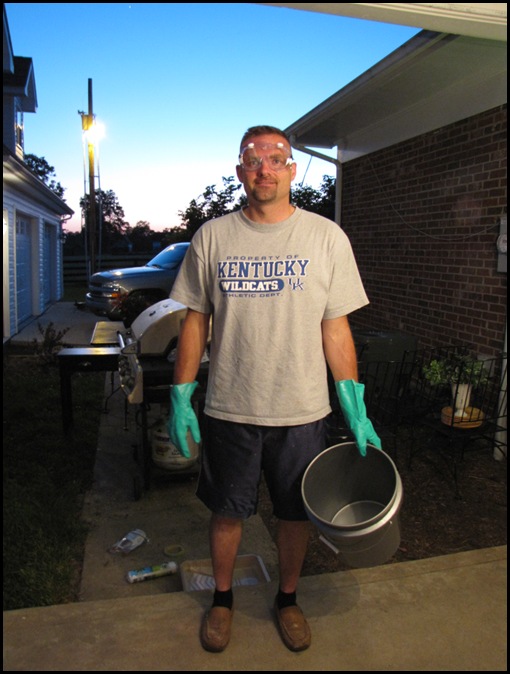
Here’s my man…ready for the job…
Now you can skip this step if you don’t want your concrete to look like tile. But since we were going for the “tile look”, we used 1/2 inch tape to make our design.
It is not easy to find 1/2 inch tape. They don’t have it at Lowe’s or Walmart. We had to go to CarQuest and KOI Motors to get our tape. It is used a lot in painting cars.
My husband measured and made our starting point in the corner by the steps…
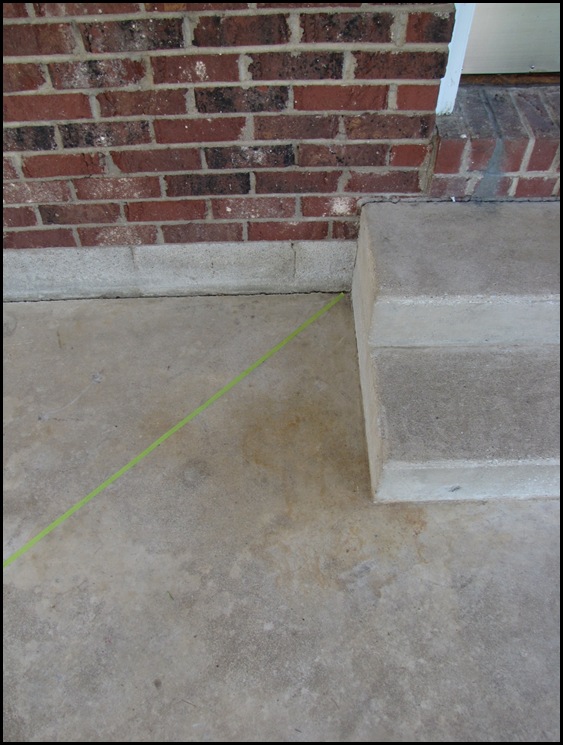
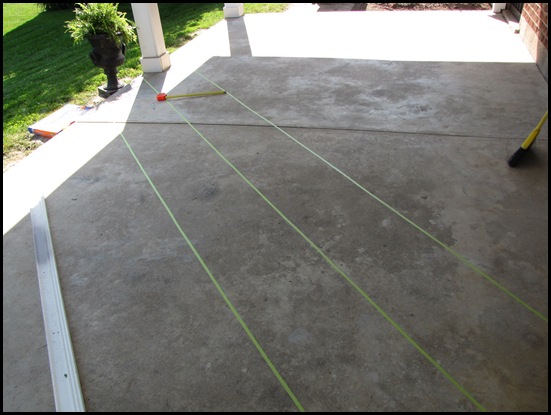
My husband also suggested we make the tiles on a diagonal. I am so glad he did! It looks so much better on a diagonal!
We used a large piece of trim molding that we had left over from another project, a tape measure, and pencil to draw our lines every 18 inches.
Well, one thing I do is to keep them busy doing something else…like a “slip and slide”.
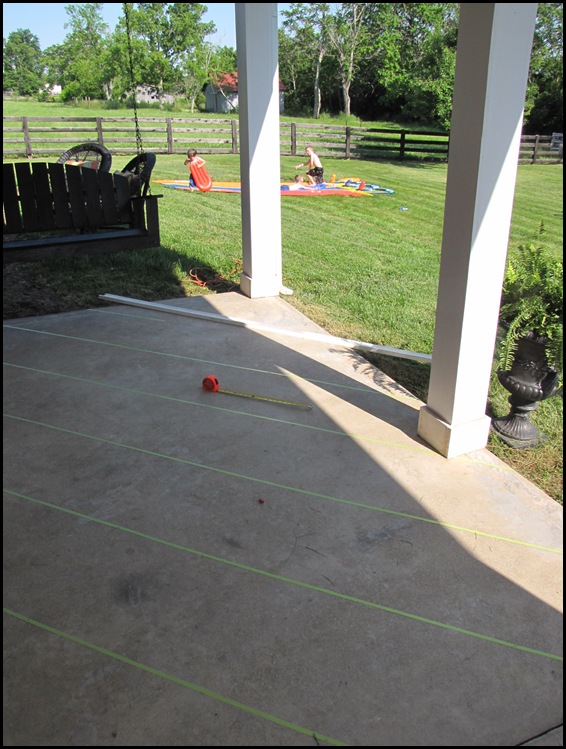
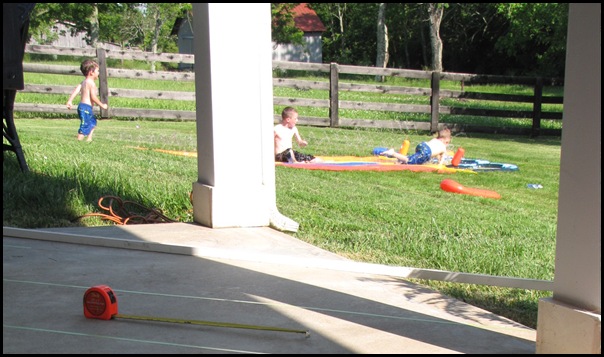
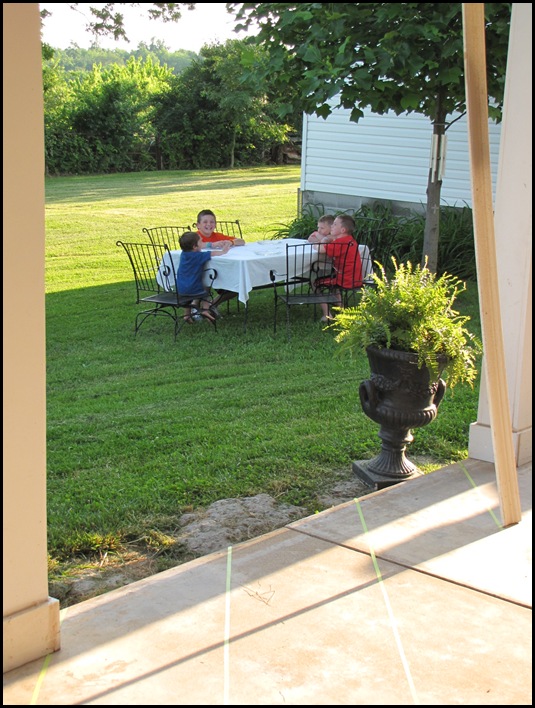
This step was not hard AT ALL! It just took a little time.
I would suggest knee pads though. I didn’t have any, and now I have blisters on both of my knees!
Oh well, it was worth it.
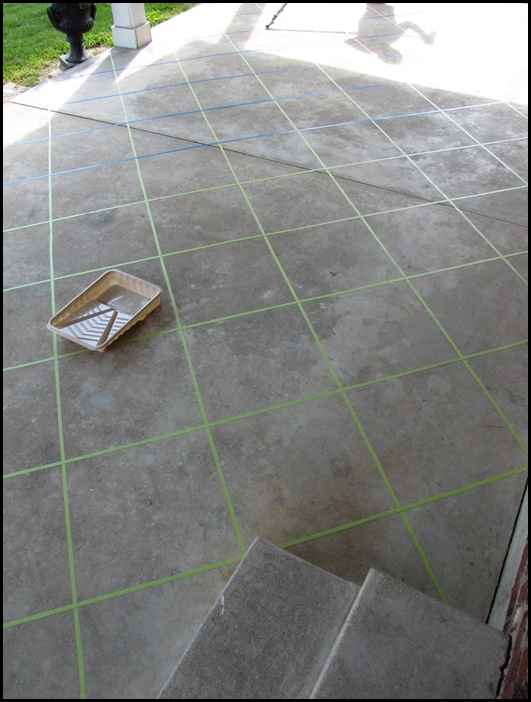
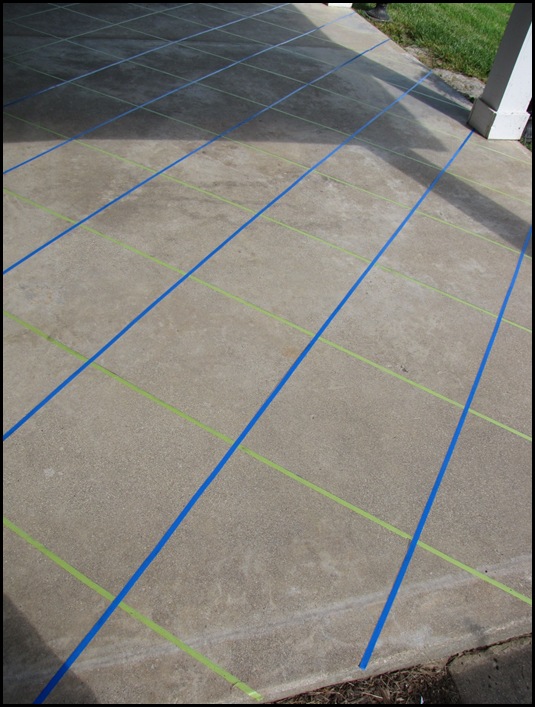
Picking out the color of the stain was the most stressful part to me!
There is a color guide in the pamphlet which includes solid stains and translucent stains.
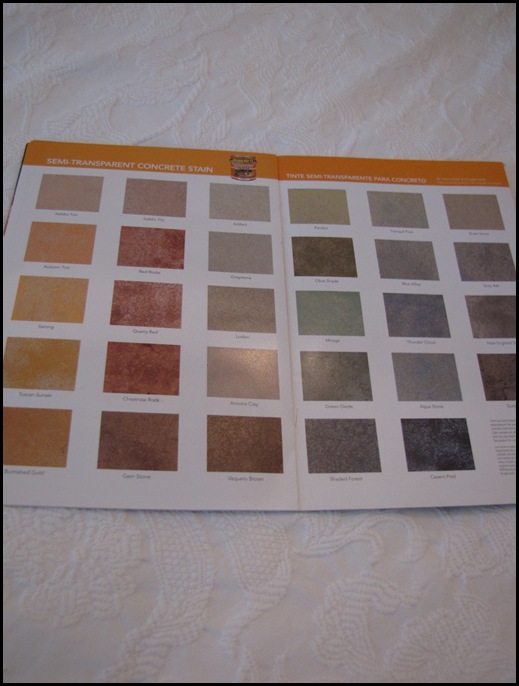
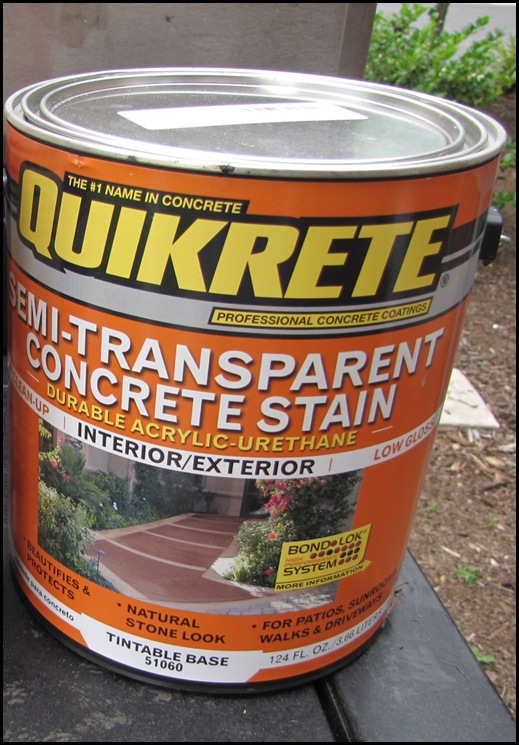
We went with the color Vaquero Brown. You have to take the can of stain to the paint desk for them to mix the color for you.I was expecting it to look lighter on our concrete than in the picture, but I was wrong. It actually looked darker.
The pamphlet suggests to wet the concrete before applying the stain, but we did not. This may have made the stain a little lighter. Don’t really know.
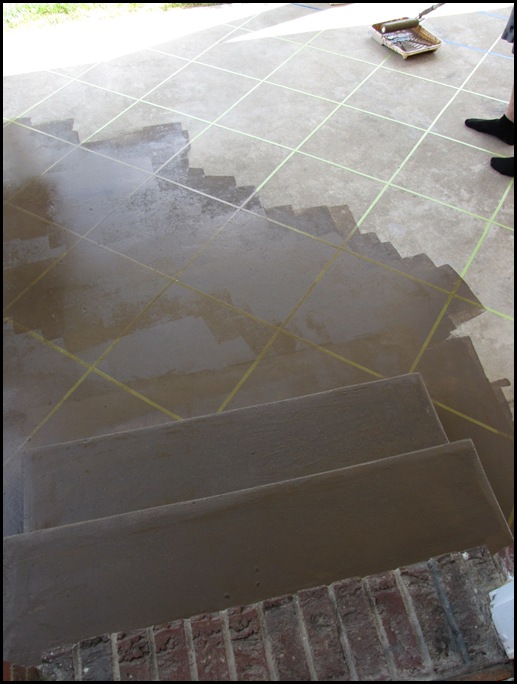
Don’t cha love my hubbies black socks? Too cute.
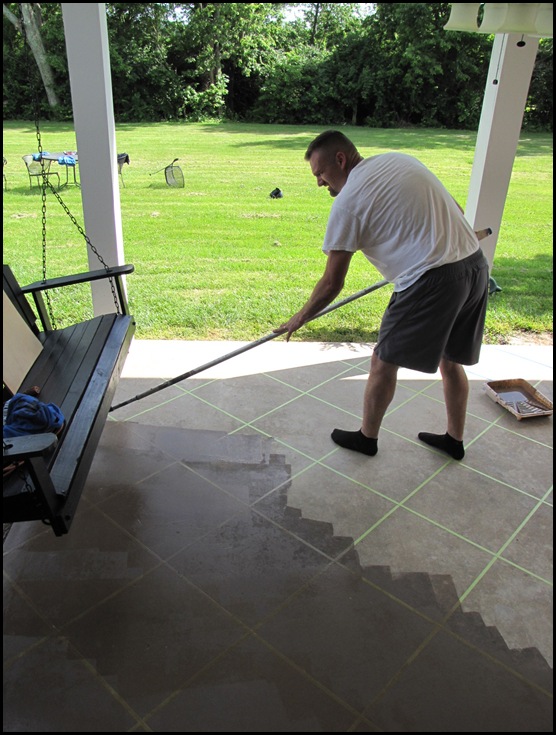
So I got on my sore knees again, and applied a second coat of stain by hand with a rag to try and cover up the brush strokes.
We let that dry, and it definitely looked much better. Now with two coats of stain, it is definitely darker than what I had wanted, but I still think it looks so much better than our dull old gray concrete.
I peeled off the tape and here is what we have now…
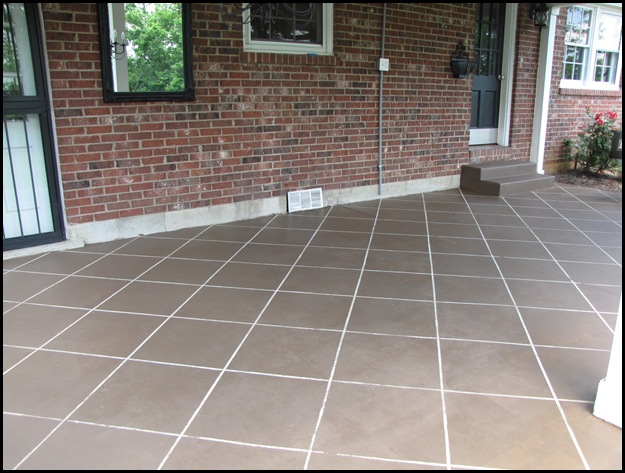
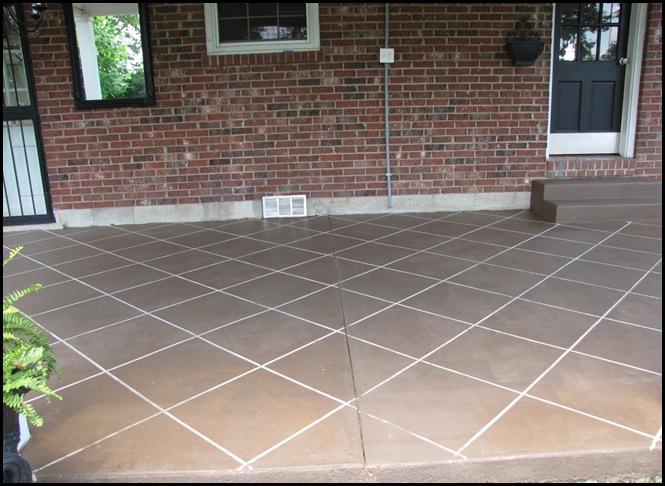
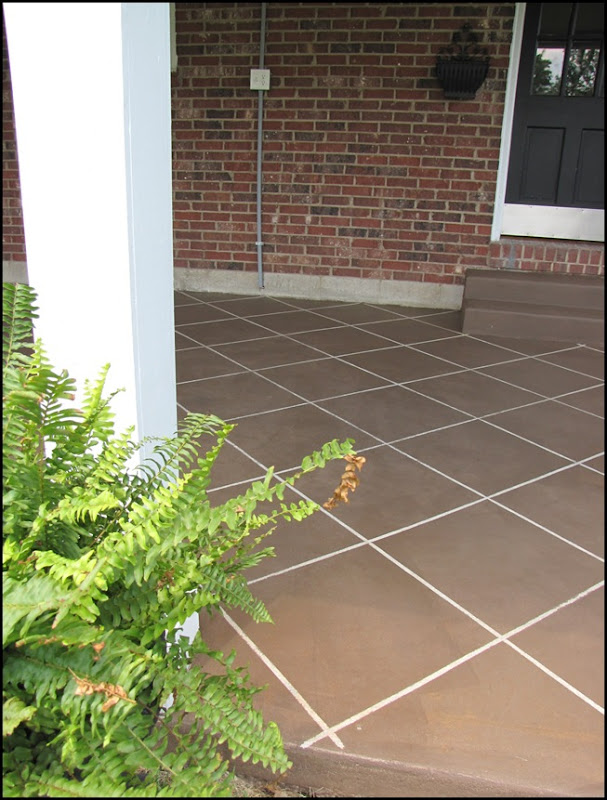
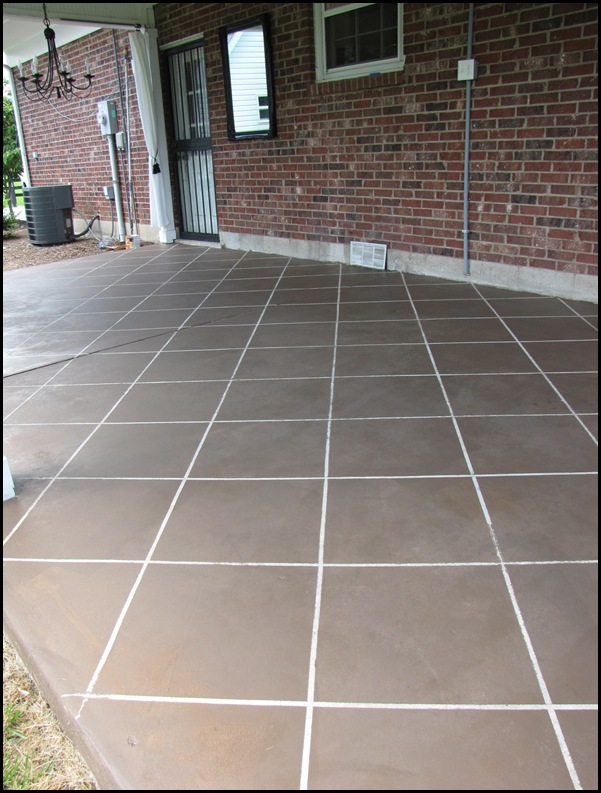
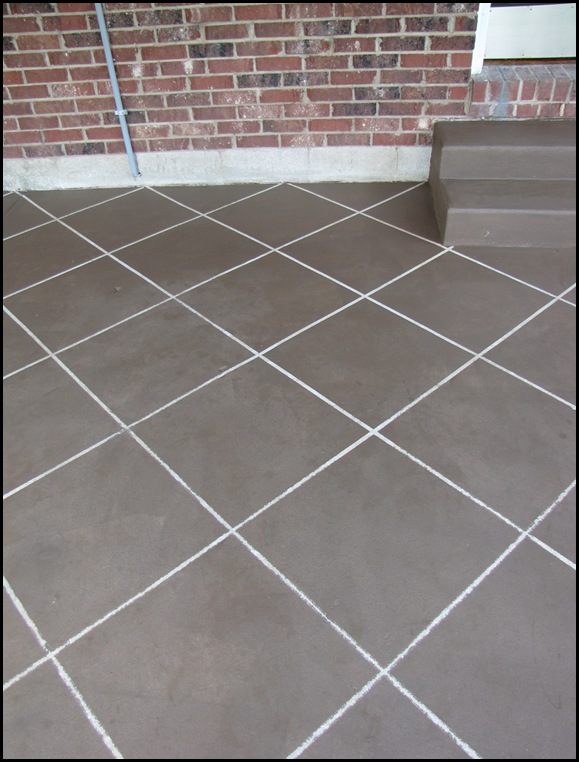
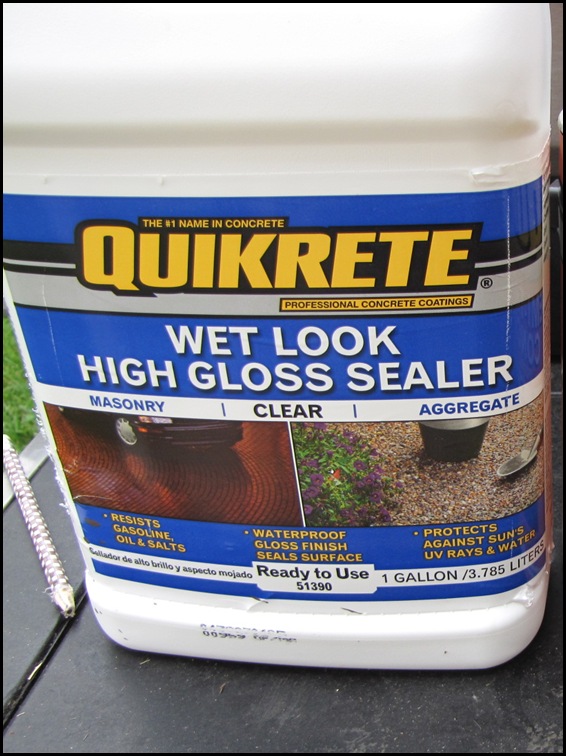
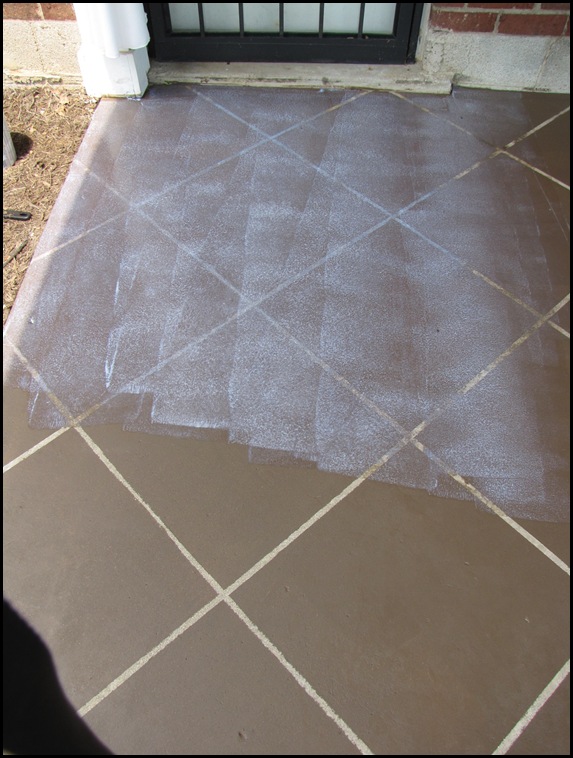
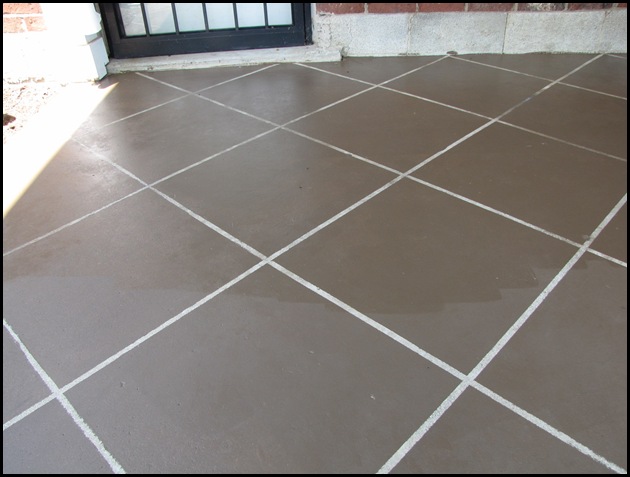
The sealer helps protect and seal the stain.
We have let that dry overnight. I was wanting to get a picture of the patio with our furniture back on there this morning, but I decided to wait a little longer. I want to make sure that it is completely dry and that the furniture does not mess up all of our hard work.
Overall, I am VERY pleased with how this turned out. It gives our patio a very finished look.
Here is the breakdown of the costs:
Muriatic Acid – free (we already had it)
Stain-$24.00
Sealer- $24.00
2 rollers – $6.00
Rubber gloves -$3.00
We already had the roll brush, the glasses, and bucket, so this whole project cost us less than $60.00!!!
Much better than the $300.00 it would have cost my husband to tile it himself! Plus, it was a lot easier!
On more time, the BEFORE…

Traci, You guys did a super job on the patio.
Looks great and adds alot of character.
God bless you and am praying.
d from homehaven
Wow! Many thanks for the detailed post. I am eager to do this to my patio & wanted to ask you a few questions:)
Did the stain/sealer hold up over time?
If you could have gone lighter or darker in color, would you?
Is there anything in hindsight that you would’ve done differently?
I am so hopeful that you will get my questions. I would be very grateful for your answers. I hope you enjoy a wonderful rest of winter!
Reading this in April 2017 and wondering the same! How did this hold up and is there anything you would have done differently (such as lighter or darker?) Thanks for sharing this!
WOW…beautiful! Great savings and it looks amazing! Can't wait to see it all decorated!
WOW I would have never thought to stain concrete – It looks amazing! I'm going to file that one away in my brain, haha. Great job!
I LOVE how it turned out! Cant wait to see the porch with all your furniture!
How beautiful, Traci! I'd bet you cannot WAIT to see what your furniture looks like on it!
I'm also grateful you told us of the cons of the procedure.
That ugly carpet in my basement may get lifted sooner than I realized now. I'm armed with info now after all! :)
Enjoy that sweet outdoor space!
Donna
http://funkyjunkinteriors.blogspot.com/
WOw, this is amazing! I love the transformation, so much work but it paid off big time! Have a wonderful weekend!
XO
Kristin
I like it sis! Can't wait to see it with the furniture back on it!
Traci, I love how it turned out!! What a great solution to concrete. I have long loved stained concrete & this is a great example. I know you'll get it spruced up & really enjoy this space.
I love how this turned out. We need to stain our concret too. Ours actually has the grout marks ground into the concret (I really like that). However, the previous owner was quite a fan of the color pink, so the "tiles" are stained pink. I need to do some research to see if I can stain over it. Yours looks fabulous and I love the color you chose.
Traci, Your patio project turned out wonderful! I can imagine the taping was very tedious but the results are marvelous. I am looking forward to seeing the patio all decorated. Great Job.
Hugs,
Sherry
WOW Tracey, that looks awesome! Great work!
This looks so amazing! I LOVE it! My hubby and I have been wanting to stain our concrete — so thanks for the tutorial! :)
Wow, I had no idea you could do this to concrete…Im such a newbie! Thanks for sharing the project and congrats to your lucky winner!:)
Sarah
HandbagsNPigtails.blogspot.com
Looks fantastic!!!
This looks GREAT!
All I can say is WOW. You are inspiring me to makeover our back patio – unfortunately living in Arizona this is going to have to wait until the fall (so November if we're lucky) because of the heat. It's amazing what you can do today withthe products out there and I love hearing about how they worked for others first hand. Thank you!
This looks AMAZING!!!! I love it! I may try this to ours! Have a great weekend!!
Cara
I love this project! You did a great job! I would have never thought to stain concrete, but it gives it such a nice look!! Good job! Can't wait to see how the rest of your porch comes along!!
It turned out great! Thank you for sharing such a thorough tutorial. This maybe something I suggest to dear hubby.
Once again you did an amazing job. Your energy is such an inspiration! Have a great long weekend.
WOW…what a GREAT job! It looks fab! Now, whens the cookout??? lol
Have a great weekend…and I'm sure you'll be enjoying your new patio look!!
It looks great. And with boys you may be thankful that it came out a bit darker than you planned:) I look forward to seeing it will everything in place.
Excellent job. It is very cool looking and what a big change. We are trying to decide about putting in a paver patio. I'm now considering having a concrete patio and doing what you have done. Jude
Your patio looks amazing!
Traci, this is spectacular! Now I wish I had a patio that I could stain! I can't wait to see it all put back together!
I think it looks great, Traci! I'm glad you achieved the look you were going for.
This is amazing, you two did a fantastic job! Give yourselves a pat on your backs!
I totally agree that the bleed through makes is appear as real tile, real tile that has been there a long time. What a fantastic job, and such a hard working hubby you have! Very, very nice!
Woooooah! That looks amazing. Only $60 too? Can't beat that with a stick!
Wow! It looks fabulous! And I love the Kentucky Wildcats shirt too!
I LOVE it! You are right…so much better! I love the projects you come up with. Thanks for sharing!
What a transformation! Like night and day. You did a great job. I'm thinking I might do this in our basement…at least in the craft room I'm going to create down there. Thanks for posting.
What a transformation! Like night and day. I love the tile look. I'm thinking of doing this in our basement…at least in the area I'm going to create a craft room. Thanks for posting.
Amazing! It looks great! Can't wait to see your furniture back in place! Great tutorial :)
I love it! I want to stain my front steps that have a little texture on them…house is darker tan. Any suggestions?
woodruffboys@gmail.com
Traci, this great! it looks so much better now. more luxurious, classy and so nice. i wish i didn't have a pavor patio now. we were gonna do a deck this year and get a pool. that didn't happen. oh well it looks really nice. you and your husband did a good job!
I love it, we're debating what to do with ours… so glad you posted this when you did.
One question: just curious… about how much was the tape?
Thanks again!
Oh my goodness!!! That looks amazing! I would have NEVER thought to do something like that. You and your friend are geniuses! Great work :)
Your patio looks great! It was well worth all that labor!
GORGEOUS!!!!!!!! I love it!
At our new house the previous owners painted the sidewalk and part of the driveway with baby blue paint. :( I wonder if muriatic acid would take it off….then I could STAIN it. :)
Wow Traci, your patio looks fantastic! I can't wait to see it with all of the furniture. I love outdoor living spaces…
It turned out great!
Awesome Tracie! It looks so nice, once you get all of your furniture back on it will be even more beautiful. Great inspiration too!
Debbie@ moorefromtheheart.com
I love it! It looks so great! I am going to feature this tomorrow!!
Wow, Traci! This really does look like real tile! And I love the diagonal too. It looks so professional. I'm always amazed at how we can save money and have pretty much the same look we are after!
Your patio looks awesome and like you said makes just a big difference. Congratulations on all the improvements and value you are adding to your home. We are currently selling our 5th home and have built our equity each time. Hard work and blisters on your knees does pay off. Looking forward to more updates!
That looks so much better! I'm planning on doing the same thing with our covered front porch. Thanks for all the tips.
Hubby's black socks were cute–but that Kentucky t-shirt? Ugly!! (we bleed orange at our house!) ;-)
Oh my gosh, that turned out beautiful!! Our patio definitely needs something … I'm thinking this is the way to go! Great job :)
Hi Traci. This turned out beautiful. I just love the big beautiful yard too. Ya'll did a terrific job. You should be very proud.
Have a safe and fun Memorial Day weekend.
Hugs…Tracy :)
This looks amazing! I know you and your husband put in some long hours on this one. Just found your blog and can't wait to go through it! -shaunna :)
Traci, things have been a zoo around my house this week, but I had to take a moment just to say how happy I am for you! This looks awesome! And thank you again for the linky love. You wouldn't believe how proud I am to be mentioned on your blog!
Love, love, love to you!
This is a fantastic transformation and I really like the dark brown color. I think it looks great with your brick!
Okay, chick! LOVE this blog post!
My husband is working on finishing our basement, and we are about ready for flooring. I have been telling everyone that I think I am gonna stain the concrete because we really don't have the funds to floor it right now.
BUT, I was wondering how to do it, and I knew I was going to have to start researching soon.
THEN, I found your post! LOVE IT. So, we will just head to Lowe's and check out the options. Thank you for sharing! I am pumped up now!
…and by the way, I just found out that one of my friends, Sarah Johnson, is your SISTER-IN-LAW! That was really SO weird!
Who knew? VERY small world!
It looks wonderful. I can't wait to see it with all for paito furniture. Thanks for the tutorial it will help my hubby and I to gather our courage for such a project.
WOW!! That looks 200% better!! Your hubby [and his black socks] did a fanTABulous job!! I just love the end result. Truly, truly gorgeous!
Your patio turned out amazing and it doesn't look like as much work as I thought it would be! You are so clever!
Your patio turned out fabulous!!! We are painting/staining ours this summer too ~ your tutorial was perfect timing! Thanks for the great photos.
xo,
Shellagh
p.s. your boys are totally adorable ;)
What a transformation!!! I've got a slab of cement that I've been wanting to stain/paint… thanks for the great play-by-play!
I cannot believe that this looks so much like tile, FAB-U-LOUS!!!! I do not know how u get all these projects finished with 4 kids,I just have two and I'm lucky to get my floor mopped once a week, I'm beginning to think you might be wonder woman…lol It really turned out beautiful!!
This looks great! Thanks for sharing. I'm inspired to do our patio by the pool now. I'm just wondering if it'll work on our concrete b/c it's a little textured and we have cracks in it already that have some caulk on them.
I am so glad I stumbled upon your blog, I was originally googling Headboard turned into coat racks, and voila! your blog appeared…and this post! Which was an awesome tutorial…because my hubby just recently pored concrete counter tops, and we were wondering how in the heck the whole "staining process" worked! I just love your new patio! what hard work that was, huh? and it sure did pay off! BTW….I am your newest follower! I can not wait to see more!
love the tile look on your patio…can't wait to come visit again! tim wants to know if he can please see more pics of your hubby in black socks!
did you get my earlier comment? it disappeared…oh no!
Hi Traci….my internet is finally working although it's on again and off again. But while it's ON i will say how incredibly excited i am about winning this!!! What do i need to do? Thank you so much. Can't wait to shop and show off my treasure!!!! :-)
It looks amazing….I did this for a clients patio once but did a cobblestone look…it held up awesome!
that turned out awesome, I would have never thought you could fake tile!
Hi, Tracey,, your patio looks wonderful. It really looks like tile. I cant imagine how tiring that must've been.
This is so stinkin' awesome! I love the new look. Thanks so much for doing the tutorial. I'm going to try to talk my hubbie into trying it. :)
Very nice-it looks wonderful
wow!!! That is impressive!
Beautiful patio…hope to see it with all the furniture soon!
FANTASTIC!! It looks wonderful and don't you love to save money and get such satisfaction from doing it yourself??? Loved the photo of your boys sitting at the table, brings back memories of my "earlier" life. Enjoy
beautiful!! It'd be a big job, but I wonder how that would look around our pool… hmm. (I better be careful. My husband is going to disconnect the internet. lol.)
This is amazing!!!
Lots of work but well worth the effort!!
Love it! love it! love it!
wow.. I applaud you on a job well done. it looks Fabulous~!
Sonny
My mom came over to ask me if I could help prep the house for the surprise party that she is hosting this coming July 25th. the event is going to take place in our patio at home, and I think we need to do something with our patio because it looks bare and uninviting. I came across your blog while I was searching for patio design ideas and, yes, you guys did a good job with your patio. It is well-polished and very attractive. I'm going to drop by our local store that sells tiles and flooring (Sarasota). I have searched their site earlier and I have found the perfect (Sarasota) tiles for our patio. Hope to finish everything before the main event. Well, wish us luck.
Thanks for sharing this great post!
Great job on the patio. I am going to do this to ours just as soon as we get back to the high 80’s and low 90’s in AZ! Thank you so much for sharing this.
I am new to tipjunkie.com and while searching ideas for our new home; I ran across your patio. I absolutely LOVE it!! My husband and I knew we wanted to stain our concrete and I can’t wait to show him the tile look. Thanks for sharing; I now feel more prepared to take this project on this summer:)
Our plain drab patio has been making me crazy for a while — love the area, but the cement was … well it was cement. So my husband and I started looking for ideas on painting our patio — came across your pictures – it looks fabulous! Thanks for the tutorial too — what to buy, how to clean it — all of it … we followed the instructions and WOW, our project came out really, really great! We did two colors to make it look like two different “tiles” — it was a fun project!! Thanks for sharing your pictures, how to do it and offering inspiration to all of us do-it-yourselfers :)
Thank you,
Margaret
Oh my! For me, this is your best DIY project ever. I’m at a loss for words. AWESOME!
Was it expensive to do the stained concrete?
Looking over your patio pictures, I thought you had laid tiles over the concrete and a light bulb went off in my head, why can’t we do that to our ugly concrete breezeway? Then I read and look at tuitorial and found out how you did it. How did you DH manage not getting the concrete stain on the brick walls of the house? We have vinyl siding and with our luck, some stain would spatter, so guess that idea can go in file drawer #13 but what a great job your DH did! We live in a gated, Sr. Citizens community and I’d have to get approval from the board and show exactly how it was going to be done, etc. I wonder if you can install tiles that look like that over a concrete breezeway?
I love how it turned out and how inexpensive it is. I would have stained the cement piece on the wall before the brick to make it look more like a baseboard to finish it off.
You and this wonderful project have been pinned for future projects. :D
Thanks!
Ok Guess what my husband and I will be.doing this weekend. Great Job!!!!
I simply love this. We, too, have an ugly concret floor on our back Lani. We built our house (or had it built) 5 yrs ago and ran out of $ before we could tile the Lani. We have talked about staining it . I love the idea of the tile look. However, I am not sure my back and knees could take the wear .I am a little older than you ! But maybe my son would be able to help hubby with it ! My one question was why you put the second coat on with a rag and not the roller? Love this and God Bless !
I saw you on Hometalk.
BEAUTIFUL!!
So it’s now been 2 years since you’ve done this.
Are you still pleased with the results?
Have you had to re-stain or re-seal?
Thank you so much!
Turned out really nice. Will inspire me to stain our front porch. Have been wanting to do it for a long time.
Blessings,
Audrey Z. @ Timeless Treasures
Great job!!! Thanks for sharing all the details!!
Hello, I just found your site and was wondering since it has been two years plus some since you stained the patio at your home, how has it held up? Any thing came up that you can give us tips on? Did it hold up to your lil guys and furniture being moved around on it, and pets scratching it, and hot and then cold, dry and then wet weather?
I would love to hear your thoughts on this product now. We have a long concrete wall and patio that I would love to transform and take from bleak urban grey to beautiful and warm.
I’d like to hear that too. We have 90m2 of concrete right in front of our door. It could do with a make-over but am not looking forward to spend the time only to do it all again in a couple of years… Please let us know?
It looks smashing by the way, well done!
You guys did a super job! I think it looks GREAT. :)
Looks fantastic! I would like to do a patio makeover very soon.
After looking through your pics, I have an unrelated question. I love that you have a chandelier above the patio. Did you have to do anything special to install that because its outside? I enjoy DIY projects, but I’m a novice. Thanks in advance!
What type of tape did you use? Your patio is defiantly an inspiration. I can’t wait to get started on our patio. Thank you for sharing.
..I’m wanting to do this on a sidewalk…to simulate brick…will this product be slick if wet after a rain or a sprinkler…I would certainly appreciate your opinion…
I took a different tack using same products. Taped off random “stones” and spritzed them all first so drops would show up darker. Then just painted on stain with a brush. Used regular masking tape as geout lines.
Wish I could ad a picture! Was easier for me than measuring and attempting straight lines. Your porch looks great!
Thank you so much for posting. I have a project for my husband and I to do with minimal cost. Again, thanks for posting.
Thank you so much on telling us about how to do your concrete..what are smart lady you are to come up with such a great idea..May God Bless You !!!!!!!!!!!!!!!
That was a lot of hard work, but beautiful results!
Thank you so much Lillace!
After all these years has the stain held up, such as fading, chipping etc?
Thanks can’t wait to try it!
Your stain job looks really, really great. The beauty of concrete is that is can be turned into so many different things. Keeping it level is important too. Lifting concrete with polyurethane foam can keep it level permanently.
Wow, this is such a good idea for you to do! It really does look like your added tiles to your patio. How long did it take you to do this whole thing? I’ve been wanting to add some for a while now, but I wasn’t sure how much I would spend on one. If I were to do this, I would definitely save a ton of money.
We completed this project in a day and a half.
How has this held up over the years? It looks awesome and I am thinking of doing this to my backporch also. I get alot of evening sun….wondering it would fade. Thanks in advance!
That is a beautiful transformation. I like to try it on our patio. Good job
Wonderful idea. Will try it out. Thanks.
This looks amazing! Your instructions were so detailed and easy to understand. It has motivated me and my husband to GET BUSY!! Beautiful job. I’m using your tutorial…lol..
Angie
Looks great! I am sharing this on Pinterest.
Absolutely beautiful! Love the darker look! Matches well with your brick. I appreciate that you are extremely thorough in your post. I think this would look gorgeous around our pool. I may try the garage first. Thank you.
Hey can you do a an UPDATE how it has held up any chipping etc?… I was going to purchase the products but many reviews were saying that its paint and it comes right off….
Hi Ana! thank you for your comment. I wish I could give you a good review, but unfortunately, we moved the year after we completed this project on our home. We had the floor for two summers before we moved. The second summer, there were a few spots that I dabbed some stain on with a sponge, but that is it. Unfortunately, I can’t speak for any more wear and tear after that. Wish I could be of more help. Sincerely, Traci
you have really beautiful patio. Loved the work done on concrete.
This is beautiful! Makes me want to do this to my carport floor.
Thank you for sharing.
Sue
Traci…do you advise 2 coats of sealer? Would that help with wear and tear or is it too slick? It’s beautiful!
Erinn, I will be honest, I am not sure. We moved shortly after doing that patio, so I’m not sure how well it held up, but definitely more sealer couldn’t hurt. And I think some sealers come in a more matte finish now? We did that project in 2010! CRAZY!