
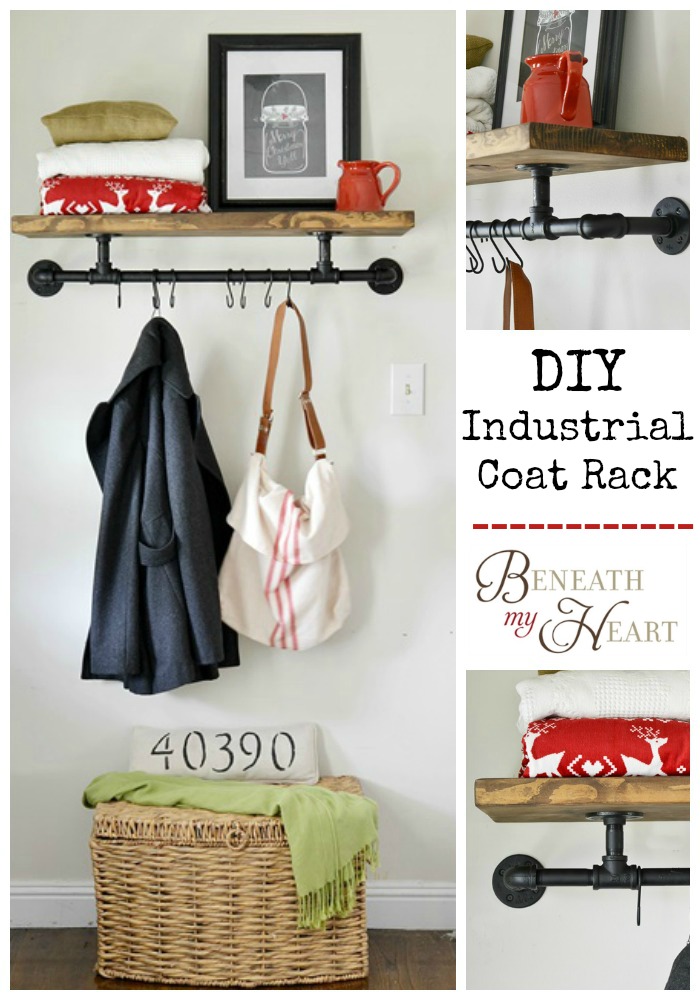
DIY Industrial Coat Rack
Hey friends!
I am excited to share with you an industrial coat rack I made!
As part of the Lowe’s Creative Ideas Blogger, I was asked to write a post this month about preparing for the holidays. I knew exactly what I wanted to do for this post! :)
I have always wanted to create a coat rack for our front door, so when guests come over, they have a place to hang their belongings.
So, I decided to make an industrial coat rack using some supplies I had left over from the industrial shelves in my boys’ room, and a few new supplies from Lowe’s.
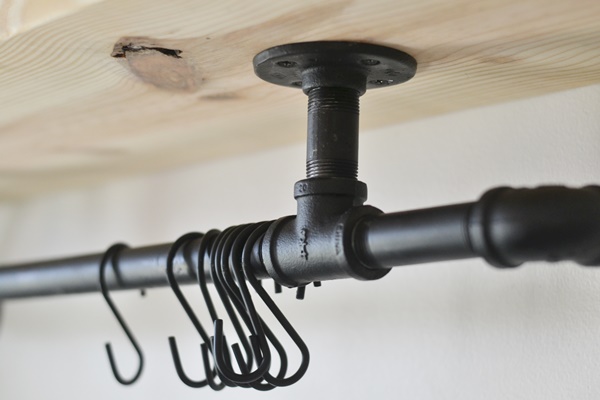
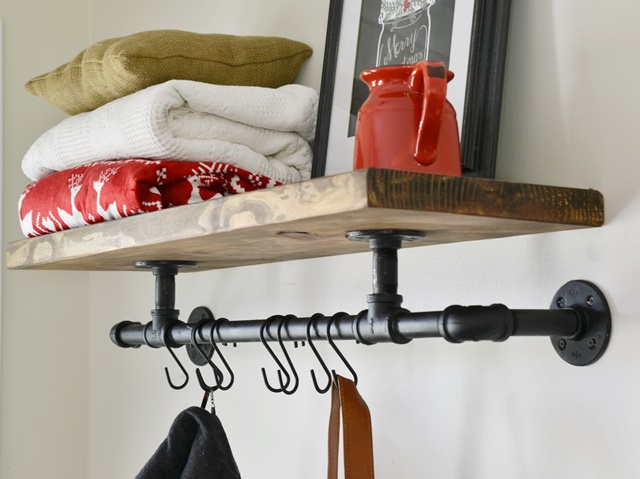
First of all, I attached together the pipes I wanted to use to create my shelf. I used the 3/4 inch black pipes from Lowe’s. They also come in 1/2 inch and 1 inch sizes as well.
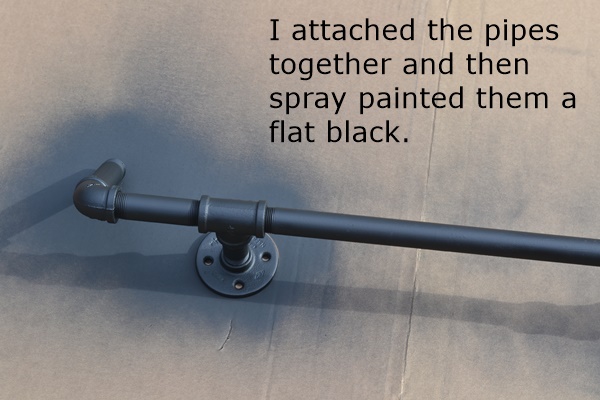
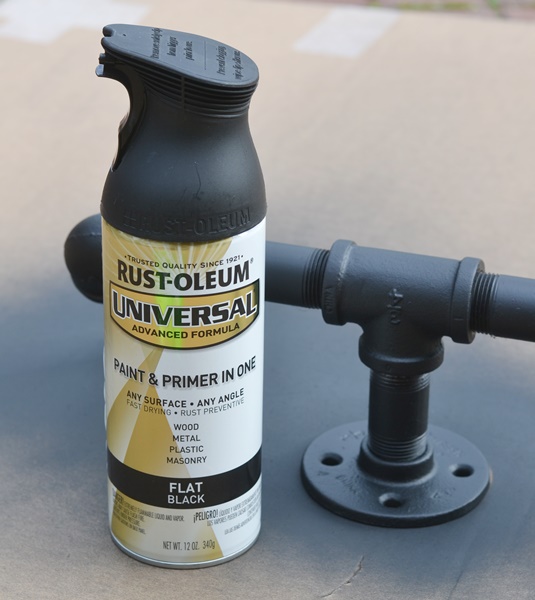
I used Rustoleum spray paint in a flat black.
For the hooks, I bought some plant “s” hooks in the plant section at Lowe’s.
The hooks in the hardware section were not big enough to fit around my 3/4 inch pipes, so I had to get creative and find these in the plant section! :)
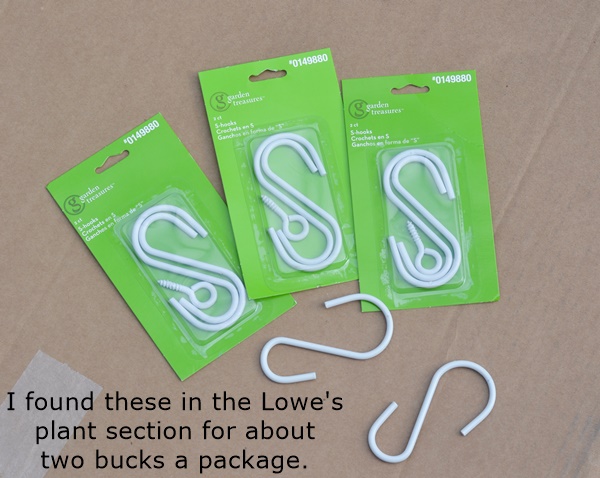
I spray painted the hooks as well.

Now, this next picture explains how I decided to put my pipes together. Since studs are 16 inches apart, I decided to make my shelf 32 inches long so I could attach the flanges to the studs in the wall.
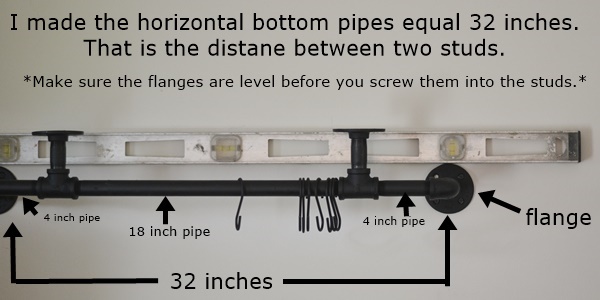
You can see that to create a horizontal pipe that was 32 inches long, I used these pieces in this order:
elbow, 4 inch pipe, T fitting, 18 inch pipe, T fitting, 4 inch pipe, elbow
Make sense?
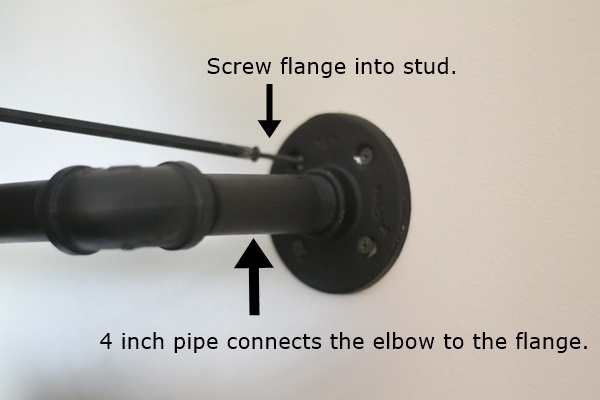
Then I used a 4 inch pipe to attach the elbow fitting to the flange.
You want to be using a level during this whole process to make sure your shelf will be level when you attach it.
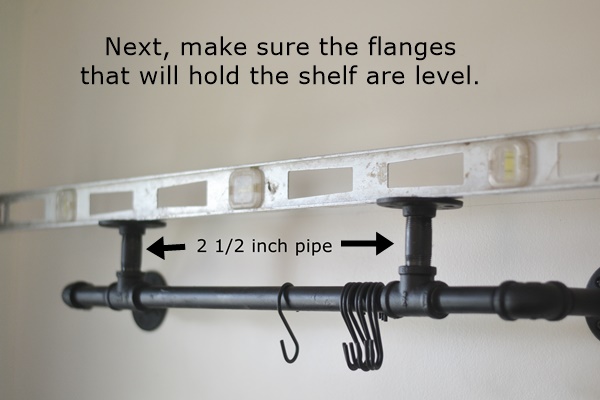
I used 2 1/2 inch pipes going vertically from the T fitting to the flange that would attach to the shelf.
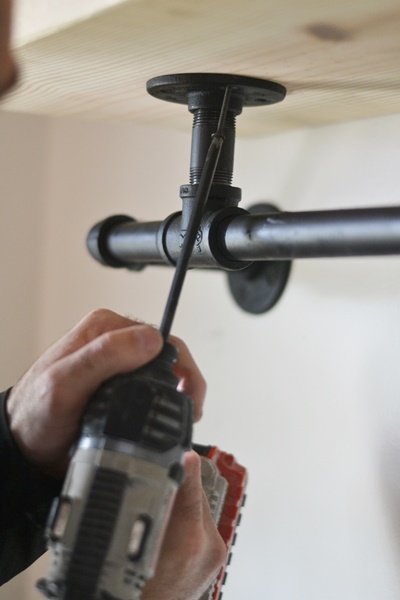
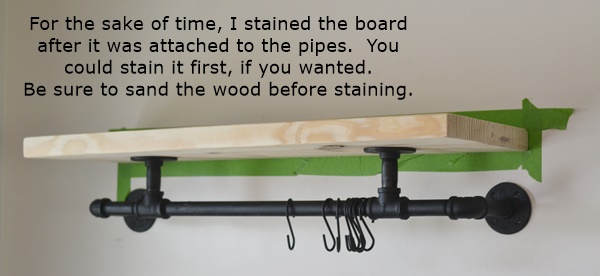
Attach the flange to the wood with wood screws (or we used drywall screws.)
Next, I tape off the wood and stained it with a MinWax stain in Dark Walnut.
Then I used a wipe on poly in Satin and let it dry.
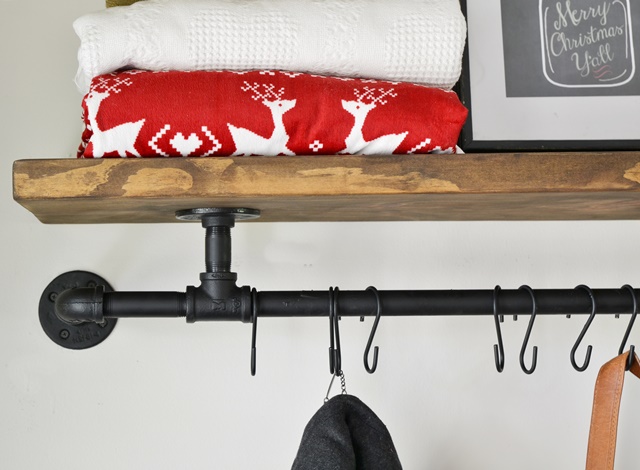
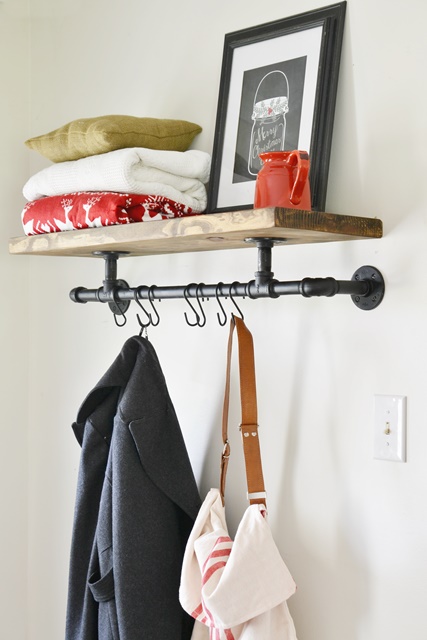
I love how my shelf turned out!
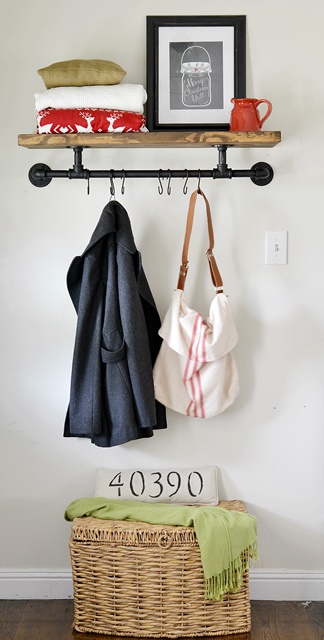
It is perfect for hanging our coats and purses, and of course, the shelf will be fun to decorate for each holiday!
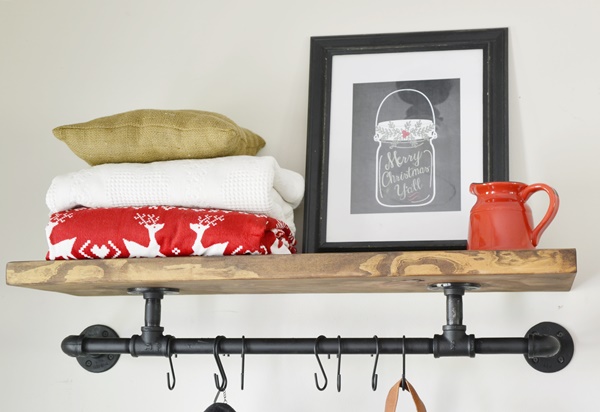
For the winter months, I am going to enjoy storing extra throws and pillows on my shelf.
I have a feeling I will be using this a LOT in the future!
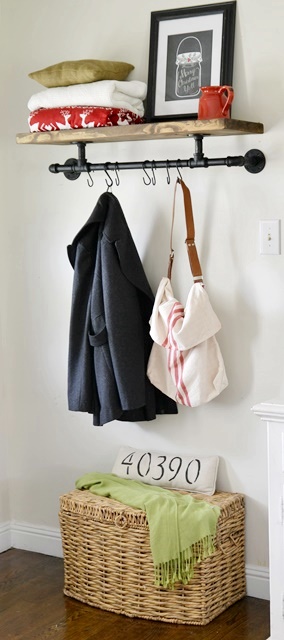
I added a basket underneath my shelf. I will be great for shoe storage or maybe some more blankets!
It might be fun to find a small bench for that space too.
Now I am ready for my guests to arrive! Come on over, y’all!
Be sure to check out the free Lowes Creative ideas magazine and app this month.
There are some great DIY project ideas for the holiday season!
Click the badge below to sign up for the magazine.
![]()
Disclosure: I am a Lowes Creative Ideas blogger and participate in monthly sponsored challenges by Lowe’s. All opinions and ideas are my own.
Where is this located in your home? It is really neat and thanks for sharing.
God Bless
What a good use of space. Love it!
Traci, you’re brilliant! This looks wonderful and will be so useful! We have a coat closet, but it’s stuffed full of OUR coats, so there’s no place for guests to hang their coats. This is a great solution. And you were so clever to keep looking until you found hooks of the right size!
Great tutorial! The shelf is also a wonderful place for guests to put their hats, too.
VEry nice inspiration DIY!
It is a beautiful fit for the space, Traci!
Oh I love this!! I’m out of wall space in my current home, but I’m pinning it for a future home! Have the s hooks paint scratched at all? Or scratched the pipes?
I love this!! Looks so great! I need a solution in storing my coats etc. this is s great idea! Great job!
Thank you, Felicia!
Hi Traci
This looks amazing and is exactly the inspiring look I was after in our first home.
Can I ask what is a “wipe on poly in Satin” that you used to stain the wood?
Thanks
Jeremy – London, UK
Hi Jeremy.
We did not stain the wood with the wipe on poly, but we did seal it with that. It comes in a can and you can get it at most home improvement stores. Minwax makes the one I use. You just wipe the poly on with a cloth and let it dry to seal the wood.
What size is the wood did you used for the shelf? It looks like the perfect length and width! I’m wondering which size to buy/cut from the hardware store.
Thanks!
Hi Kirsten! We used a 2 x 12, and we cut it the length we needed it. We used the rest of the wood for another project. The people at Lowe’s could help you cut it. :)
Thank you so much for the inspiration! I made some very minor changes and made it a pots and pans rack for my kitchen. It is so functional and much cheaper than buying one!
That’s awesome! What a great idea! :)
That is so cool! May I ask what you estimate the cost of this since you made it for your pot and pans?
Hi! How much would the pipes for this project cost? (I saw you used left over from a previous project, but wanted to know what only these pieces would run me).
I love this so much. This is exactly what I’ve been looking for but not sure i can do it myself. So did you buy the pipes on line? Do you think i could get the pipes etc in a diy store like B&Q?
Thank you
Love this! Am thinking of using it in the laundry room for those few items I don’t put in the dryer!
All the items for this project came to over $70. Does this sound about right? Pricier than we expected.
Hey I am currently making the shelf and I really appreciate your tutorial on how to do it. I do have one question and that is when you attached the flange to the wall did you only use two of the holes one on top and one on bottom? I’m asking because in order to get them in a stud all four holes would not go into the stud on the wall Thank you in advance.
Hi Amy! I think we used screws in all four holes. The top and bottom screws went into the studs, and the screws on the side just went into the drywall for “looks.” They weren’t really functional, but we didn’t want to leave the holes empty. Does that make sense? Thanks!
Love it, do you make and sell these?
Do you know if they still sell this perticular type (Rustrolem flat black) of spray pain anymore?
/produce it?
I ‘m having trouble finding that particular color.
I see “Metallic Flat Black” and other brands of flat black paint + primer (in one),
Do you have a link maybe where they sell this?
I only checked on Amazon, I should probably look on Ebay, seeing as a lot of times they sell things that are no longer in production.
Thank you,
-H.
Hi Heather! I am sorry, I do not have a link for that paint. That was a project I completed many years ago. Thank you, Traci