
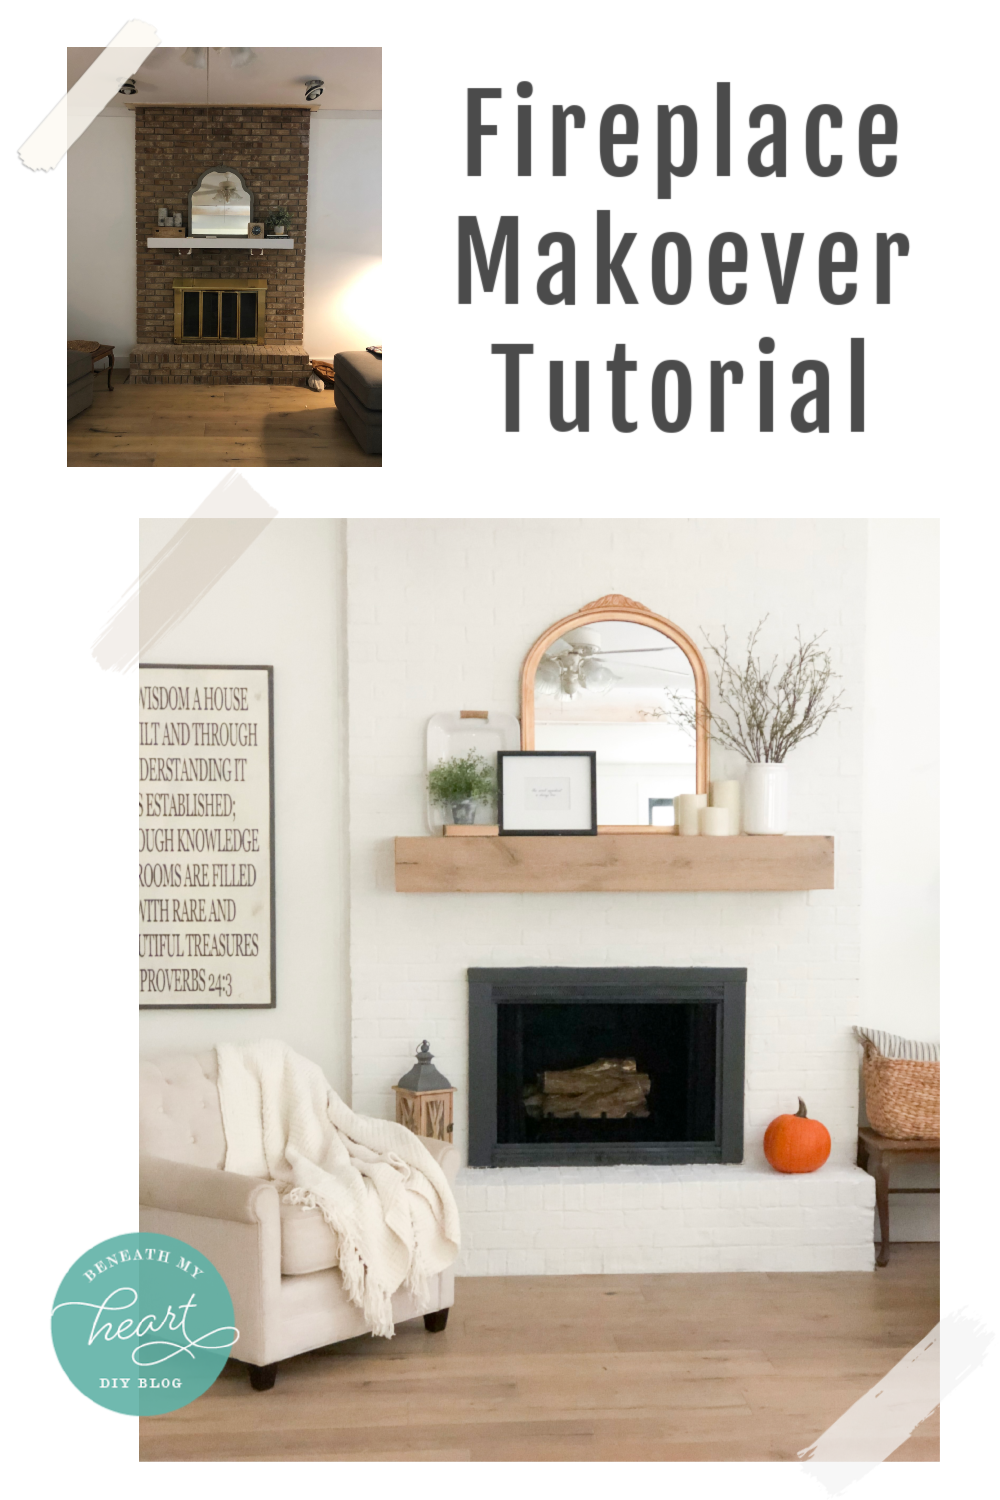
Our Fireplace Makeover Reveal
DIY FIREPLACE MAKEOVER REVEAL
Hey friends!
I want to share with you our Fireplace Makeover Reveal!
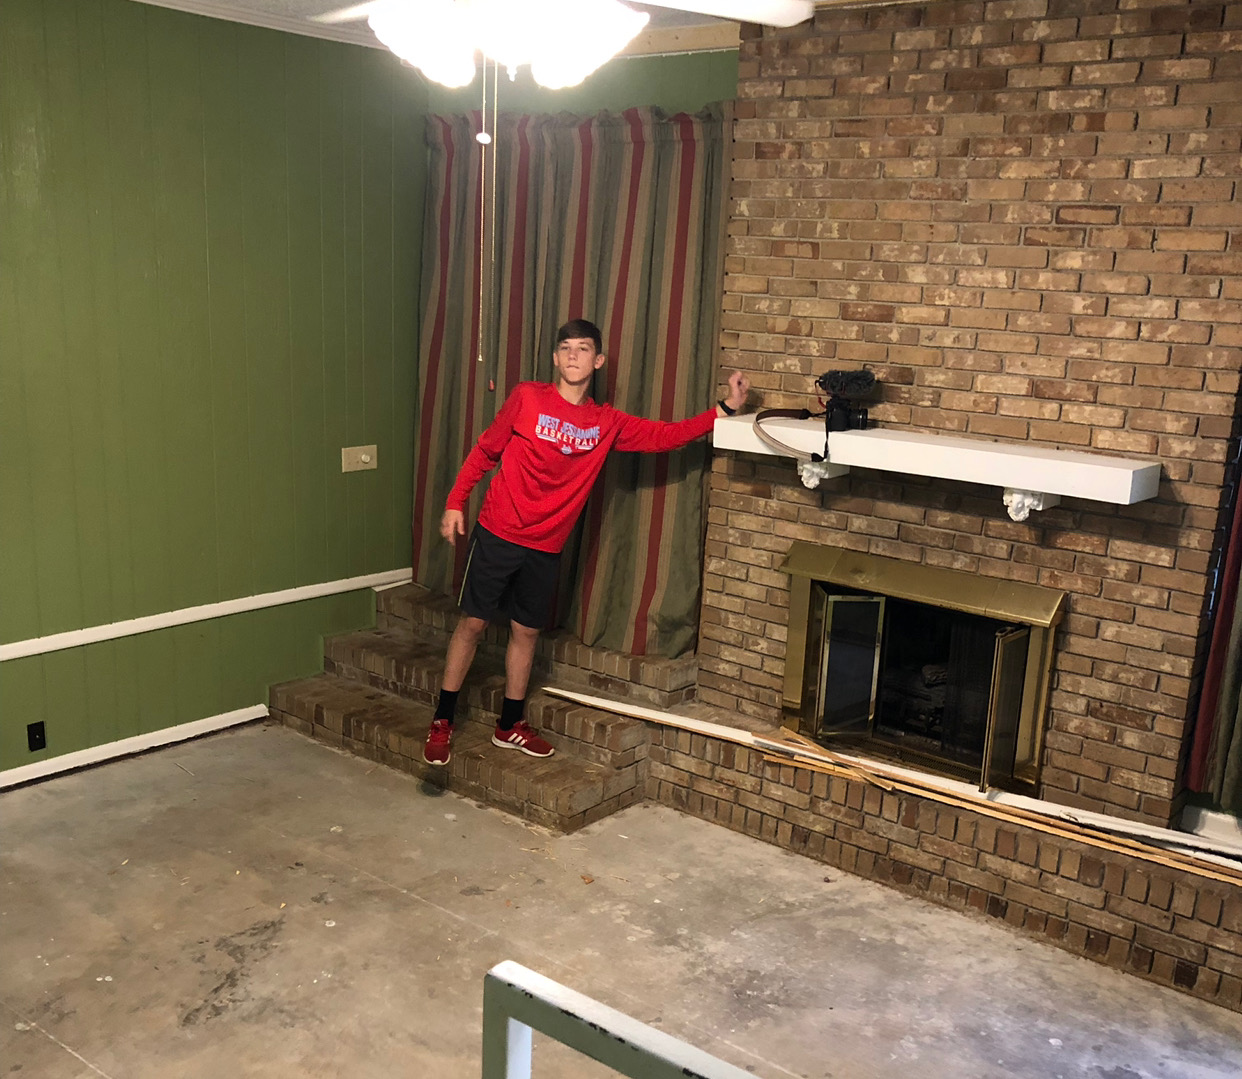
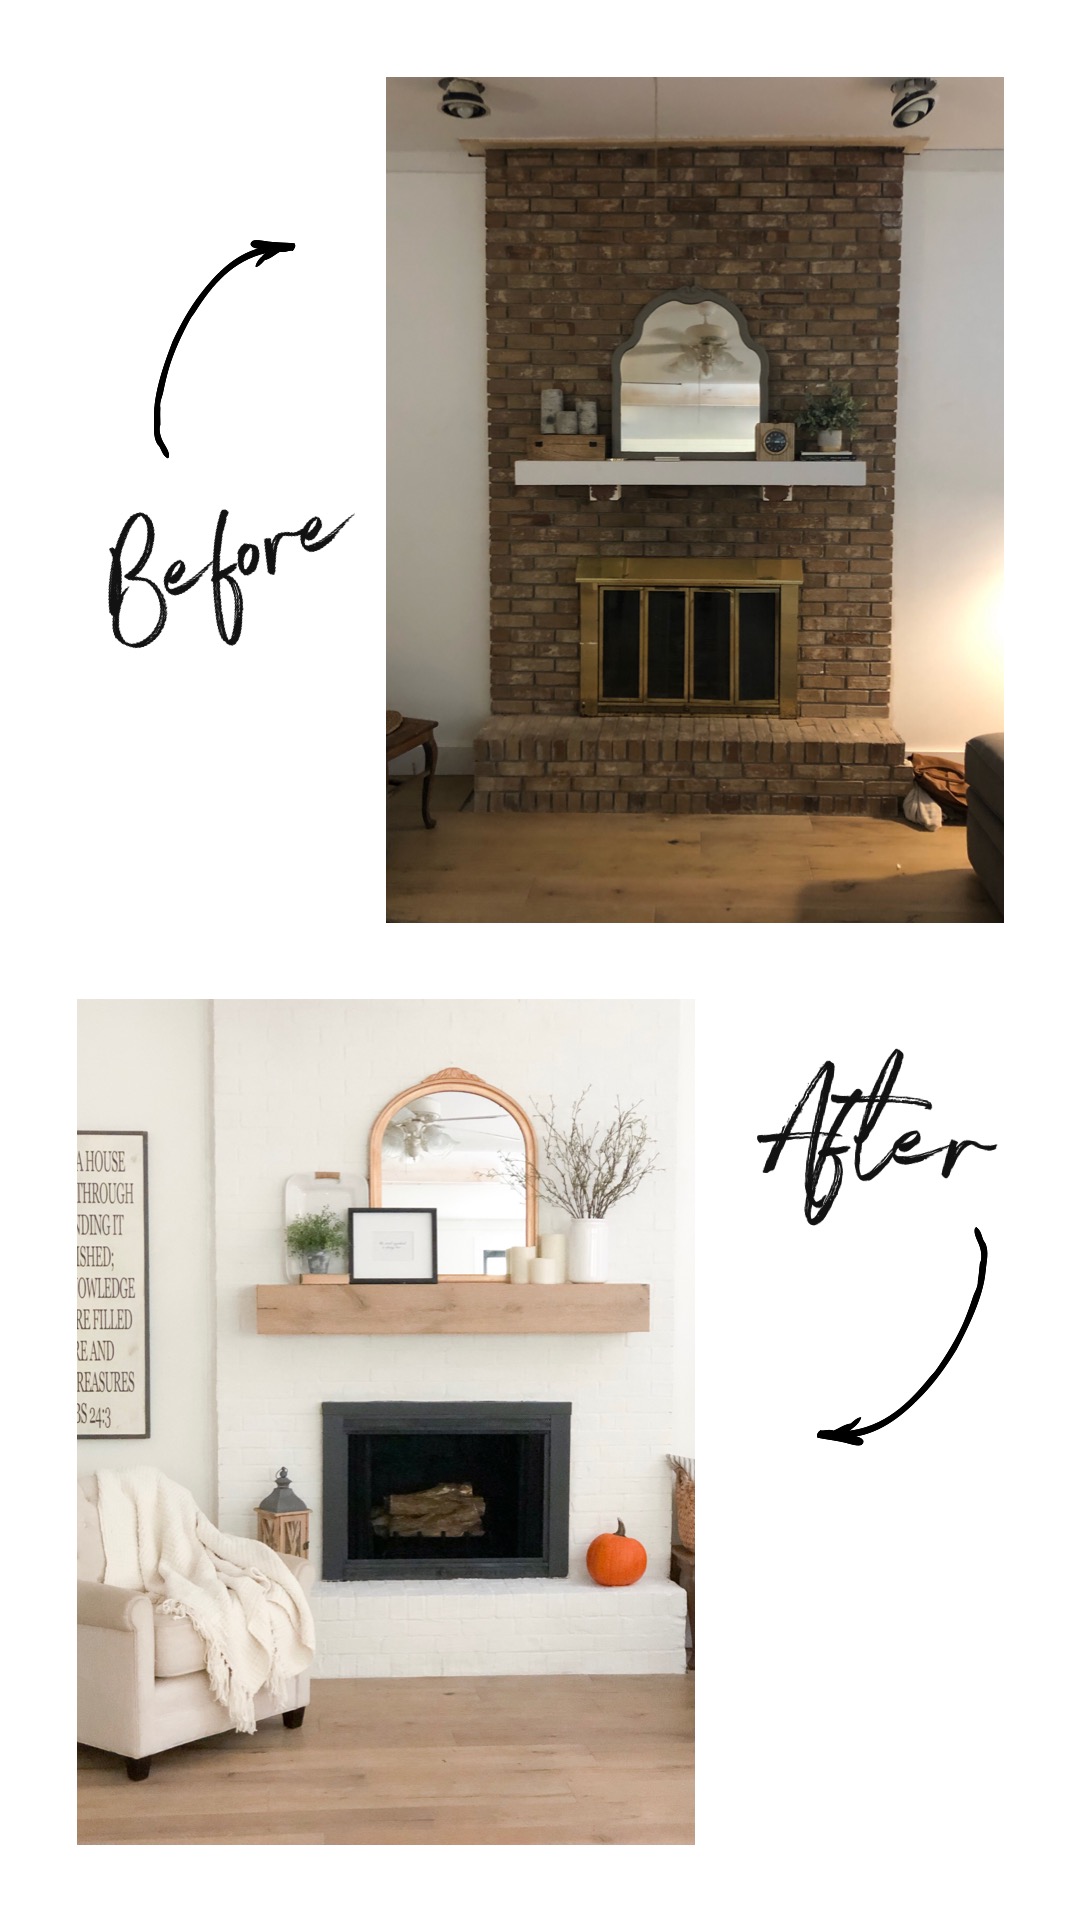
This is what our fireplace looked like when we bought the house…
And this is what is looked like just a couple of weeks ago…
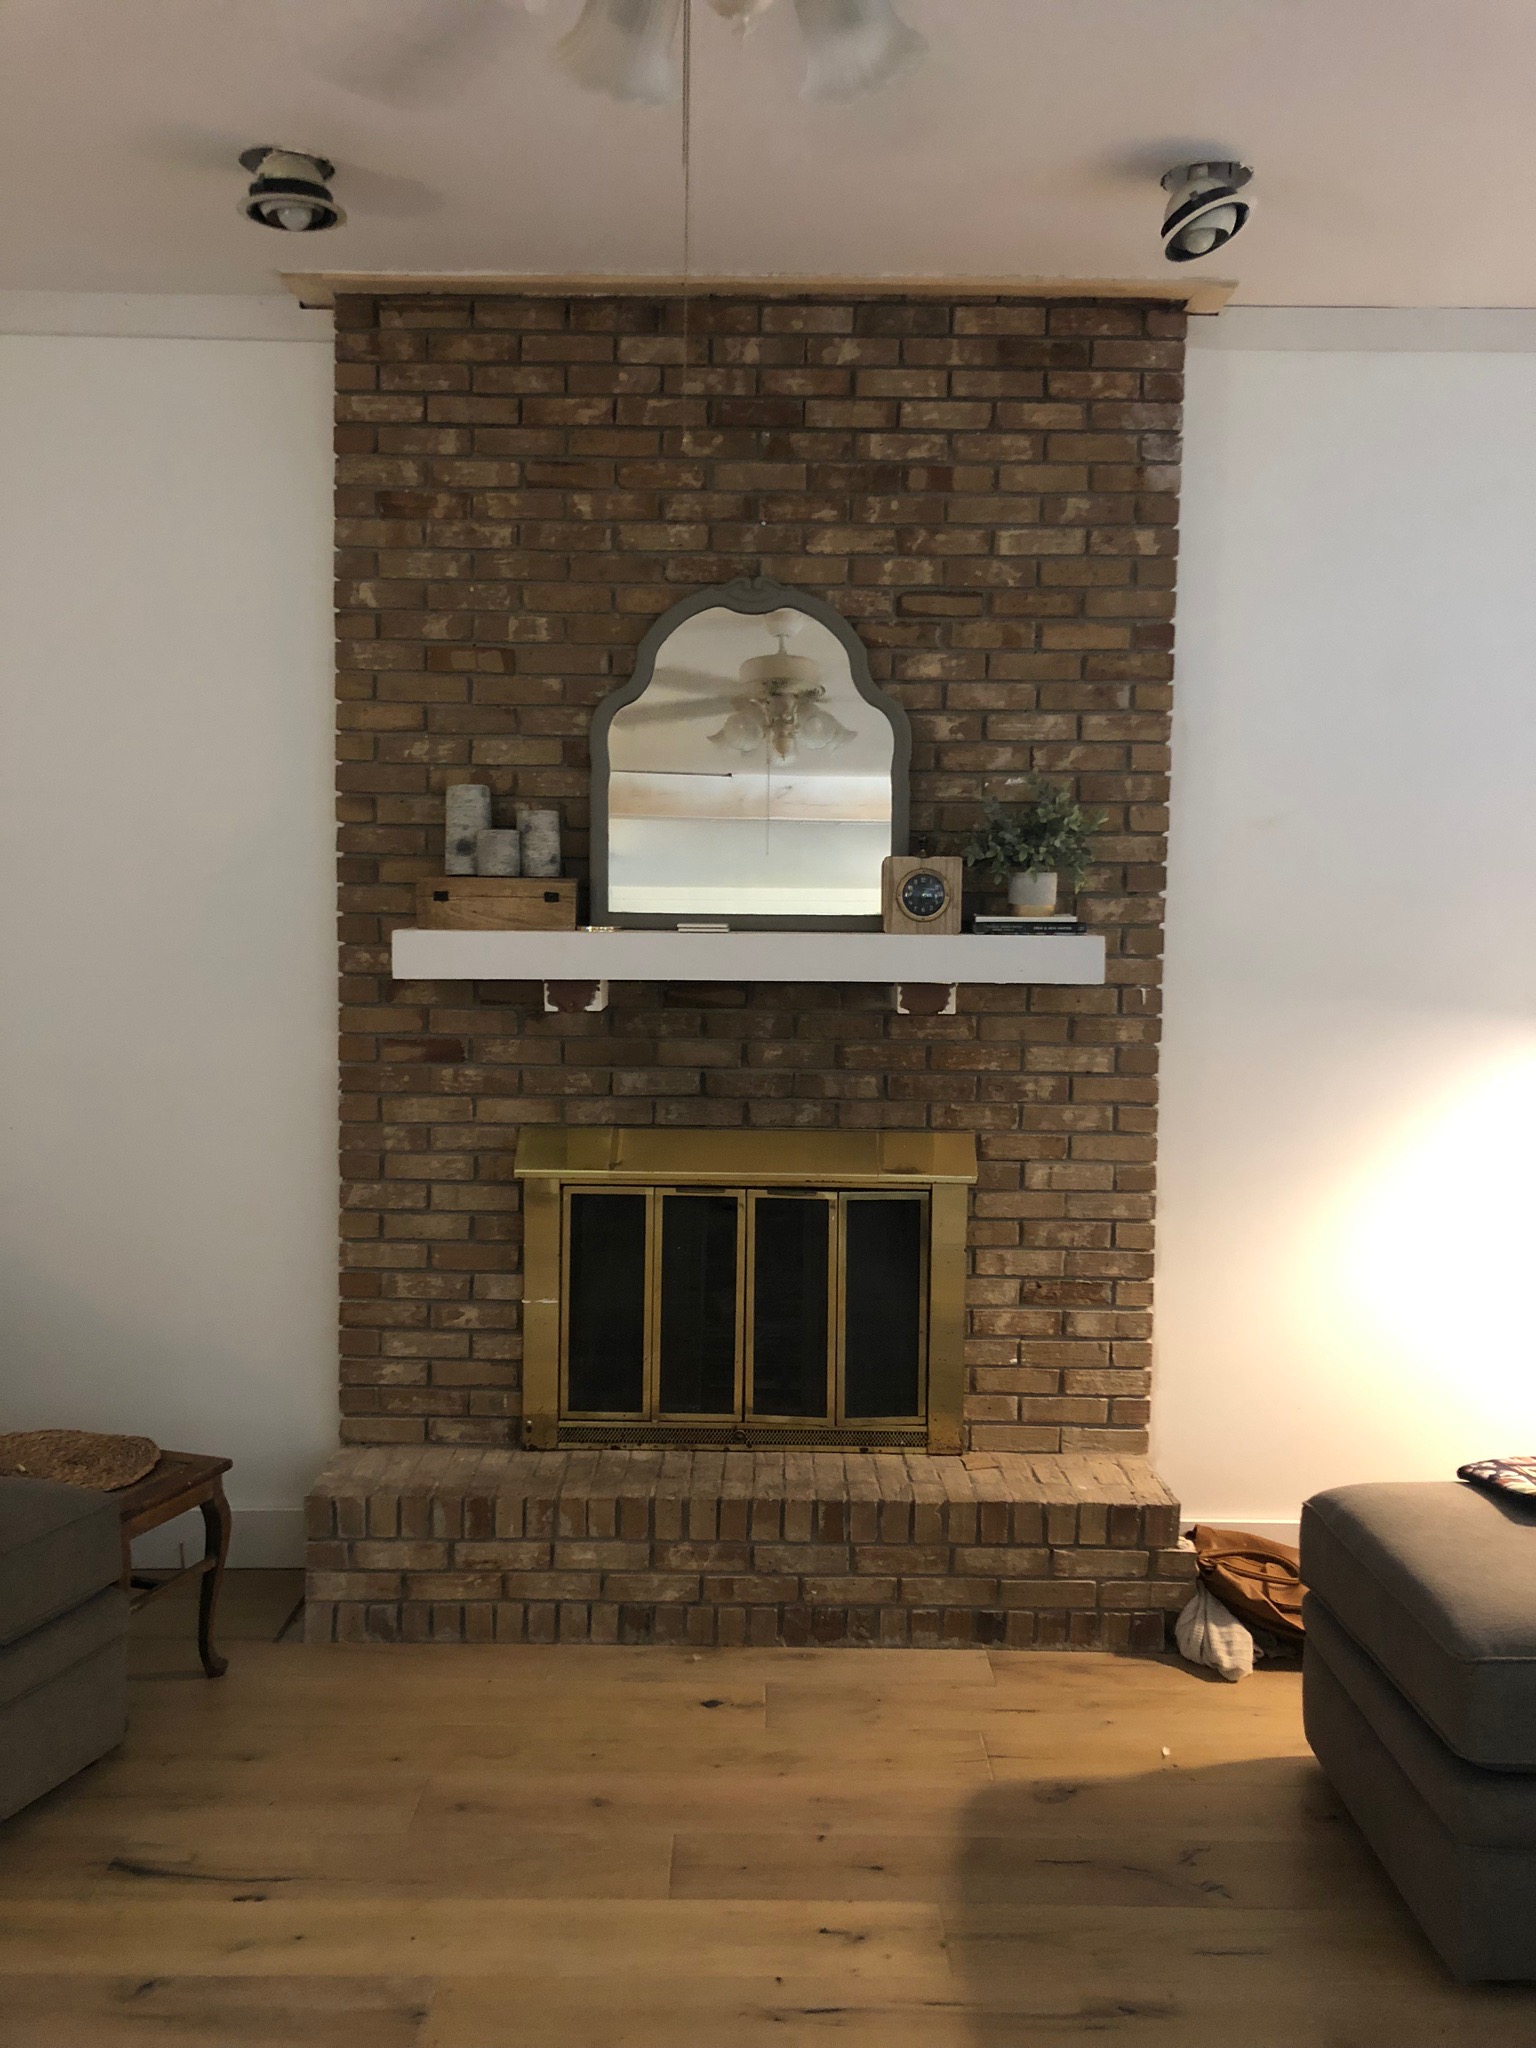
I was contemplating doing a stone fireplace, or maybe a concrete fireplace, or maybe even building a surround. I just wasn’t sure yet. But I needed to shot some photos of our flooring for Twenty & Oak, and I knew that I needed to do SOMETHING to the fireplace to make it look better.
So I started by priming and painting the insert…
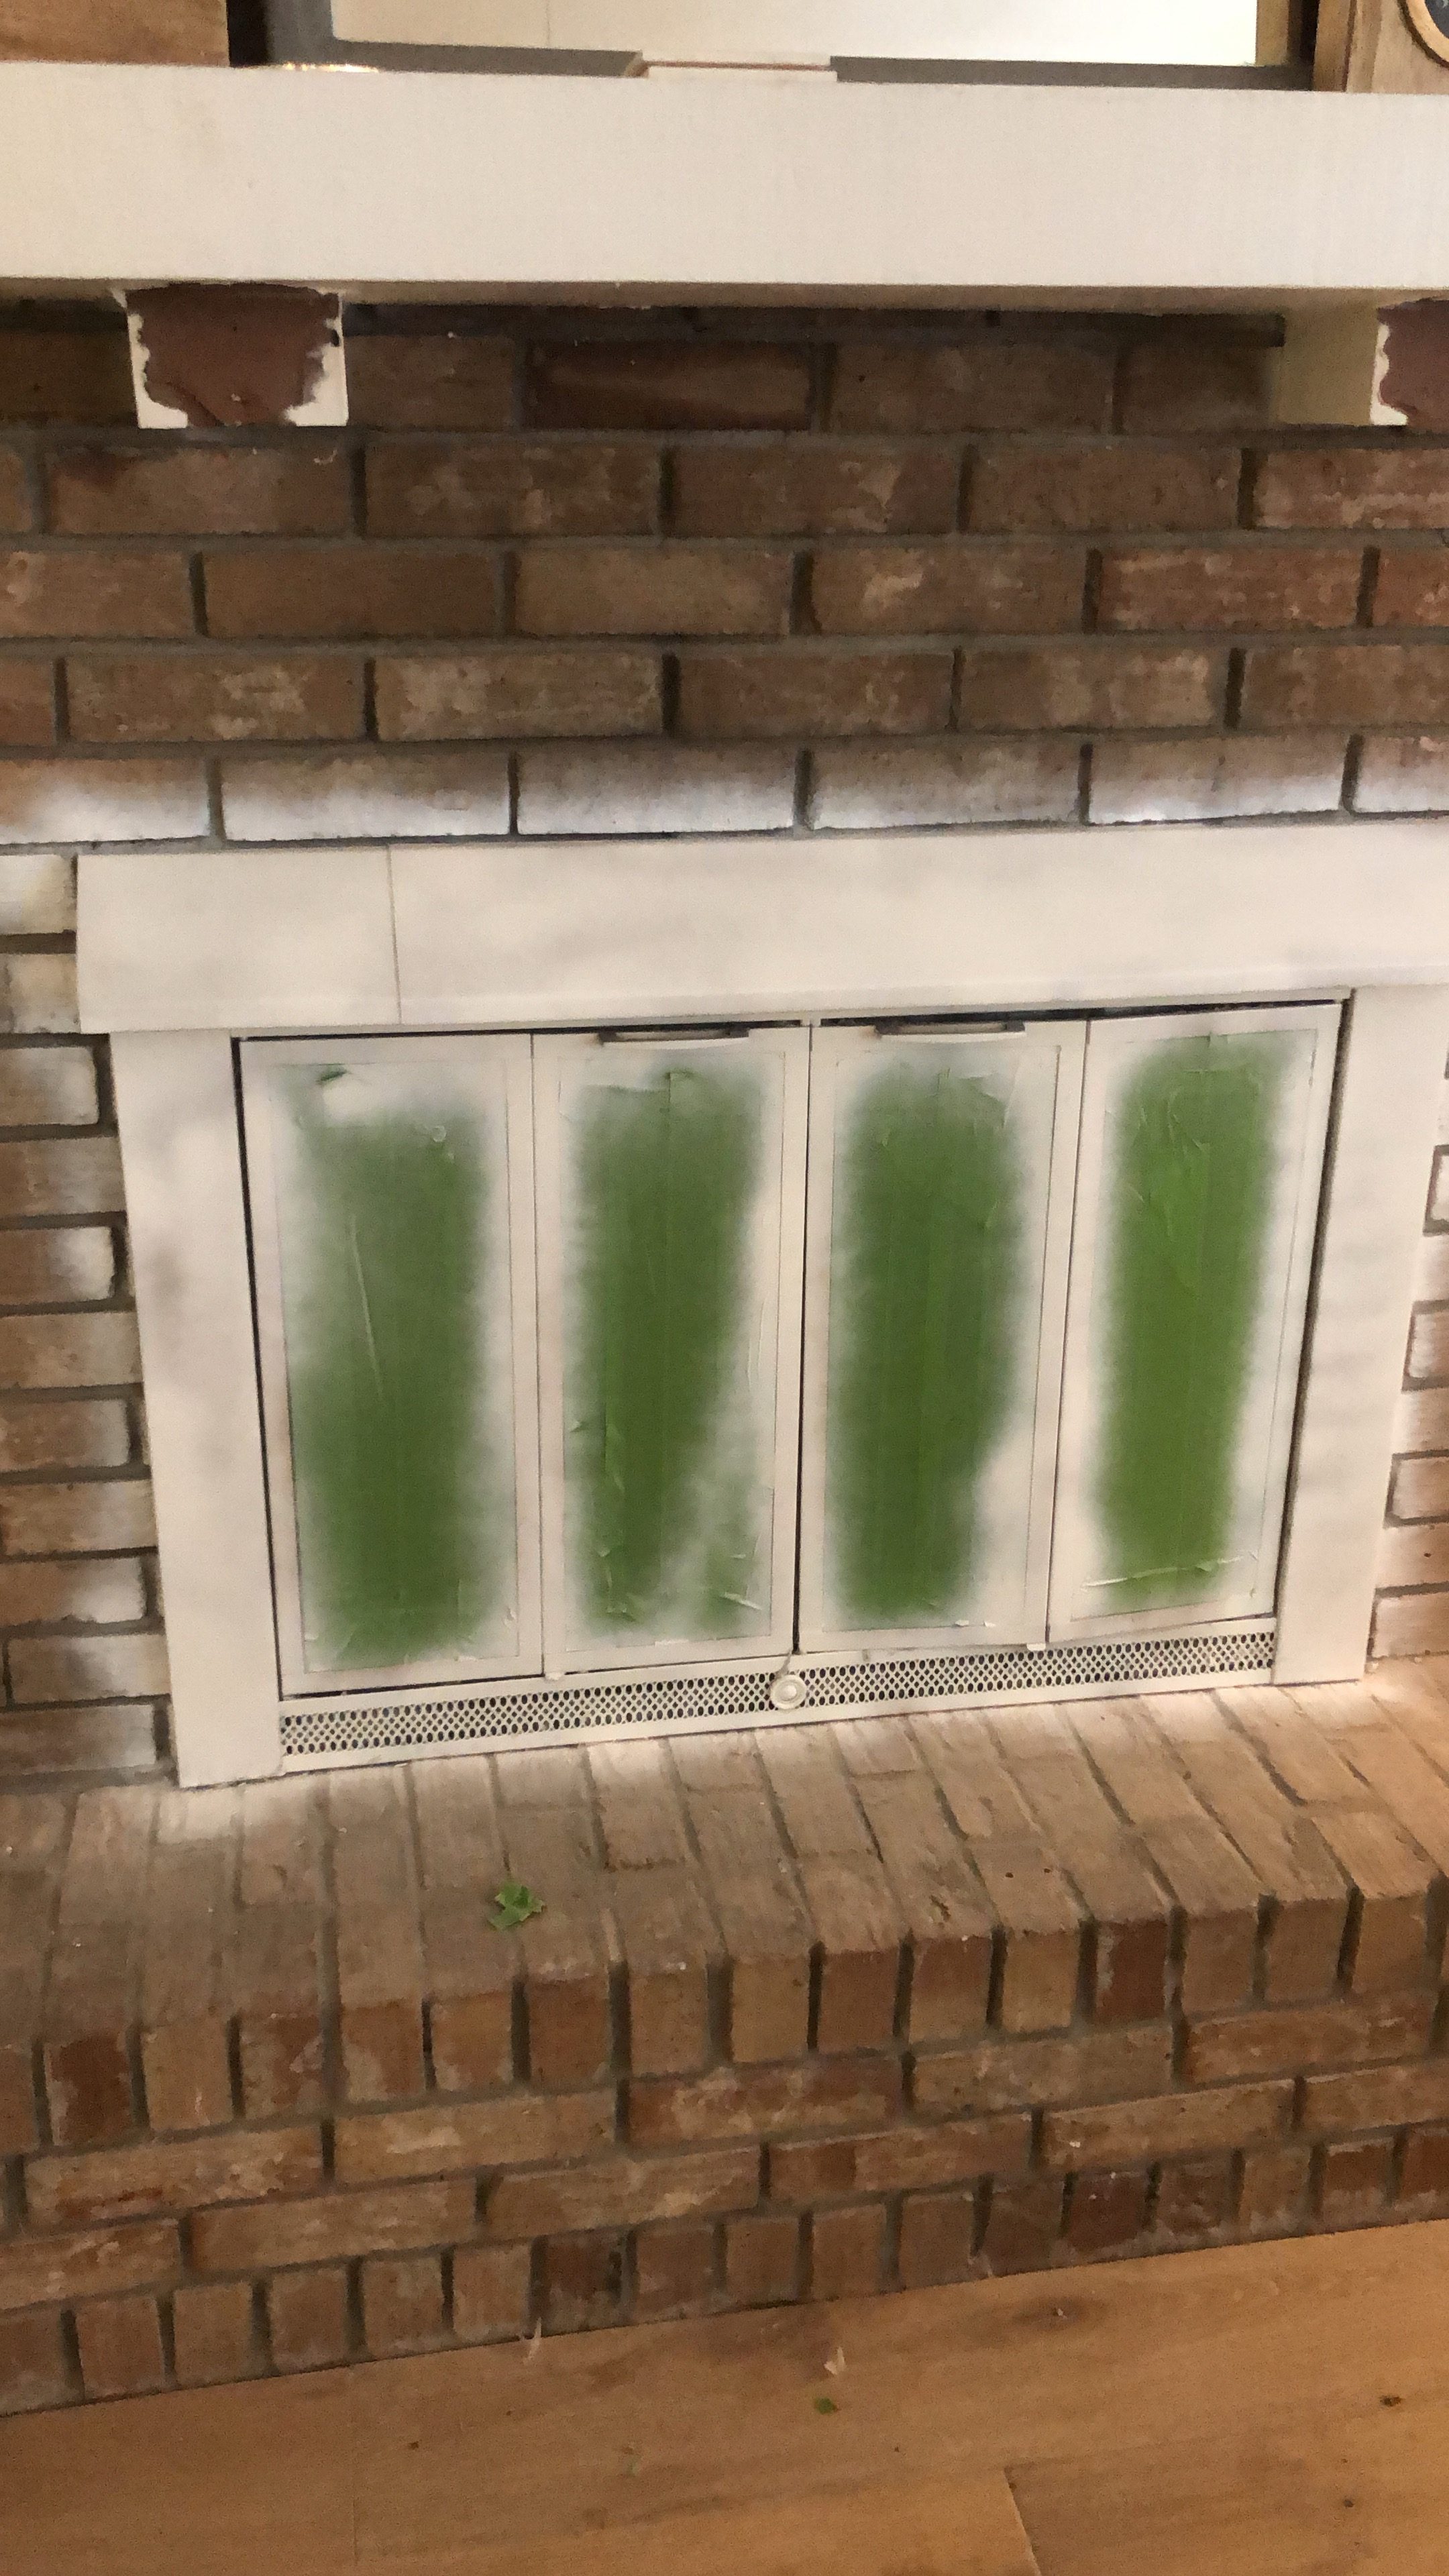
And then I decided to temporarily paint it white. But when I did, I couldn’t paint all the way into the joints with my roller, even though I used a thick nap.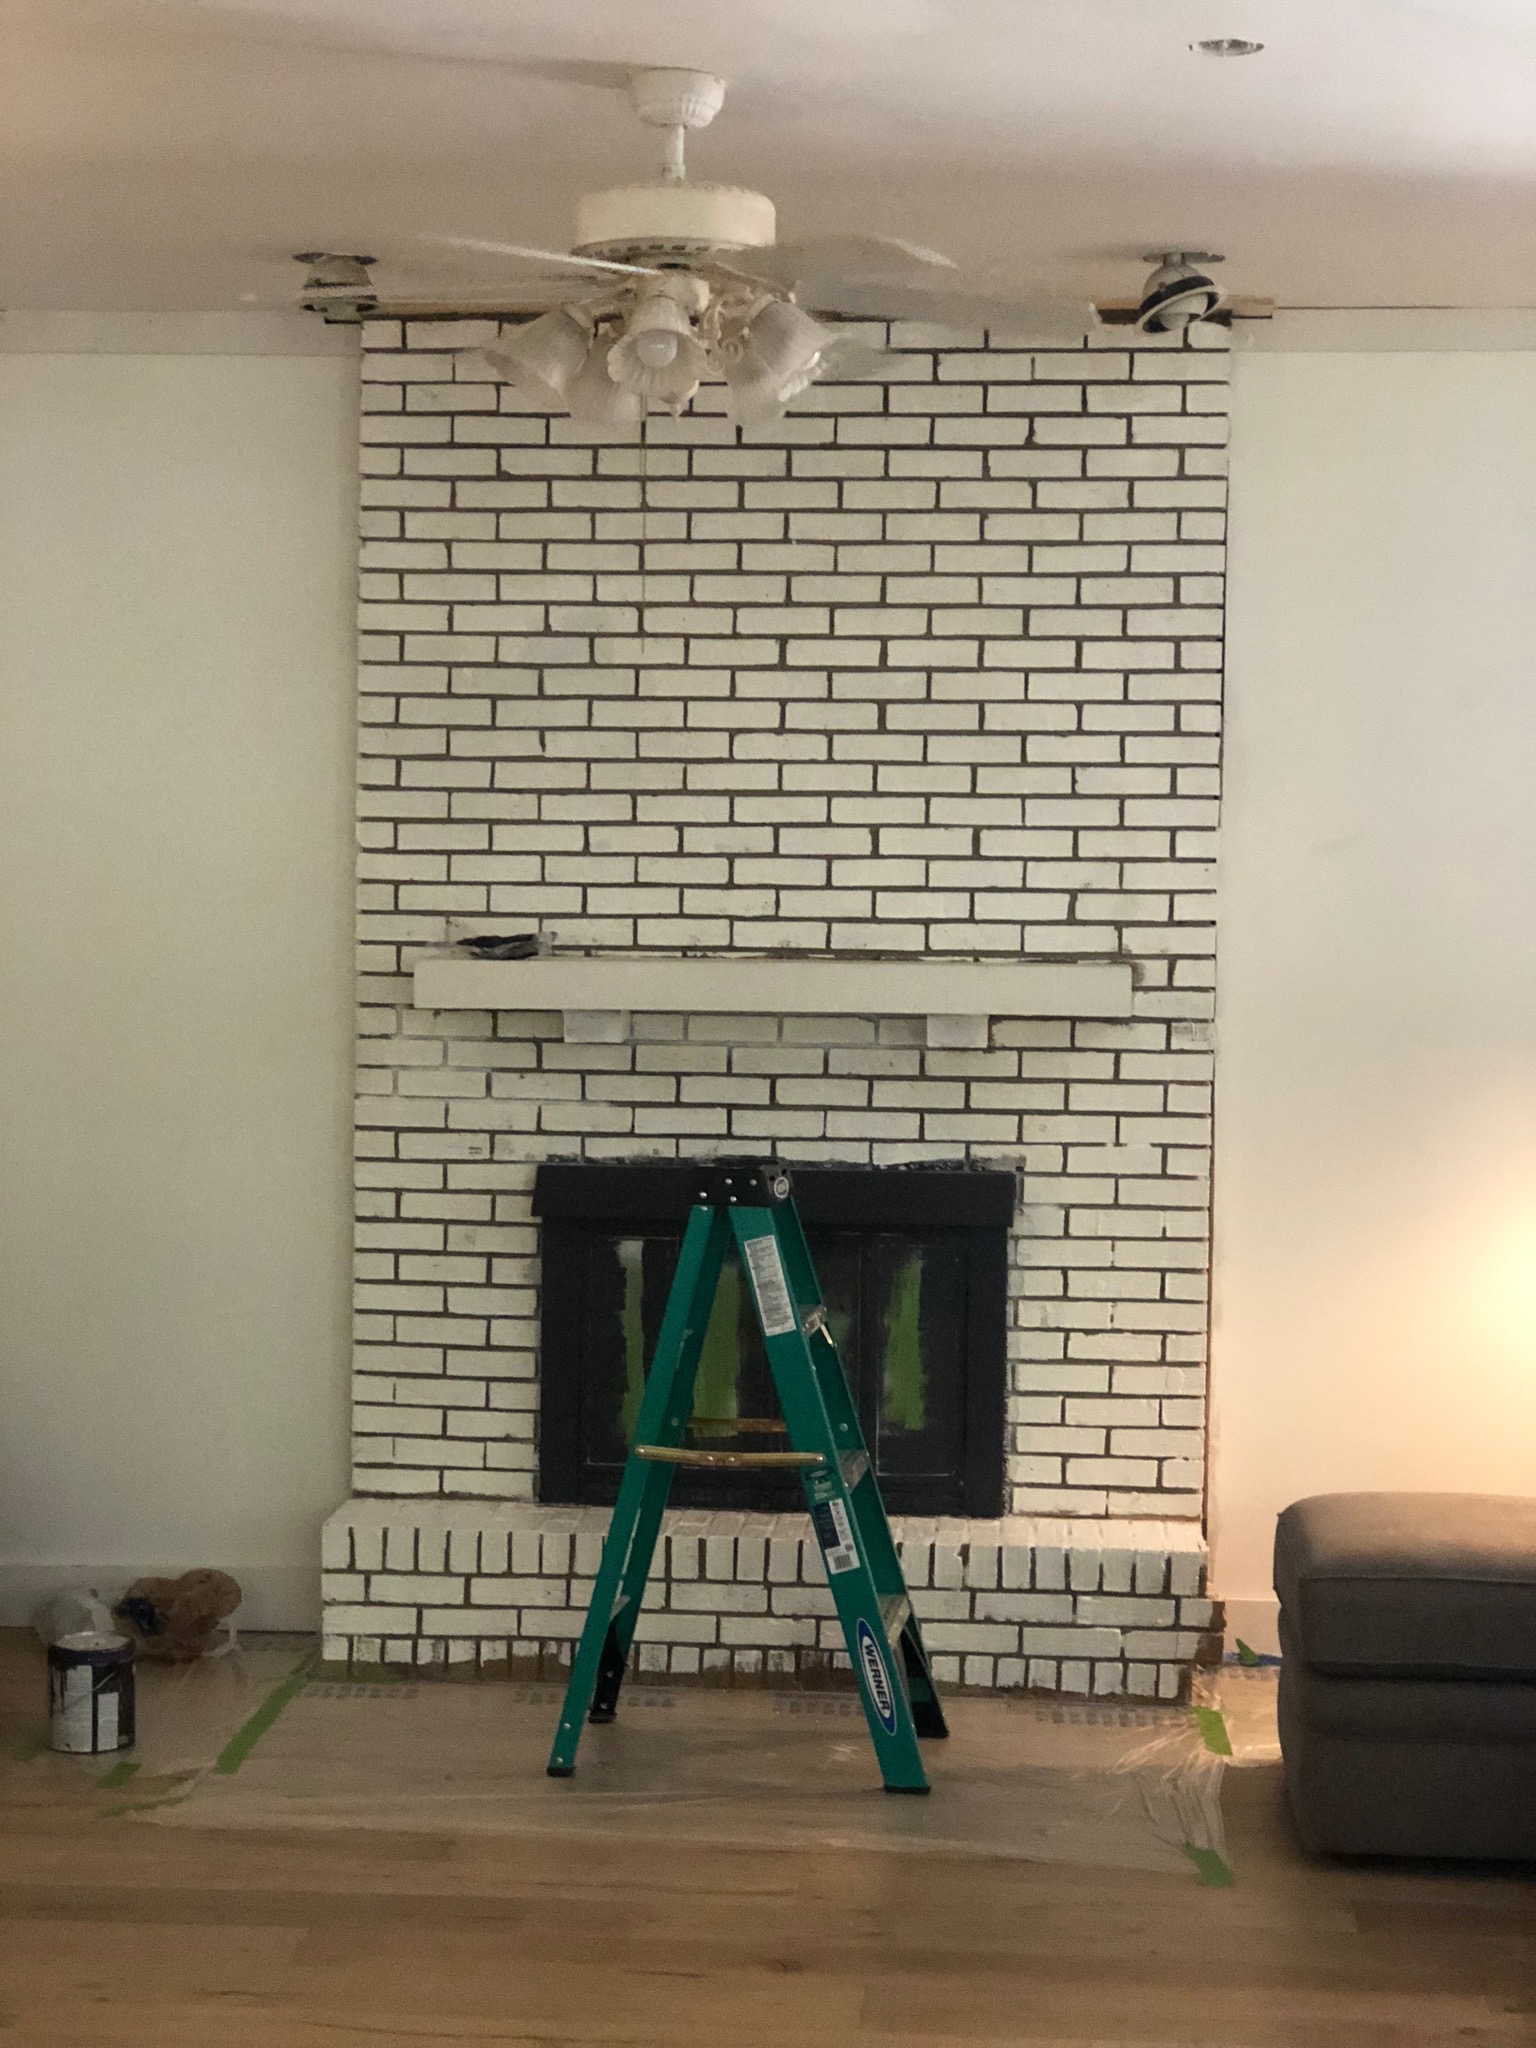
The joints were VERY deep, and I knew I would have to use a paint sprayer to paint them quickly. But I didn’t think I would like the look of the deep joints even if they were painted white.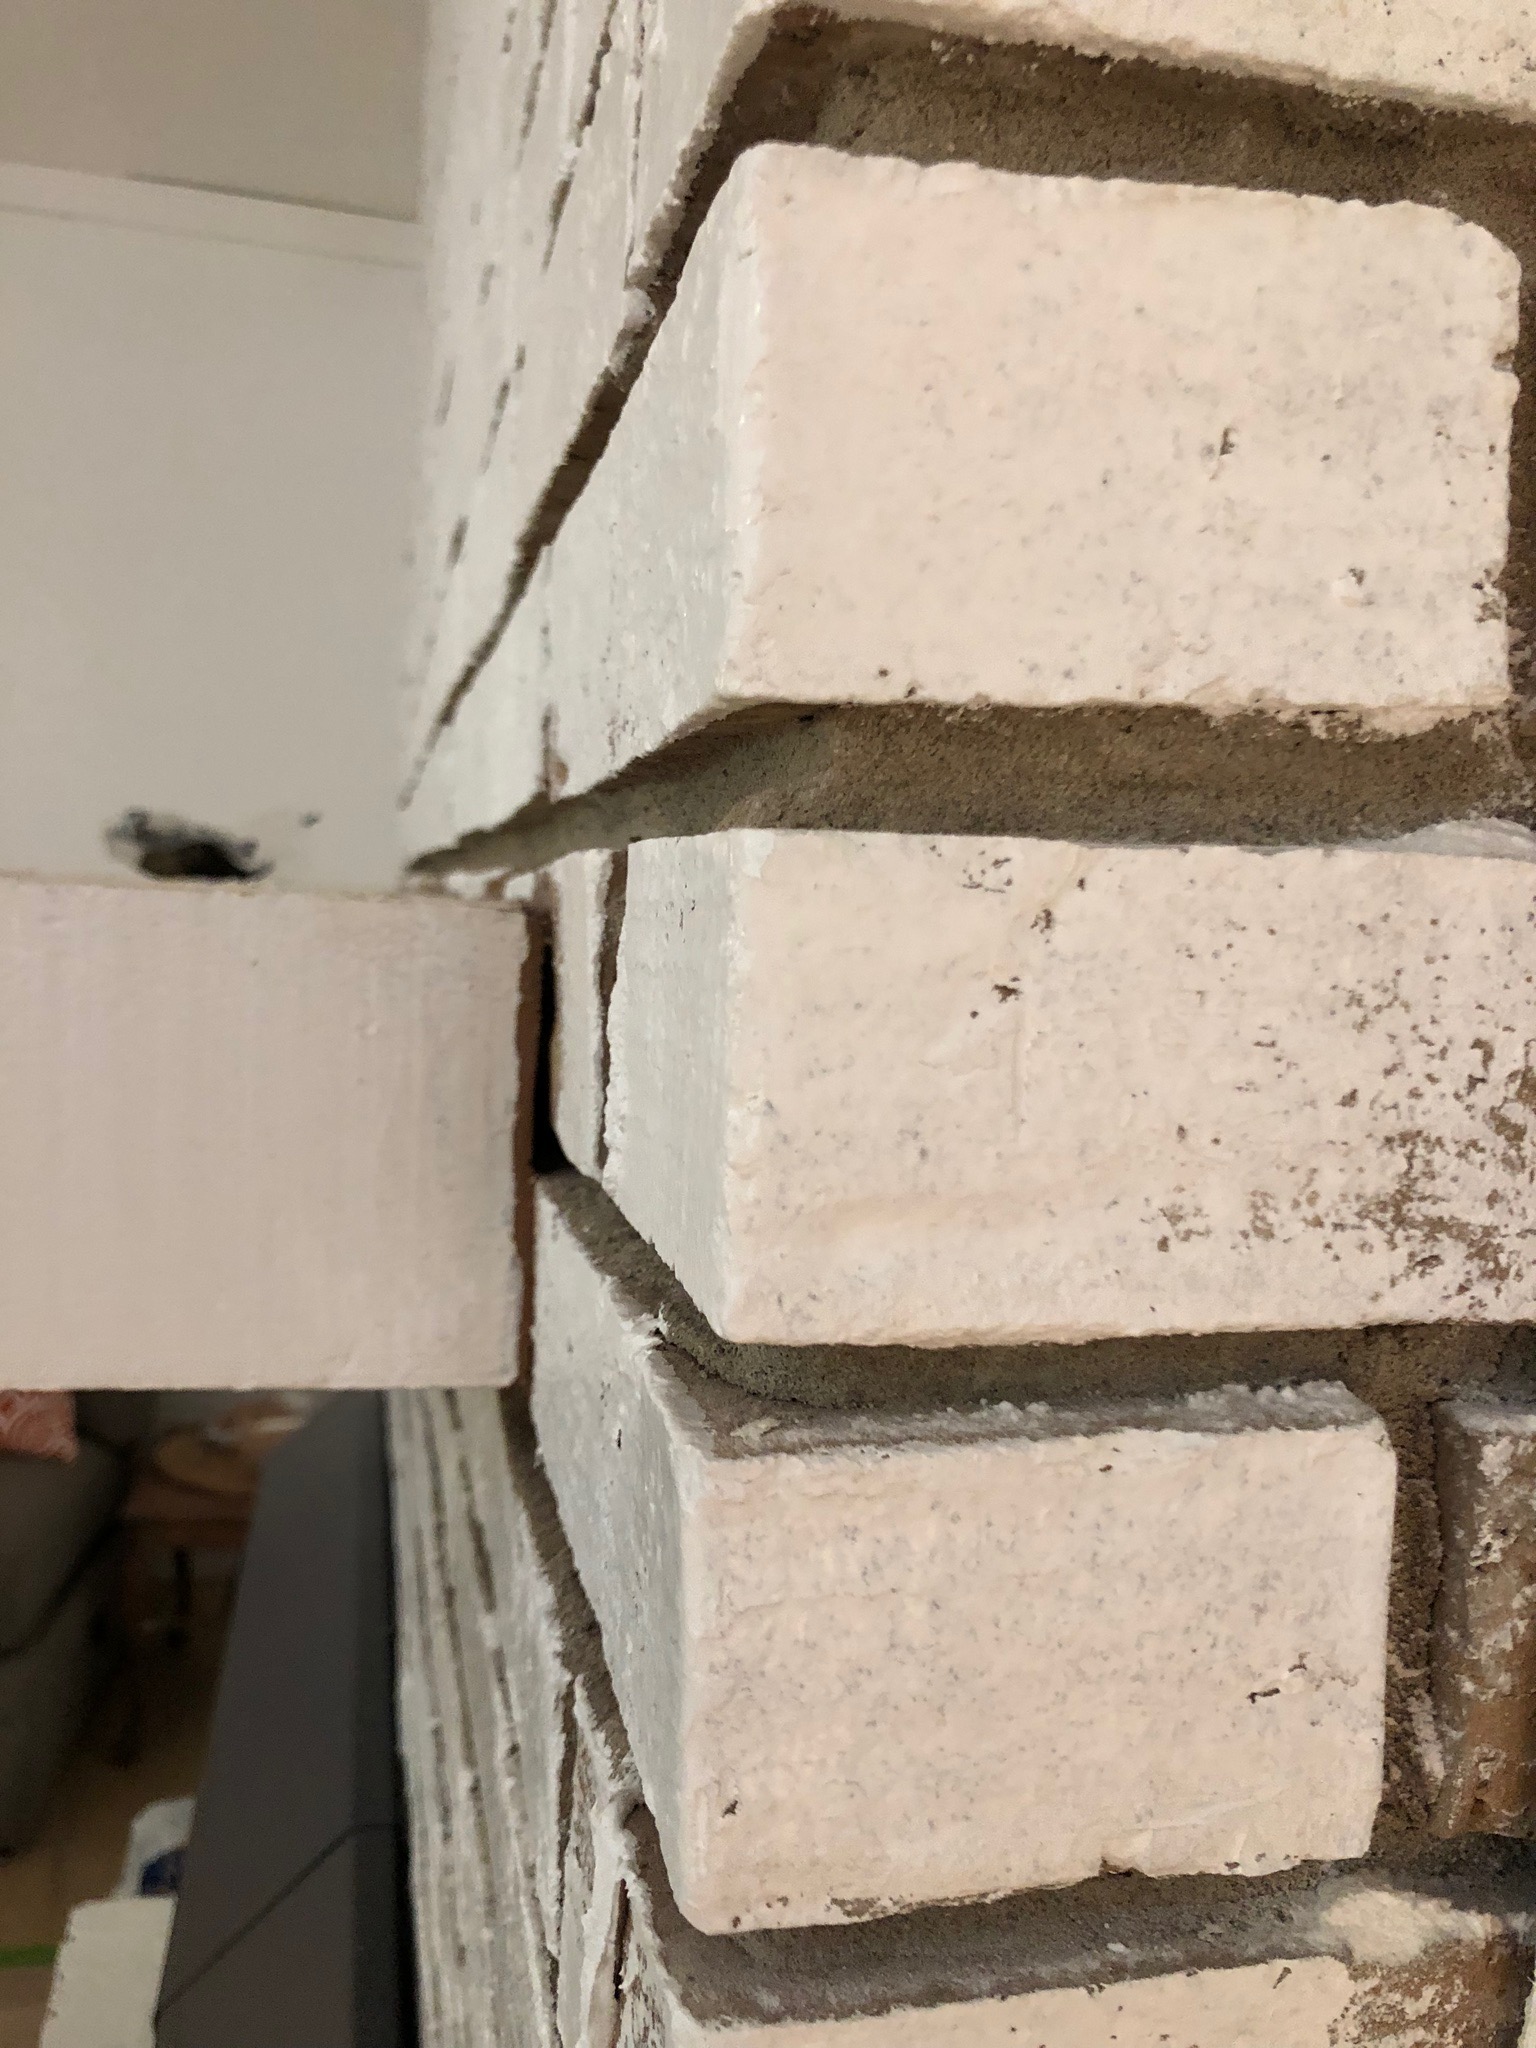
So I decided I wanted to fill them in with grout.
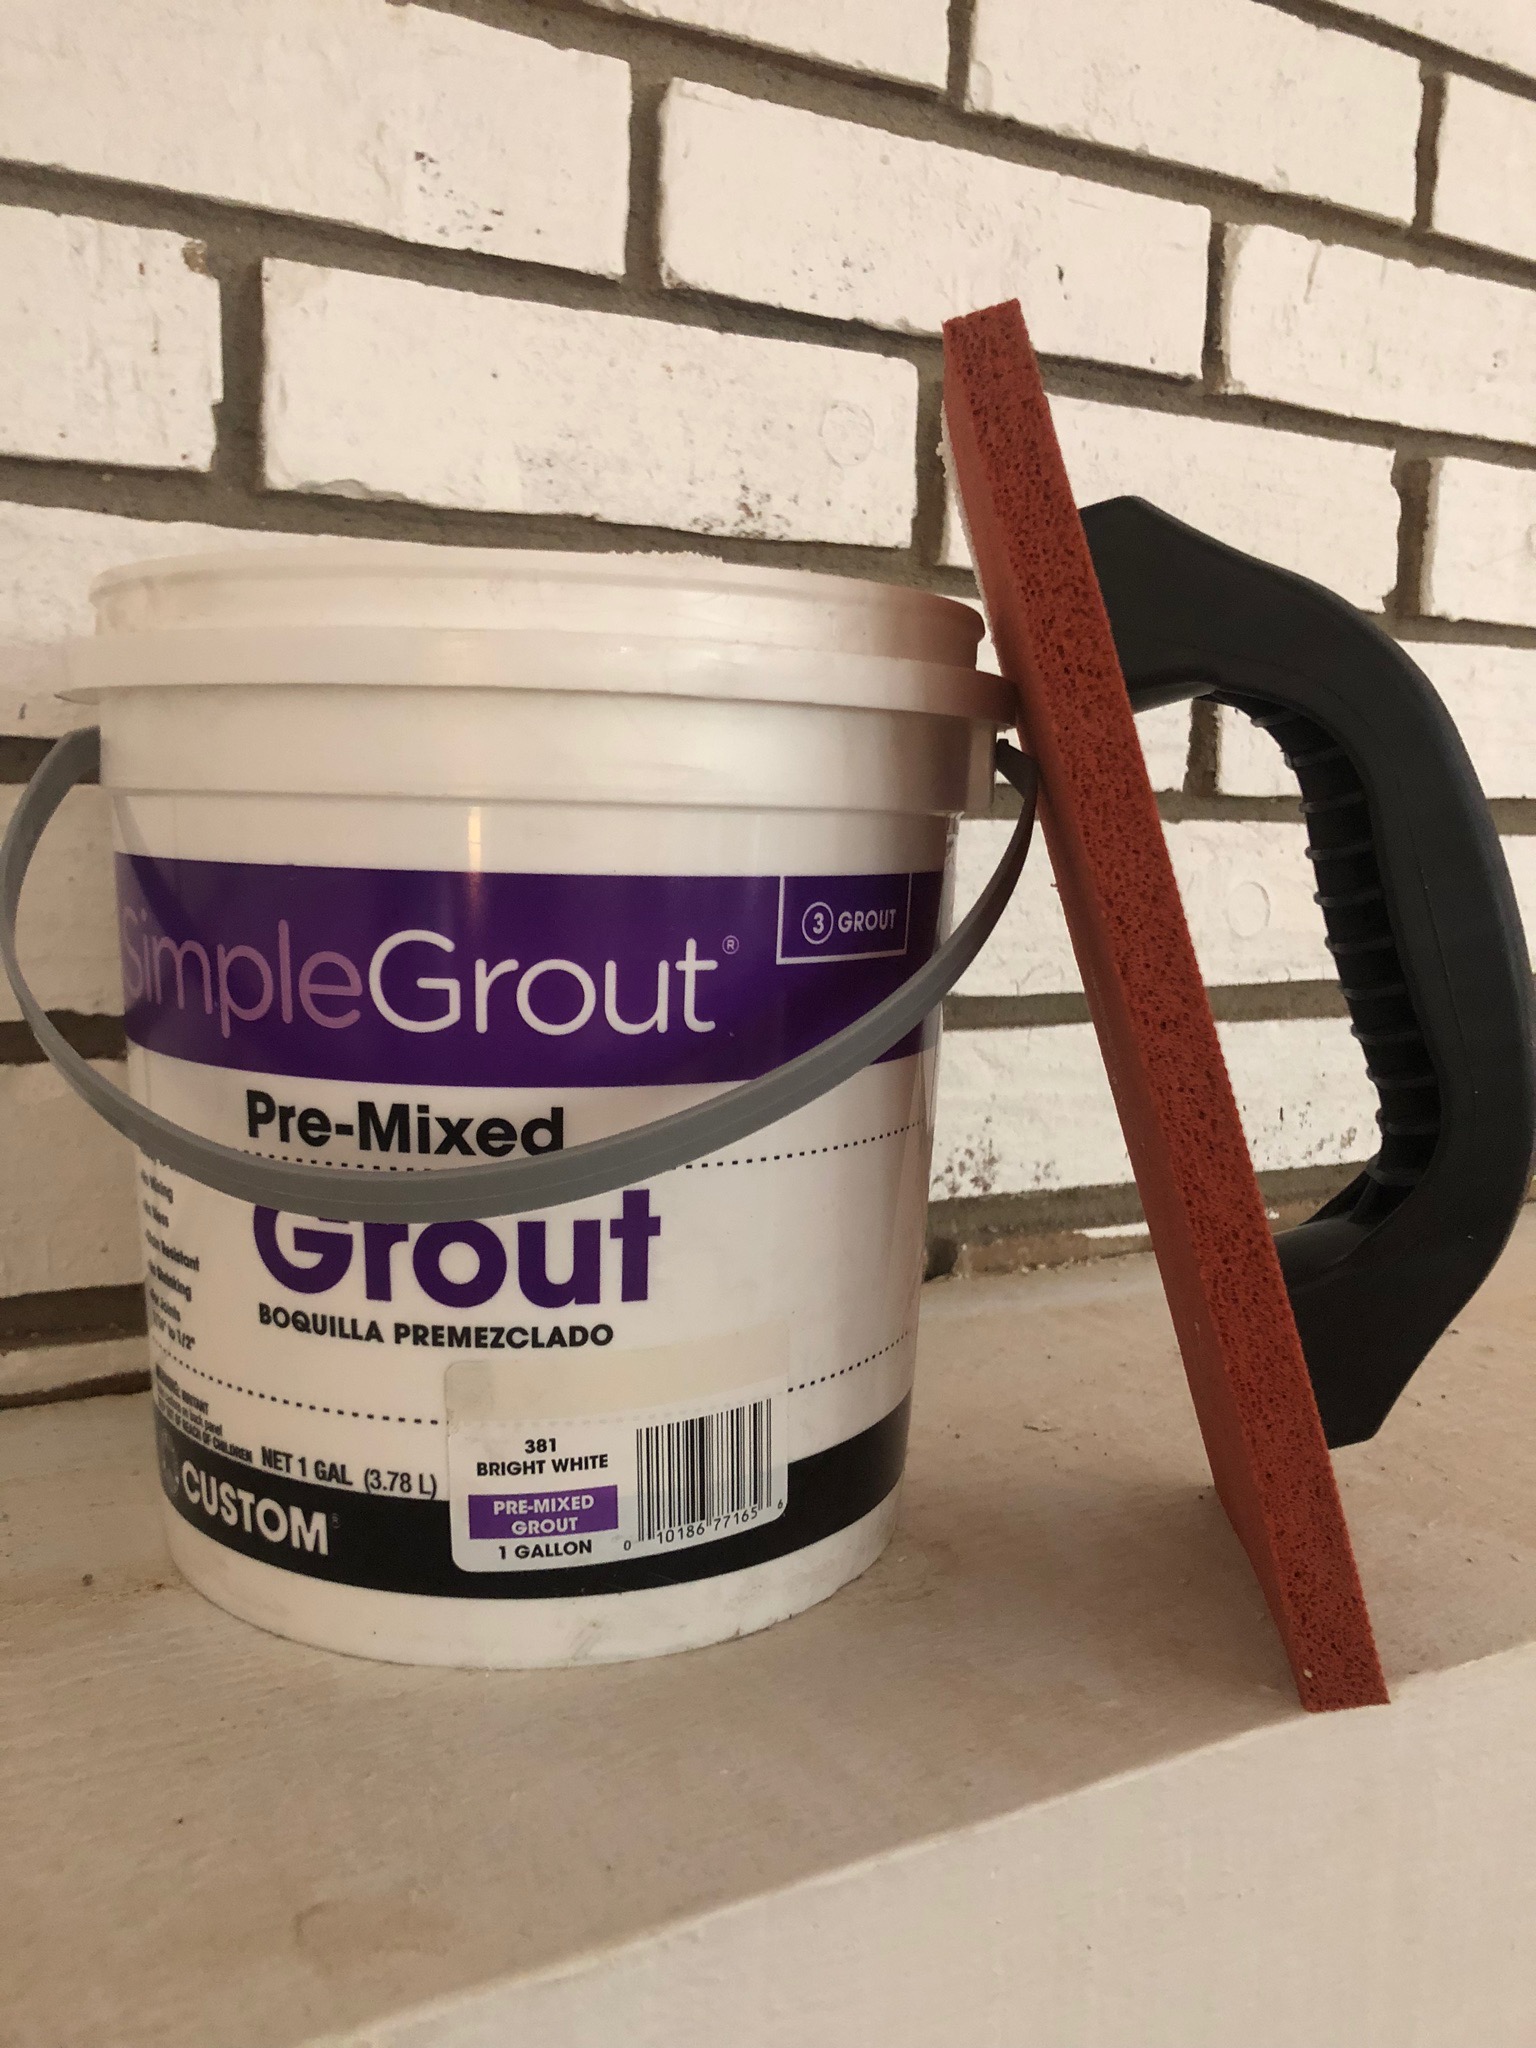
That is when it got REALLY messy, but I LOVE the way it turned out!
I saved my Instagram stories of the whole process in the video below, so you can see how I got the finished look.
And I LOVE the way it turned out soooooo much, that it is not a “temporary” fix anymore. We are gonna keep it just the way it is.
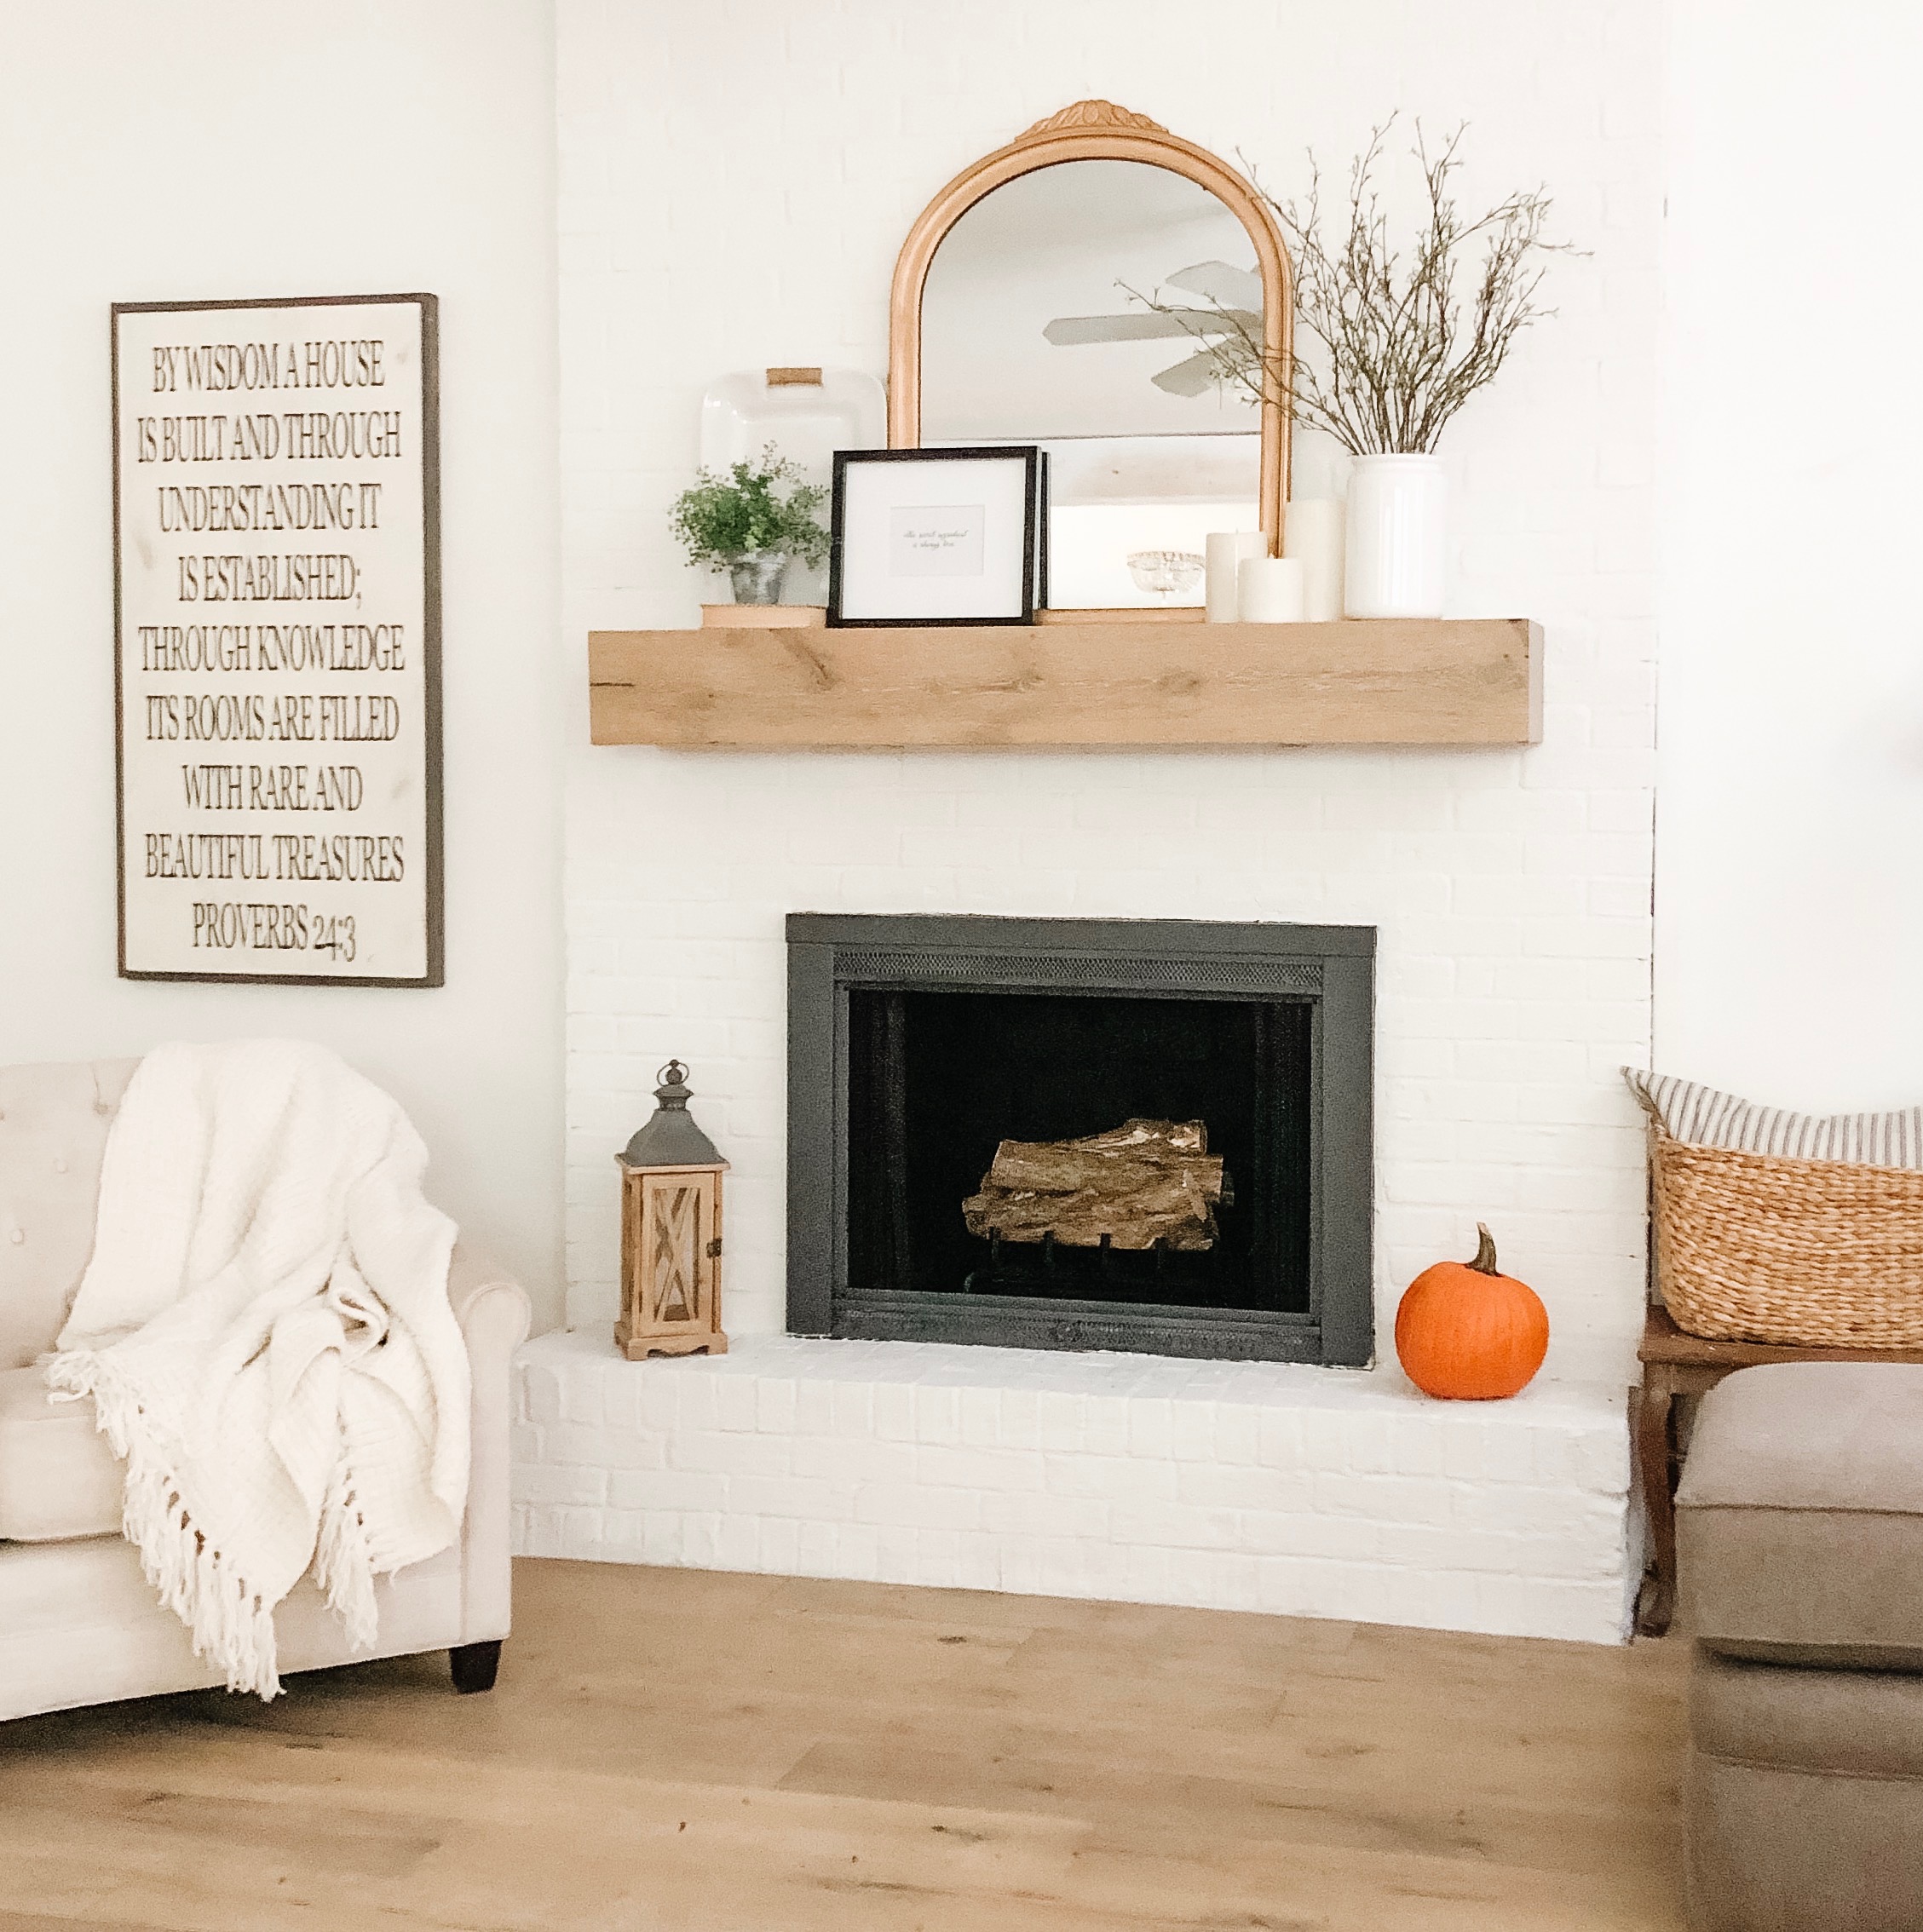
Cy built the mantel with leftover flooring, and I will share that tutorial with you soon. That is also the same mirror in the “before” picture, but I did a little makeover on it as well. That tutorial is coming up too!
I found a cute fall pompom garland at Michael’s and added it to the mantle. It was 70% off. Regularly $25 on sale for $7.50!
You can get it HERE.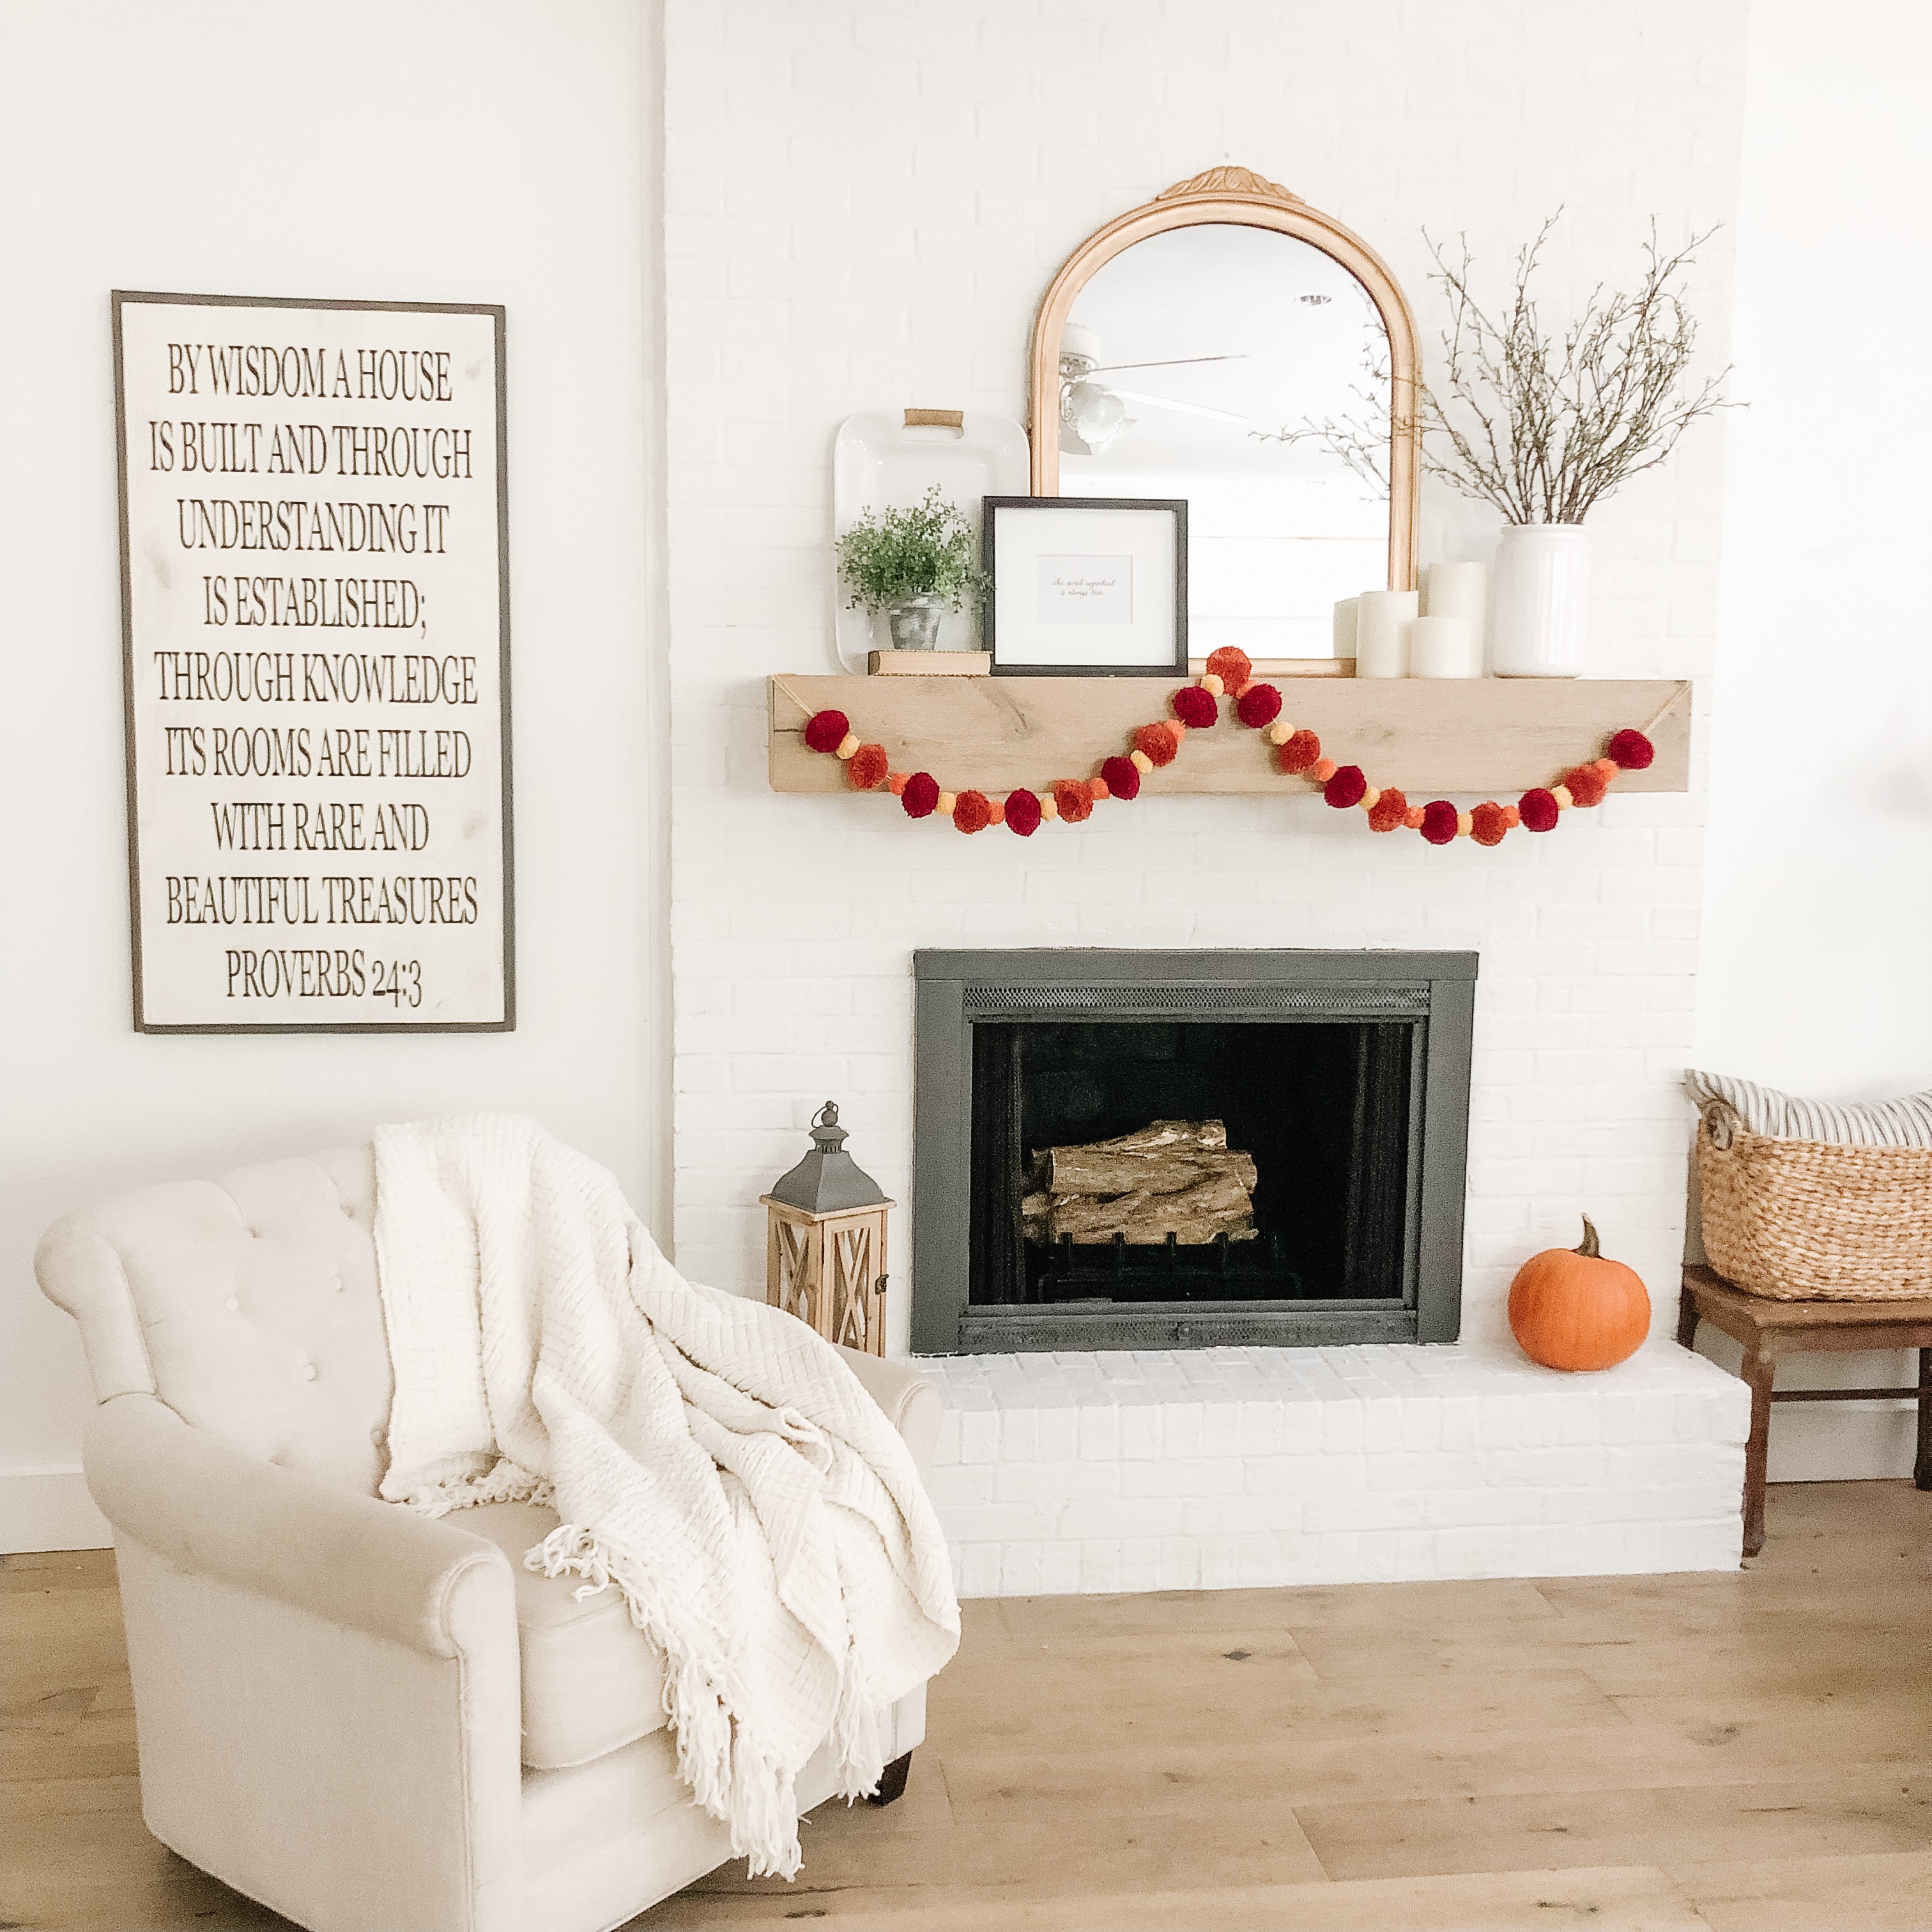
It’s hard to believe it is the same fireplace!
I can’t wait to hang some stockings on it! :)
Have a blessed day!
xoxo
Traci
Love the look of your fireplace and mantel. You make things look so easy. Yes,definantly permanent!
Love your blog and your family.
Wow, I love it. I will admit that the thought of doing that around the new flooring made me nervous.
I am in love with pre-mixed grout and mortar. You can do so much with it and really turn something drab into something fab! Your fireplace makeover is outstanding!! ((hand clap))
Sooooo much better! Love the results!
Beautiful! You are so talented and have such vision!!
It Is GORGEOUS A keeper for sure….. Love how you styled this area as well….and can’t wait for the next project…
What a difference! It looks amazing!
Great job! Can’t believe it’s the same fireplace.
What a transformation! Your “new” fireplace looks great!
Love it! Can’t imagine how long it took to grout it 😱. Well worth it though! Looks beautiful! I always look forward to those crazy videos of your family!
Great job, Traci! Love it!
You inspire me to try this! On my Old red sooty brick fireplace W concrete hearth.going to try the premixed grout,bright white., using subway marble tile (12×12) sheet for inner edge..screen already black,firewall black….I want a chunky wood mantle! Love Cy’s work too.. Bless you both….
You knocked this makeover out of the park! I love the after.
How did you change the shape of the mirror? Looks grand
Wow, what a difference a few steps can make. Great idea grouting the bricks and I love the white. I know you’ll enjoy it!
Great job! Looks amazing ❤️
I love it! What’d you do with the glass doors and hold surround?
I LOVE that!! It looks amazing! My Goodness!! What a difference in the before and after..that end fix on the hearth was brilliant too. Great job guys, y’all are so talented.
Wowza, as always!!!! The insert looks different though. Did you get a new one? I wasn’t able to view the video. I wish you could come fix my drab house…. your family is a delightful inspiration!
It looks great! And getting rid of those olive green walls helped too ;)