
How to Build Front Porch Columns
*This post is sponsored by Lowe’s. All opinions and ideas are 100% mine.

Today I am going to share with you how we built the new columns for our front porch. I am going to share the supplies, some photos, and a video of the process!
If you have smaller square columns that you would like to make look larger, you could follow this method by simply attaching the PVC boards directly to your current posts.
However, this post explains how to build your new columns from scratch, like we did. We supported our new gable roof with cedar posts versus pressure treated posts because they have less tendency to twist or warp. 
Here are the supplies we used:
- PVC Board
- Cedar Post
- Craftsman 18 Gauge Nailer
- 18 Gauge Nails
- Liquid Nails
- Paintable Caulk
- Miter Saw
- Pencil
- Safety glasses
- tape measure
Step One: Cut PVC Boards and Attach to Cedar Post
Cut the PVC boards the length you need them for all four sides of your column. Attach the first piece of the PVC board to the front of the cedar post with liquid nails construction adhesive and a 18 gauge nailer.

Step Two: Attach Remaining PVC Boards
To build out the column box, apply a thin bead of liquid nails where the PVC boards will meet together.

Nail the boards together with an 18 gauge nailer, making sure the edges are flush before before nailing.

Step Three: Add Bottom Trim Pieces
Use a tape measure to determine the length of the four pieces of 1×8 PVC trim for the bottom of the column.

We cut our boards at a 45 degree angle using a miter saw to make them fit together nicely.

Cy will put one piece of trim up against the other pieces and mark where they come together so he knows where to cut using the miter saw.

Be sure to apply liquid nails to the back of each trim piece before nailing it to the base of the column.


Once you have completed the bottom trim, it’s time to move to the top of the column.

Step Four : Add trim to top of column.
Repeat the process in Step Three for the top trim using a 1×6 piece of board.

Step Five: Fill in Seams and Nail Holes with Paintable Caulk.
After you build the column, you will want to fill all nail holes and seams with paintable caulk.


Once the are filled, you can paint the columns with a durable exterior paint. Or if you want your columns to be white, you can just clean the PVC column and leave them unpainted.
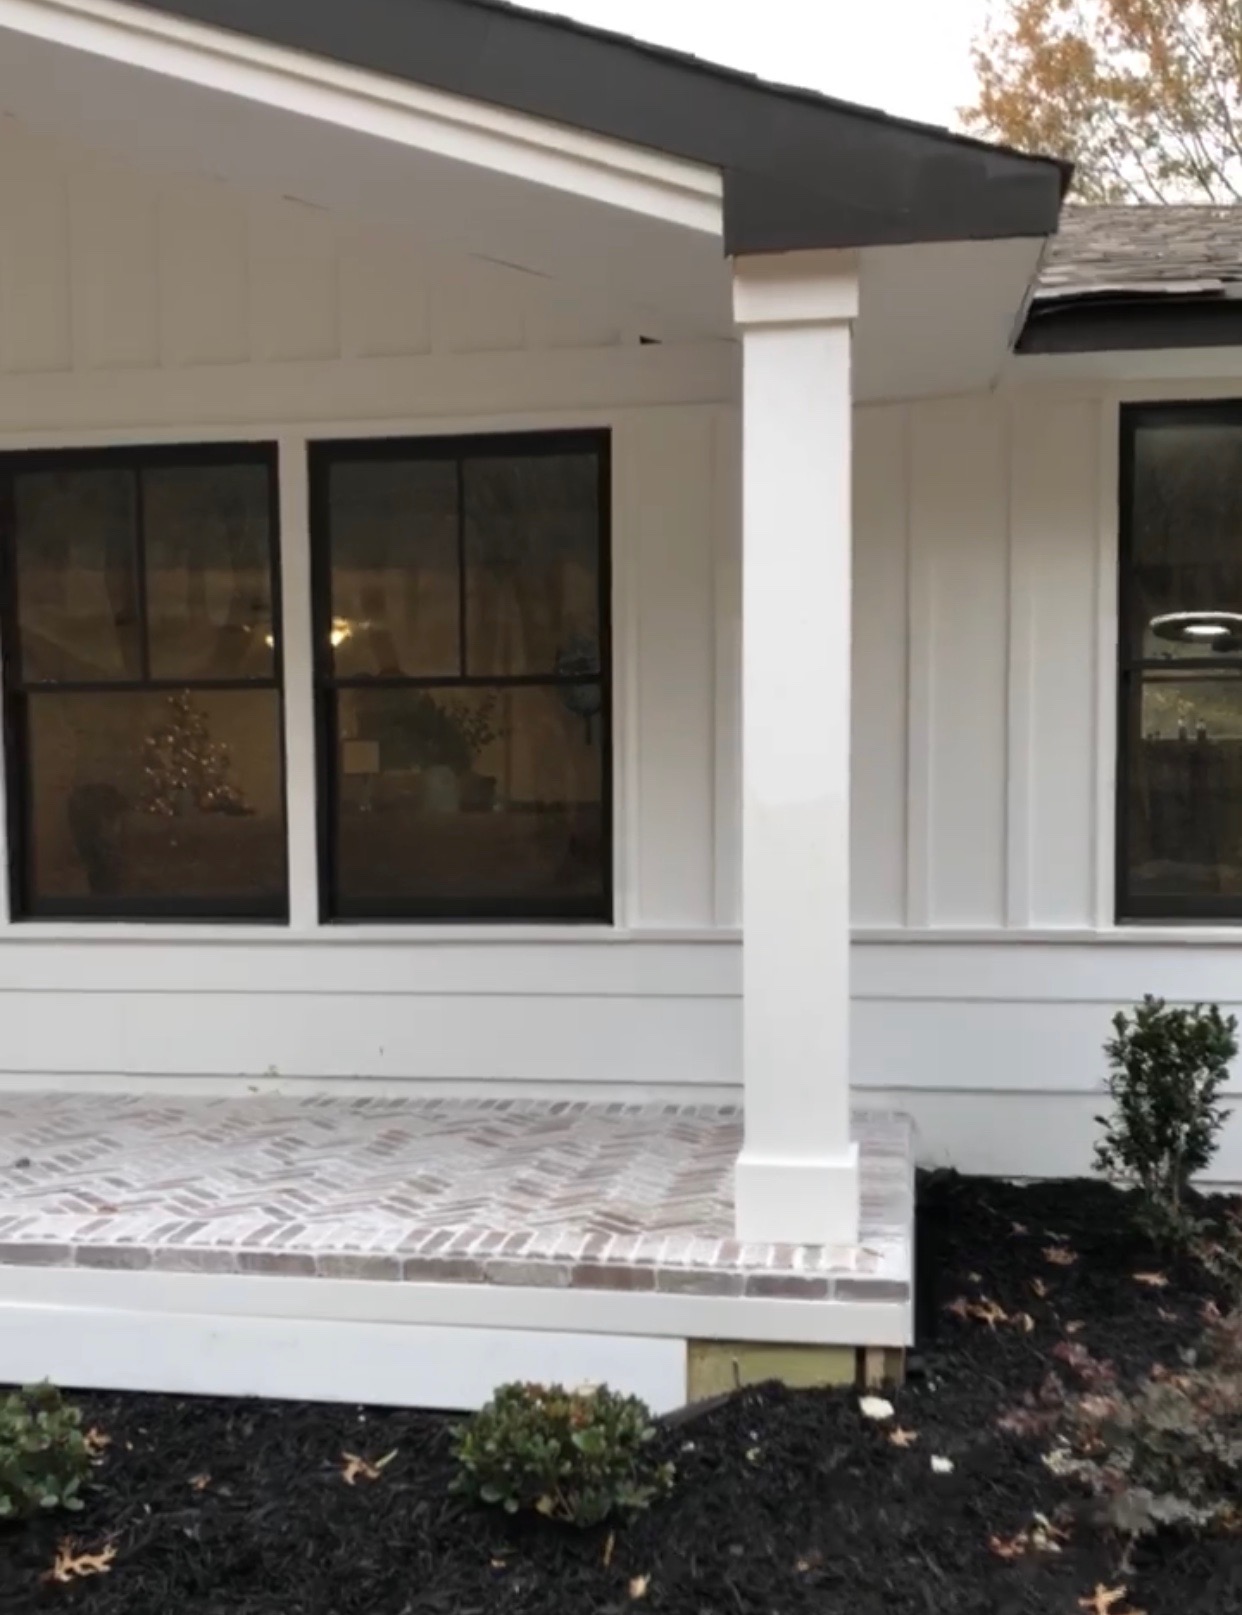
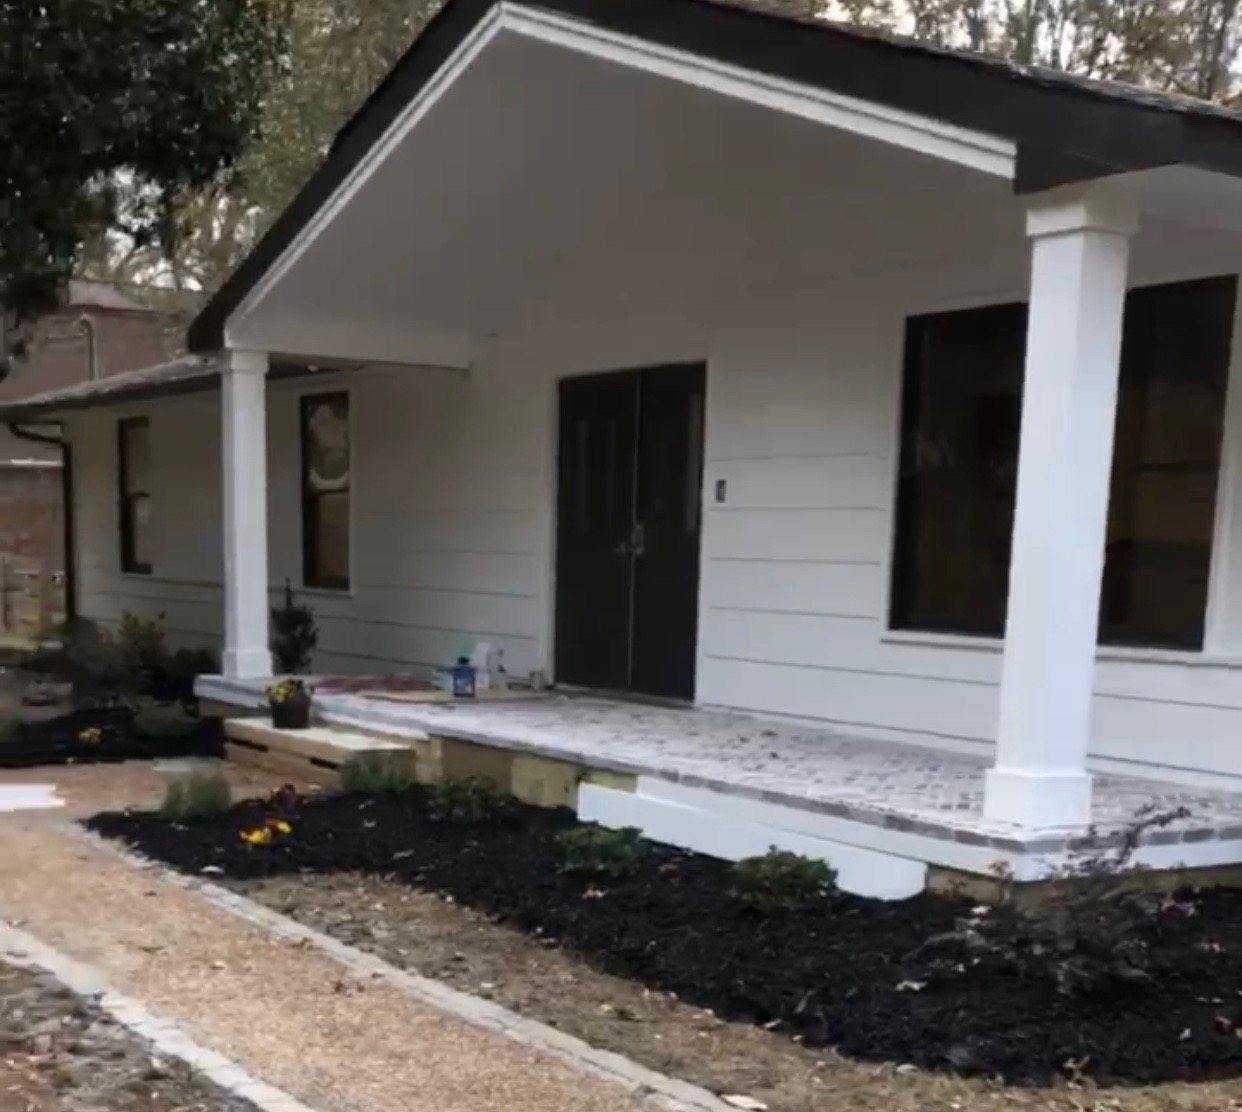
We still have to finish the landscaping and the walkway for our exterior makeover, but we are thrilled with how the columns turned out. They are perfectly “chunky!”
Here is what our front porch looked like when we bought the house…

And here is what it looks like as of now…
If you would like to watch a video of how we built the columns, you can check that out below…

Wow!! Big difference.
These columns are perfect! Wow, your house is becoming more and more charming with each addition!
Very Nice!!
I love your columns! How wide are your columns in inches? We’re about to redo ours and I’ve heard 8 inches is a good amount to make it slightly chunky, but I wanted to ask you!
Hi Tracy,
I love this front porch design! I am just wondering the width of the porch?
They look very nice! Do you happen to know the width of the columns? Getting ready to replace ours and I’m looking for ideas. Thanks!
What size cedar beams did you use under the PVC . They turned out great! Love it
Did you put wood or pvc spacers between the cedar post and the pvc boards? Did you nail only to the pvc and not to
spacers? It looks like you just nailed the corners to each other. If no spacers, why did you not add spacers to nail to?
Did you leave yhe pine board inside with the cedar post?
What a transformation! Great job.
LOVE LOVE your front open gable porch!! Your post how to do the columns is so helpful , could you share what you used under the roof portion and above window???
Thank you so much,
Heidi
honestly , you guys done an amazing job. and the explanation is amazing.
How did you deal with the edge of the woodgrain PVC boards? When boxing out the posts?
(There will be a visible difference in the woodgrain/flat narrow edge of PVC no finish)
Thx!