
How to Paint an Outdoor Building {Our Chicken Coop}
Today, I am partnering with Purdy Paint Tools to share with you how to paint an outdoor building on your property. With just a few easy steps and the right paint tools, you can give any building a brand new look!
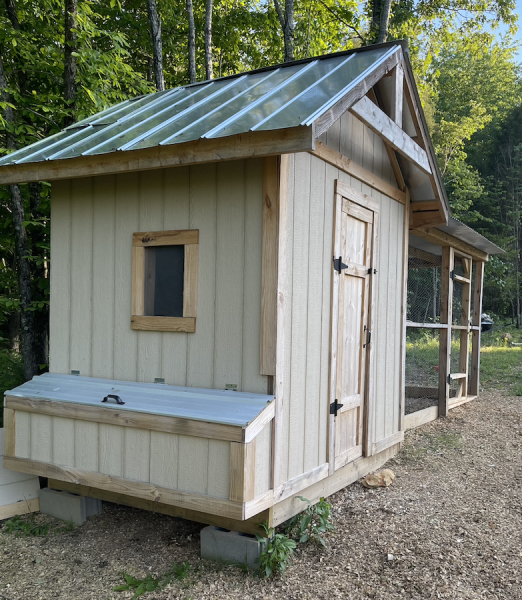
The outdoor building on our property that we will be painting is our chicken coop! Cy built our chicken coop a year ago when we moved out to our new property, and I have been dying to paint it ever since! I had the vision of what I wanted it to look like, and I finally brought that vision to life this past week.
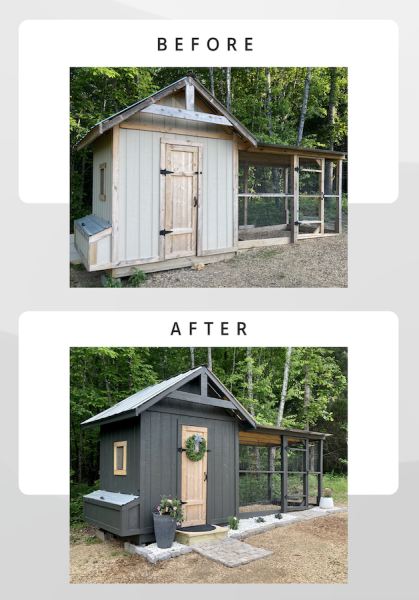
Here are the before pictures of the coop…
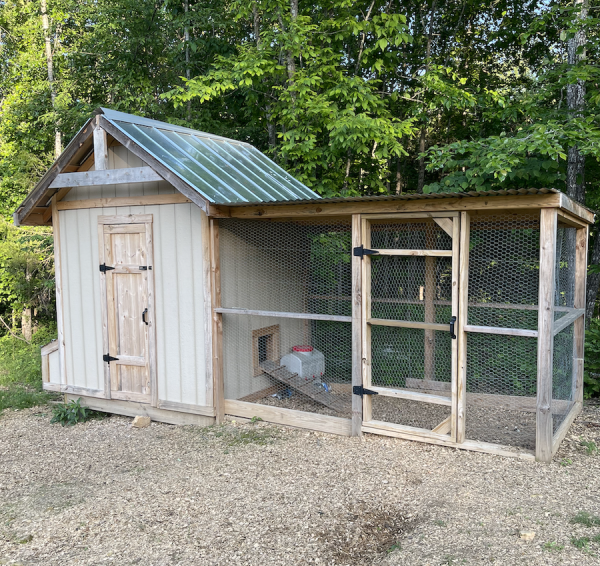
It’s a great coop as is, but y’all know I like to make things pretty. ;) I wanted to paint it to match the other outdoor buildings that we have/will have on our property.
So Cy and I spent a couple days giving our chicken coop a makeover, and I am going to share with you how we did it!
Here are the steps on how to paint an outdoor building:
Do not paint your outdoor building if it is going to rain or if the temperature is too hot or too cold. The ideal temperature for painting is between 50 and 85 degrees Fahrenheit.
1. Check the weather forecast.
We actually had to move our plans to paint back a few days because we had rain in our forecast. It was only spotty showers, but we didn’t want to take any chances. So we waited until we had a couple of fully dry days in the forecast before we started this project.
2. Clear and prep the area around the outdoor building.
Move any furniture or other items away from the building so that you have plenty of space to work. Rake up any leaves or debris from the ground.
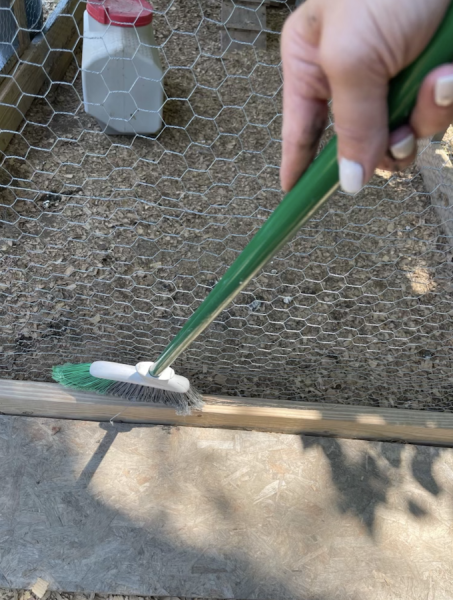
3. Prep the outdoor building.
Use a wire brush to remove any loose paint or debris from the shed. If the building is old, you may need to sand it down to create a smooth surface. Wipe away any dust with a damp cloth.
Since our chicken coop was newly built, it did not have loose paint or debris that needed to be cleaned with a wire brush. I just used a broom to sweep off any dirt from the wood before I began painting.
4. Gather your paint tools.
It is so important to have the best paint tools to help you get the job done right! Trust me, I’ve learned the hard way. Switching to only using Purdy paint tools has helped me get my paint projects done more quickly, more efficiently, more effectively, and the results look professional!
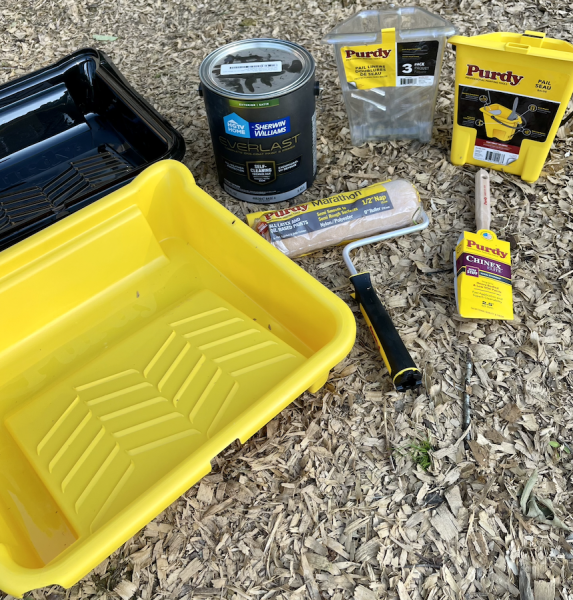
Here are the paint tools I recommend for a project like this:
Purdy’s NEST™ paint tray fits 9″ rollers and has a 1-gallon capacity.
The Purdy® Pail has multiple grip options, including a flexible bail and coffee-cup-style side grip that can help reduce hand fatigue. The roller grid and rest fit up to 4.5″ mini rollers, allowing you to skip the need to use a paint tray. A strong magnet on the inside of the pail allows users to rest their brush out of the paint. Liners are available separately and provide quick and easy cleanup. See it in action HERE.
Chinex® Elite™ brushes have preflagged bristles for better coverage and fast application. Preflagged means the ends of the bristles are split, which allows them to pick up more paint and apply it more smoothly, like split ends on hair opposed to a sharpened pencil point. They offer greater pickup and smooth release with superb cleanability. Chinex® Elite™ works great with heavy-bodied, low-VOC paints.
- Purdy Marathon Roller Cover in ½” nap or greater.
Marathon™ roller covers are very durable and won’t mat down on rough surfaces like concrete, masonry and decks. They are great for use with all paints and stains. They last longer and provide a smoother finish with less lint than other knit covers and can be used with all paints and stains.
5. Pick paint based on building type.
For a wood building, use a paint that is designed for exterior use. When painting metal buildings, use a paint that is rust-resistant. For vinyl buildings, use a paint that is specifically designed for vinyl.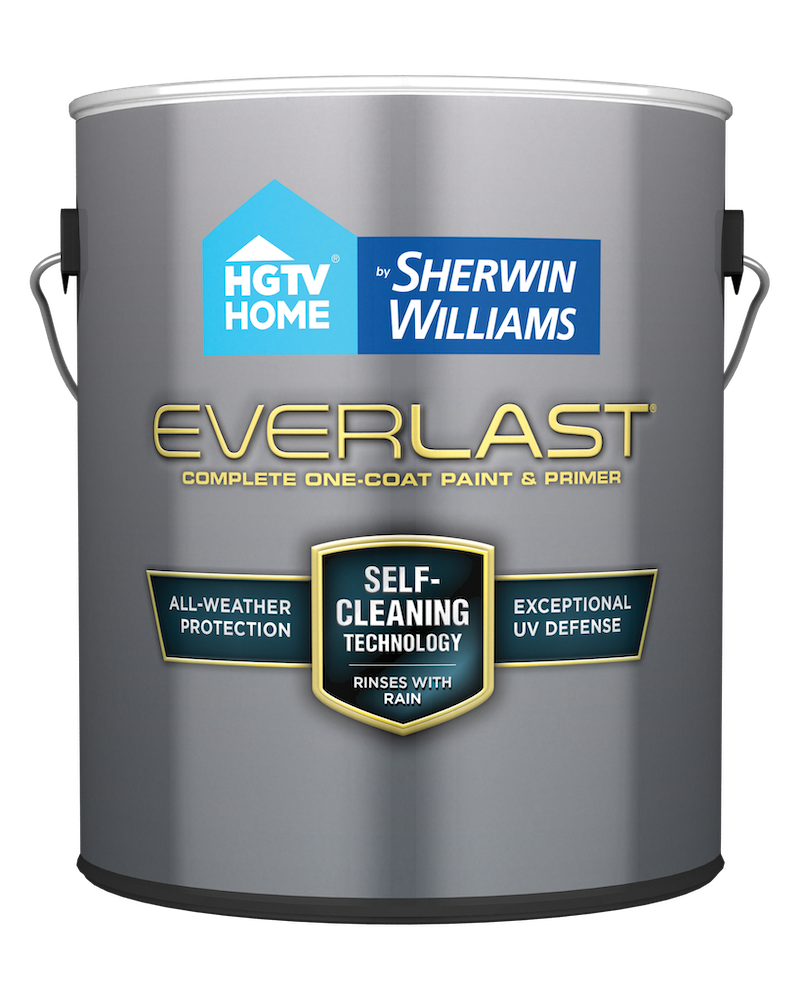
For our chicken coop, we chose to use the HGTV Home by Sherwin Williams Everlast brand in the color Ebony Fields {satin finish.} It is a Paint and Primer in ONE and gives extreme all-weather protection in just ONE COAT!
6. Paint the shed.
If you are not using a paint and primer in one, you will want to prime the building first and then follow with one or two coats of paint. Follow the directions on the label of your paint product of choice.
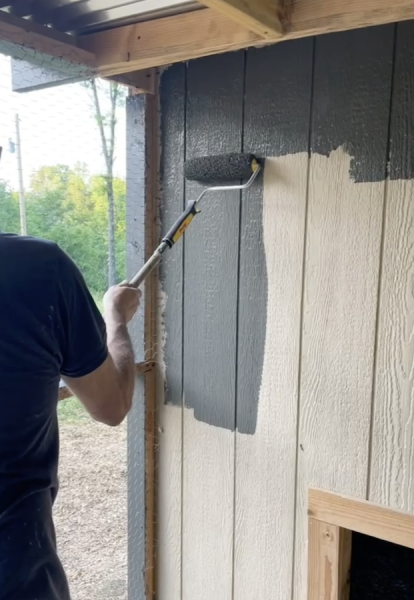
For us, we only had to apply one coat of the HGTV Home by Sherwin Williams paint. Using the Purdy Marathon roller with the ½” nap {for semi smooth to semi rough surfaces} made painting the wood paneling on the coop super easy. The roller holds a lot of paint and was able to get into all the grooves and uneven surfaces with ease!
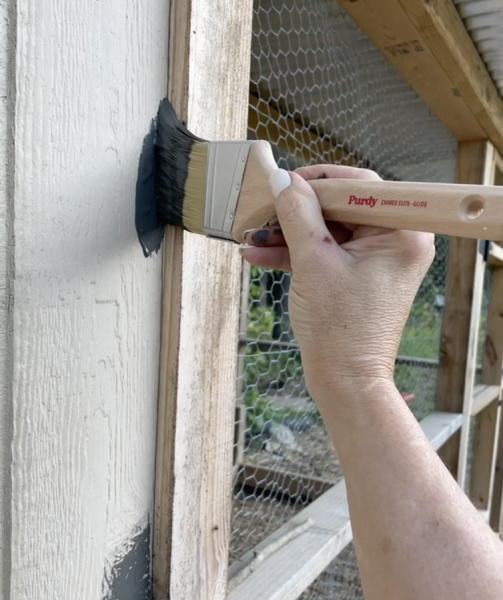
I used the Purdy Chinex Elite angled brush to cut in and get to those hard to reach places. I LOVE this brush! It holds so much paint and made a single coat application so easy. The paint went on smooth like butter!
7. Let the paint dry.
Allow the paint to dry completely before using the outdoor building.
Here are some additional tips for painting an outdoor building:
- Apply paint in the direction of the wood grain.
- Allow each coat of paint to dry completely before applying the next coat.
- Paint the shed in the shade to prevent the paint from drying too quickly.
- Clean up any spills or drips immediately.
After we painted our coop, I added some landscaping around the front and “prettied her up.” I mean, if you are going to have a coop, why not make it pretty, right? haha!
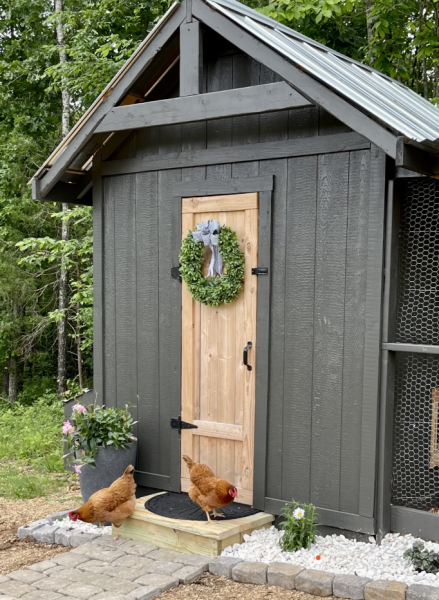
Now for the afters!…
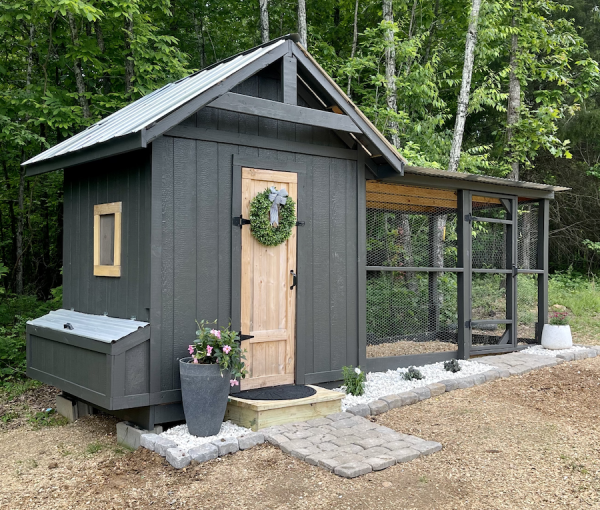
I love it so much!
Purposefully, we kept the door, window trim, and rafters inside the run unpainted to provide contrast, and I think it looks so good.
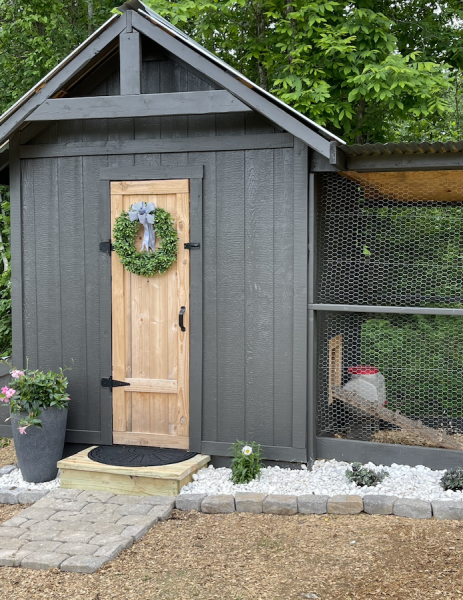
Additionally, Cy built me a platform step in front of the door with some leftover wood from our garden fence that will eventually turn the same color as the door. Luckily, I was able to reuse some pavers we brought with us from our last house to create a walkway and border for the landscaping, then added white rocks and some plants.
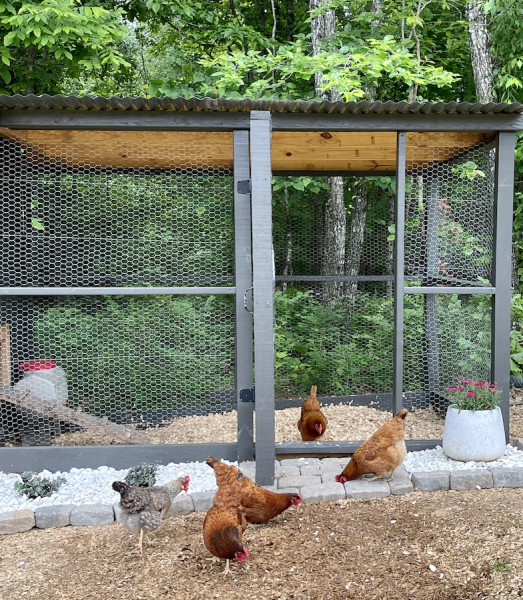
It’s just so cozy looking, and our chickens love it too!
Isn’t paint amazing?!! It continues to amaze me! Just a couple days of work and a couple gallons of paint, and we took our coop from drab to fab! :)
Now, I know it’s a chicken coop and won’t always be this clean, but it will still be adorable. Thankfully, we have a hose nearby and will be able to wash off the rocks and pavers when we need to.
Right now, we are just enjoying how cute our little coop looks on top of our hill!
Do you have an outdoor building on your property that needs to be updated with some paint? Follow the steps I mentioned above with Purdy paint tools and tackle it! Believe me, you will be so glad you did!
Remember to send me some pictures, because I love seeing your projects too. ♥️
Traci you have done it again. The coop is adorable!!!
Thank you, Debbie!
That is the cutest chicken coop I have ever seen! The colors are perfect. I bet those are the happiest chickens and will lay an abundance of eggs for you all!
It’s a love affair for sure! They give us the best eggs, so we have to take good care of them. :)
Can I move in with the chickens? I can’t lay eggs but
I can gather them! ha! ha! ha!
Your chicken coop looks amazing…
haha! SURE! :)
Your chicken coop is so cute!!! I love the color you picked!
Thank you, Carol!
What color is it? We are painting our coop tomorrow. Super cute!
Sorry I’m late, but it is Valspar’s Ebony Fields.
OMG, how cute is your coup!! My husband would think I lost my mind if I decorated a chicken coop! 😂
Haha! I know it’s kind of crazy, but it makes me happy every time I see it! Totally worth it! :)
Once again, an adorable project! 👏🏼👏🏼👏🏼
Thank you, Annette!
You have raised the bar for chicken coups now! It’s beautiful! I’m so happy for them to have such a beautiful place to live!
Thanks, JoAnn! It’s been fun to create this coop!
Wait!!! The Purdy Nest Tray holds a whole gallon?? You mean to tell me I don’t have to call my husband to come refill the tray every 10 minutes?? I’m IN!!! Thanks for the tips and the coop is absolutely adorable!!
Haha! Yep! It holds a ton. :)
Soooo cute!
Love it Traci! I have to admit I’d do the same thing if I had chickens!
These chickens have a beautiful home thanks to you and Cy! You did a fabulous job! I love it!
Did y’all seal the rafters and door with anything?! This is exactly the look I’ve been wanting! Got my dark paint – rock bottom (Sherwin Williams) but trying to figure out how to get your natural light looking stain for my girls’ nesting box and the inside of the coop! Any help would be so appreciated!!!!
Hi, Amy! We actually did not add any stain or sealer to the door. Not on purpose, just because we liked it as is. But we probably should add a sealer on the door this year. I would just do a matte clear sealer on the bare wood.
This is adorable. Where did you get the coop or the plans? I like everything about this coop.