Beautiful Christmas (Gifts)…on a budget!
Hi there!
Welcome to Day 4 of the Beautiful Christmas…on a budget series!

Today it is my turn to share with you some inexpensive gift ideas for the Christmas season.
I don’t know about you, but money is tight these days, right?
But even if money is tight, that doesn’t mean that I still don’t want to give Christmas gifts to all my loved ones, family, and friends!
Is your Christmas gift list as long as mine?
Well, if it is…then you have the same dilemma I have.
Do I buy just a few people on my list an expensive gift (because that is all I can afford), or do I buy (or make) everyone on my list an inexpensive gift?
Here’s my decision…I would much rather give everyone on my list something!
One reason is because I truly believe in the saying…“It’s the thought that counts.”
It IS, isn’t it?
Don’t you love getting those little, unexpected gifts from others that warm your heart just because they “thought” of you.
I sure do!
So I came up with a few easy crafts that are super cheap…but cute, and easy to make…yet meaningful.
Gift #1
Dressed Up Post-it Notes
The first gift idea is one that I am making and giving to my children’s teachers. Being a teacher myself, I can tell you that you can NEVER have enough Post-it notes! So why not make them real “purdy” and more enjoyable to use?!
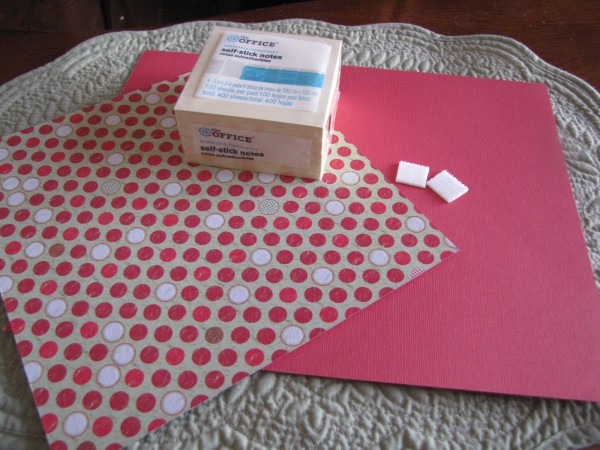
Here’s all you need:
Post-it notes (Walmart has 4 for $2.00)
Scrapbook Paper
Velcro buttons
Hot glue gun and a gluestick
Miscellaneous items from your “craft drawer”….stickers, stamps, ribbon, buttons, etc.
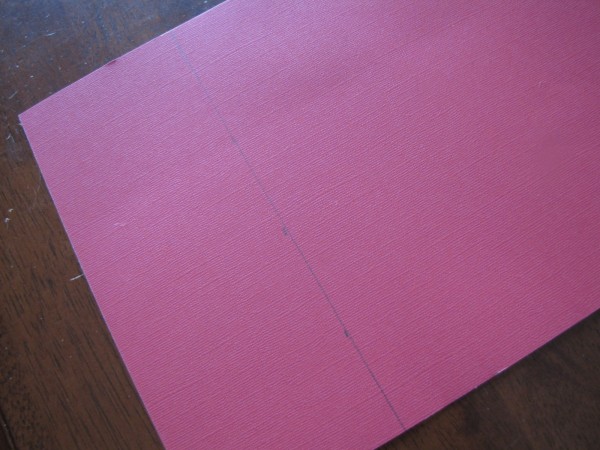
First you measure a piece of scrapbook paper 3 1/2 inches wide by 8 1/2 long and cut on the line.
Then do the same thing for the other piece of scrapbook paper you want to use. I just made it a little bit smaller than the solid color paper. To be honest, I kind of eye-balled it! :)
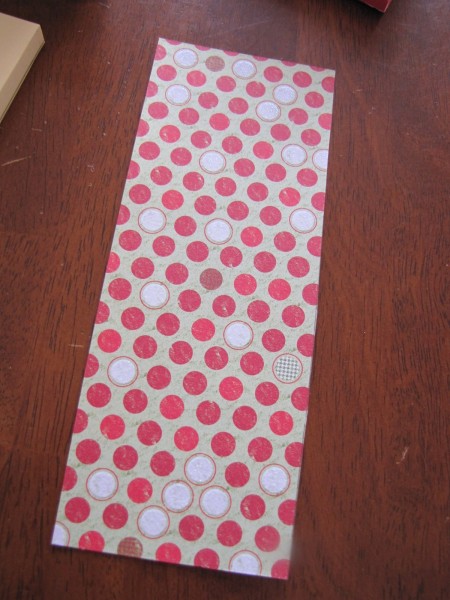
Then I hot-glued the Post-it note pad in the middle of the inside of the paper and folded up the sides.
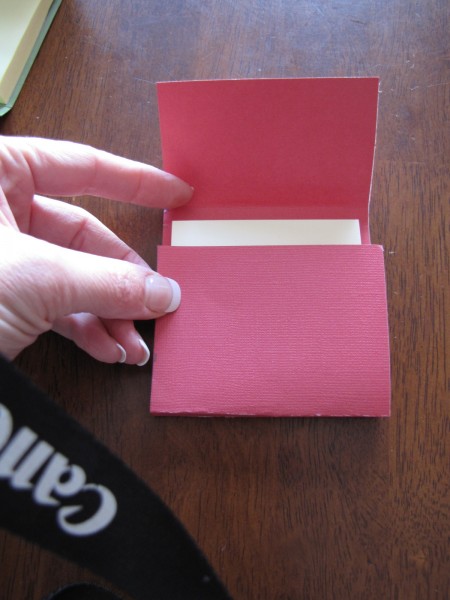
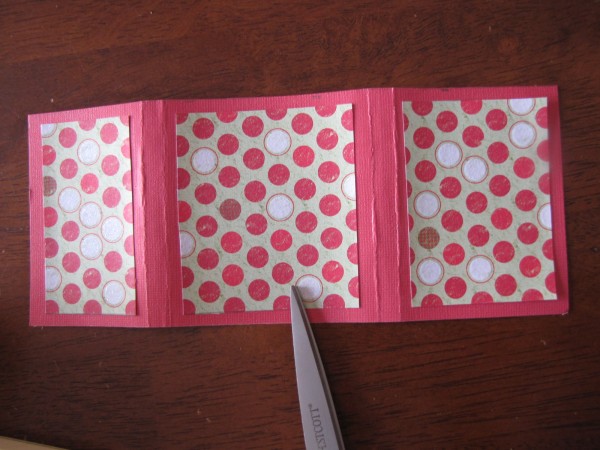
Then I cut the patterened paper in three sections and glued it to the red piece of paper. (Notice how I creased the edges below to0 hard and my paper tore a little? I did not crease the other ones I made, and they worked perfectly. Just let them fold naturally over the sides of the Post-it notes.)
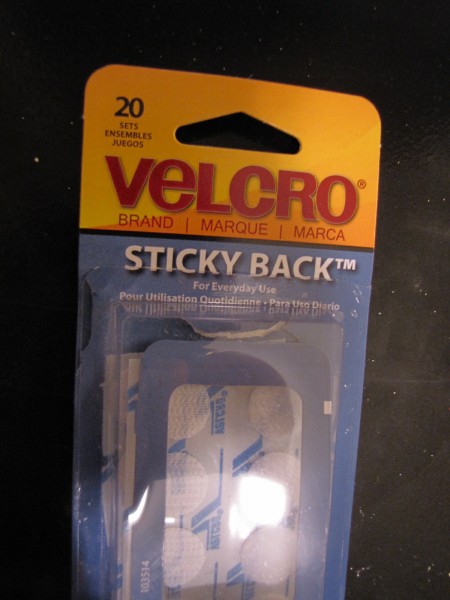
Then you used a these velcro buttons to fasten the two sides together…
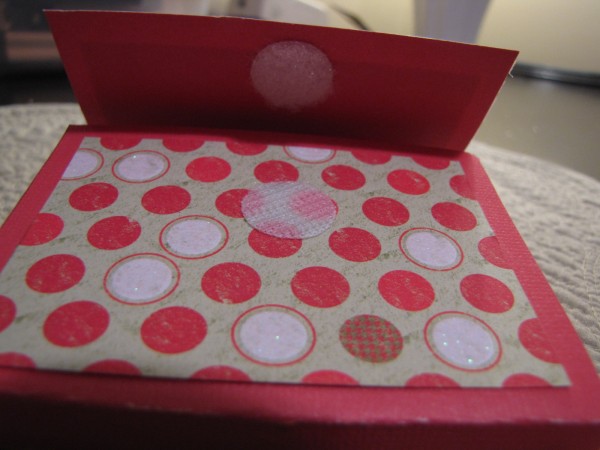
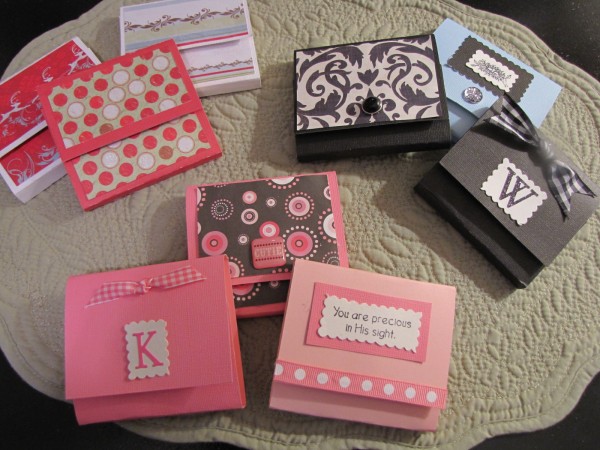
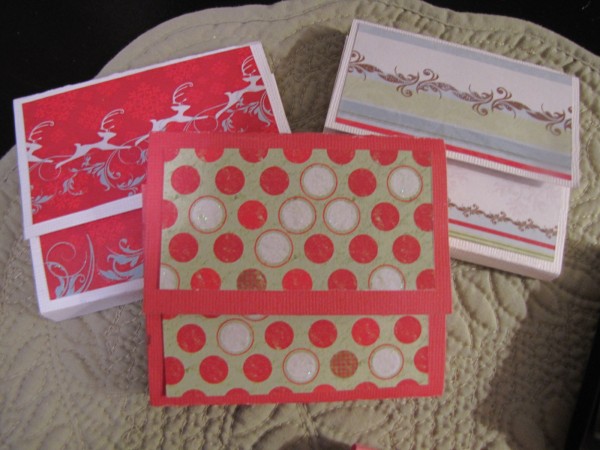
Here are some of the Christmas note pads I made….(I wish you could see the glitter on each one…they are so cute!)
I had so much fun making these, that I decided to make some for my niece, Kinsey. She’s 11, and she would love using these! (And you can use them to send a special message too!)
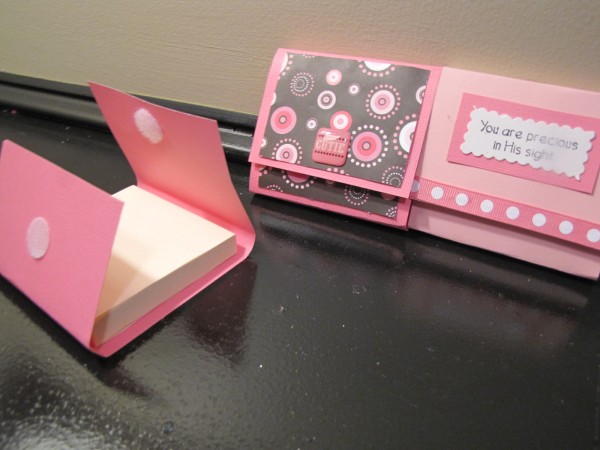
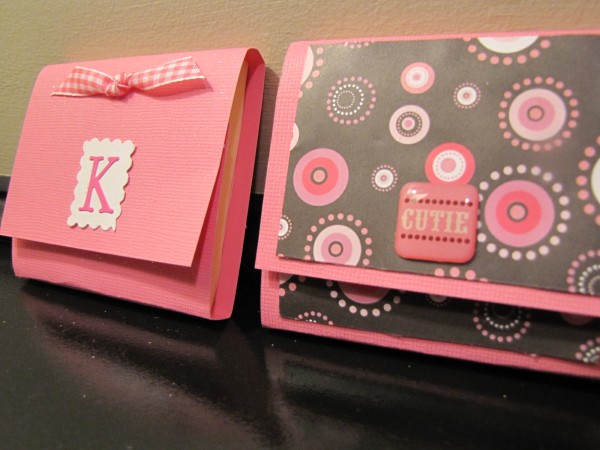
I tied all three note pads together with a cute white bow and added a pink mechanical pencil for fun! I know she will love it! Heck..who am I kidding? I would love it! :)
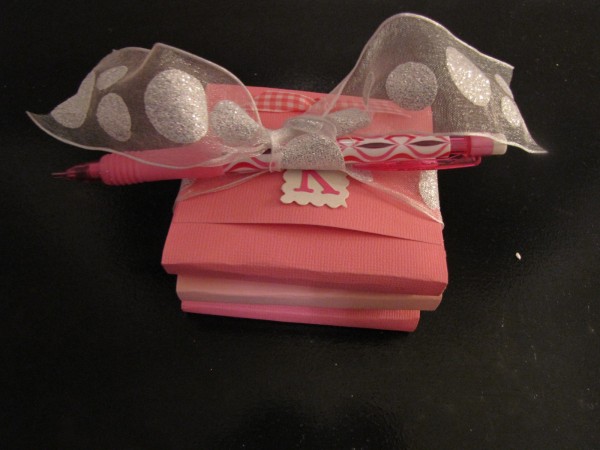
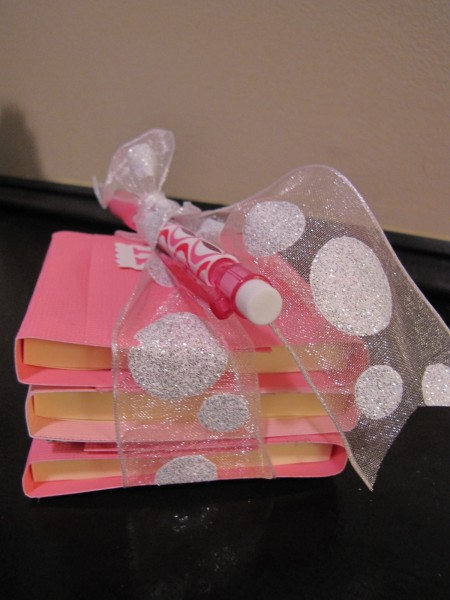
And these I made for my school secretary! Won’t she feel special using these?…
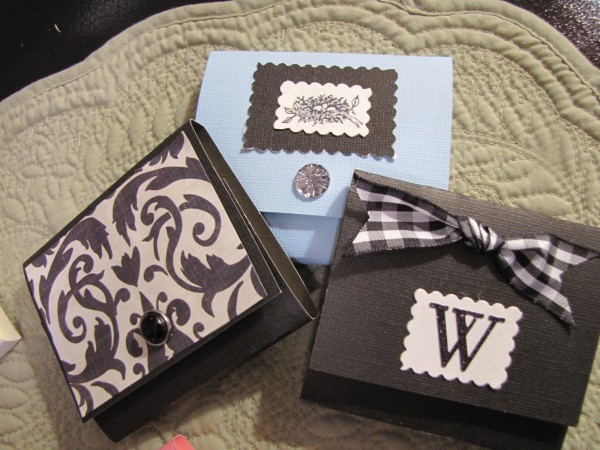
I also think these would be simple, thoughtful gifts for Sunday School teachers, librarians, Assistant teachers, etc. You could add some cute pencils and a ribbon to just one post-it note, and it looks adorable!
(I got the pencils at Walmart.)
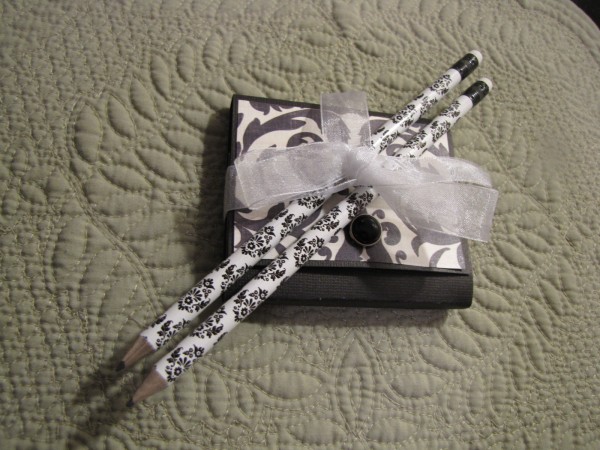
Here’s a cute one for your child’s music teacher…
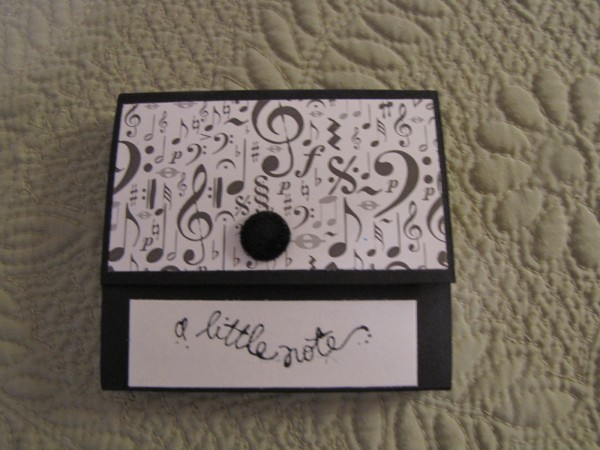
I cannot tell you how much fun I had making these. I could have made them all night long!
I looked in my “craft” drawer and found little buttons, ribbons, and stamps to use. So they were FREE!
To make about three of these Dressed Up Post-it Note Pads, I estimated it cost me about $1.50-2.00. Now that’s a great price for a Christmas gift!
You could afford to make these for MANY people on your Christmas list! Woohoo!
Gift #2
Handmade Coasters
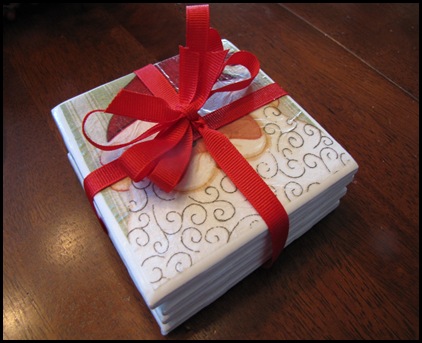
The next gift idea I am sharing is one of my favorites from last year. I made these tile coasters for my sons’ teachers, and they loved them. I got the idea from a student who gave them to me about 8 years ago. I just loved them! Every Christmas, I have used the coasters she gave me, and I think of her sweet face!
These have got to be the easiest, most inexpensive, yet cutest, gifts I have ever made for someone.
They make perfect Christmas gifts for school or Sunday school teachers, neighbors, co-workers, or anyone else on your list! You can make a large batch of these and cover most of your gift list!
Here is all you need:
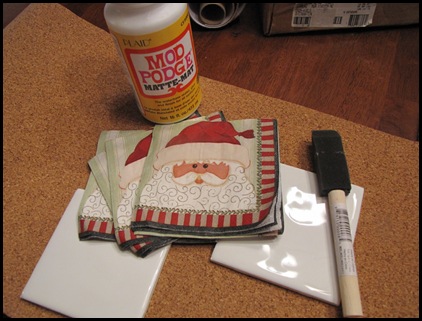
4 x 4 white tiles (from Lowe’s or Home Depot)
napkins with a cute picture
*mod podge
*cork board
*acrylic sealer
glue gun
*sponge brush
*These products can all be purchased at places like Walmart, Hobby Lobby, Michael’s, etc.
You can get the tiles for as low as 16 cents a tile!
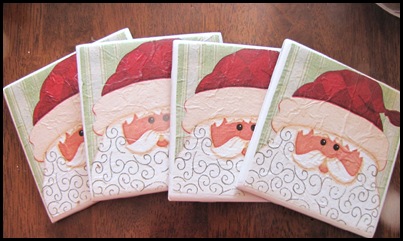
I already had the cute Santa napkins from last year. But you can get a pack of napkins for a couple of dollars.
Now here are the easy steps.
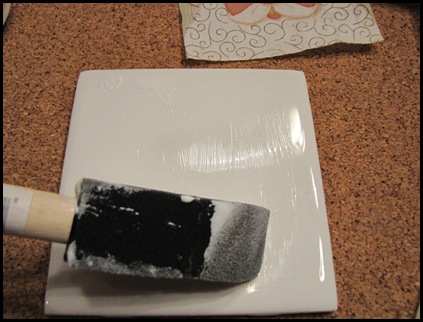
1. Cover the tile with a layer of Mod Podge.
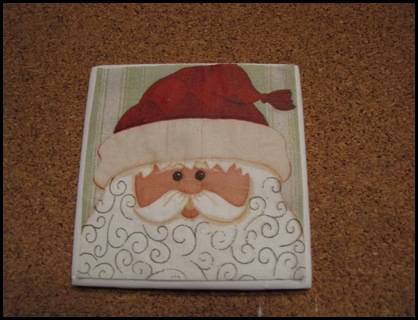
2. Lay the napkin (cut a little smaller than the tile) on top of the mod podge.
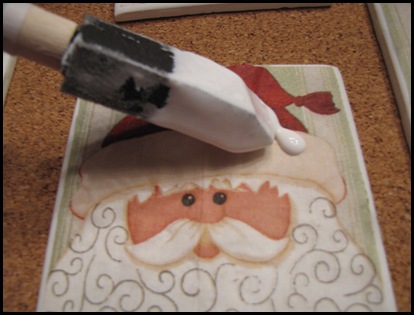
3. I usually let the the mod podge dry just a bit, and then apply another coat on top of the napkin.
4. Let it dry.
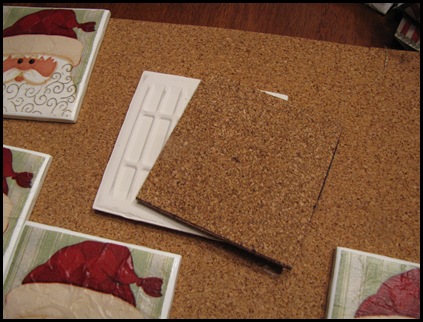
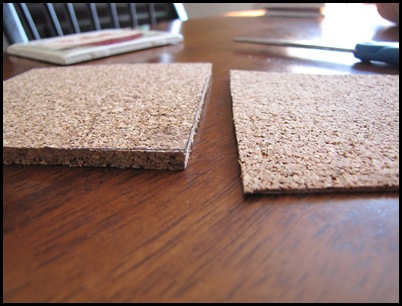
5. Cut the cork into square pieces that are a little smaller than the tile.
(You can get cork in different thicknesses. I prefer the thinner kind.)
6. Hot glue the cork to the bottom of the tile.
![[IMG_4094[4].jpg]](http://lh5.ggpht.com/_2biIHt1YrHA/SveUxWIUIsI/AAAAAAAABhQ/cTpkCZxoBJo/s1600/IMG_4094%5B4%5D.jpg)
7. Spray the tops of the tiles with acrylic sealer and let dry. Be sure to do this in a well ventilated area. I usually spray mine in the garage or outside.

The sealer allows your tiles to get wet without ruining them.
That’s it!
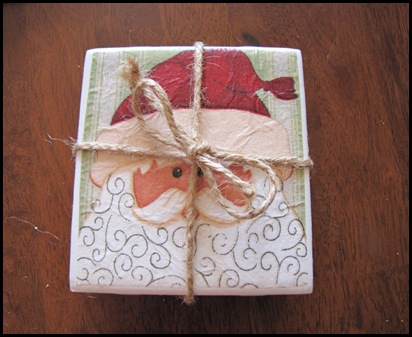
8. Tie them up with jute string or a bow, and they are ready to give away!
Here’s another idea…
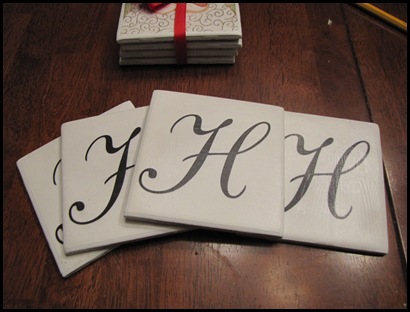
Monogrammed Coasters!
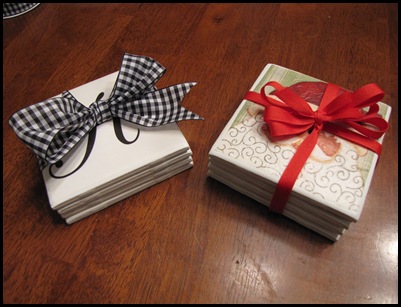
I printed the letter “H” off my computer and followed the same steps as above.
I just cut the paper around the monogram in a square smaller than the tile. I did NOT trim around the monogram.
You could also use monogrammed napkins if you don’t have a printer.
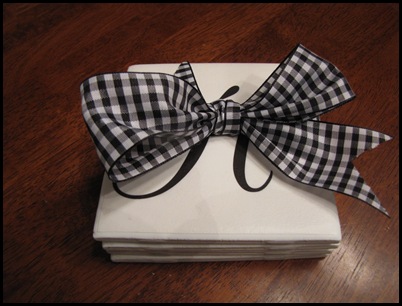
Look how cute they are tied up in this gingham bow!
I would love to receive these as a present.
Gift #3
Heart-warming Hot Chocolate Art!
I soooo wish I could take credit for this adorable idea, but I can’t!
I saw this idea at How Does She, (one of my new favorite blogs!) this past week, and I knew I had to share it with you!
It’s Hot Chocolate Art by Shelley!

I cannot wait to make this for some special families in my life!
Shelley brainstormed words that described each member of her neighbor’s family, and used a free online program called “Wordle” to create the art to wrap around the cups and cannister.
I can only imagine how fun it would be for each person to hold their cup of warm hot chocolate in their hands as they read the meaningful words that were written about them on the cup. PRECIOUS!
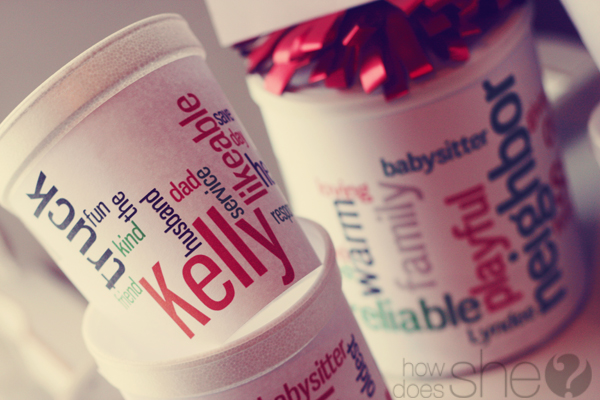
To find out all the steps to this adorable gift idea, visit the post Shelley wrote at U-Create by clicking HERE.

How Does She also have an extensive list of 30 Neighbor Gift Ideas that you have to check out HERE.
Tell them Traci sent ya! :)
Extra Gift Ideas
To see how to make each of these, just click on the picture!
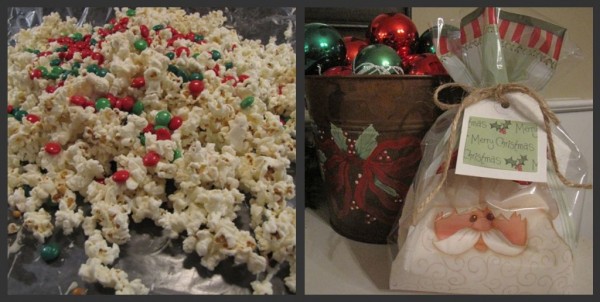
White Chocolate and M&M’s Popcorn Treats
Stamped Tile Project
Clever Gift Wrapping Idea
Placemat Pillow
Silhouette Tiles
Wow! That was a long post! But I hope you found an idea or two that you liked. :)
I want to thank Kaley, Sharon, and Katie for letting me join them this year in their Beautiful Christmas…on a budget series!
Here’s some good news!
There is still one more day left!!!
Kaley is hosting a Christmas linky party on her blog tomorrow, so be sure to drop by and link up your Christmas ideas. I can’t wait to check them out!
I will send you the link to the party as soon as it is up!
Have a blessed day!



Love the post note idea and the ones that you made turned out so cute! Also LOVE the hot chocolate idea – I’ll be clicking over to check it out. Thanks so much for sharing the ideas!
Thanks for stopping by! :)
Ohh, some good ideas here, thank you!! THe post its are cute and easy, I love the coasters, and I am definitely checking out the hot chocolate cups – really really cute! Thanks for the ideas.
These are such great ideas. I love the post it note covers! So cute.
What fun ideas! I have done Post-It covers on the computer before (to go with a theme or event) but love the look of these even better! Keep the ideas coming! ;-)
The monogrammed coasters are very cute, and I love giving personalized gifts!
What cute gift ideas. I love the dressed up post-it notes. THey would make a perfect teacher gift.
Those are some fabulous ideas. Thank you for all of the work you put into snapping photos for the tutorials. I’m going to get past this weekend, which is a busy one, and then work on making a list of things I need to do the post-its and coasters!
Merry Christmas!
Thank you, Traci–these are great ideas! I just LOVE the post-its–you’re so clever!
Hope you’re having a blessed Advent season!
What great gift ideas. I’m heading out to get some post it notes and try making some. They are so cute for just the right price!
These are truly amazing and wonderful ideas, thank you so much for sharing! I especially love the post-it-note holder. Those would be great for gift cards, too.
You’ve inspired me to get cracking on some new ideas; thank you!
:)Erin
These are all very cute ideas and who isn’t on a tight budget! Love the post~its and the coasters…I’d like to try making those! Thanks so much!
XO
Jane
Love, LOve, LOVE these ideas!! You have helped me out with one of my gifts!! Thank you, thank you, you gorgeous creature!
Great ideas! Thanks for sharing!
Love these ideas! I am bookmarking to read more later! I think I could make some of those coasters for gifts!
Love the post it notes tutorial! Some great posts!
Loved, Loved, Loved the adorable ideas…thanks so much for sharing!
Girl! Those are so cute! I love all those ideas! I just saved this post in my “Christmas ideas” file. : )
Traci, great ideas! Loves the post-it notes and coasters. Wonderful!
When you first shared the handmade coasters last December, I knew I had to made them! Instead of using festive holiday napkins, I decided to use different photographs (using recycled photo paper, they are very thin and paper like) and my entire family loved them! I am not sure what to make this year yet, but I am definitely going to browse through more of your and the ladies’ craft ideas!
That is a great idea! I am so glad your family loved them. :)
I’ve always wanted to try making them with pictures…hmmmm….maybe I will!
WOW I just love those coasters. I pray I have enough time to make some for people and us! Thanks so much for sharing…I THINK I met you at Relevant. Do you have all boys for kids? Melissa
Yes, Melissa.
I have four boys! :)
Maybe we did meet at Relevant.
Unless you are confusing me with Quatro-mama. :)
Thanks for stopping by!
Traci, Thank you for the sweet words about my Hot Chocolate Art and linking up to our 30 neighbor Gift Ideas! :) You’re the best. :) -Shelley {howdoesshe.com}
You are welcome! I am just so excited you stopped by my blog! Woohoo! :)
Thanks for all of the great inspiration from your blog!
GREAT ideas! I have left over tile from a fireplace project that was inexpensive to begin with. My husband kept nudging me to get rid of it because he said it’s just taking up space in the garage. I told him some day I’d find something to do with it. Well there it is. I love those ideas and one could just keep coming up with new things to put on them. I can’t wait to do it. He recently built me a potting shed and I’ve been collecting tiles from do-it-yourself pottery places my kids make and now I can use these along with those to create a really unique table top or just hang some on the walls. Thanks again for sharing such great ideas. Merry Christmas.
What great ideas. I love the coasters. I used to have a bunch of white tiles left over after we remodeled our kitchen. I kept them for awhile but didn’t know what to do with them. Now, that I know what to do with them, I don’t have them anymore!! boo hoo.
GREAT ideas!!! Thanks!
Interesting blog…. Thanks you have given a good idea for a Christmas gift…
What wonderful ideas, if anything they are definately inspirational. I work part-time at Home Depot in the flooring Decor Dept. I will definately suggest the coaster idea to customers (we have lots of white tiles lol. Another idea for feet is the felt feet or plastic tabs that go on cupboard doors so they don’t mark. Love the hot chocolate covers and post it note covers. I would love getting these gifts too. Thank you for posting these.
Okay, those Post-it Notes have to be one of the cutest things I’ve ever seen! And I’m a BIG scrapbooker (I keep four books … one for myself and one for each of our three sons), so I always have lots of paper and craft materials close at hand. THANKS for the wonderful idea! And have a blessed and happy holiday season.
Traci,
W o W !!!!
Love the ideas you have shared. Fantastic and cute.
I don’t have my act together to do these this year…but Lord willing I will in 2011.
Merry Christmas to you,
d from homehaven
I love, love, LOVE the coaster idea!!! I hope we have cork at Walmart!!! I am running out to get the spray, tiles and cork board. First time here, I love your site! Thanks!
Samantha,
Thanks for stopping by!
I am glad you liked the coaster idea…it’s one of my favorite projects ever.
Have a Blessed Christmas!
Traci
You as well! We are making them today, and I will have pictures on my blog soon. :) We are making them for our elders and their wives. (My husband is a minister.) We are making oodles of them!
Hi Traci, I love your gift ideas! I think homemade gifts are so thoughtful. I’m featuring your post-it notes on my blog today..I just had to share your idea!
http://www.diynewlyweds.com/2010/12/diy-homemade-christmas-gift-ideas.html
I am sooo inpsired that I am ready to make those coasters!!! What a super idea!. Thanks so much for sharing.
Merry Christmas!
Marilyn C.
I love how you packaged the post-it notes. I can think of many I could gift these to. I have the stamp you used on the tile. Did you “rough” the tile or did it come that way? So many cute ideas…I may have to wait until after Christmas but these are some that could be used to encourage others.
Love all of these but especially the post it note ideas!!! I have to share this on my FB page!! Great post!
Those post it notes are the cutest thing ever, thank you for the idea!!
Good Morning! I loved your idea of making coasters using small ceramic tiles and mod-podging on
a cute pic from a napkin. I tried doing them last night and they really went “wrinkley.” Any suggestions
you could give me would be so gratefully received!
Absolutely love your web-site, I check it every day!
Thank you!
Pam
I linked to this today on my blog! Thanks so much for the wonderful idea (and I hope you don’t mind my copying you!)
http://onehappinessinlife.blogspot.com/2011/02/post-it-note-crafts.html
Thank you for the inspiration with this very cute post-it holders…I gave you a shout-out on my blog today :)
http://christinasadventures2010.blogspot.com/2011/02/fun-school-supplies.html
I finally made your adorable post it note holders and told people to come to check out your tutorial. This was a great teacher appreciation gift!
Thanks for the tutorial! These were super easy to make!
Jill of oursevendwarfs.com
Thanks for posting, I shared your post-it note tutorial link on my blog
http://craft-connection.blogspot.com/2011/11/upgrade-your-post-it-notes-diy.html
Thanks for the tutorial…easy to follow directions!! I made one and then got on a roll and had an assembly line…they are so fun and a great use of scrap paper. Giving to lots of teacher friends this year!! Thanks again for the inspiration and instructions.
I’m a teacher too, and I know what you mean about never having enough Post Its! I love the little covers because you can keep the Post Its in your purse or tote bag tohave them handy whenever you need them, without the notes falling off or getting torn or crumpled. Great tutorial!
Hi,
Do you think I could use a picture on the coaster? Such cute, great gift ideas!
Jennifer
Wow, I love all of these!! Thank you for all of the budget Christmas gift ideas!! I’ve just finished a frugal crafts round-up and hope it is okay that I featured your cute little post it note holders.. You can see it here: http://jamiebrock.hubpages.com/hub/Frugal-Crafts-15-Easy-Craft-Ideas
Thank you again :)
Loved the post-it note gift. Made several but one problem. When opening the finished project, the stick on Velcro tore off the paper. Had to go back and hot glue all Velcro. Otherwise, simple and fun.
I made the tile coasters and could not keep the napkin picture from wrinkling from the wetness of the modgepodge. Any ideas on what I might be doing wrong?
The napkin does wrinkle some. It gives a cool effect. It shouldn’t however distort your napkin. Maybe try a thinner layer of modpodge?