
DIY-ing our Basic Brick Ranch into the Cottage of our Dreams! {Part Six}
Welcome to Part Six of my series!

Today, we are headed back over to the new addition of our house.
I found some old pictures of when we were working on our master bedroom, and I think it will help you visually see where everything is.
This is what you see when you walk into our master bedroom…

To the right is our sitting area and french doors that lead out to our “someday” wrap around porch…

You can see the entrance to the master bathroom below…

And there is the door leading out of our bedroom…

Unfortunately, I haven’t taken a ton of pictures of our bedroom because there are so many unfinished parts. And when I say “unfinished,” I am referring to decorating instead of building projects.
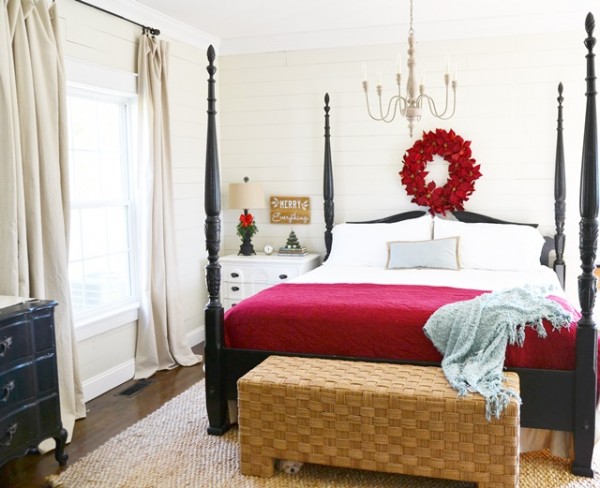
But I have been able to spruce up parts of the bedroom for home tours I have participated in, like my Christmas tour…
And my fall home tour…

You can see the makeover I did on our bedside table HERE.

I do not have any current pictures of our sitting area because it isn’t finished yet. I basically have two chairs sitting in that area, and it usually is used to “store” items I don’t want to see. (aka: junk corner) It is my plan to finally get the sitting area decorated and finished this year! #fingerscrossed
I also found this picture of our bedroom in our Kentucky Home Tour (notice the sitting area is not included. ha!) My friend, Layla, took this picture.

For our master bathroom, we found a beautiful antique door that used to belong to a classroom in our alma mater, Asbury University. We replaced the old glass with a new glazed piece of glass for privacy.

For our vanity, I re-did an antique dresser. Click HERE to see how we added the sink, and HERE to see how we painted it.

My favorite part of our bathroom is our claw foot tub. We found it on craigslist and re-did it.
Click HERE to see how refinished the claw foot tub.

To give our ceiling some character, we installed faux wood beams.

You can see more pictures and a video of how we did it HERE.
Since our brick had an “orangey” color to it, I decided I wanted to white wash it.

You can see how we did that HERE.

We went for a clean, timeless look in the shower by using white subway tile on the walls and Carrera marble on the floor.

For more pictures of our master shower, click HERE.
Sooo, I haven’t really done anything else in the bathroom except we added this antique knob that we got at an antique mall for about five bucks. 
I also found this rug that I loved at Home Goods, and it was the perfect size. It also adds a little color to the space.

We also added a crystal chandelier above the tub, but it is impossible to take good pictures of it! UGH! We got it at Home Depot, I think. I’m not super crazy about it, but it is fine for now. I am hoping to eventually find a beautiful antique brass one to go there.

As you can see, I still need to add curtains and other decor. When I do, I will be sure to share it here on my blog! :)

So as you can see, we have built a NEW addition onto our house, but we have tried out best to make it feel OLD. Are you feelin’ it?
Working on this part of our house caused me to write one of my most popular series on my blog…..

For more inspiration in how to make your new house feel old, click HERE.
Next week, we will finish our series with the upstairs in our addition and our den. Yay!!
HAVE A BLESSED WEEKEND!!

Wow! Beautiful!
You have such a cozy home. You both have done a wonderful job of not making it look/feel like a new build. Centsational Girl posted about taking pics in front of bright windows: http://www.centsationalgirl.com/2013/04/photo-editing-trick-fixing-blown-out-windows/
Great pictures but the very best one is the fur baby photo bomb peeking out from under the bench at the foot of the bed. Precious.
I love your space! So many great details. Thank you for the inspiration. Layla is amazing, isn’t she? You’re blessed to have each other.
Hi, I love the plank walls. We are building a new “old” farmhouse and I would like to incorporate plank walls in the living room and master bedroom. What advice can you give me for types of wood, size of planks, most cost effective? Thank you!
Hi Kathy, check out my pinterest boards, I’ve got several pins there with DIy tips and tricks for this exact project!
It is all so beautifully warm and inviting. Would you be so kind as to tell me the brand and paint color you used for the wall behind the tub?
Thanks!
Love the whitewashed brick!