How to Refinish an Antique Claw Foot Tub {Check out my New Tub!}
Last year, we found this great antique claw foot tub on Craigslist.
You can see the video HERE.
Well, it was finally time to refinish this baby!
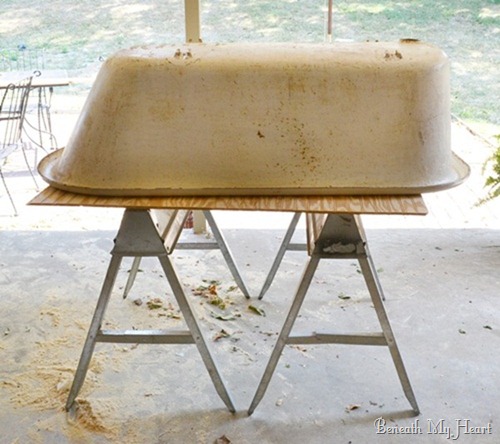
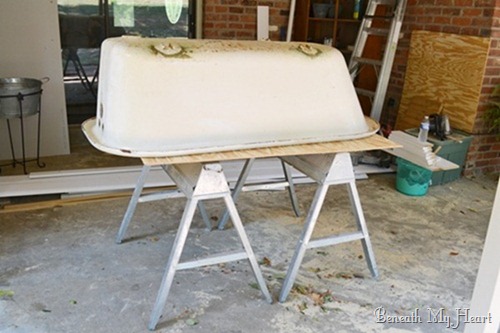
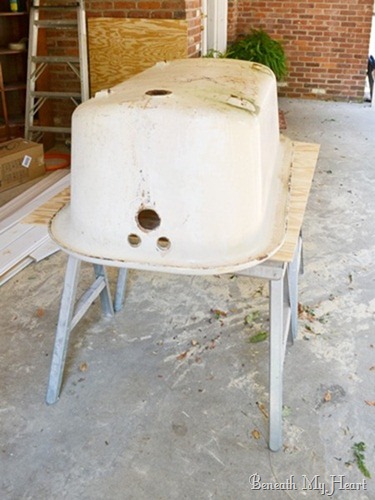
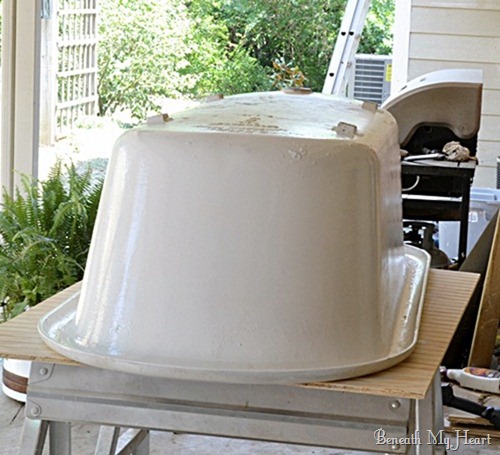
So Cy set the tub up outside on some saw horses this past week.
I’m not totally sure how completely safe this set up was, but it worked for us. ![]()
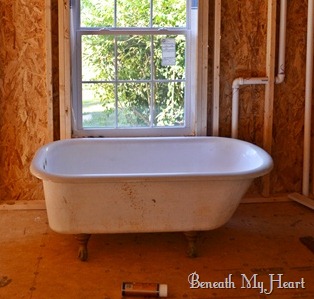
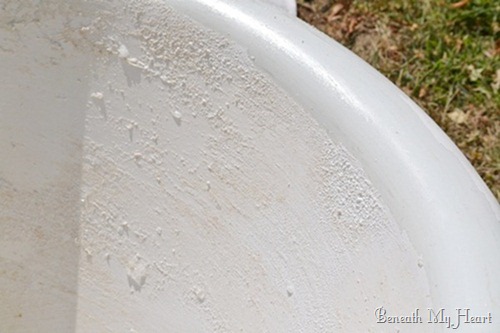
As you can see, the tub needed a little TLC.
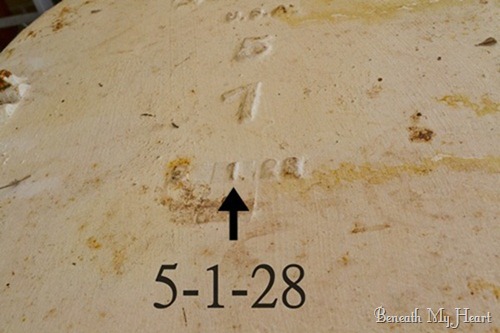
I took a picture of the bottom of the tub to show you when it was made. How cool is that?
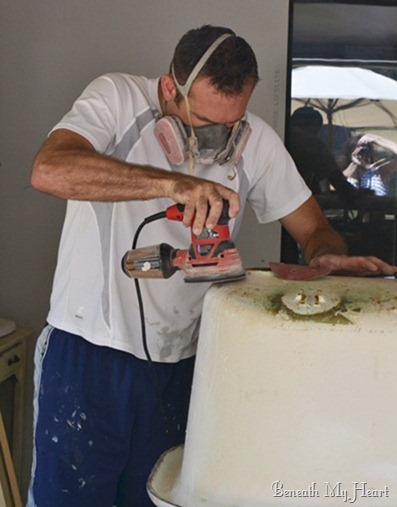
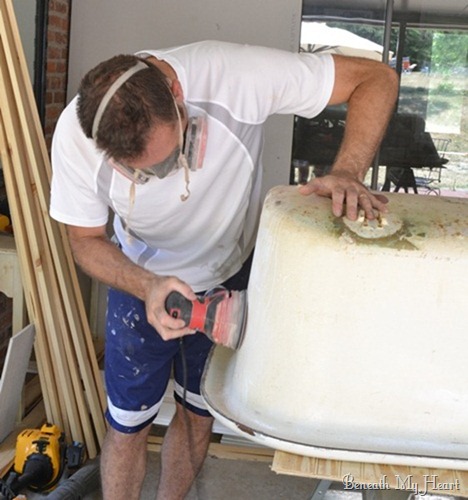
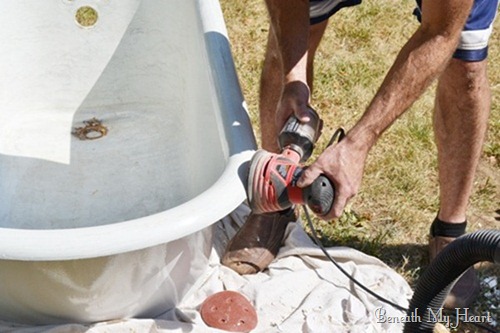
Cy used an orbital sander, with 80 grit sander paper, at first to get the flakes off the outside of the tub. With a cast iron tub, it is hard to get a perfectly smooth surface.
Next, he sanded it with 120 grit sand paper, and then 220 grit to get it as smooth as he could.
There were a few spots on the tub that sanded down to the metal, so he sprayed those spots with a spray primer so the paint would adhere.
Next, he chose to use white automotive paint from PPG that we had left over from another job that he had done a couple years ago. Many people use automotive paint for the outside of the tub, but it is not necessary.
You could use the same tub and tile kit that we used on the inside of our tub (see below) on the outside of the tub if you wanted.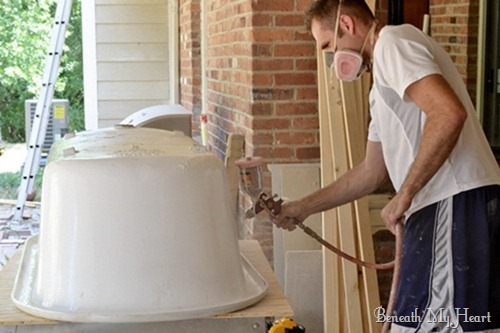
Aaaahhh…doesn’t it look beautiful already?
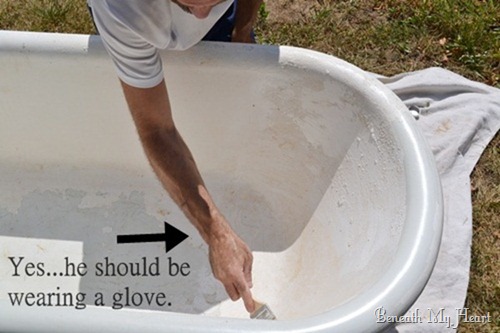
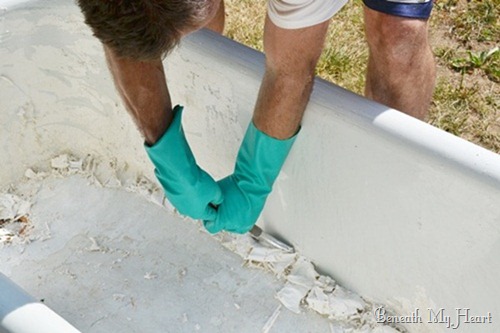
Next, it was time to apply gel paint stripper on the inside of the tub. Cy didn’t have gloves on at first, but he quickly put them on, along with safety glasses. This stuff will eat your skin up!
Let me tell you that my husband did this work in 100 degree temperatures! It was BRUTAL!!!
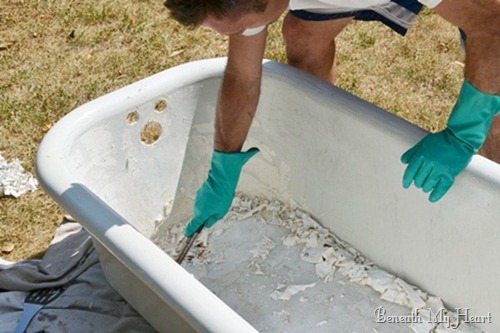
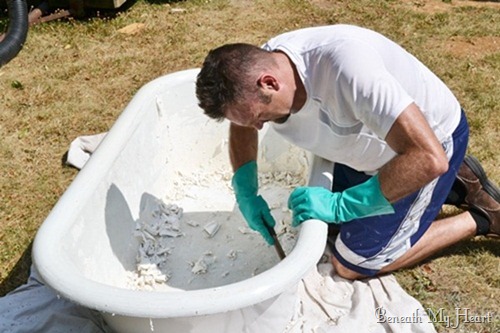
He spent hours in the sun stripping the inside of the tub. This was the most difficult part of the whole process by far.
He used a scrapper and wire brush to help strip off the paint.
I kept bringing water and gatorade out to him about every 10 minutes. The boys and I watched him work from the comfort of our air conditioning inside the house.
He is such a hard worker! I think I fell a little more in love with him that day. ![]()
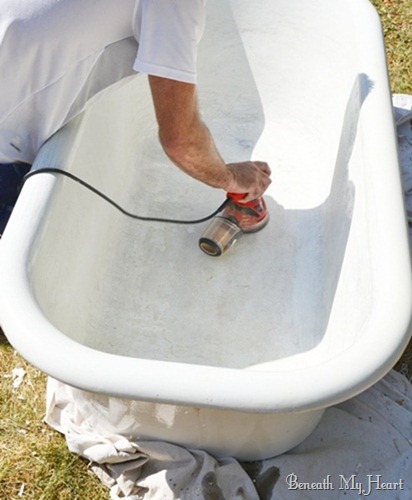
After he cleaned up all the paint residue from inside the tub, he used his sander again to smooth out the surface.
He used 180 grit sand paper.
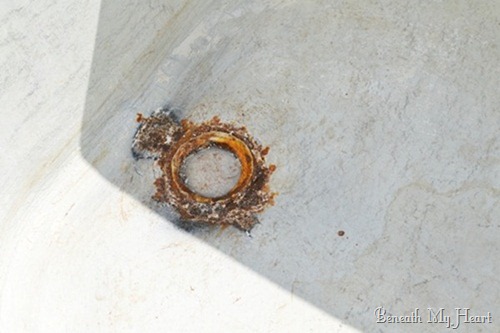
You can see that there was rust around the drain.
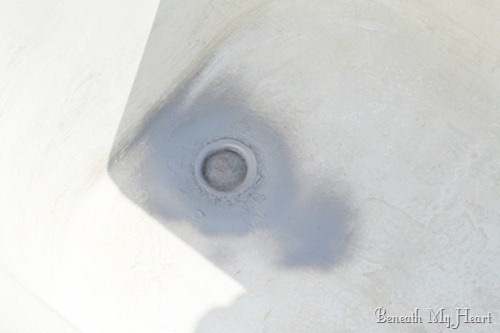
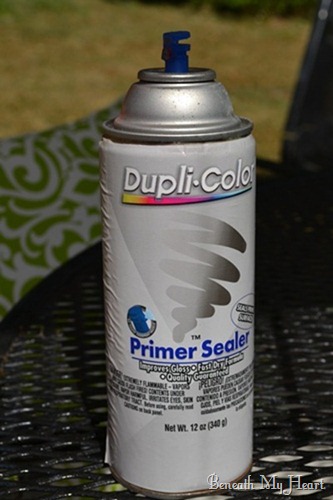
So Cy covered the rust with a spray primer/sealer.
Here is the spray primer that he used. This will keep the rust from coming back and help the paint to adhere to the metal.
To paint the inside of the tub, Cy used this Tub and Tile refinishing kit from Lowe’s. It’s about $40 for a box, and we used almost two boxes.
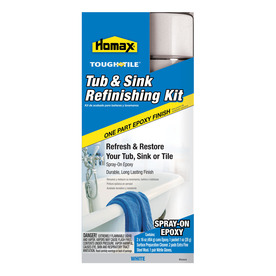
We bought the spray on refinishing kit, but Cy said there is also a brush-on kit you can purchase as well.
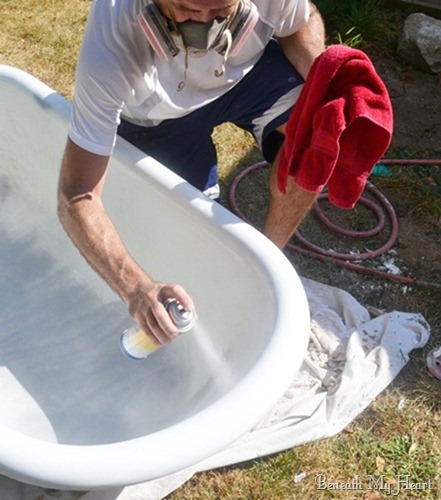
You want to make sure you spray the epoxy paint on in small, smooth strokes.
We did three coats of epoxy, lightly scuffing with steel wool between each coat. Cy also used a tack cloth between each coat to get any dust/steel wool particles off the surface.
Notice the red towel Cy is holding? It wasn’t for the tub, it was for his head because his sweat kept dripping into the tub. That’s how hot it was!
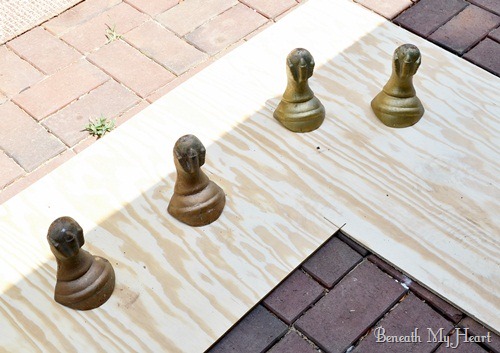
For the claw feet, we just removed them from the tub and lightly sanded them before painting. You can spray them with a primer first if you want, be we didn’t.
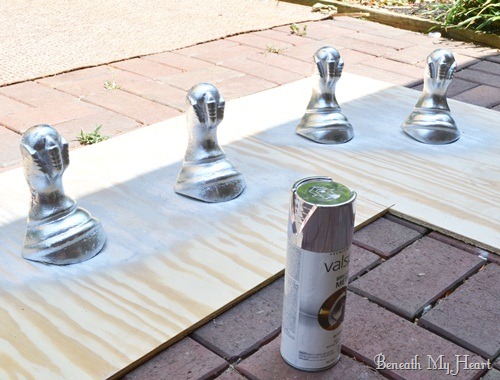
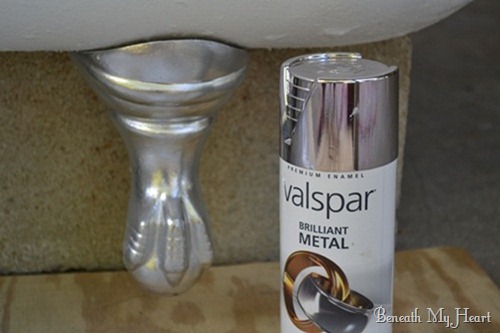
We used some Valspar metallic spray paint at first
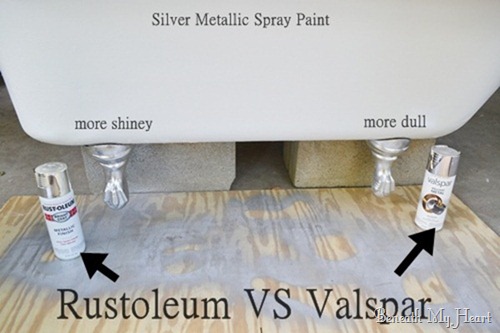
I wasn’t crazy with the results. It looked a little dull.
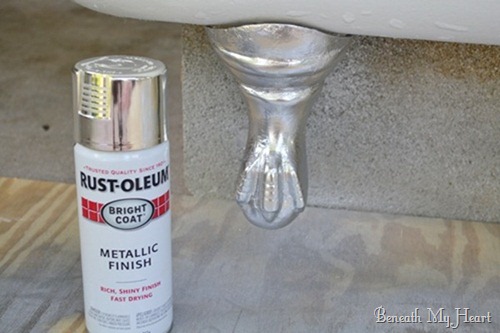
I was hoping for a shinier, “chrome-ier” look on the feet, so I went back to Lowe’s and got Rustoleum’s metallic spray paint.
I was super happy with the results! I don’t know if you can tell the difference in the pictures, but the Rustoleum spray paint was definitely shinier than the Valspar spray paint.
We left everything dry real good before bringing it back into the house.
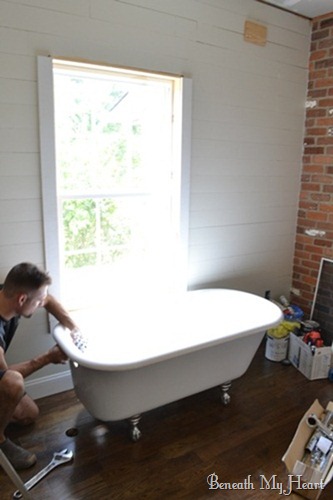
Here is Cy hooking up the tub faucet.
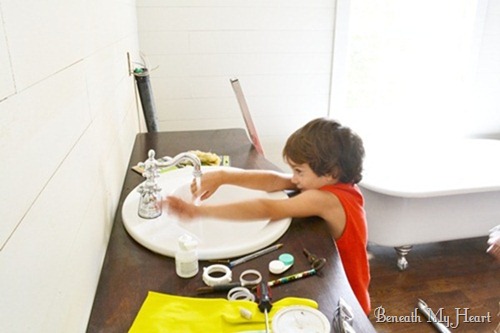
Here is Eli enjoying the running water we FINALLY have in our bathroom! Woohoo!
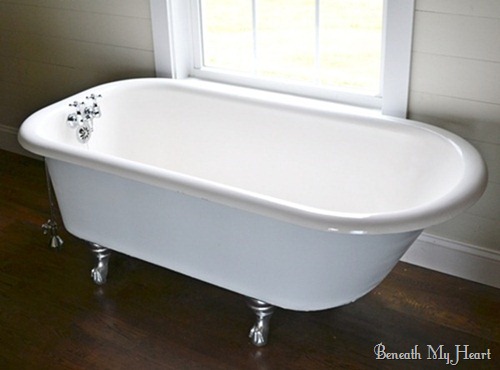
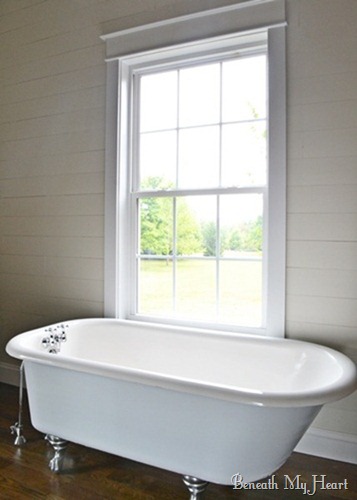
Now we have a beautiful claw foot tub to enjoy!
I love the way it turned out! We have about $250 dollars in this tub (minus the faucet), and I think it is just as beautiful as this claw foot tub that sells for about $1,200 at VintageTub. And that is on the low end of prices.
Cy also finished the window trim in the bathroom this weekend. I will be posting a video tutorial of that soon.
What do you think of our “new” claw foot tub? Do you think the money we saved was worth all the hard work?
If you have any more questions about this process, just let me know!
Thanks!

It’s gorgeous!!!! You guys did an amazing job refinishing it. Love watching your bathroom come together!
“Oh my gosh it looks terrific” I have one exactly like that sitting in my back yard and I would have never guessed it wood look as beautiful as yours. I am now rethinking getting rid of it. Thank you so much for posting. GREAT JOB!!!!
REBECCA UDINK
Absolutely beautiful fantastic job well done love it will be doing the same with ours
It looks so good!! I dream of having a clawfoot tub one day :) Looks like a lot of hard work went into it but soo worth it! Can’t wait to see your new master bathroom/bedroom all done!
I love it!! I’m sure it was a lot of work…and if it wasn’t so hot, y’all would probably feel like it was an even better deal! In the long run though, you saved a LOT of dough! That’s got to feel good! It’s gorgeous!
anything is worth it when you do it right and do it your self. Cy sure put a lot of love and hard work into that tub and it shows. You all will enjoy bathing in it more knowing all the love that went into it.
the MB is shaping up. can’t wait till you put all your little finishing touches on it for the final reveal.
Wow, wow, WOW!!! I think just knowing how much work went into it, and how hard your husband worked on it, actually makes yours look even BETTER than the brand new expensive one. That looks FANTASTIC!
Your claw foot tub came out beautiful! II love the chrome feet. It was definitely worth the effort!
It is beautiful! Does is weigh a ton? I ask because my uncle has one he offered to give me. It is in much worse shape than yours was to begin with. I would love to have it, but worry about how difficult it would be to maneuver it, first for refinishing, then getting it into the house. I’m not sure it’s a project my husband would get on board with, since we have a perfectly functioning (boring) tub.
A typical 5′ clawfoot tub weighs between 250-300 lbs.
WOW!!! Amazing! Yes Cy’s hard work is worth every penny saved! Plus you’re reusing and keeping that beauty from being tossed. You’re one lucky lady to have such a hard working talented hubby who shares your vision….my hubby would of said, “nope, not doing all that hard work just to save $1000. Lets just put in a shower.” Lol
Hope you get to enjoy your new tub soon!
Love your tub! I do have a question about claw foot tubs though. How in the world do you clean behind them, next to the wall?
Wow a lot if sweat equity there but she’s a beauty! And you have the real deal, not a vintage tub wanna be!
Wow!! It is beautiful!! Great job!
your bathroom surely is shaping up nicely. and that tub! the transformation was unbelievable & all for $250. that’s such a steal for the result you got!
Amazing! I have been wanting a claw foot tub for a long time. Never thought to look on Craigslist. I will be checking now. Great Job!
Oh Traci, it looks absolutely stunning. I am so impressed with your husband and working in 100 degree temps. I would have given up as soon as I stepped outside. His very hard work paid off. I hope you’ll let him soak and take a bubble bath!! ;)
Gorgeous! Your husband rocks! I can totally tell the difference between the spray chrome. :) I thought you’d go with a darker type color like that dark coppery looking color.
It looks so amazing, Traci! Cy is a genius and I love your vision for the bathroom. I can’t wait to see the finished look! Your posts always inspire and add just the right amount of ‘umpf’ to remind us what is possible as we continue to search for the perfect farmhouse to restore. :O)
OMG, this is GORGEOUS!! Seriously, am so jealous right now! Love it. <3
Your tub is just beautiful and so much more worth the time your absolutely amazing husband spent fixing it up to the beauty it has become!!! You sure got a good one with Cy–he is so talented and willing to work so hard. I do not know many men like that. My husband is always willing to work hard and tries a lot of things–but he could use some classes from your husband in the DIY area. Enjoy you lovely new claw foot tub…..
I am in love. It sure looks nice in your bathroom. I have just stating to look at bloggs.
Do you live in an old country house or are you making a new one look old?
What a man! Great job on the tub. I bet you can’t wait for a nice long soak. Your bathroom is turning out just fab.
Love it. It has always been a dream of mine to have a claw foot tub. I feel in love with the idea when I was a teenager. My husband also has the same dream. However I have a feeling he would not spend as much time as your did to restore one. He did a wonderful job. Now when you are taking a nice relaxing bath you will appreciate that claw foot beauty a little bit more. I can’t wait to see the completed bathroom.
Looks amazing! Your husband must really, really LOVE you to do that in 100 degree heat. I have one to do and I was wondering…where did you get your faucet hardware? Need to get some and LOVE yours!
Oh wow!! You must be so thrilled!! And no wonder you’re so in love with the hubs — he’s a rock star!
In that heat? I would have caved & bought one already finished. :-) Seriously, this guy is truly amazing to do this! He does so much and both of you are extremely talented. I honestly am amazed that he could tolerate the heat like that.
The tub is truly gorgeous! I know your completed bath is going to be beautiful…and I think a long soak is in order for him.
Pat
Traci the tub is beautiful. I noticed all through the blog you said “we”. (Ha-Ha) Cy did a great job and he deserves some extra hugs and kisses. Can’t wait to see it all finished but I am sure not as much as you do but as they say you are never finished. Thanks for sharing, you are such a sweetie..
What a fabulous job, Traci! And what a keeper Cy is! I’ll bet that you just love having such a handy hubby! lol! I love the look of your tub next to that awesome planked wall, too. Reminds me of something I’d see over at Layla’s at Lettered Cottage. :) Enjoy that tub, girlie! I have one in my bathroom and can’t imagine my life without it! lol!
xoxo laurie
was it worth it?? yes mam’m! think of all the love you felt for hubby! think of your boys being with you! that is something you all will remember for the rest of your lives! enjoy the moment, Dear One. Job well done! gorgeous!!! now put the little rubber duckie in! :)
Pink Hugs,
Dee
My husband looked at all these photos and said to tell you that your husband is a saint!
P.S. It is beautiful!!!
What a wonderful job. Our tub is built into the wall so we can’t remove it but I think it could be done the same way. Thanks for sharing.
Looks amazing! What a great job
Traci. your tub is beautiful and so is your home. I have a hard working husband who is usually ready to tackle most any project but I’m not sure he would have done this. I am so glad your husband didn’t have a heat stroke! It is very obvious the love he has for his family by all the hard work and sweat he has put into making this house a home . He is setting a good example for the boys in his “can do” attitude. How proud you must be!
Traci. It’s is beautiful! I love it. Y’all are having some wicked heat this summer…Texas is fairly mild this year believe it or not. Keeping my fingers crossed that it will stay that way, after last year we’re still feeling the effects of intense heat and drought.
So who got to take the first bubble bath in the tub? you or Cy?
Wow, Traci, Cy is the MAN! Sometimes we can say a guy is being “a man” but when we say they’re “THE man,” it means they’ve done something extraordinary. Giggle giggle…..
That tub looks professionally done and think of all the money you’ve saved!!
Terri
Very, very lovely! This post is very timely for me since I just started refinishing a clawfoot tub for our bathroom redo. I’m still working on the outside but I have a question about the inside; why did you strip it first? Mine seems to be enamel and I was just planning to use the Rustoleum Tub and Tile paint from Menards and follow their instructions for application. Now you have me rethinking. Maybe I need to strip (the tub) first???
Oh, and my tub has a date on the bottom too. I forget exactly but I know the year was ’42. Not as old as yours but it looks identical down to the feet.
Traci,
It’s been so long since I’ve commented. I just got a new computer yesterday. I have missed seeing all of your projects! I love your bathtub. It turned out beautiful. I just know that you love it. Now you have inspired me to get to work on ours. I bought one at an auction over 5 years ago. Thank you for the inspiration! I just showed my husband your post. :)
Hugs.
Lee Laurie
This project took me back to last year when I was refinishing our antique claw foot tub! Our inside was in good shape, so we did not need to redo it… just clean it real well! Yours turned out fantastic! Just a note if you have a building or plumbing permit, you might need to change out your faucet our tub came with the same type original faucet, but we were told it would not pass code here in Ohio. I have enjoyed watching you add to your new home!
dee dee
Visiting from A to Z. That looks amazing and i love the tip about the automotive paint!
Your tub looks great! We had an old claw foot tub years ago, painted the outside and had the inside professionally done. Unfortunately, the builders stuck a ladder in it and scraped it up before we even got to use it! I don’t think there were any diy kits back then. Would love to have a clsw foot tub again.
This is beautiful! Was your inside already painted? Mine are porcelain and I’m sure paint stripper wouldn’t remove it. I’ve cleaned and polished the interior (not the bottom) and painted the outside years ago, but you’ve inspired me to make a change in color on the exterior. I used the paint on finish at another house and it worked really well. It is also possible to have them reporcelained which bonds the finish to the iron for not too much if you can transport the tub. otherwise it’s expensive. I really want to do it to my old -fashioned sink.
My bath has the original faucets, but since they’re original to the house they’re grandfathered into the code here in Ohio. In another house I had for rental they passed as it wasn’t on a shower. Yours look reproduction, so I’m sure they meet code.
The molding is also really beautiful. I can’t wait to wee the final product.
CTD
I love Eli at the facucet. Running water is kind of a miracle that we take for granted.
I love it! You guys did a fantastic job on refurbishing it. I would never think to look on craigslist for a tub but now I definitely will!!!
Anna
http://www.askannamoseley.com
Traci – Absolutely stunning! Poor Cy, hope he doesn’t get too overheated in this lovely heat we are having here in the south. Yes, it has been brutal the last few days, but God is merciful – we had rain and temps were 20 degrees cooler than two days ago. :)
Marilyn C.
Hi Traci,
WOW, are you the luckiest wife in the world or what? How wonderful of Cy to work so hard to make your home a beautiful place to live.
I just had to let you know that I have a friend that refinished antique tub like yours with the same product. I saw it and it was gorgeous just like yours. About a year later I was talking to her about her tub and she told me that her husband was dealing with severe muscle pain and decided to use the tub to soak in and he added Epsom Salts………PLEASE DO USE ANY BATH SALTS WHAT SO EVER, it ate into the paint and made the beautiful finish that was in it all rough and ugly. She was so sad and her husband was so sorry that he accidentally ruined her tub. WHO KNEW!?!?!?
I’m posting this info just in case no one else did. I haven’t got time to read them all.
Blessings and Hugs from Louisiana,
Dawn
Beautiful job! Your bathroom is going to be gorgeous!
Words aren’t enough to describe this post! i know that you know what an amazing man you have there. The “Cys” in this world are a rare breed. Not many men would do the things he does for you and your family. The fact that you love him soooo much brings a smile to my face.
It looks amazing. You two do work so hard, but you always do something that is fabulous. I love it. Hugs, Marty
It’s just gorgeous, Traci! As for being worth all the work, maybe we should ask Cy….lol!
Just an FYI regarding Cy’s sweating. My hubby sweats like crazy & discovered an item that keeps it out of his eyes & off projects. He bought some thin sponge-type things from a place that carries supplies for welding. They fit around your head with a nice half-inch band & welders use them under their helmets. He bought a ton and always has them handy, so when one gets totally “sweat-logged” he just grabs another one. He just hangs them some place to dry and then re-uses them until they disintegrate. He’s been working on a garden building during our triple-digit AZ weather. He doesn’t even mind when I call him “mophead!”
Looks amazing!! I’m impressed that he was working in the insane heat this weekend! It was miserable to just walk outside to the car, let alone work outside doing manual labor! Great job Cy!
Yes, it’s worth it! I would do the same thing. I’m so glad someone else out there is as crazy as I am.
Dear Traci,
She’s a beauty!!!!
You’ll love soaking in this tub after a long hard day!
Great job.
God bless and I know God will honor all your hard work.
d
The tub looks wonderful. I was wondering a little bit about how much you have invested in the tub. In the video you said you paid $275 for the tub from Craigslist. At the end of the re-do pictures you said you have about $250 into the tub. Does that mean you have invested $250 in addition to the $275 purchase price? It didn’t seem like you spent $250 on the cleaner and paint. I can’t tell if you got a new faucet. It looks like the original one, but looks shinier. I just have a mathematical mind. Thank you for all you inspiration.
Oooooo,, so glad to read this. We are getting ready to re-do the ugly tile in our bathroom with this kit and I’m so glad to know how great it worked for you guys. :) Good bye ugly green tile wall…….
Wow! I would love an old clawfoot tub. What a hard worker your husband is, he is amazing. The tub looks wonderful in your bathroom. I didn’t even know Lowes had tub refinishing kits. I might have to start keeping my eyes open for a clawfoot tub. I’ll break the news to my husband later about the project I want him to take on.
Traci – love your tub. I have one like this but it needs to be re-done. a few years ago I used the stuff from Lowes but during winter we let water set in it for several days to use to flush the stool during bad weather and I have a few spots peeling. I like th idea of how he sanded the tub first. Also, I really need new fausets since the chrome on mine is a little bubbly. Did you purchase new fausets? If so where did you get them?
Hi there! Where did you get your faucet hardware from? I have a very similar looking clawfoot tub that I’m in the process of refinishing, and I’m having the hardest time finding great hardware. Love yours! PS – your tub looks great!
WOW… I am thoroughly impressed with your hubby…that looks like such hard work…but the results…gorgeous!
I’ve been wondering how the paint refinishing kit actually works! Thank you for sharing your sweat, blood, and tears with us! It had great reviews on the HD or Lowes website. We have a tub from the 50s that desperately needs to be repainted. Can’t wait to try this!
This is a fab tutorial! Thank you! I have an older clawfoot tub sitting in my basement from my family’s cottage in Maine… We took it out before it was rebuilt. I was wondering how to refinish it. Your husband is a good man. :)
Hi Tracy _ still wondering where you got your faucet for your clawfoot tub?
Your tub is beautiful! Your hubby did a wonderful job!!
I just aquired a tub from one of my clients….I am stockbroker by day, budding restoration of anything as often as possible. My tube is a 5′ clawfoot with a manufactured date of 1/13/99 as in 1899. It is in pretty good shape but needs the same treatment as yours. You did a nice job. Your efforts will be very helpful in my completing of this job.
I am still floored by this project Traci. It is beyond gorgeous (& such a steal!!!) We have had that refinishing kit in our shed for three years… & I am terrified to try it. (Mostly because we are a one bathroom household!) How is the epoxy holding up? Our tub is in need of some lovin. This might just be the year.
xo-Kristin
It looks amazing!!! It really helped me appreciate how much work it would be to do a similar project. I am looking to rent an apartment I fell in love with with an antique clawfoot tub that a previous tenant painted the inside of with regular house paint and now is peeling. I am negotiating with the landlord to fix it. It doesn’t make sense for me to put in hundreds of dollars into a rental! I think the moral of the story here is DO IT RIGHT! That means $$$, blood sweat and tears! Great results come with it :)
Hi I am preparing to do a claw foot tub for the first time and yours turned out great! What kind of paint stripper did you use? I only have a small window to do this so I have to be prepared, I don’t want to have to run to the store to get more supplies if what I got doesn’t work.
Hi!
I am getting ready for my own clawfoot tub refinishing adventure and your post has made it seem like a possibility to do it myself. I am wondering how this has held up. I have heard that some of the tub refinishing kits do not hold up very well and am nervous about putting all that work in to have it not work.
Thanks for sharing that, Traci! I’m in the process (finally!!) of refinishing a cast iron claw foot tub and I’m looking for tips and tricks and info. I take it your tub was painted on the inside as well as the outside(?). I don’t think mine is. I just have a little rust on the inside to contend with.
I was especially glad to see that you used spray paint! My husband is an auto body tech/painter by trade, and he’s been making this venture (the way I want to do it) sound impossible! :-) I can see from your post here that it’s absolutely do-able (by ME!) and I can’t wait now to get moving on it! I started scraping loose paint today. This weekend I’ll get it moved outside and get the feet off it. Hubby did offer to do some sanding with is DA, so that’ll be helpful. (He’s not into this rehab/refinishing stuff around the house. That’s MY thing!)
I’ll let you know how it turns out! Thanks again.
i know that your husband worked really, really hard on this in the grueling heat, but the fact that you watched him do that for your family with your boys is priceless. they’ll probably never forget how hard their daddy worked for something that was so important to you and that is an incredible lesson. plus, it will make them appreciate an ‘old tub’ a lot more! ☺ a beautiful story is told here; when you said that you fell in love with him a little more that day, i knew just what you meant. my husband and i spend most of our time collaborating and DIYing on our 1925 home together. it’s our baby!!
xoxo, sharonna misha
Actually in the middle of the same process! Your finished tub looks great! Hope ours goes as well ;)
Hi Traci, I love the makeover of the tub…. Thanks for sharing!
We’ve got a similar tub that we are working on. How do the legs attach?
Hi there, Neat posting. Likely to issue as well as your web-site with web browser, could follow through? For example ‘s still the market main in addition to a big section others is going to rule out the great producing for that reason dilemma.
I’m so impressed! This weekend I’m moving into a 125 year old house with a clawfoot tub. You can tell that someone tried to paint the outside of it, but now that paint is bubbling and peeling. I would LOVE to get it looking pristine again. I grew up in a home with a clawfoot tub, so I’m excited!
Where did you find the faucets? How much did they cost? Thank you for your info.
Hi – we’re doing the same thing to a tub we bought on craigslist! thanks for the great instructions! One question… we’re trying to buy the drain/overflow pipe for it and can’t find one that fits, they all seem to be 14″ horizontal, but the drain hole is much closer than 14″ from the tub wall, about 5″. It looks just like yours. Did you buy a drain that was longer and cut the pipe? or did you find one that fit perfectly?
Just wondering…I see that this post is a couple years old. How has the paint held up over the years? Does the tub get used regularly?
I’m wondering how it’s holding up a couple of years later as well. We would love an update!
Good, bad, or ugly. :)
OMG! My hubby and I bought a 1929 tub like yours in MUCH worse shape. He followed the guidelines you posted. We are almost done and it is AMAZING! God bless you and your husband and thank you.
was wondering how the refinished tub is holding up sense 2012
also wondering how it is holding up? And if you’re still glad to have saved the $ on having it professionally redone
it looks great here
Truthfully, we have never used this tub. I do not really take baths, and our boys use the bathtub in their bathroom. We’ve never gotten around to hooking up the water lines for our claw foot tub, so I don’t know yet. Sorry. :)
Amazing! I didn’t even know something like this was possible. We just purchased a house with an old clawfoot tub in it, and I can’t wait to try some of your tips on it. Thanks for sharing :)
Your tub is beautiful. We got one that my grandfather had broccoli planted in when we were building our house and put it in our daughter’s bathroom. On the edge or lip, there is a place that glaze has come off….it looks like it was dinged and she ran her fingernail down it. Do you think I could fix it with the kit you used?
Thank you for the tutorial! We also bought a clawfoot and refurbished it. I only did the bottom part and left the inside of the tub for a later date. Well, now is the later date! I will definitely be using the same method you did. But I would like to add for anyone wanting a claw foot tub in their own bathrooms, the tub and refurbishing are not the expensive part it is the fixtures. Make sure you check around for the cost of replacement fixtures before you begin this job. Thanks again for the informative post!
We are getting ready to refinish ours and enjoyed your pics and comments. How is the finish holding up .. with kids? .. any cracks or peeling after what .. 2 years or so ??
thanks for any info you have time to share
Hi Dave!
I wish I could help, but we haven’t used our tub yet. :) We are “shower” people, and my hubby never hooked the water up to the tub yet. He is going to someday, but since we don’t really need the tub, we haven’t yet. I know…we’re crazy. :)
Traci
Hey there Traci, I’m enjoying your claw foot tub refinishing! However, in your post I am concerned with the date of your tub and the method you guys chose to remove the flaking paint. That flaking paint, based on the date of your tub, can be well guaranteed as lead based paint. I just raise concern for I noted a child in one of your photos. For anyone considering a refinishing project, especially on those built before 1978…. Do your research, safety first! Home Depot has a DLead paint test kit for fairly cheap if your unsure the date of your project.
Hello!! Thanks for posting this!! My husband and I are about to refinish our old claw foot tub and we have no idea what we’re doing! Lol This helped us find a starting point!!
Hello! I just read the post about how you drilled the hole into your vanity dresser for the sink and I know that your first three drawers are unusable, but how did you get the drawer fronts to stay there? Did you just nail them on?
Runt
Beautiful!! But how did you carry that tub around? lol. We have the same tub, inside needs refinishing, but it’s already installed and weighs a ton! Could we do it inside you think??
Thanks for now!
Just wondering how the paint is holding up after a couple years? I have been contemplating refinishing our claw foot tub because some of the porcelain finish is worn and the base is really rough (minerals maybe).
What does the drain look like post epoxy?? That’s is the most important part. How’s it holdin up ?
I’m so glad I came across this! I plan on redoing my clawfoot tub the same way (white paint, chrome feet). How did you get the feet off/on? Was there any trouble with putting them back on? I’m afraid that if I take them off, I won’t get them back on the right way again. It looks great!
Your tub looks amazing! What if I just want to add a coat of paint to my existing clawfoot in the bathroom – any prep work needed for the paint-on color? The white color is just worn looking – no serious chips or such
Yes, there is still prep-work. Just follow the instructions on the box of whatever paint you use. It will explain exactly what to do. :)
Hi! I love how your claw foot tub turned out! Now that you’ve had it for a while, could you please let me know how the products you used on the feet and inside of the tub have held up over time and normal use? I’ve refinished the outside of one tub and am contemplating starting another soon, and may do the inside of it as well. However, I’ve been hesitant to use refinishing kits as some I’ve seen re-done ended up chipping or wearing off. Hopefully, this hasn’t been the case with yours. (Boy, a LOT of hard work went into that one!) Thanks!
Tina,
Truthfully, we do not use that tub because we have never hooked up the water to it! I know! We are crazy. :) But we are not “bath” people, so it hasn’t been a priority. We have other stuff going on around the house to complete first. We have glazed tubs in previous homes and they have lasted anywhere between 3-10 years. Just depends.
I love this tub! I am in the process of refinishing my own. I know this is an old post but I was hoping I could ask a couple of questions.
1. Was the inside of your tub painted? Am wondering if I really need to strip the interior if it is the original enamel, or if I can just sand it smooth as is and just prime any exposed metal or rust? I am currently working on stripping the exterior paint as the outside was painted several times.
2. How has your tub held up since you posted this?
Great work and thank you for sharing! I have been using your post as a guide and so far so good!
I l-o-v-e those old tubs!
GOOD JOB–it’s beautiful!
(and I’m sure will not scare any more children!)
Hello, I am from nyc and my great aunt is moving out of a house in new london ct. She has a vintage claw foot tub in her bathroom. She is getting ready to sell the house, needless to say, I want the tub. How much or how can I transport the tub? How much does this process usually cost.
Looks great! I really really hope your tub keeps the paint, mine chipped off in giant pieces within a year, I was so very sad. A pro I contacted wanted $800 to refinish my tub, and that was with me taking it to him and the out side and inside ready to paint ;(
Hi Tracy would love the info on the bathroom trim! We just followed your advise and did our clawfoot tub! Now we need to trim out our window! Love what you are doing. Thanks so much!
The tub looks great. Thanks for posting your process. I am curious, how is the finish holding up now – a few years later?
Absolutely gorgeous. Thank you so much for the tutorial. You did a great job of explaining things and including lots of photos. We are rehabbing my deceased Grandmother’s 100 plus year old home, and I will use your tutorial for the clawfoot tub. The house has been in my family since my great great aunt had it built in the late 1800’s, and we would like to retain the integrity of the home as much as possible. My niece is purchasing the home so that we can keep it in the family :).
Thanks for the inspirational post….I have a claw foot rub circa 1920 thAt has been in my house since new. We last used it about 25 years ago. Now we are ready to restore that rub and find huge amounts of rust where it was next to an outside wall….thanks to your post we will attempt to turn it upside down to check for more rust. We did get the legs iff; I like your metallic finish for them. I hope we get results half as nice as yours
It turned out gorgeous!
Excellent DIY demonstration. Well done you two.
Linda, Sydney Australia.
Thank you!
Hi Traci. I know it’s years down the line since you restored your cast iron claw foot bath. Would it be possible for you to give me some feedback on how the paint job on the bath has held out? We purchased an old tub from a local salvage yard years ago with the intention of having it ‘properly’ seasoned and done up, but the AU$2,500 price tag for the restoration costs, we’re looking at other options to give our tub another lease on life. Our research has told us that many painted baths are not standing up to long-term use, particularly where the hot water is poured into the bath first, as is usually the case. Has this been a problem for you? Would love your feedback, and look forward to hearing from you soon. Warm regards – Heather
Hi Heather!
Our tub has held up pretty well, but has started to flake on the bottom of the tub this past year. We knew it would only last a few years, so we are happy with the results. We may touch it up some more soon, but it was worth the savings.