
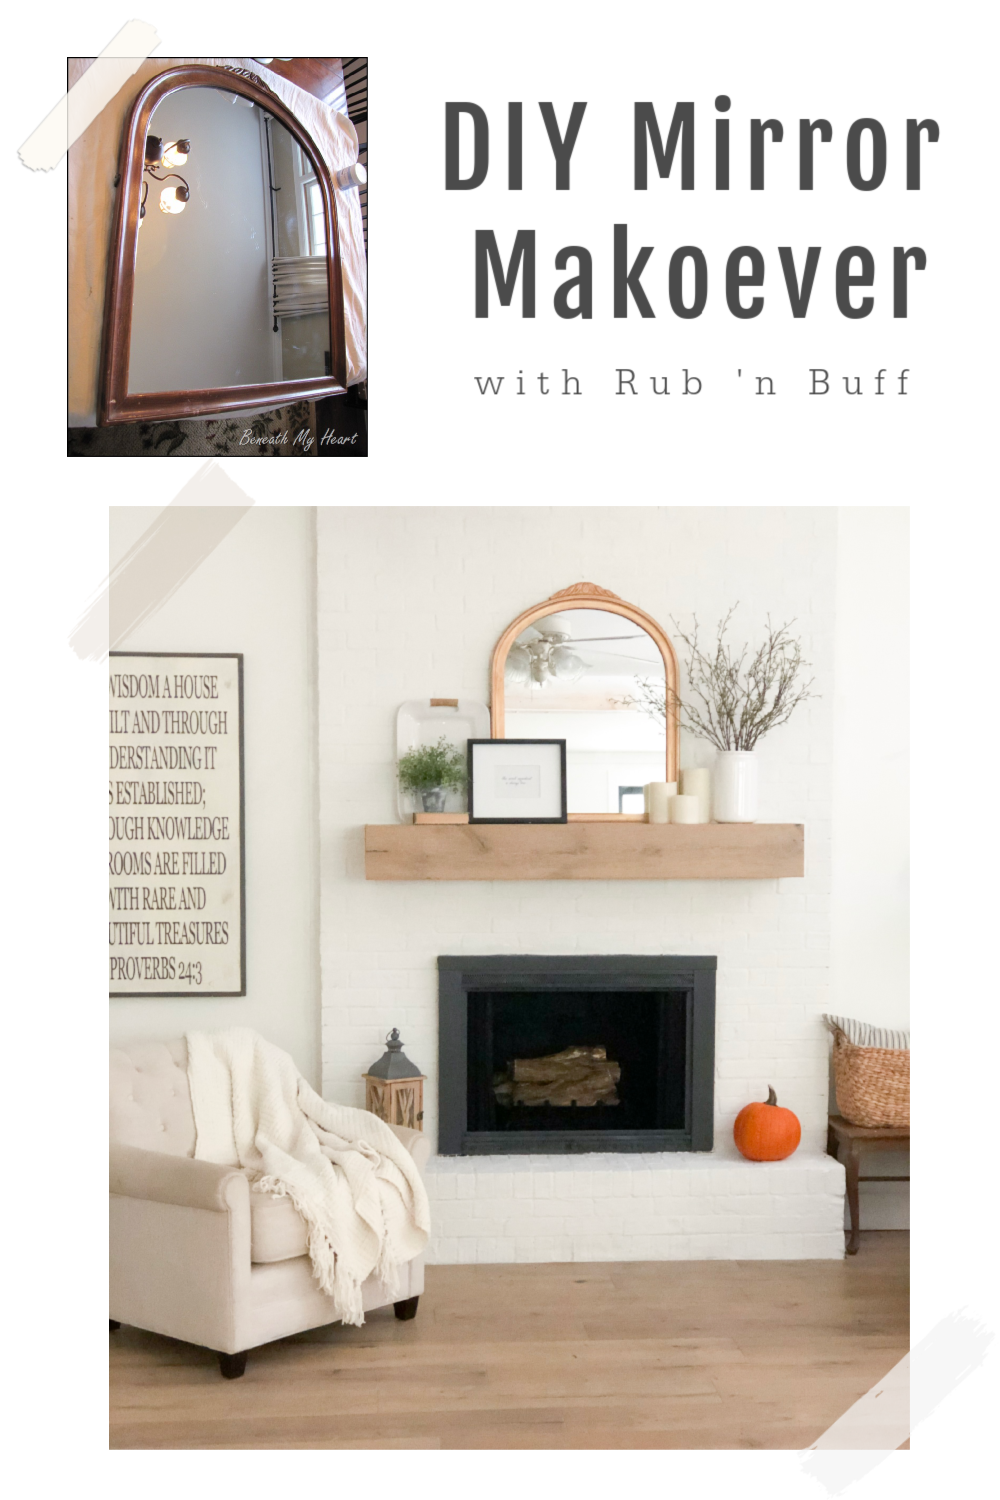
DIY Mirror Makeover {for our Fireplace Mantel}
DIY Mirror Makeover with Rub ‘n Buff
Hey friends!
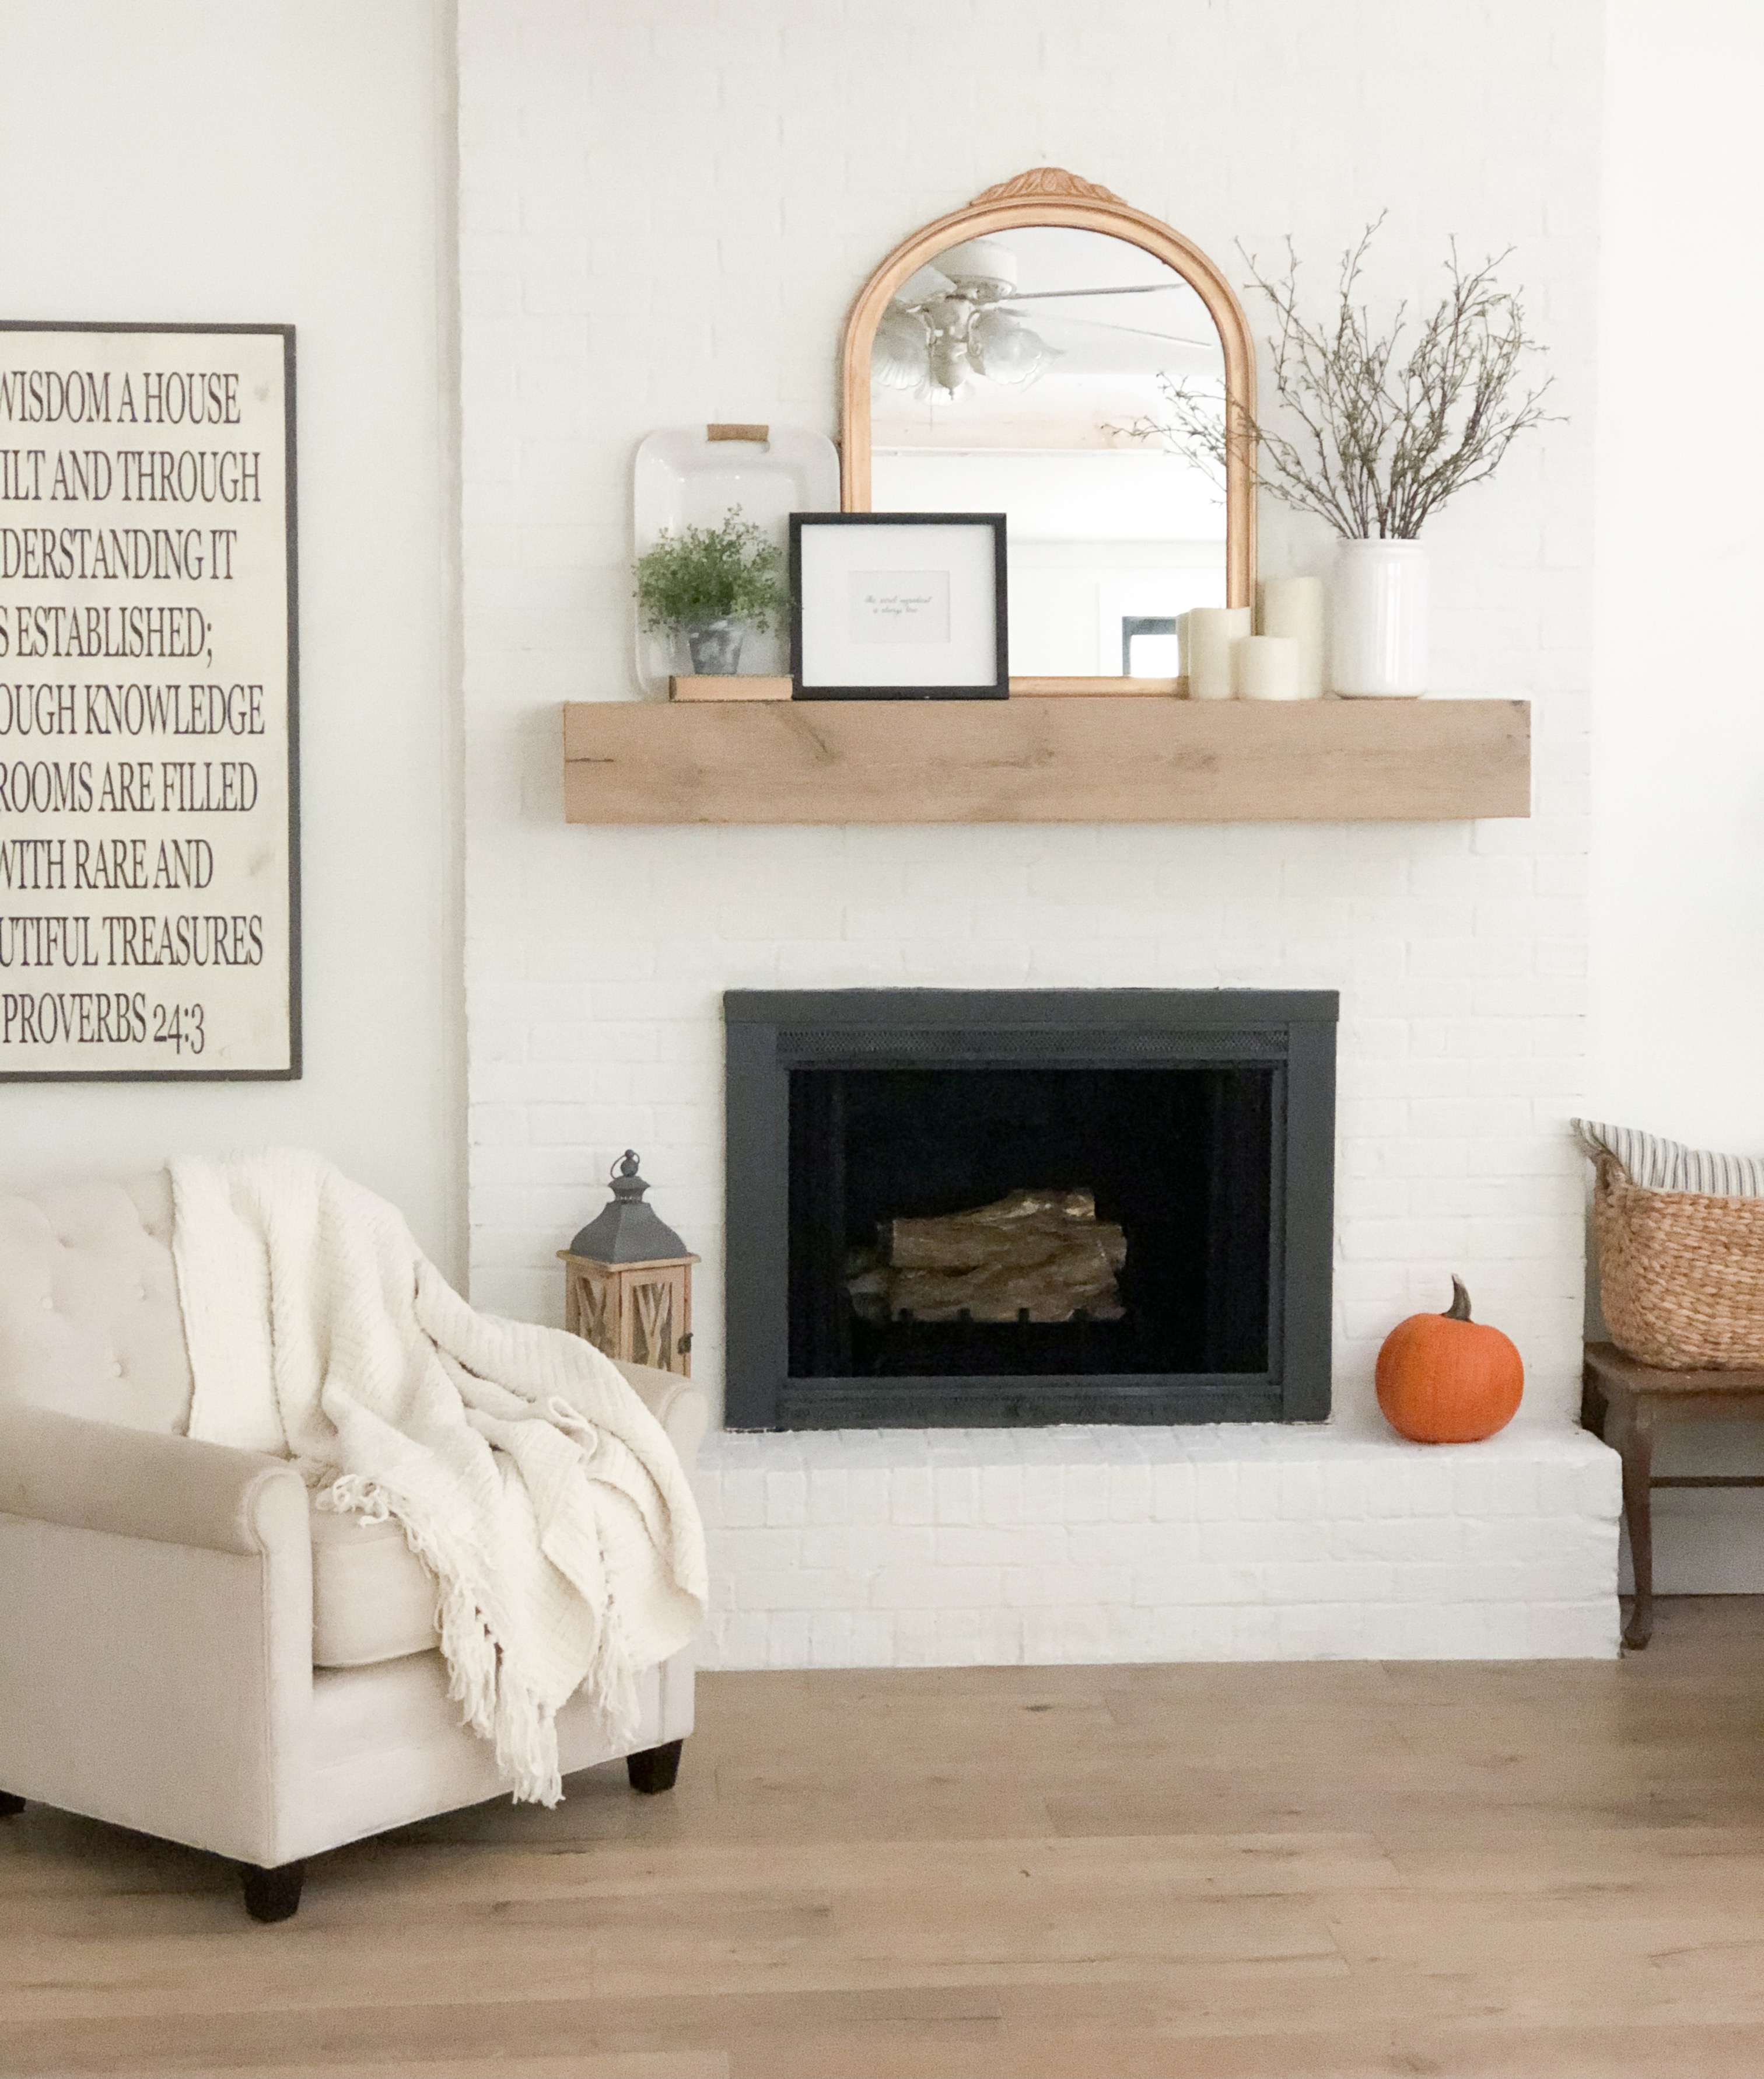
I wanted to show you a quick little DIY makeover I did on the mirror above our fireplace!
A couple of weeks ago, I needed to style our fireplace for some sponsored content, and I didn’t have anything pretty to put above the mantel. I tried several different pictures that I had in storage, but they didn’t look good. I had seen this inspiration picture on Pinterest, and was hoping I could do something similar…

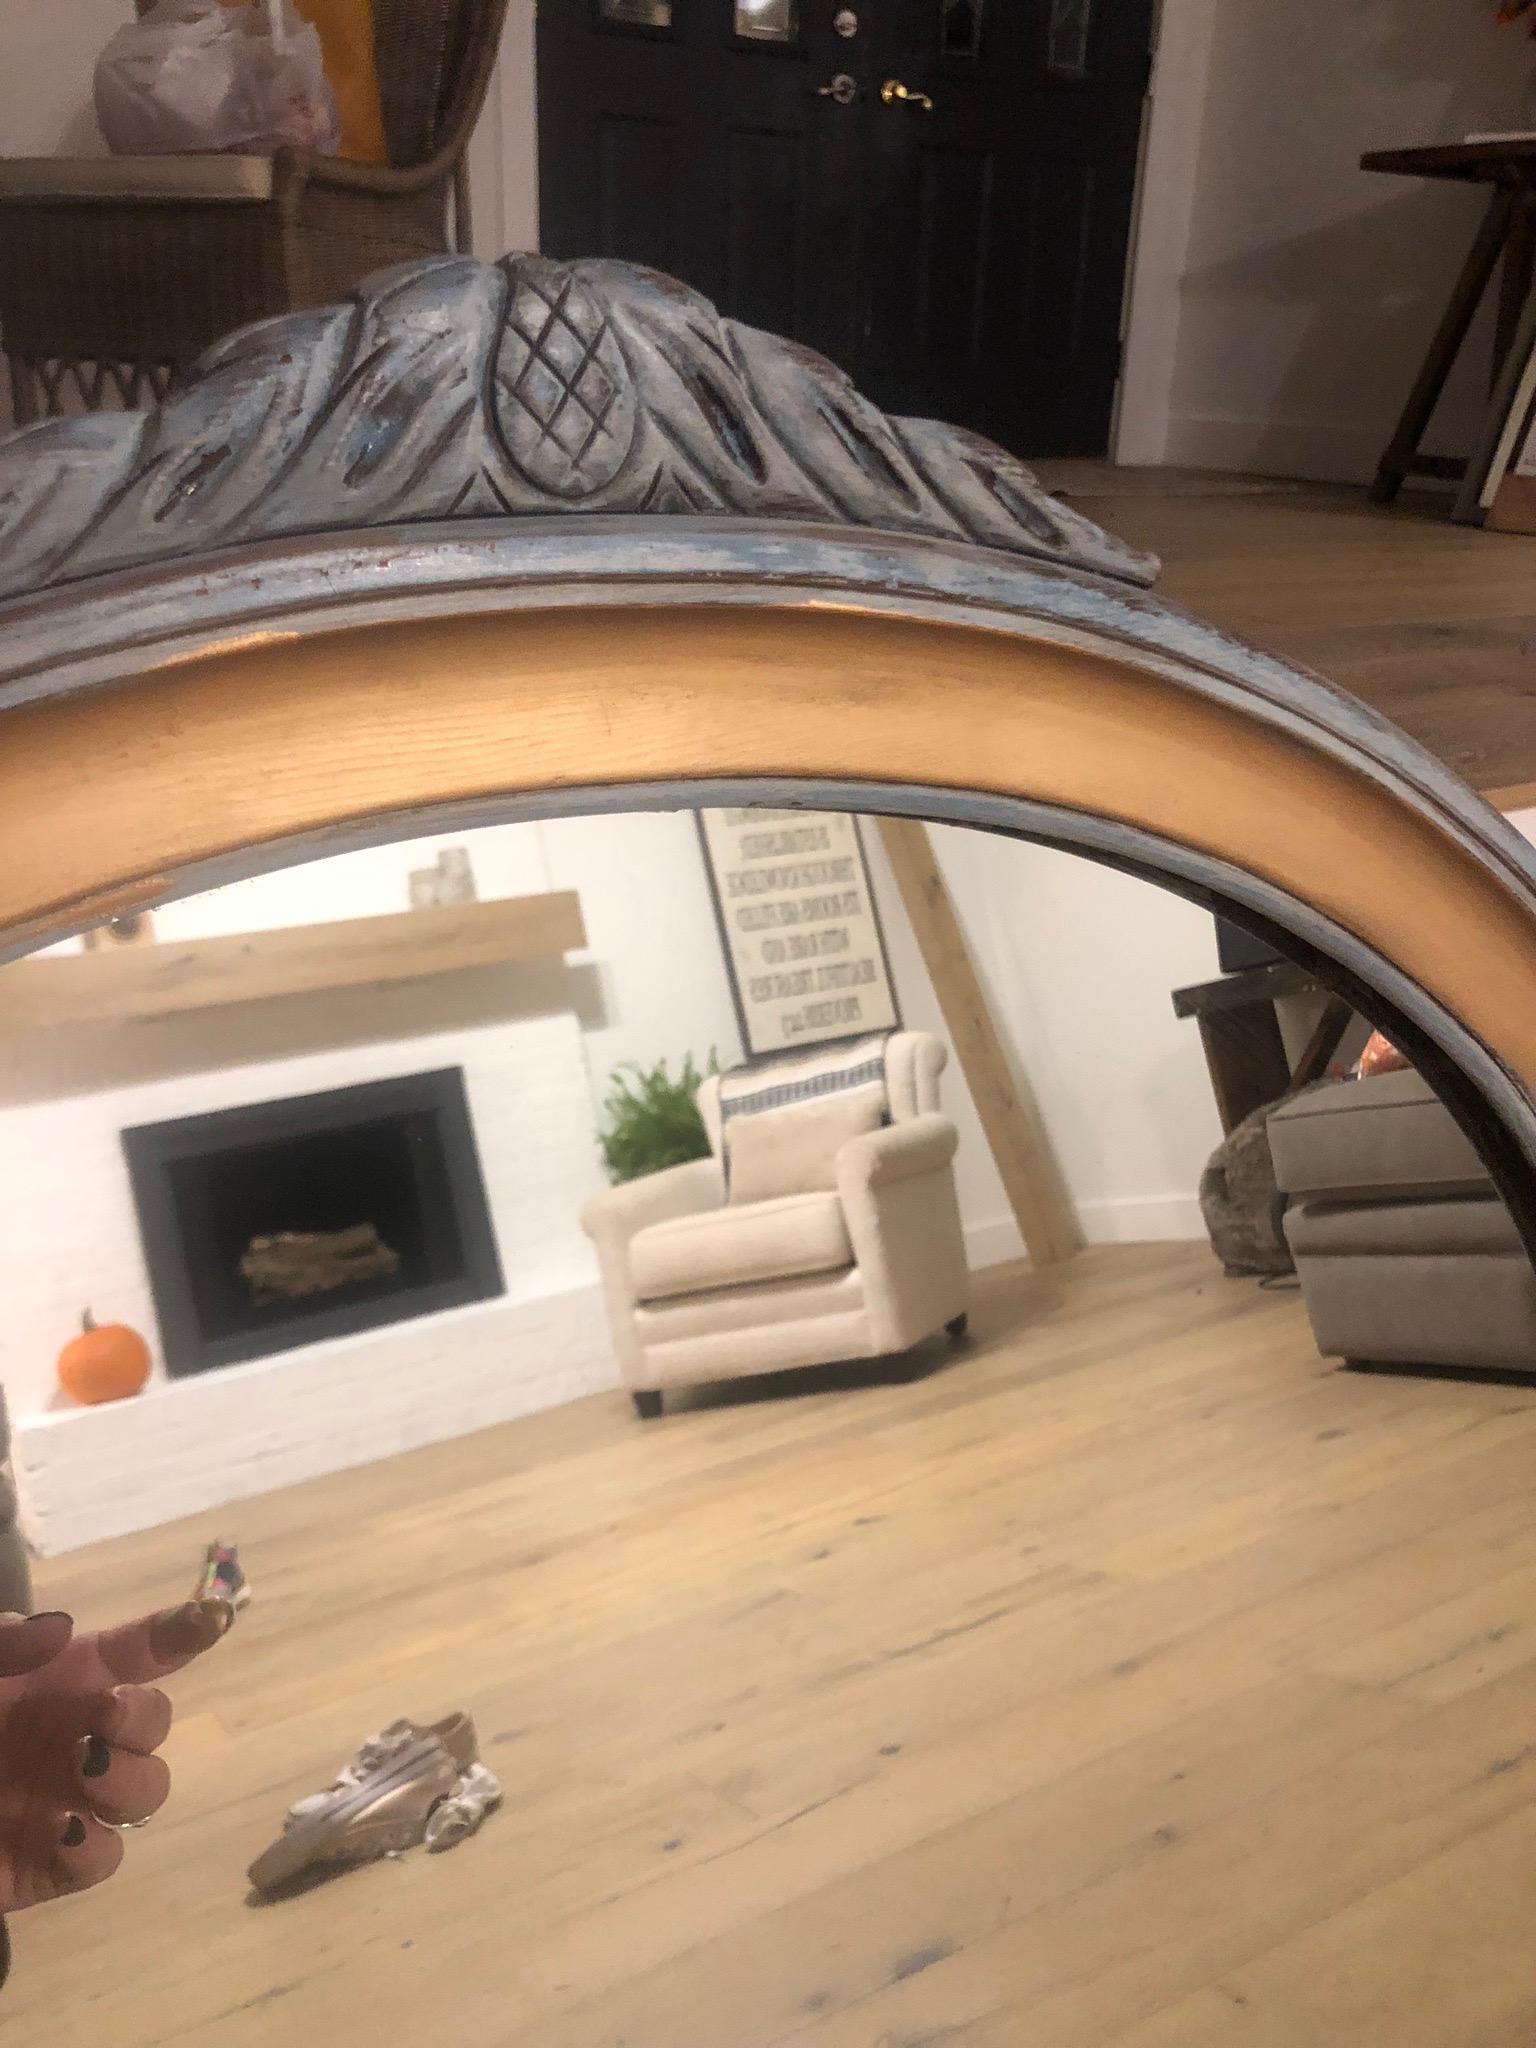
I didn’t really have any money to buy anything new, so I went out to the storage shed to see if I could find anything that I could make work. That’s when I stumbled upon this blue mirror that I had gotten in 2011.
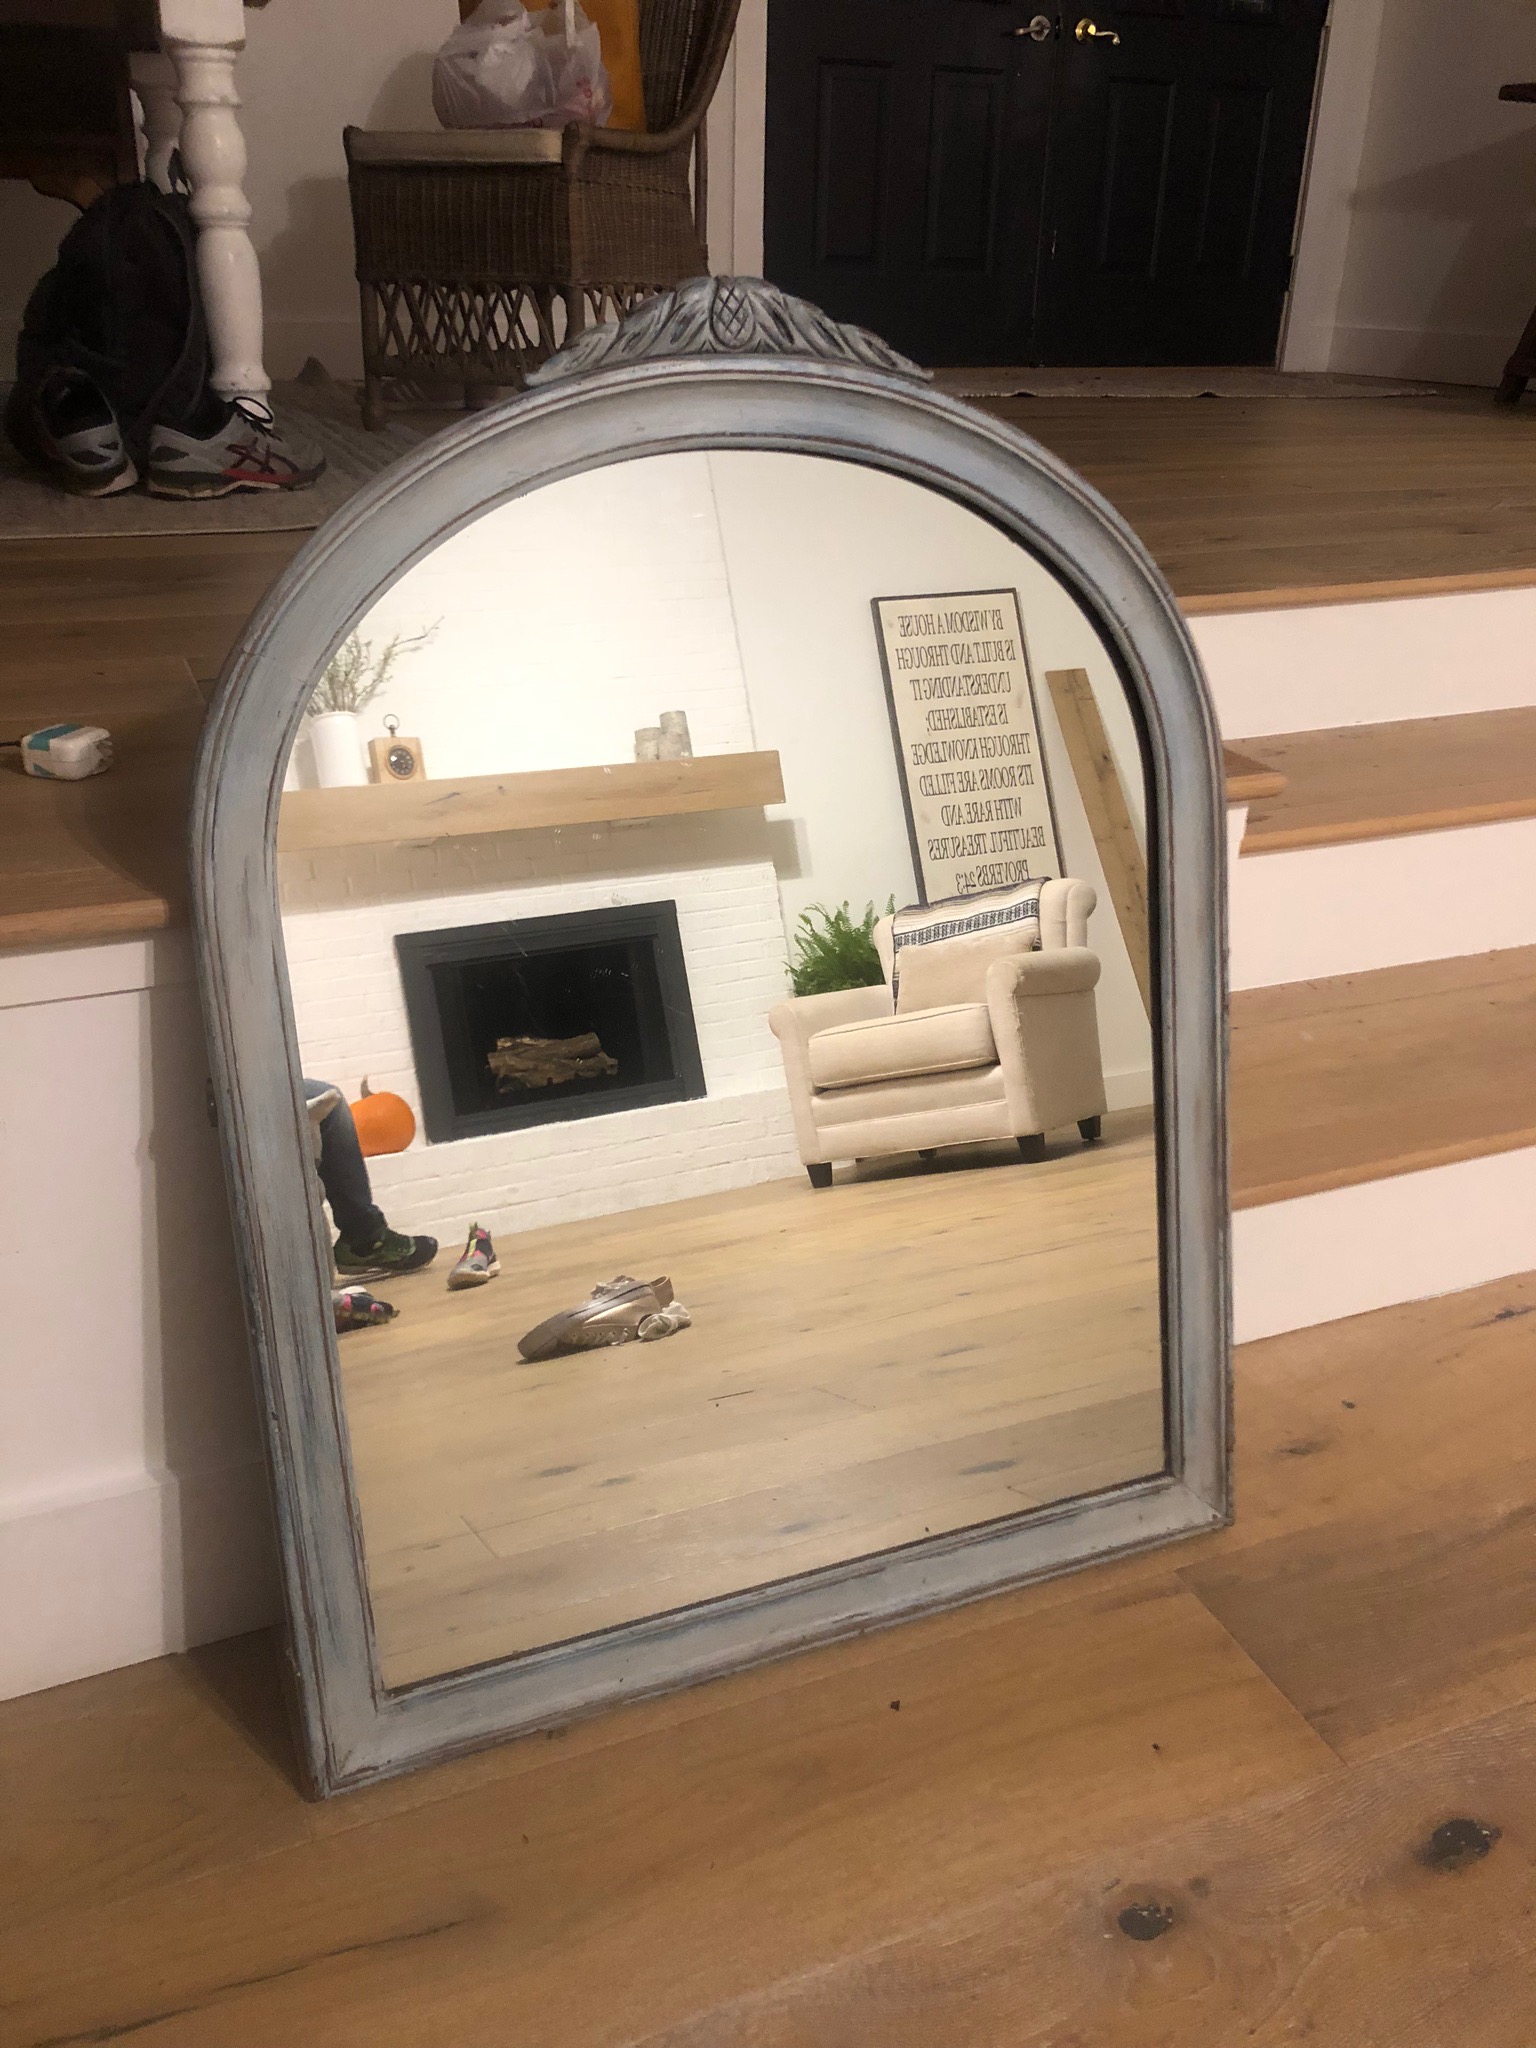
I found this mirror at a Goodwill store, and I think I paid about $7.50 for it. It was brown, and I painted it blue. You can read about that tutorial HERE.
I didn’t want a blue mirror on my new fireplace, but I did like the shape of this one, and it reminded me of the inspiration picture.
I just needed the mirror to be gold.
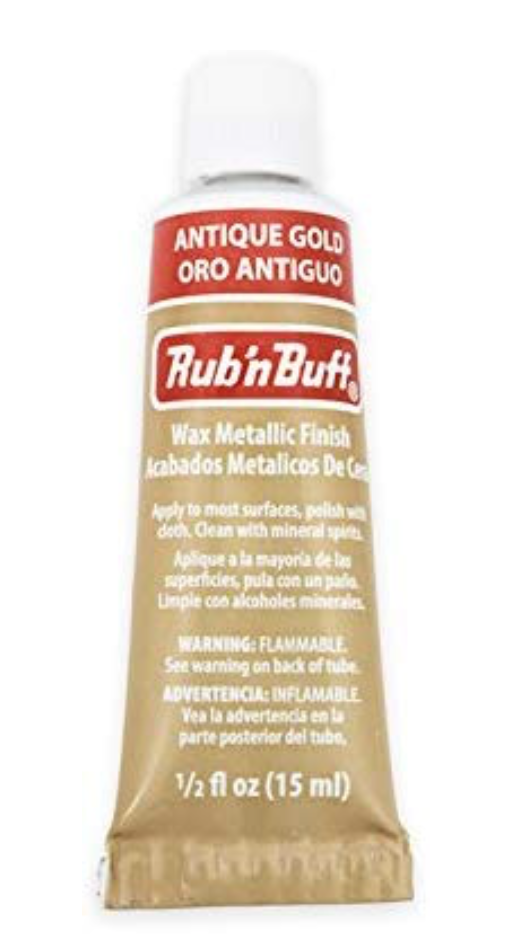
So I went to Michaels and bought some Rub ‘n Buff. It was only a few bucks with the online coupon, and I got the Antique Gold color.
I used my finger to apply it to the wood on the mirror. It was SO EASY! No sanding. No priming. No sealing. I just rubbed and buffed. (Actually, I didn’t even buff. It just went on so smooth.)
It took me all of 5 minutes, and I was done.
And now I have a pretty gold mirror on my mantel for FREE! It doesn’t get any better than that!
Have you ever tried Rub ‘n Buff?!
If so, what color did you use, and what did you use it on?
The mirror looks great! I used Rub and Buff to update my hinges on my interior doors from 1950’s brass to a brushed nickel when I changed our all my door knobs. I’ve been trying to downsize and get rid of the stuff I‘m not using and this post isn’t helping. I have a stash of items I may need someday. Lol
This mirror really turned out well! I have some questions about why you used interior wall paint you on your fireplace with no primer. Do you not intend to burn wood in the fireplace? When you put on the grout, it looked like you spread it over the bricks along with putting it in between the bricks. Did you need to sand that when it dried or just wipe it before it dried? We have a brick fireplace we use, but the red bricks are kind of an eyesore. I have gone back and forth about painting those bricks, haven’t done anything because there is no going back. If I ruin the bricks, we are stuck. Also have seen masons installing brick veneer over sheetrock to reproduce the real brick look. Any thoughts?
Where did you get your framed verse?
I did practically the opposite of your mirror. I bought a cheap “gold” plastic mirror at the local antique mall that had a perfect size and was all scroll-y and ornate. I wanted it silver for the guest bath on the main floor of our house. I used Rub n Buff in the silver and let a bit of the gold peak through. It turned out wonderfully and it was so easy. I started out using my finger but changed over to a rag because my finger was turning silver and I wasn’t too sure about how safe that was. I sprayed a sealer on it to keep it bright silver since it hangs over the sink and I wasn’t sure about wear and tear and tarnishing. It still looks good a few years later.
I love your blog! Could you tell me where your purchase your sign by the fireplace? Thanks