
RV KITCHEN MAKEOVER REVEAL! {Before & After}
I’m back with another post about our RV renovation!
This time, we are going to look at before and after photos of the kitchen.
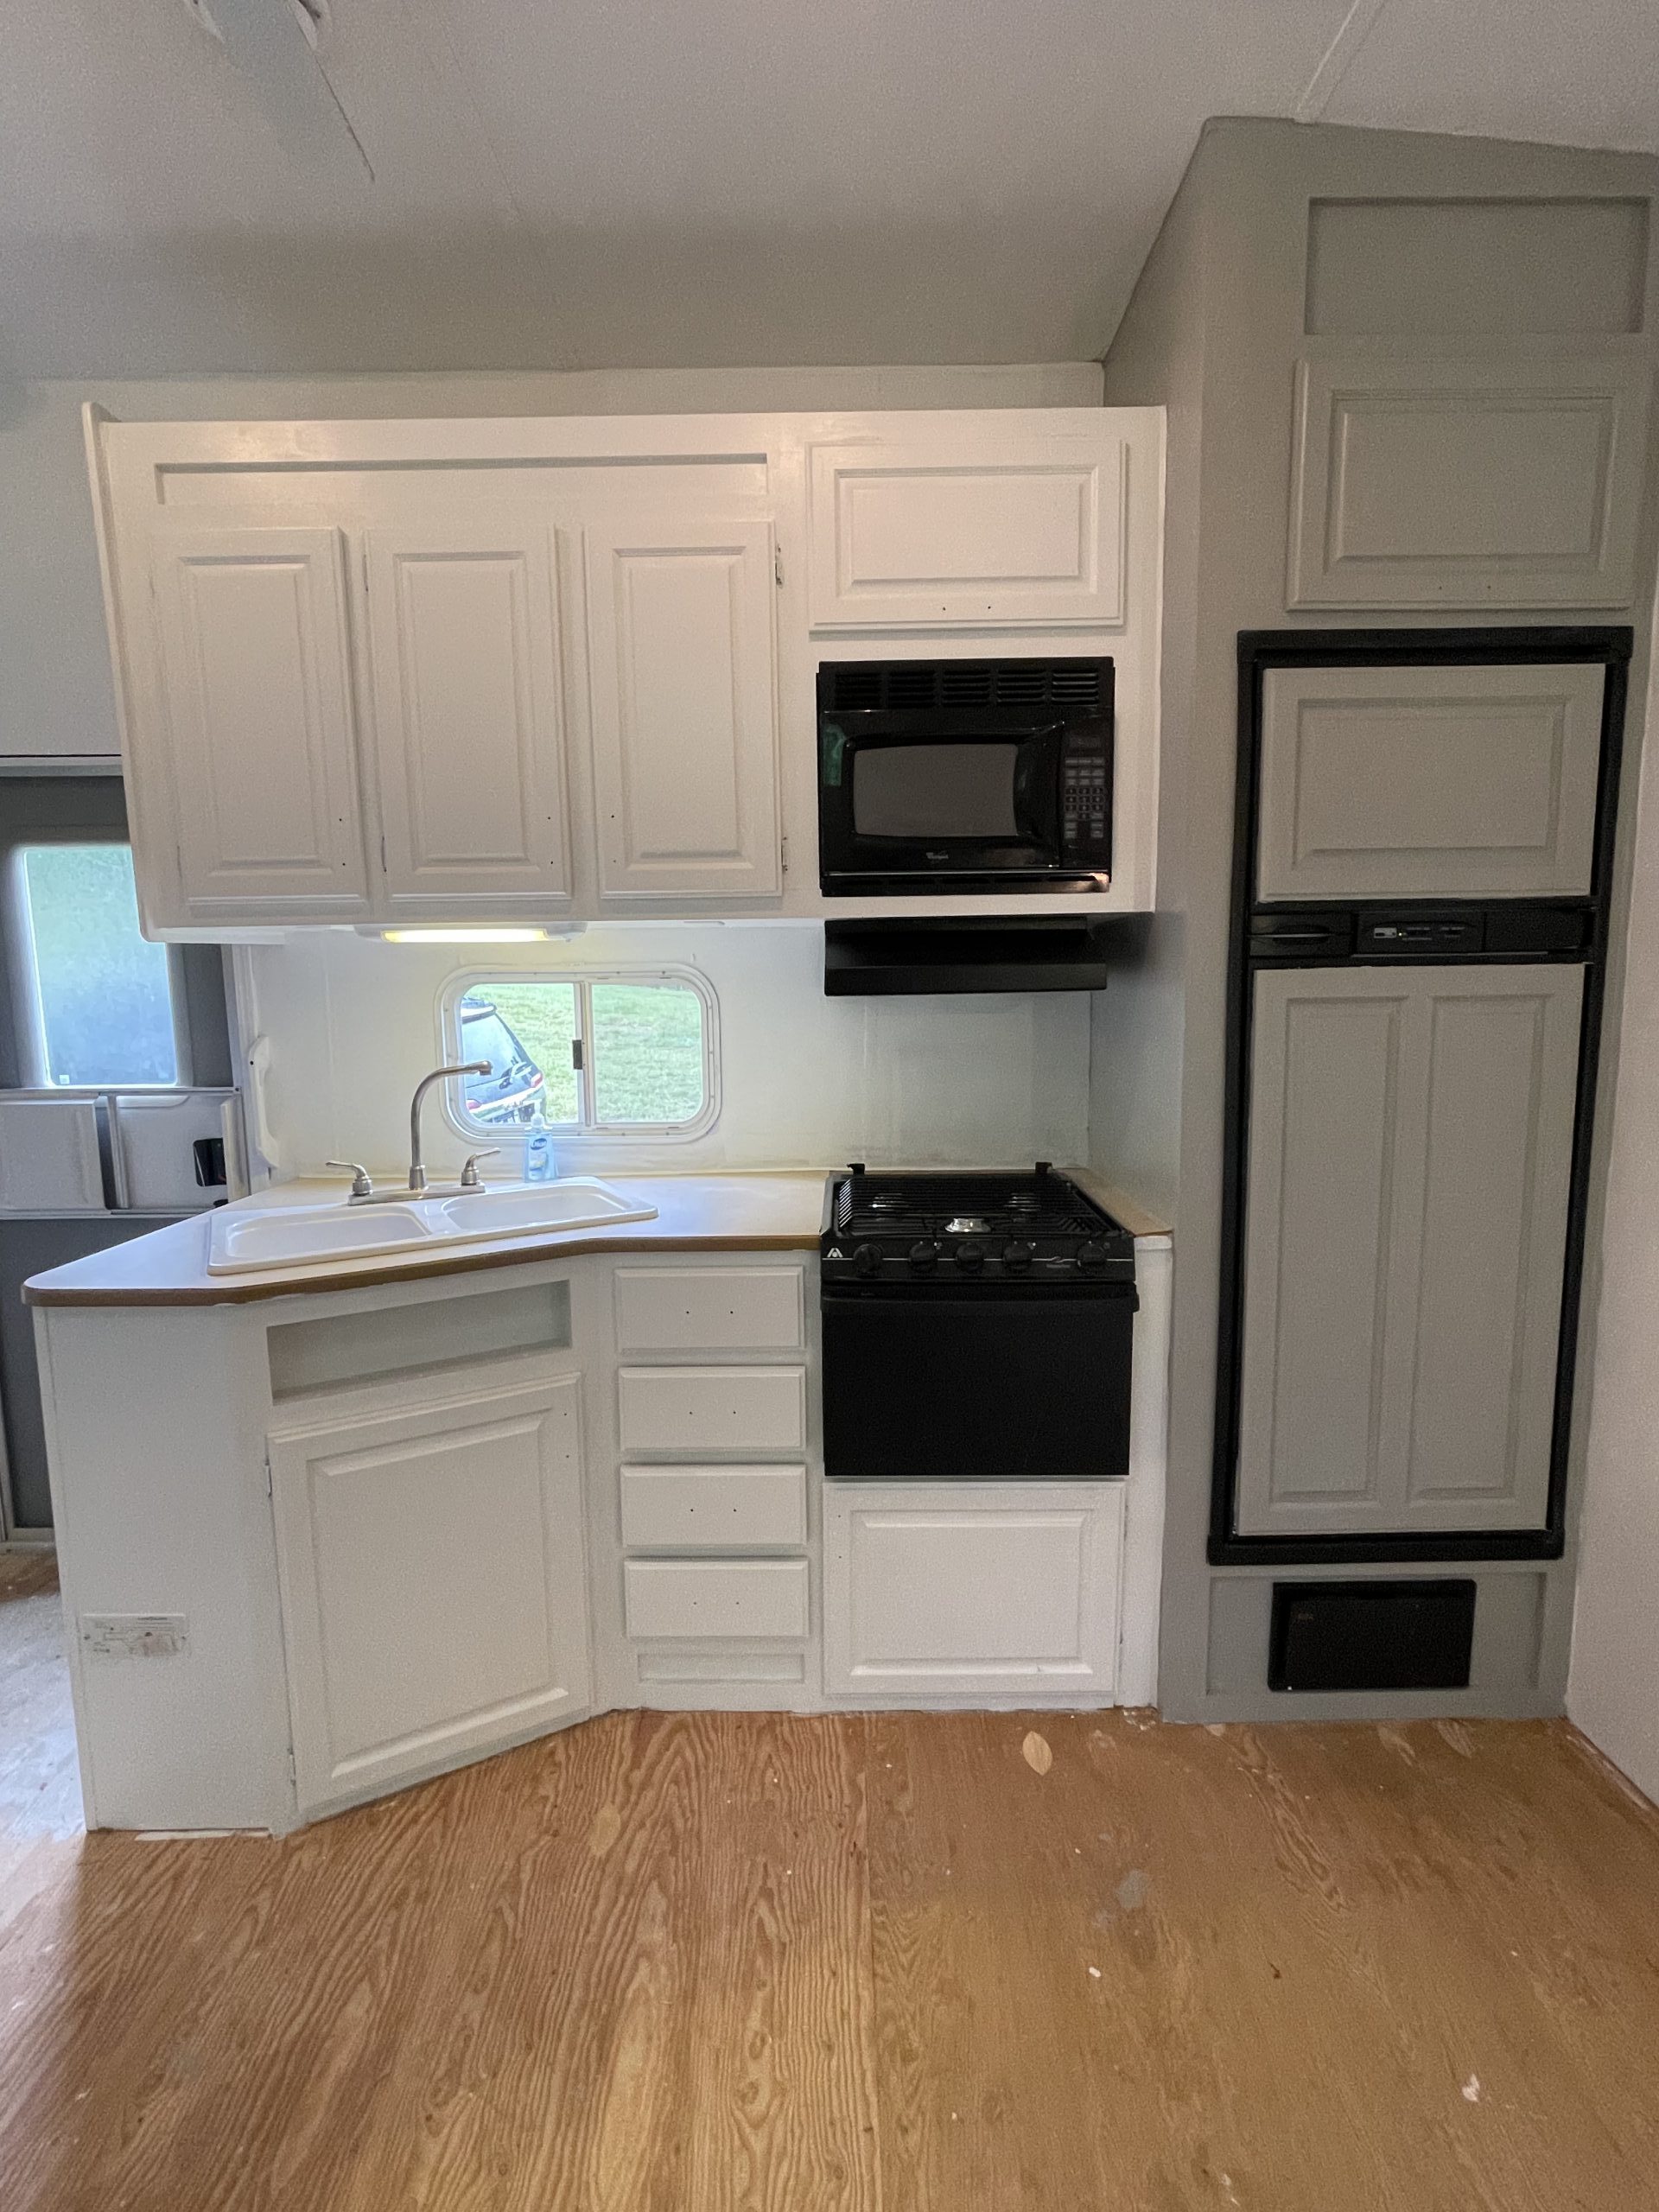
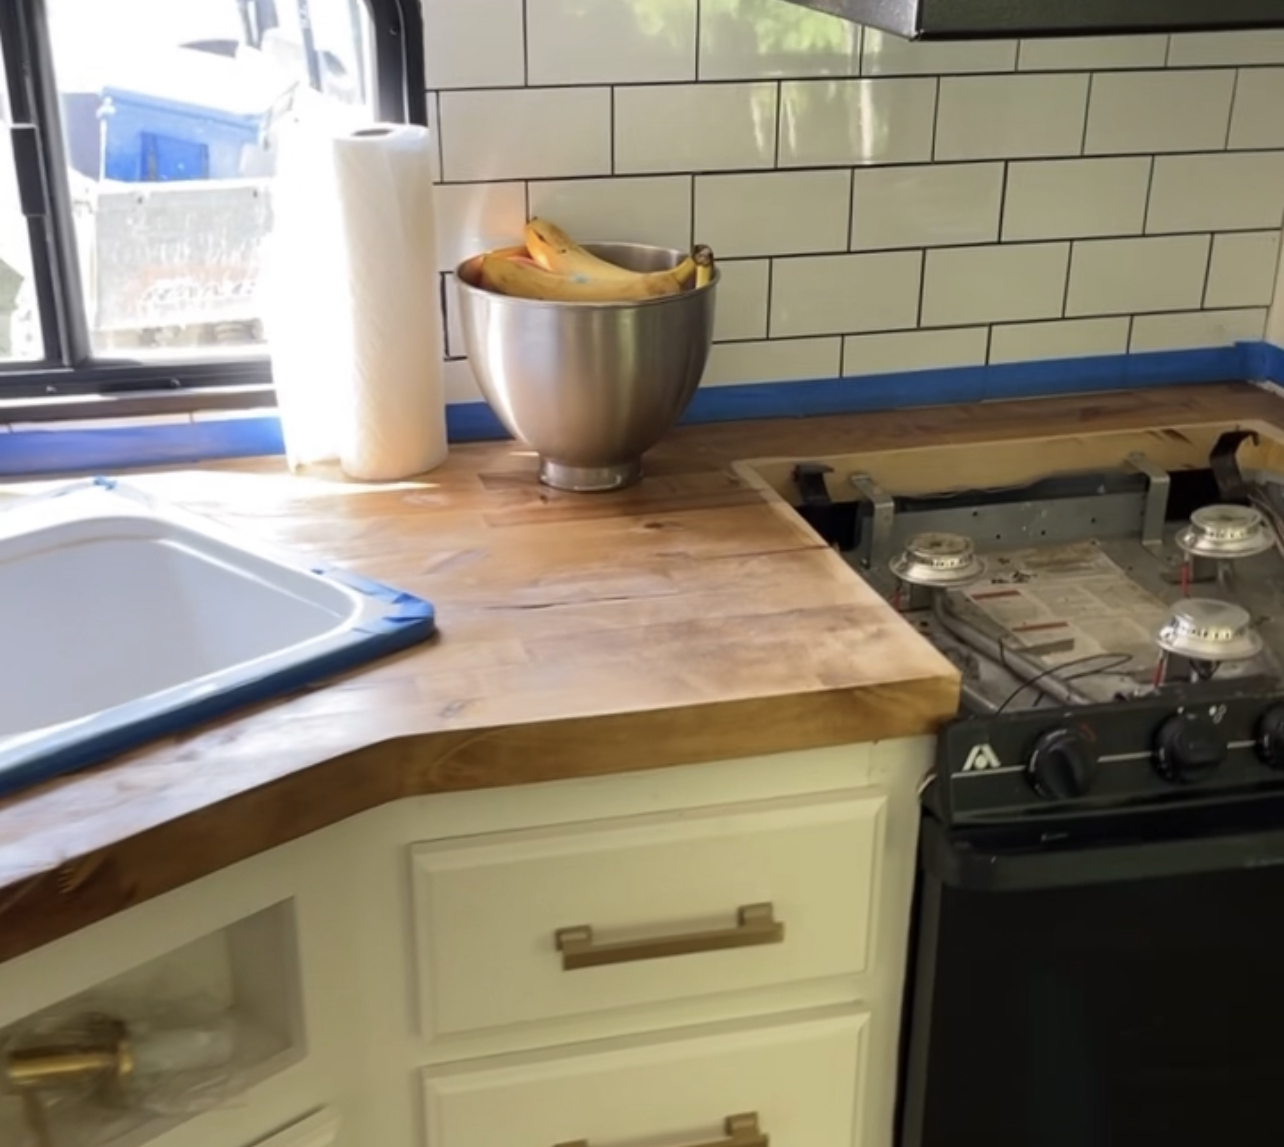
Here is a reminder of what the kitchen used to look like…
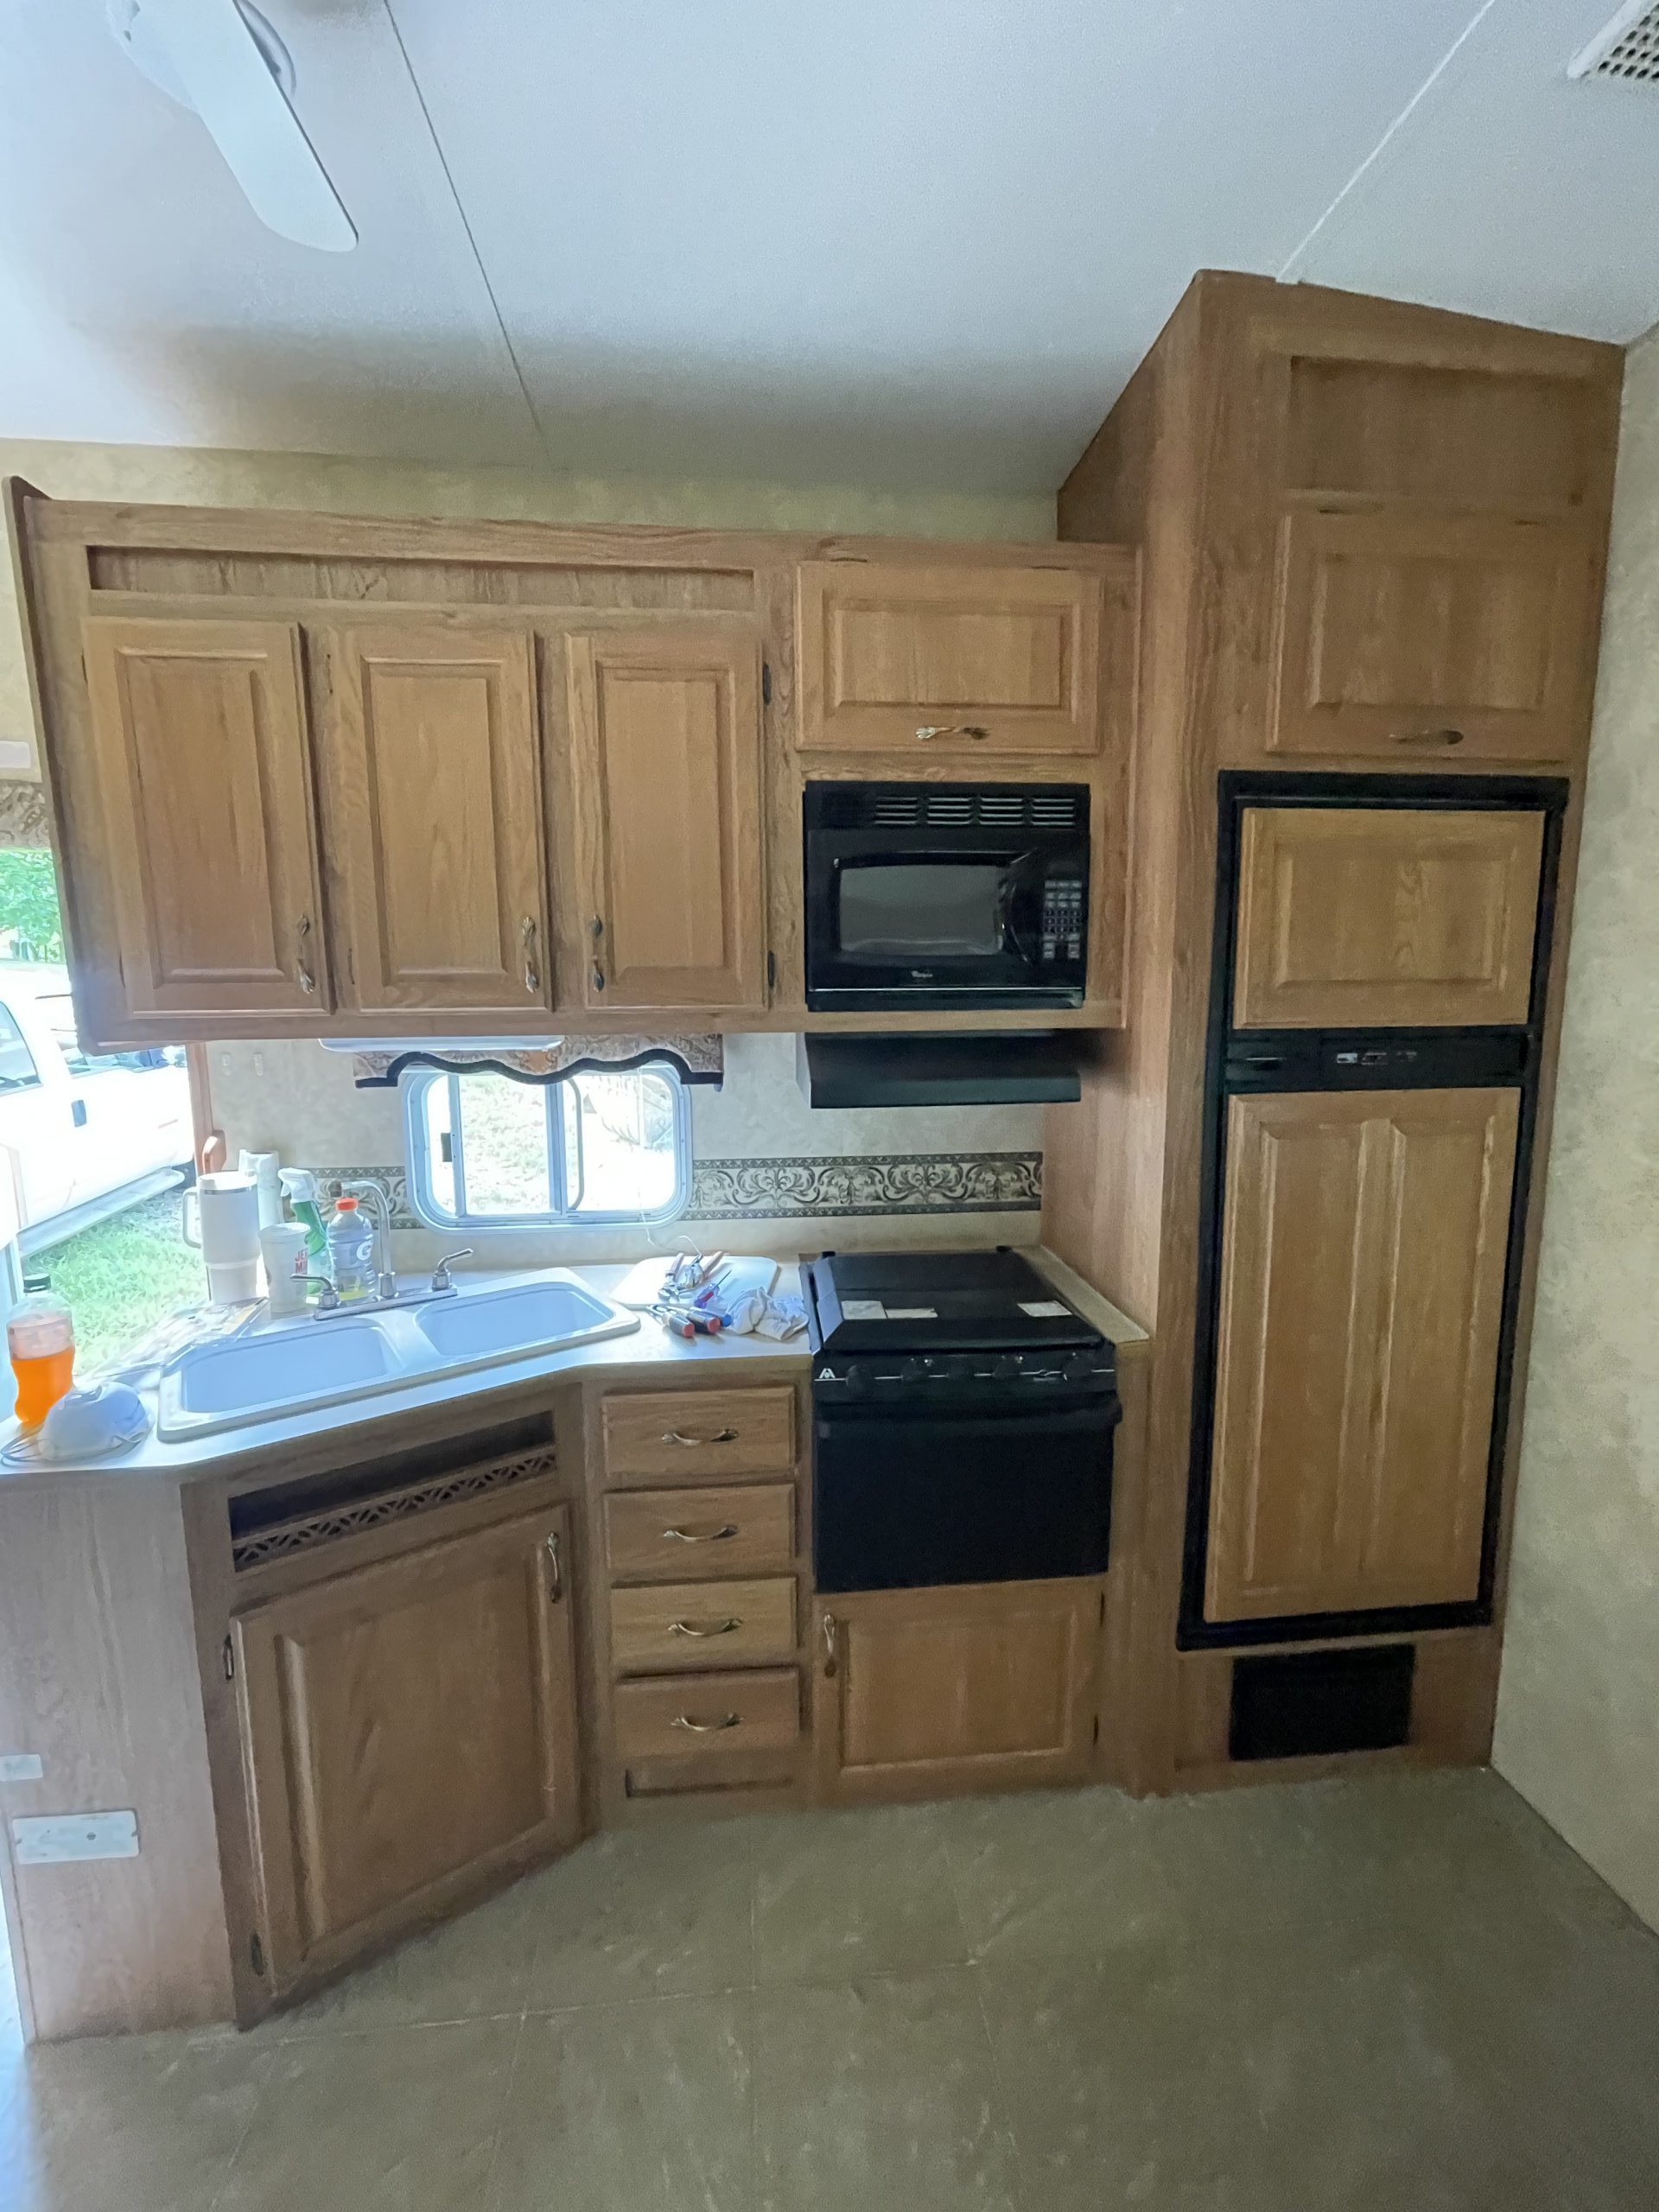
The kitchen really didn’t look too awful compared to the rest of the RV, but I knew I wanted to lighten the space up by painting the cabinets.
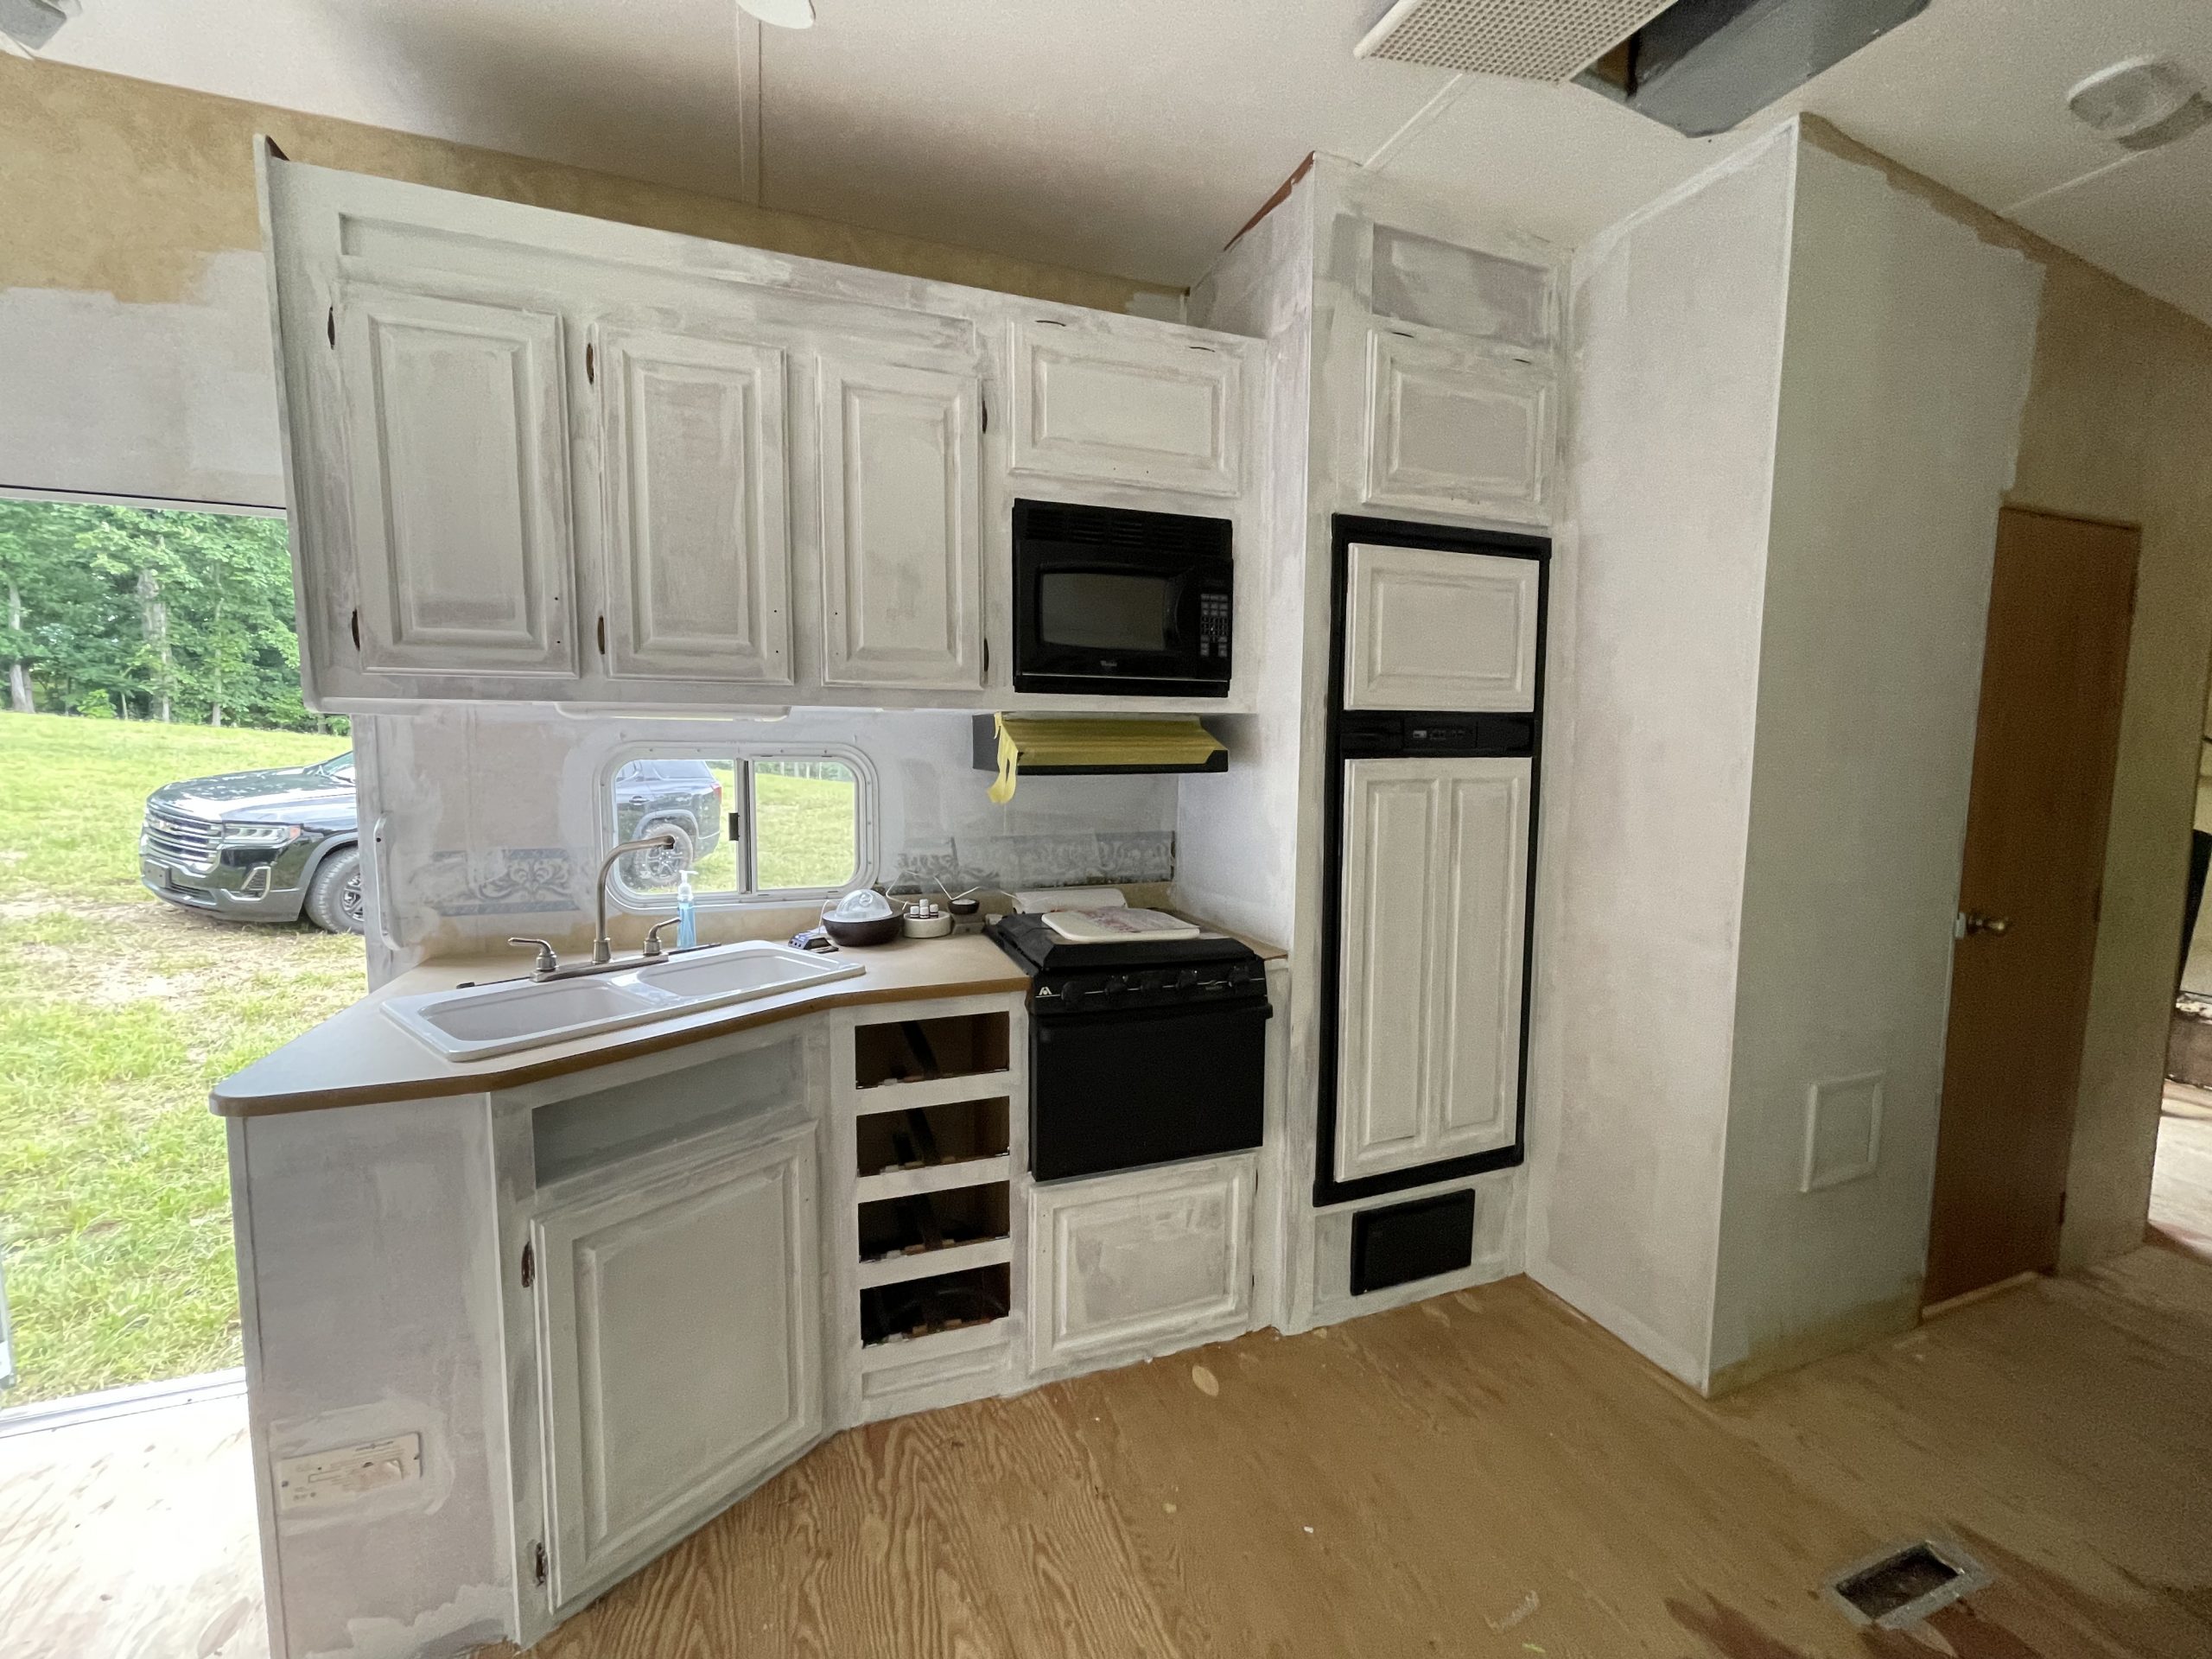
The first thing I did was to prime the cabinets, which meant that I had to clean them really well with a degreaser and then lightly sand them before priming. This process is not fun. There’s no sugar coating it. haha! But it is super necessary.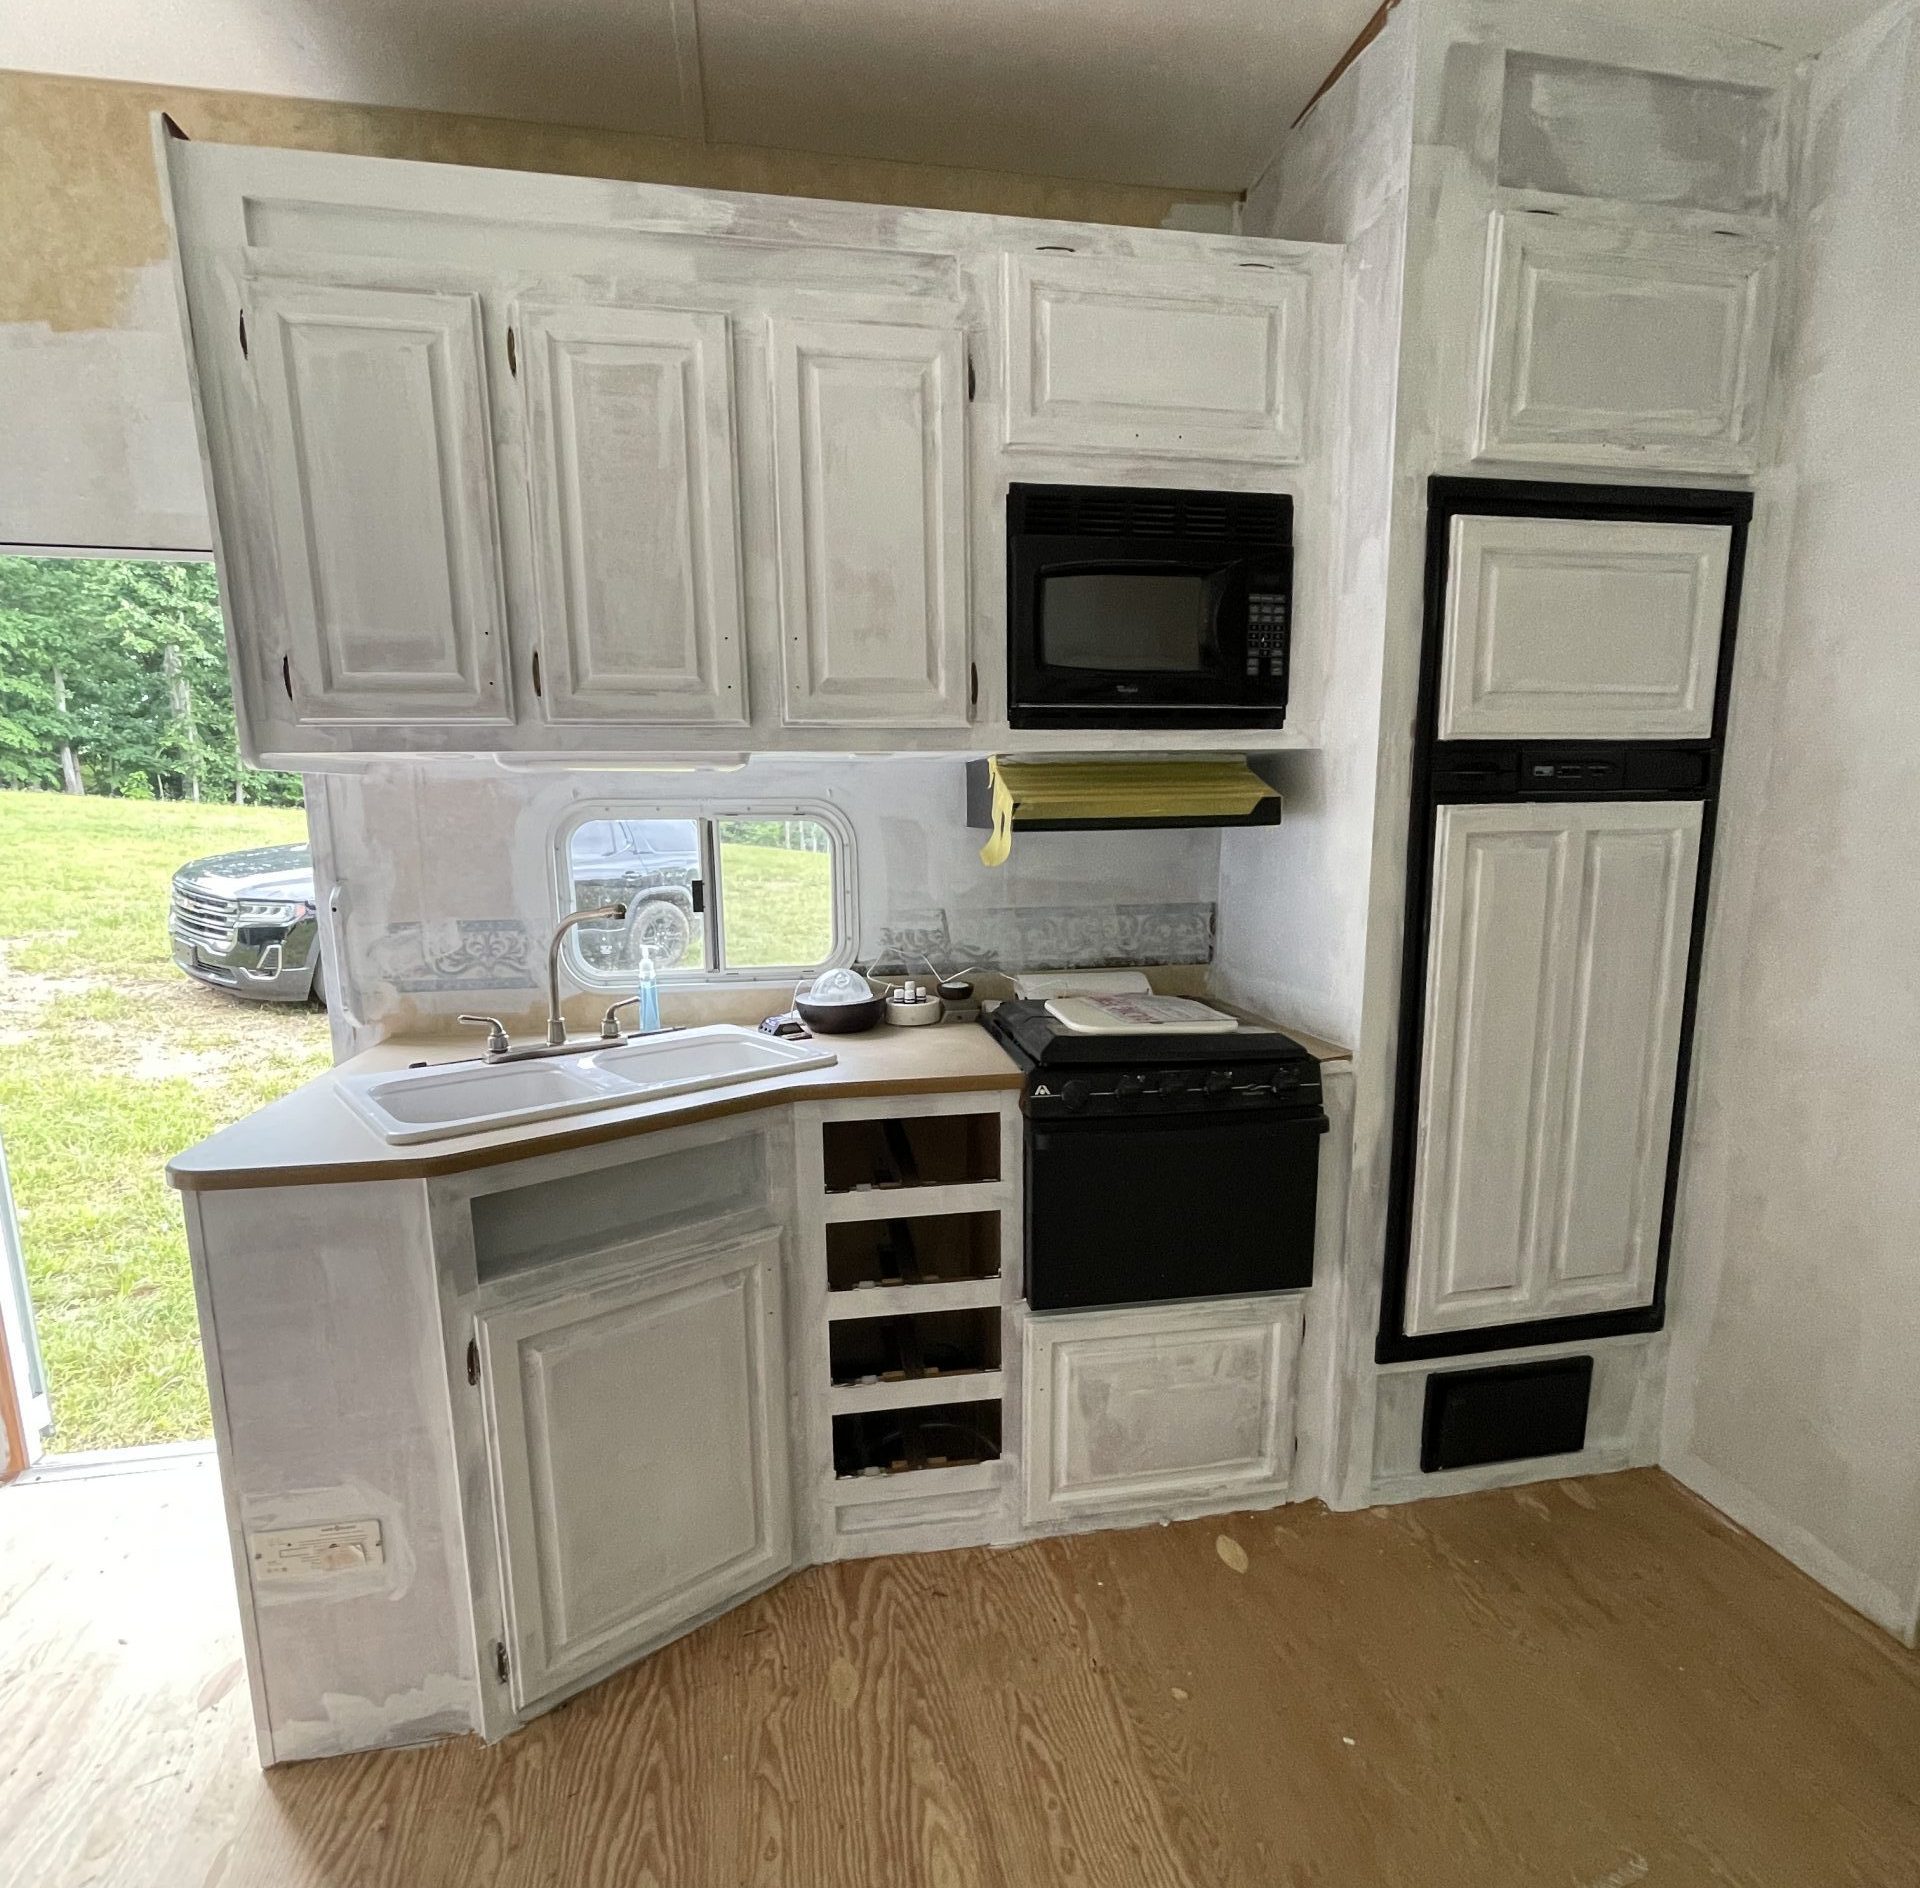
I could have taken the doors off to paint, which is truly more professional, but since this RV was just for us, and to save some time, I just painted the cabinet doors in place, and I think it turned out just fine.
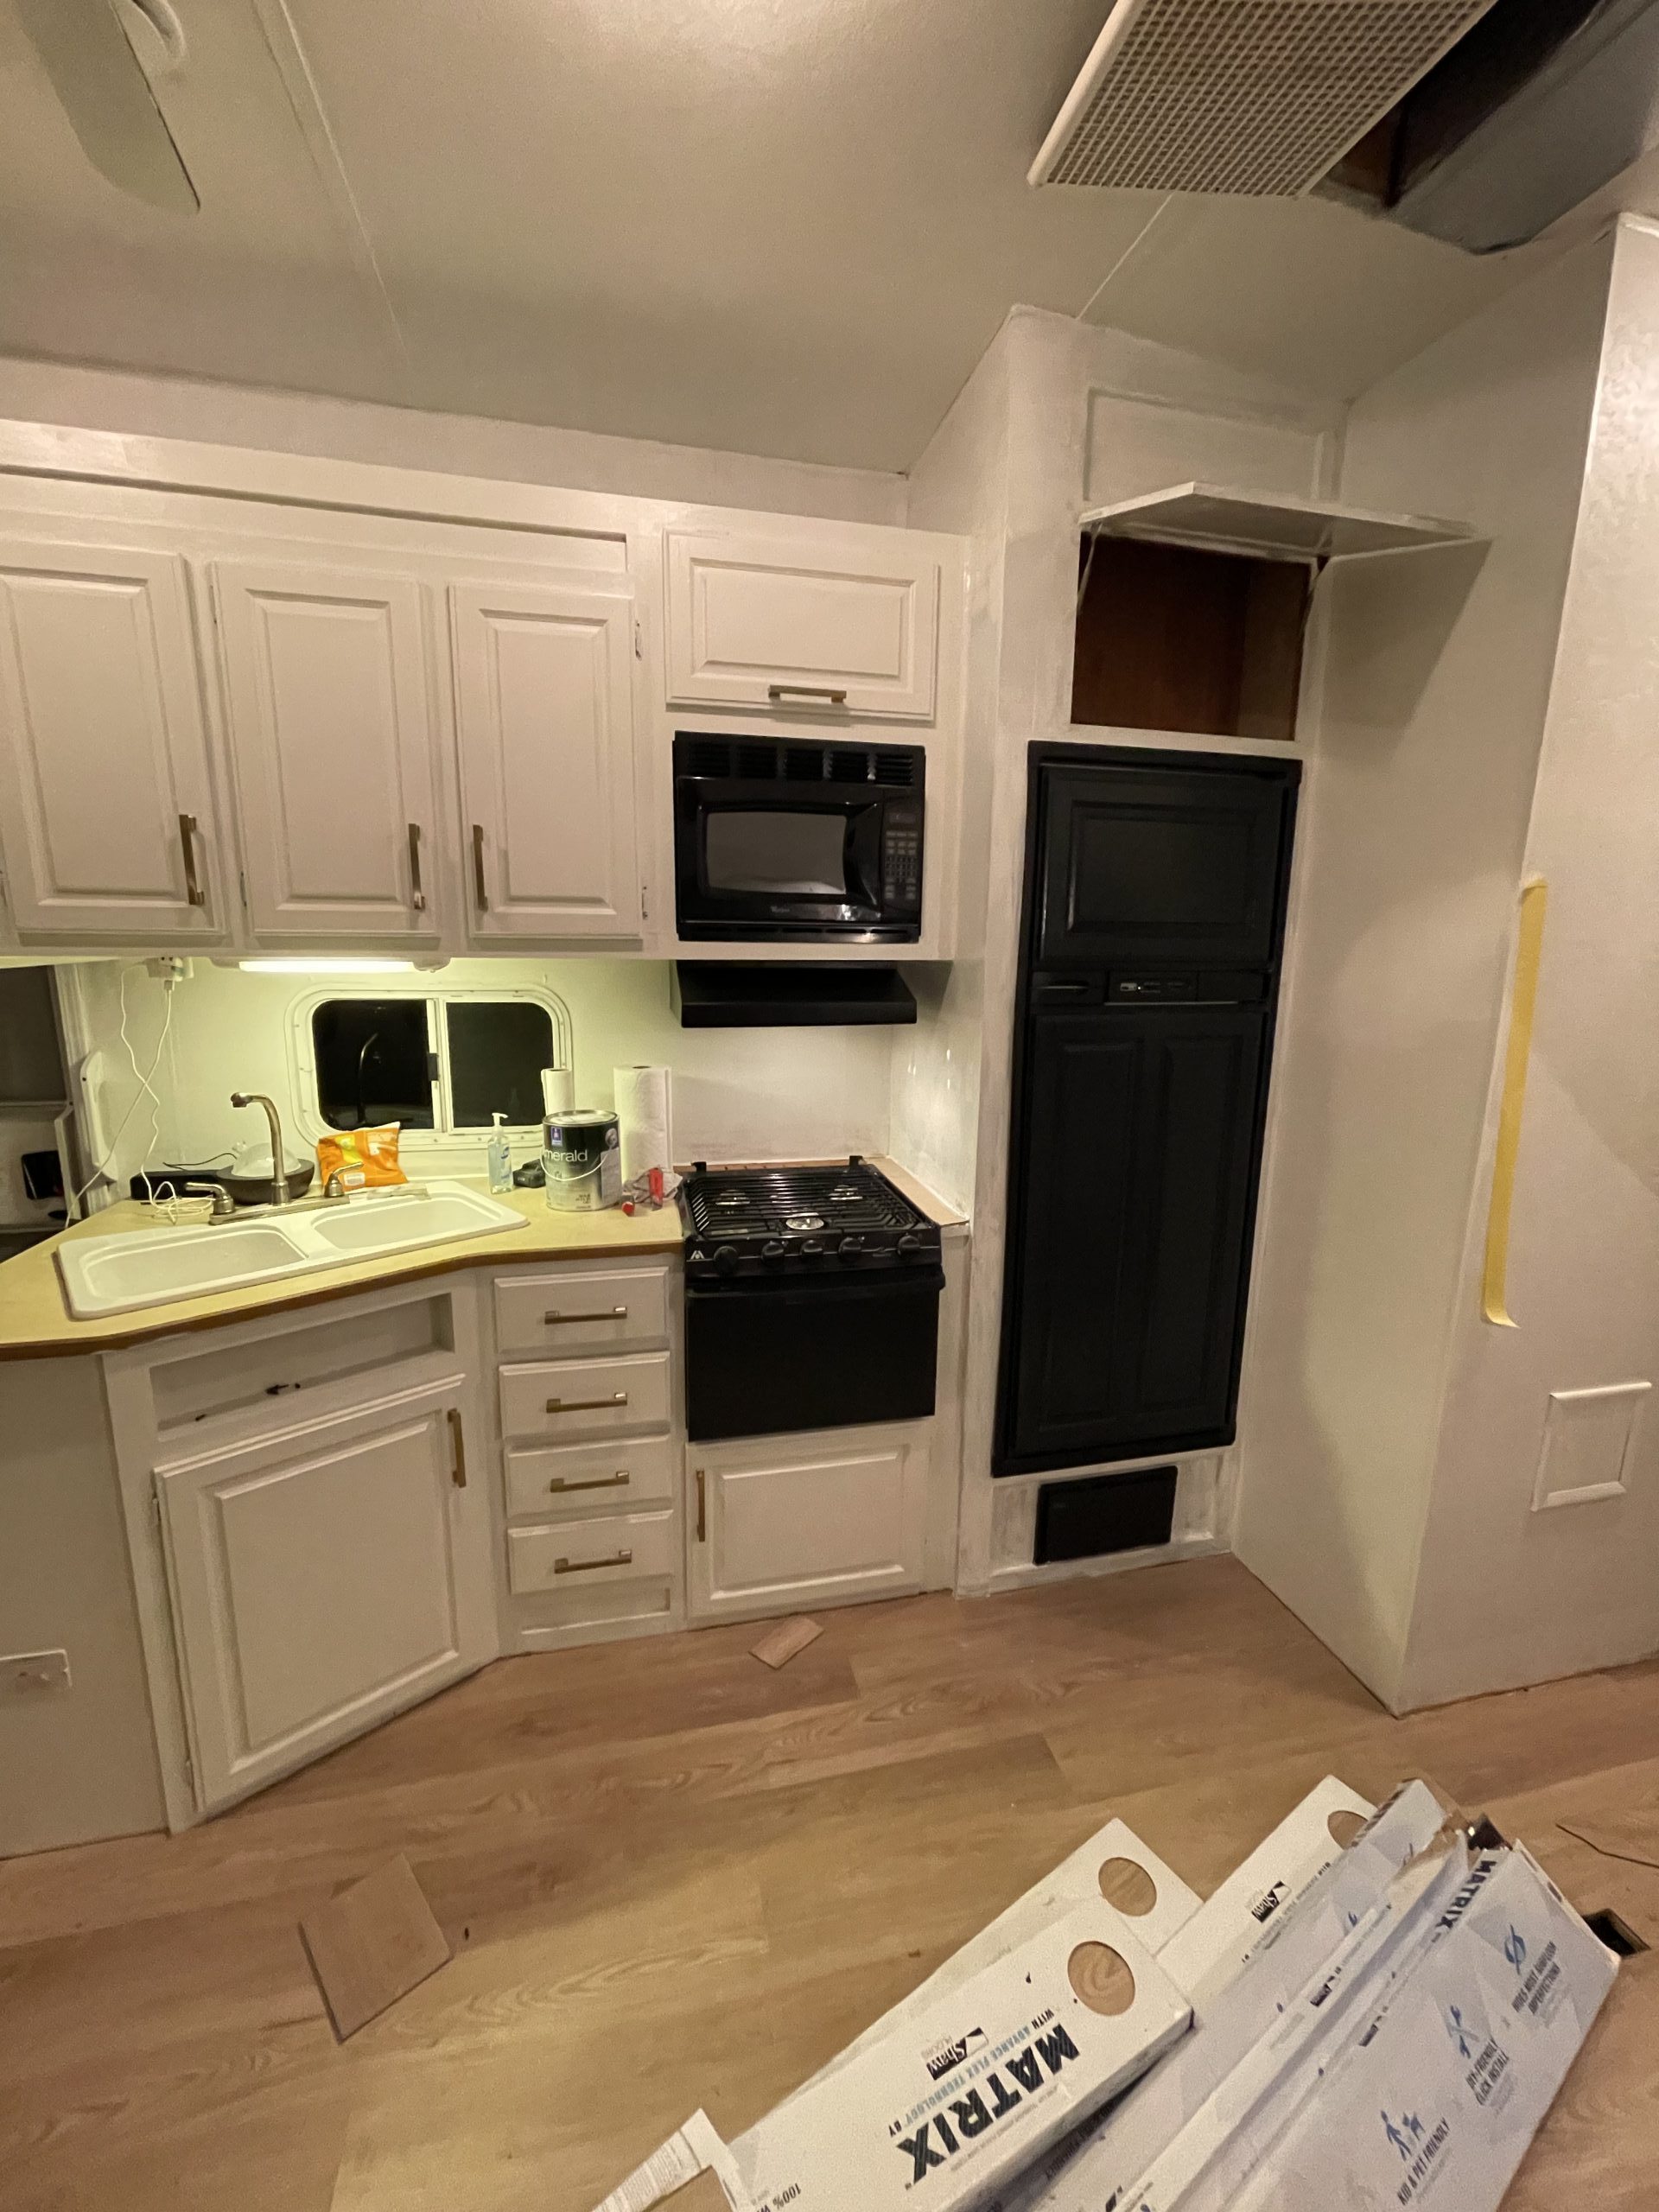
You can see below that I had started priming the walls in the RV too. I literally primed EVERYTHING! haha! And I did it by myself. (I might have been about to lose my mind during the painting stage….just saying.)
After everything was primed, I used the color GREEK VILLA by Sherwin Williams to paint the cabinets. It’s a warm white and looked so good in this space. The paint I used is the Emerald Line by Sherwin Williams. It is the BEST paint to use on cabinets. Very durable and goes on so smoothly.
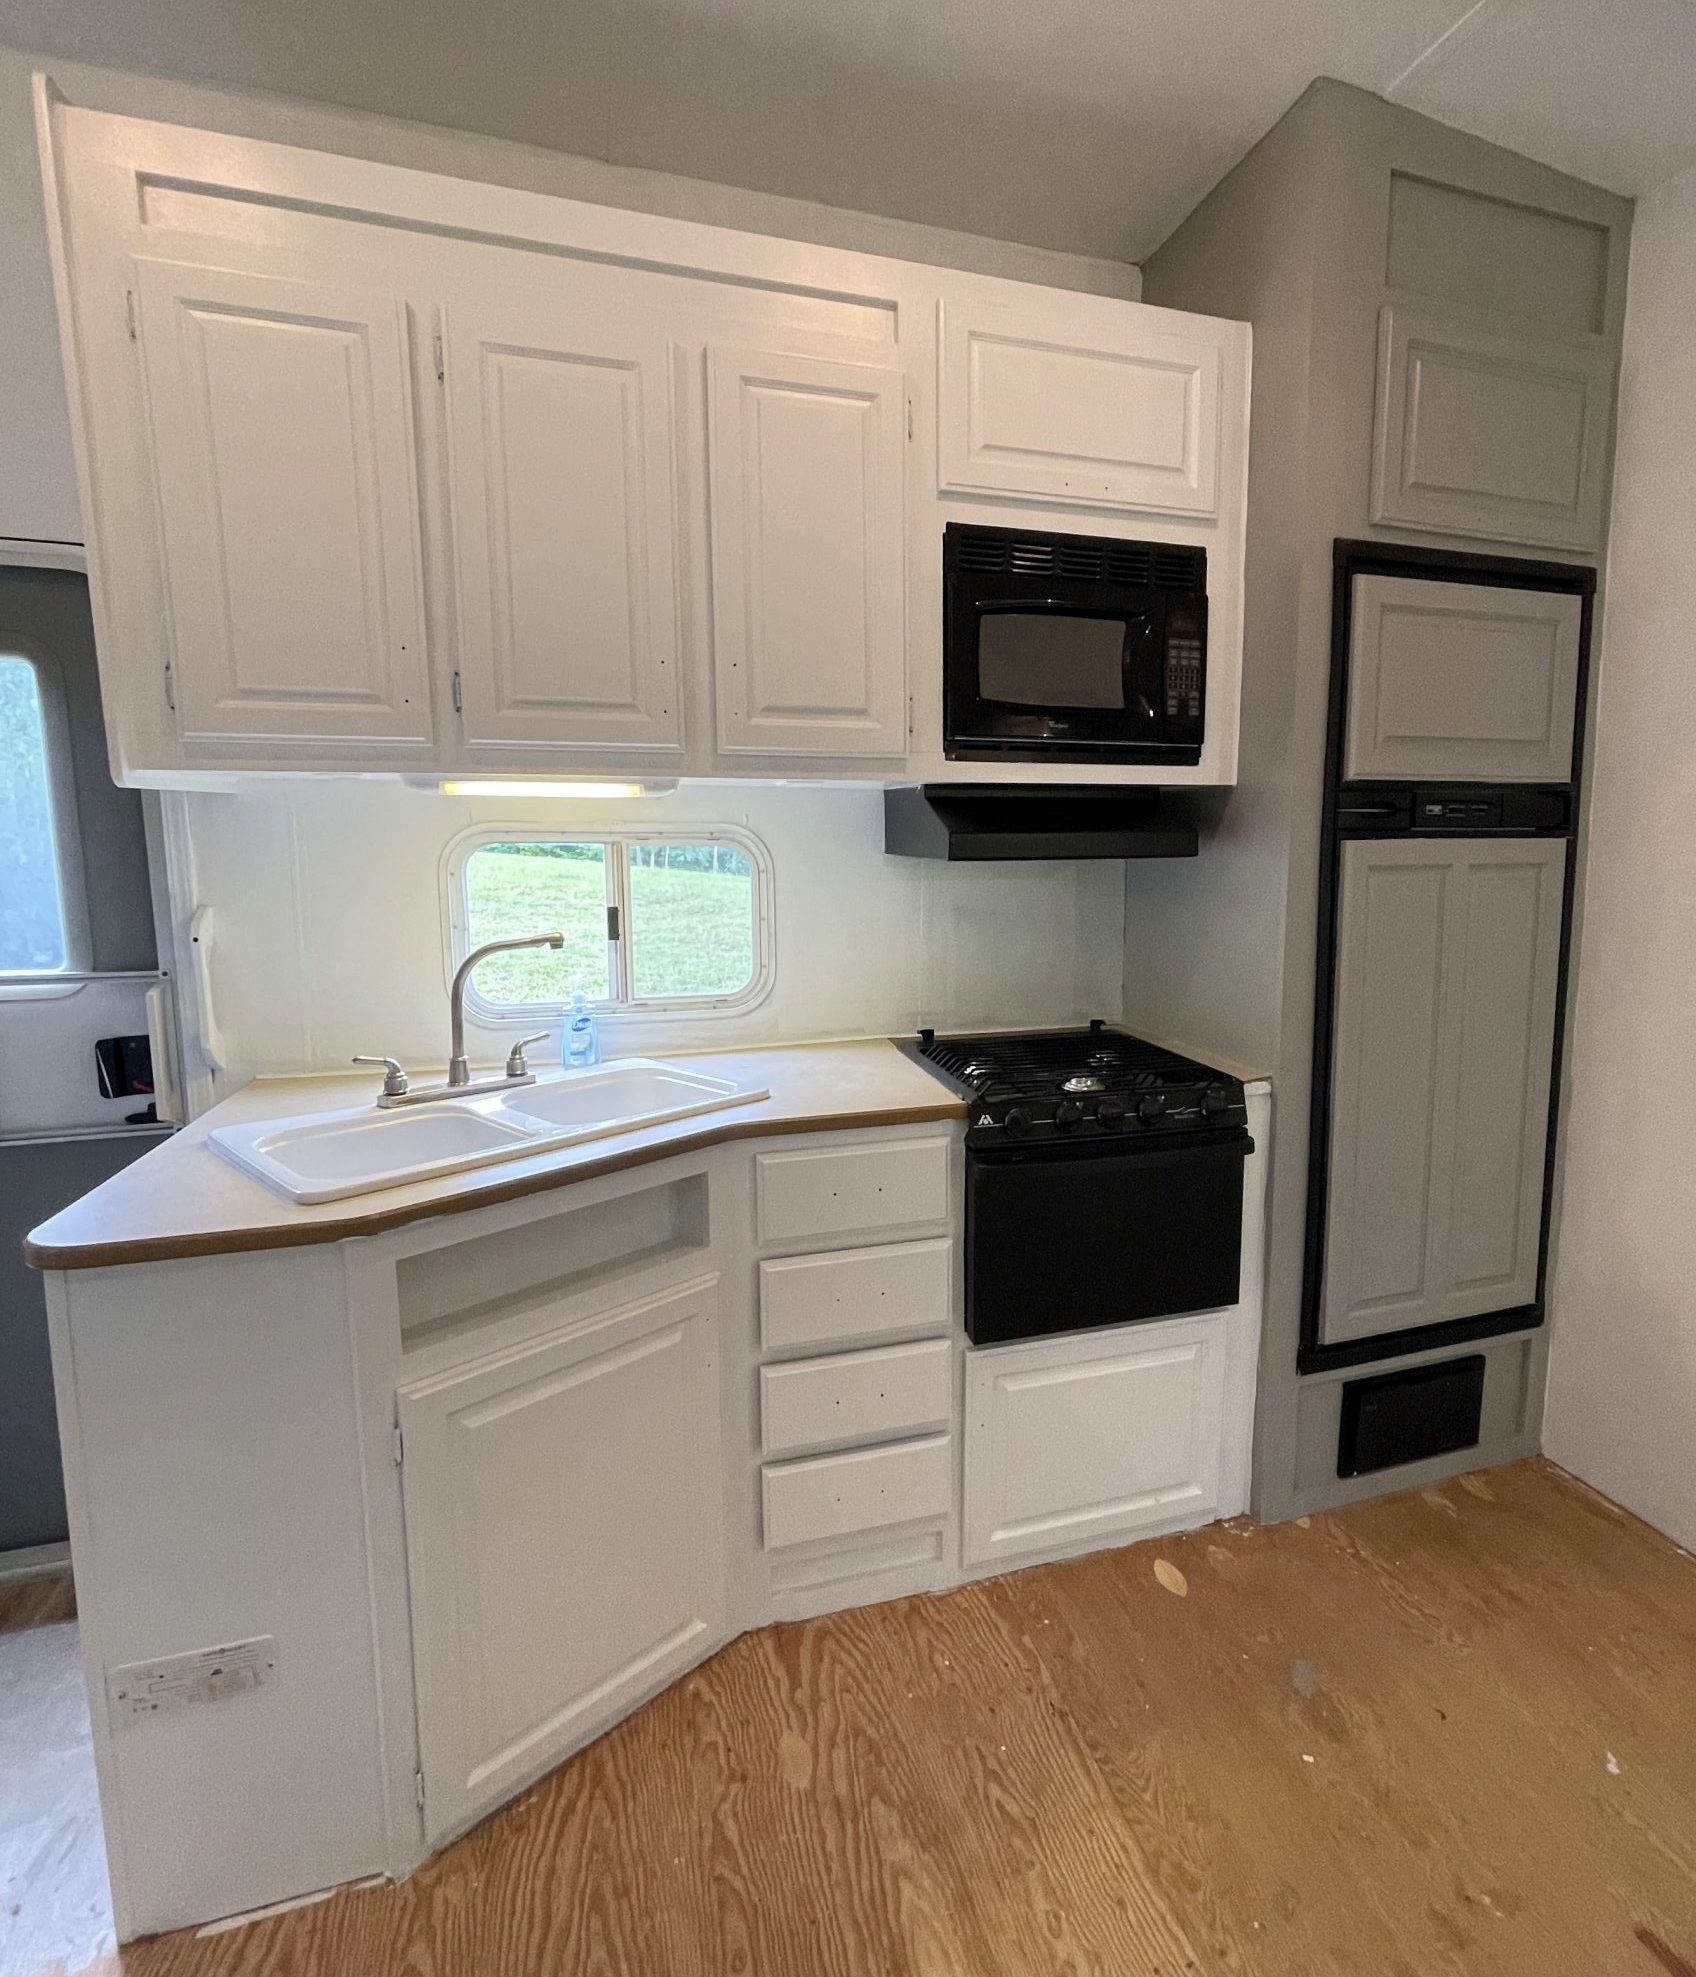
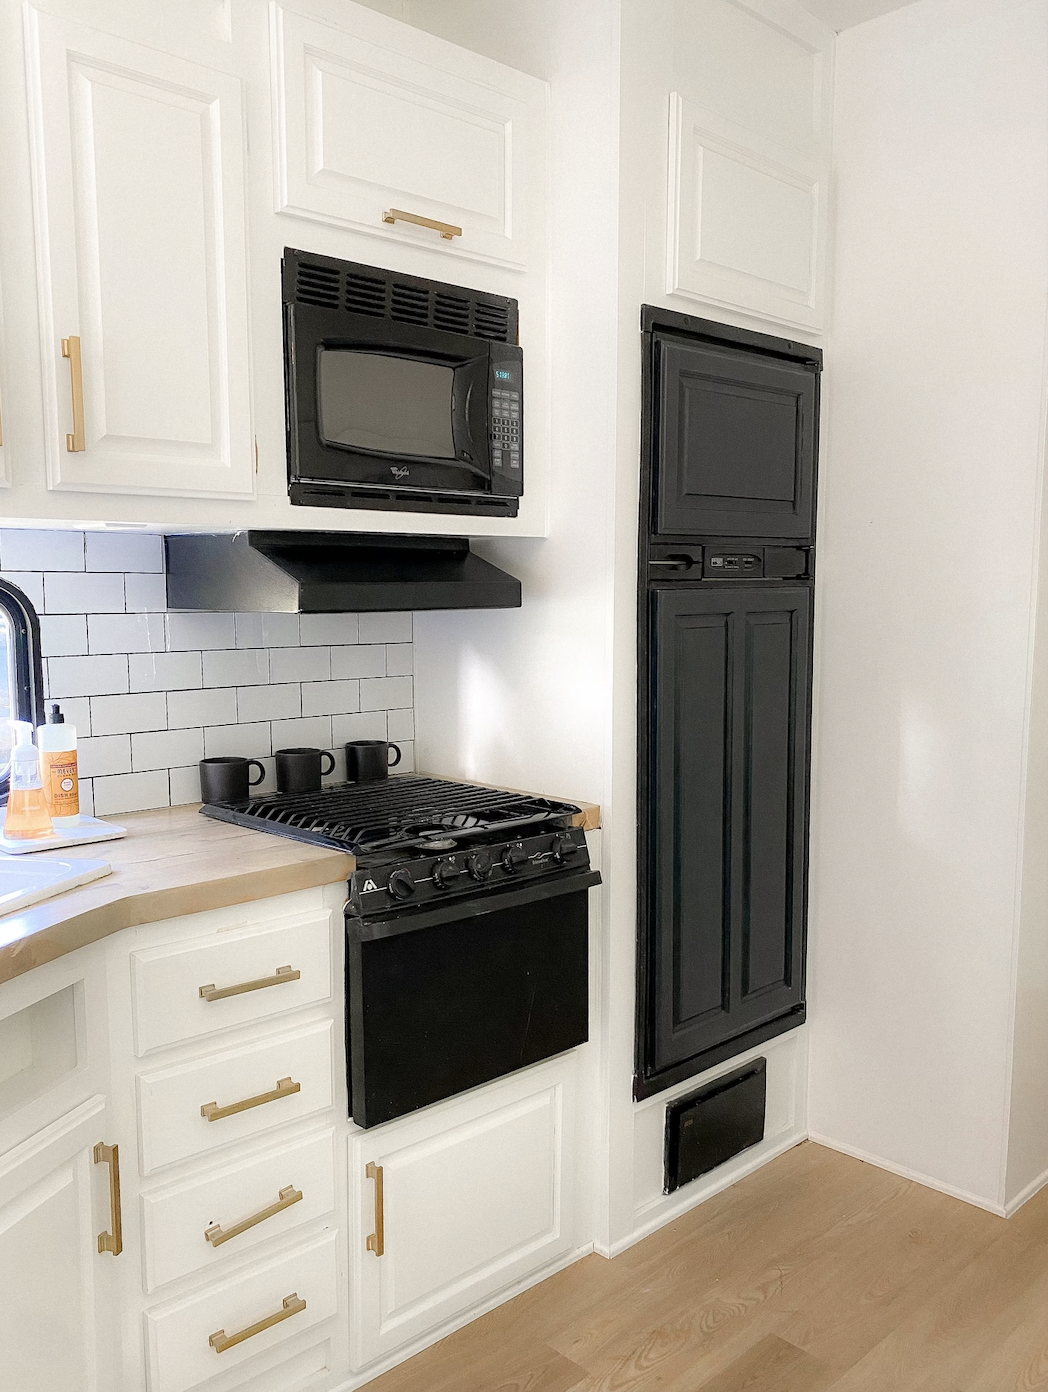
It took about two coats in most places. I may have done three in a few spots. You can also see in these pics how I first painted the fridge and surrounding cabinets Dorian Gray by SW. This is my favorite warm gray color, and I knew I would be using it on the cabinets in the main RV bedroom. I thought it may tie everything together nicely, but it didn’t. I just didn’t like the look.
So I ended up painting the whole fridge SW Tricorn Black, and the surrounding cabinet SW Greek Villa, and I like it a lot better!
Cy did a bathroom remodel last year, and the homeowner wanted navy blue vanities with chrome hardware. The vanities they ordered came with gold hardware, and they replaced them with chrome. Which mean I got to keep the beautiful gold hardware for free! yay! And I had just enough to add it to our RV cabinets.
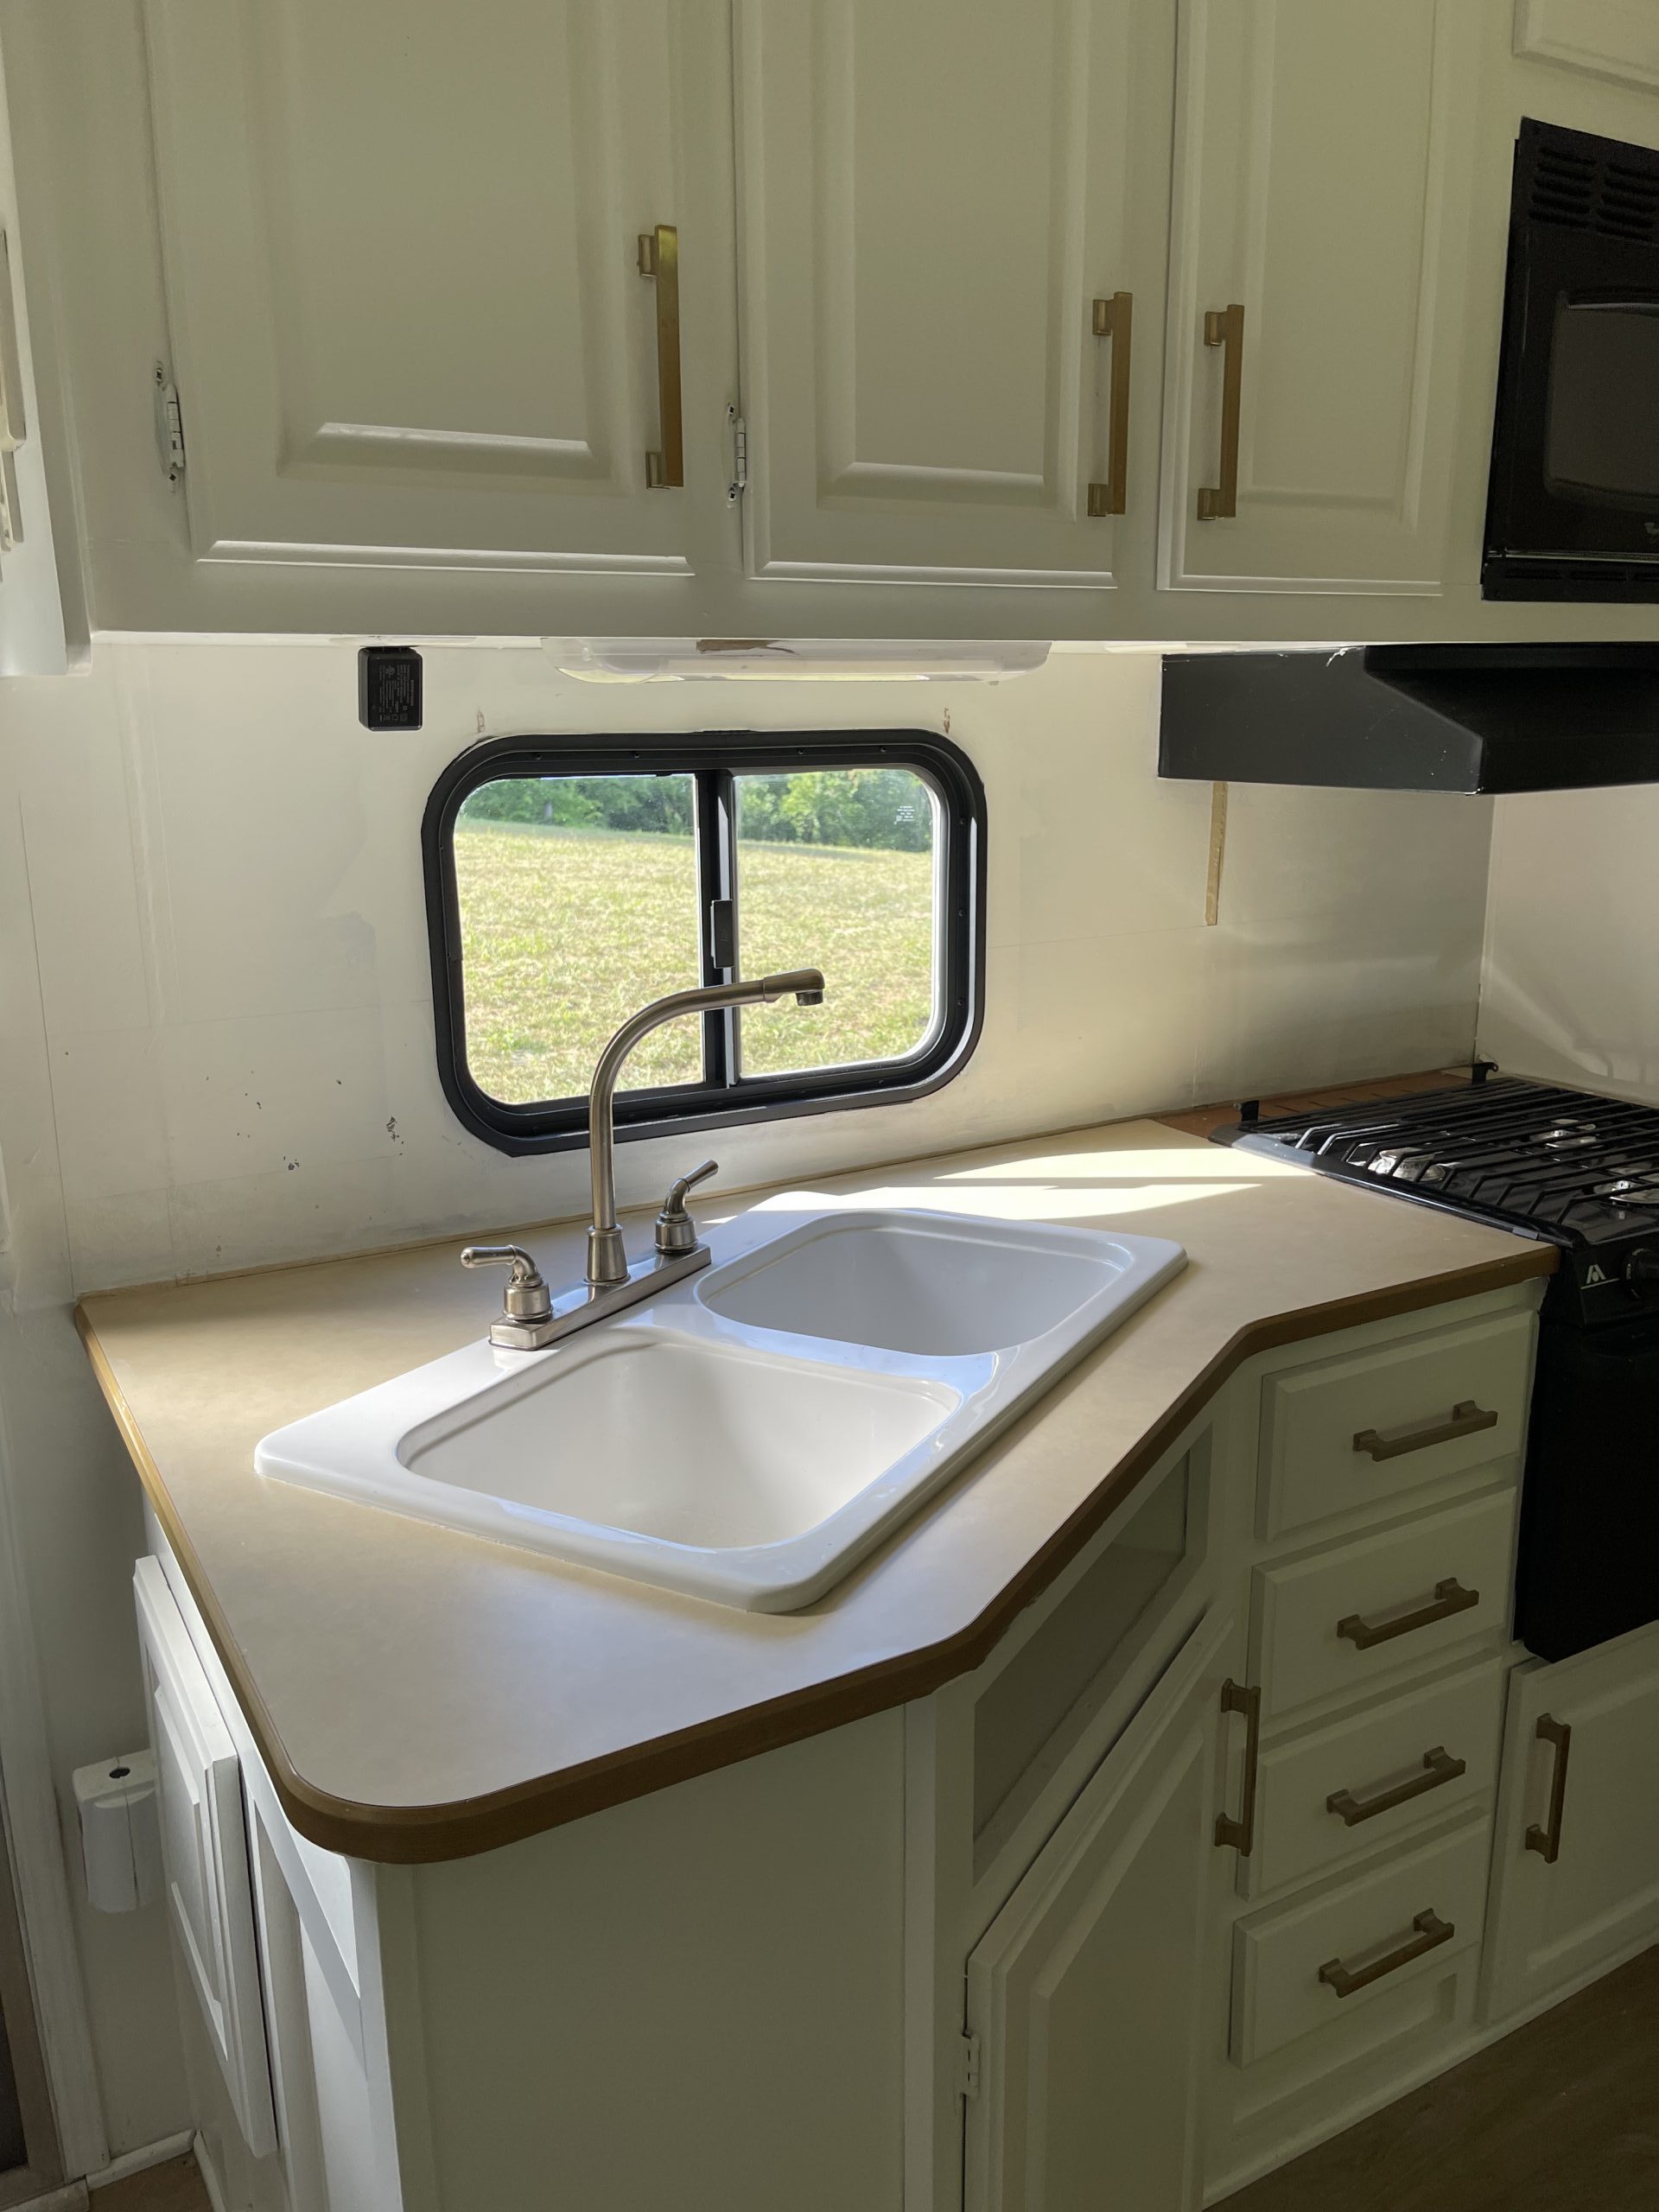
You can see in the picture above that I painted the trim of the windows black. I actually did that with a can of spray paint. For the kitchen, I had to make sure I had everything covered really well so the overspray didn’t get on everything. But for the rest of the windows in the RV, I spray painted thew windows black before I did any other painting in the area to make it easier.
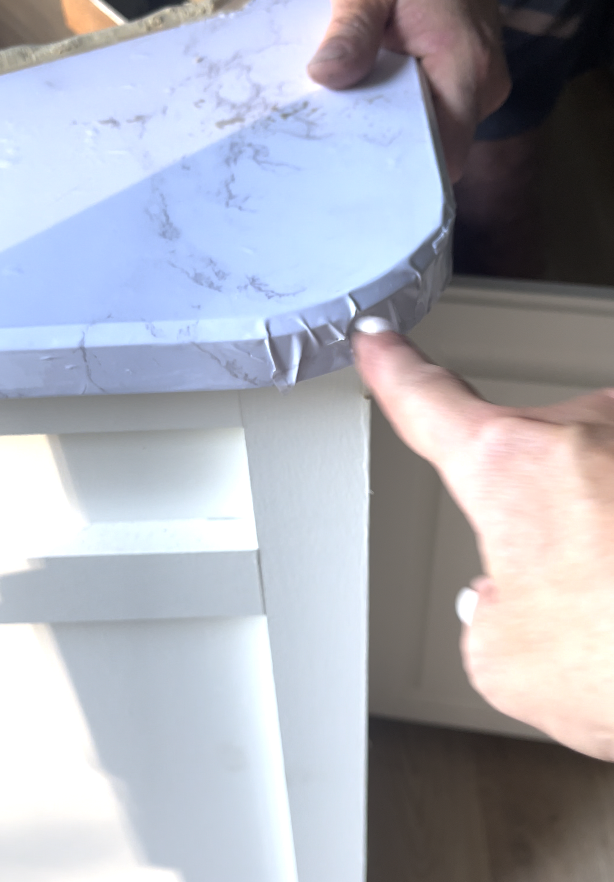
Next, I wanted to make the old kitchen countertop look nicer by applying this marble countertop heavy duty contact paper. I had seen a ton of other bloggers do it in their RVs, so I thought it would be no problem. WRONG.
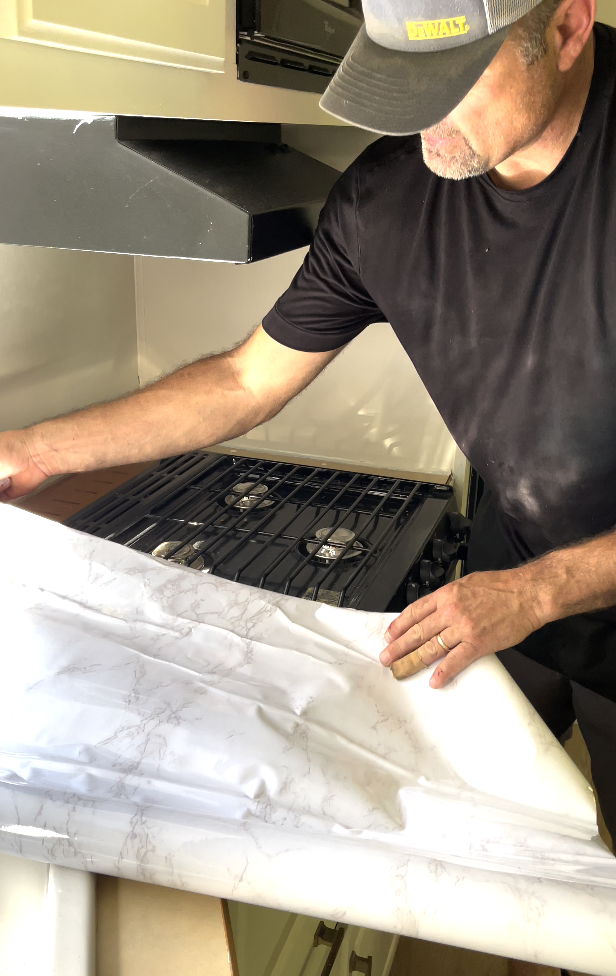
It was a nightmare! haha! We had the worst time trying to get it to lay right and then it looked awful around the corners. We quickly got frustrated and gave up (to save our marriage. haha!)
The only positive out of the whole situation was that we decided to install butcher block countertop instead, and I LOVE IT!
Cy took the old countertop off and used it as a template to cute a new piece of butcher block from Lowes.
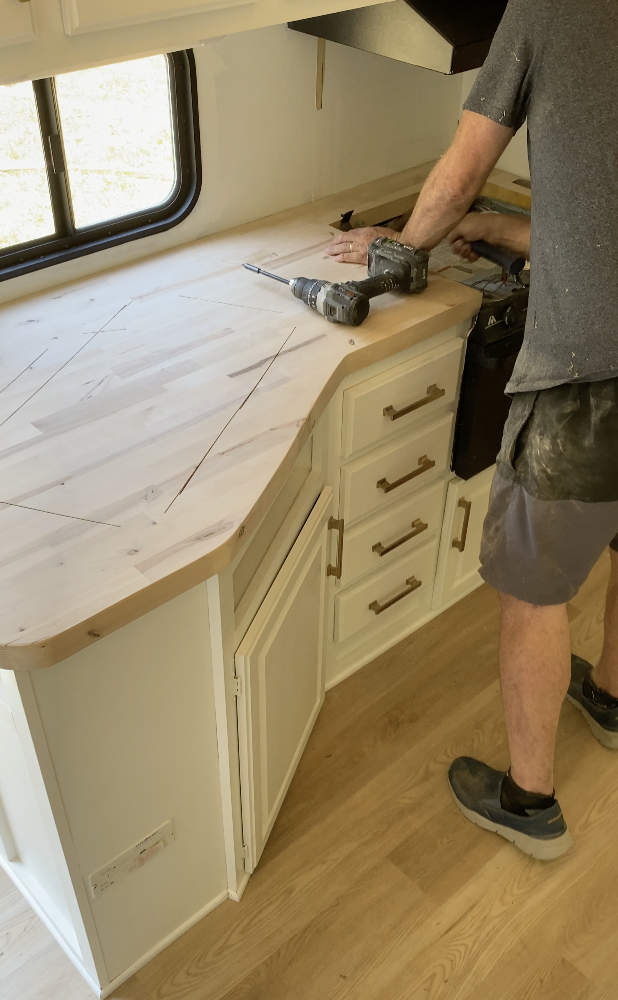
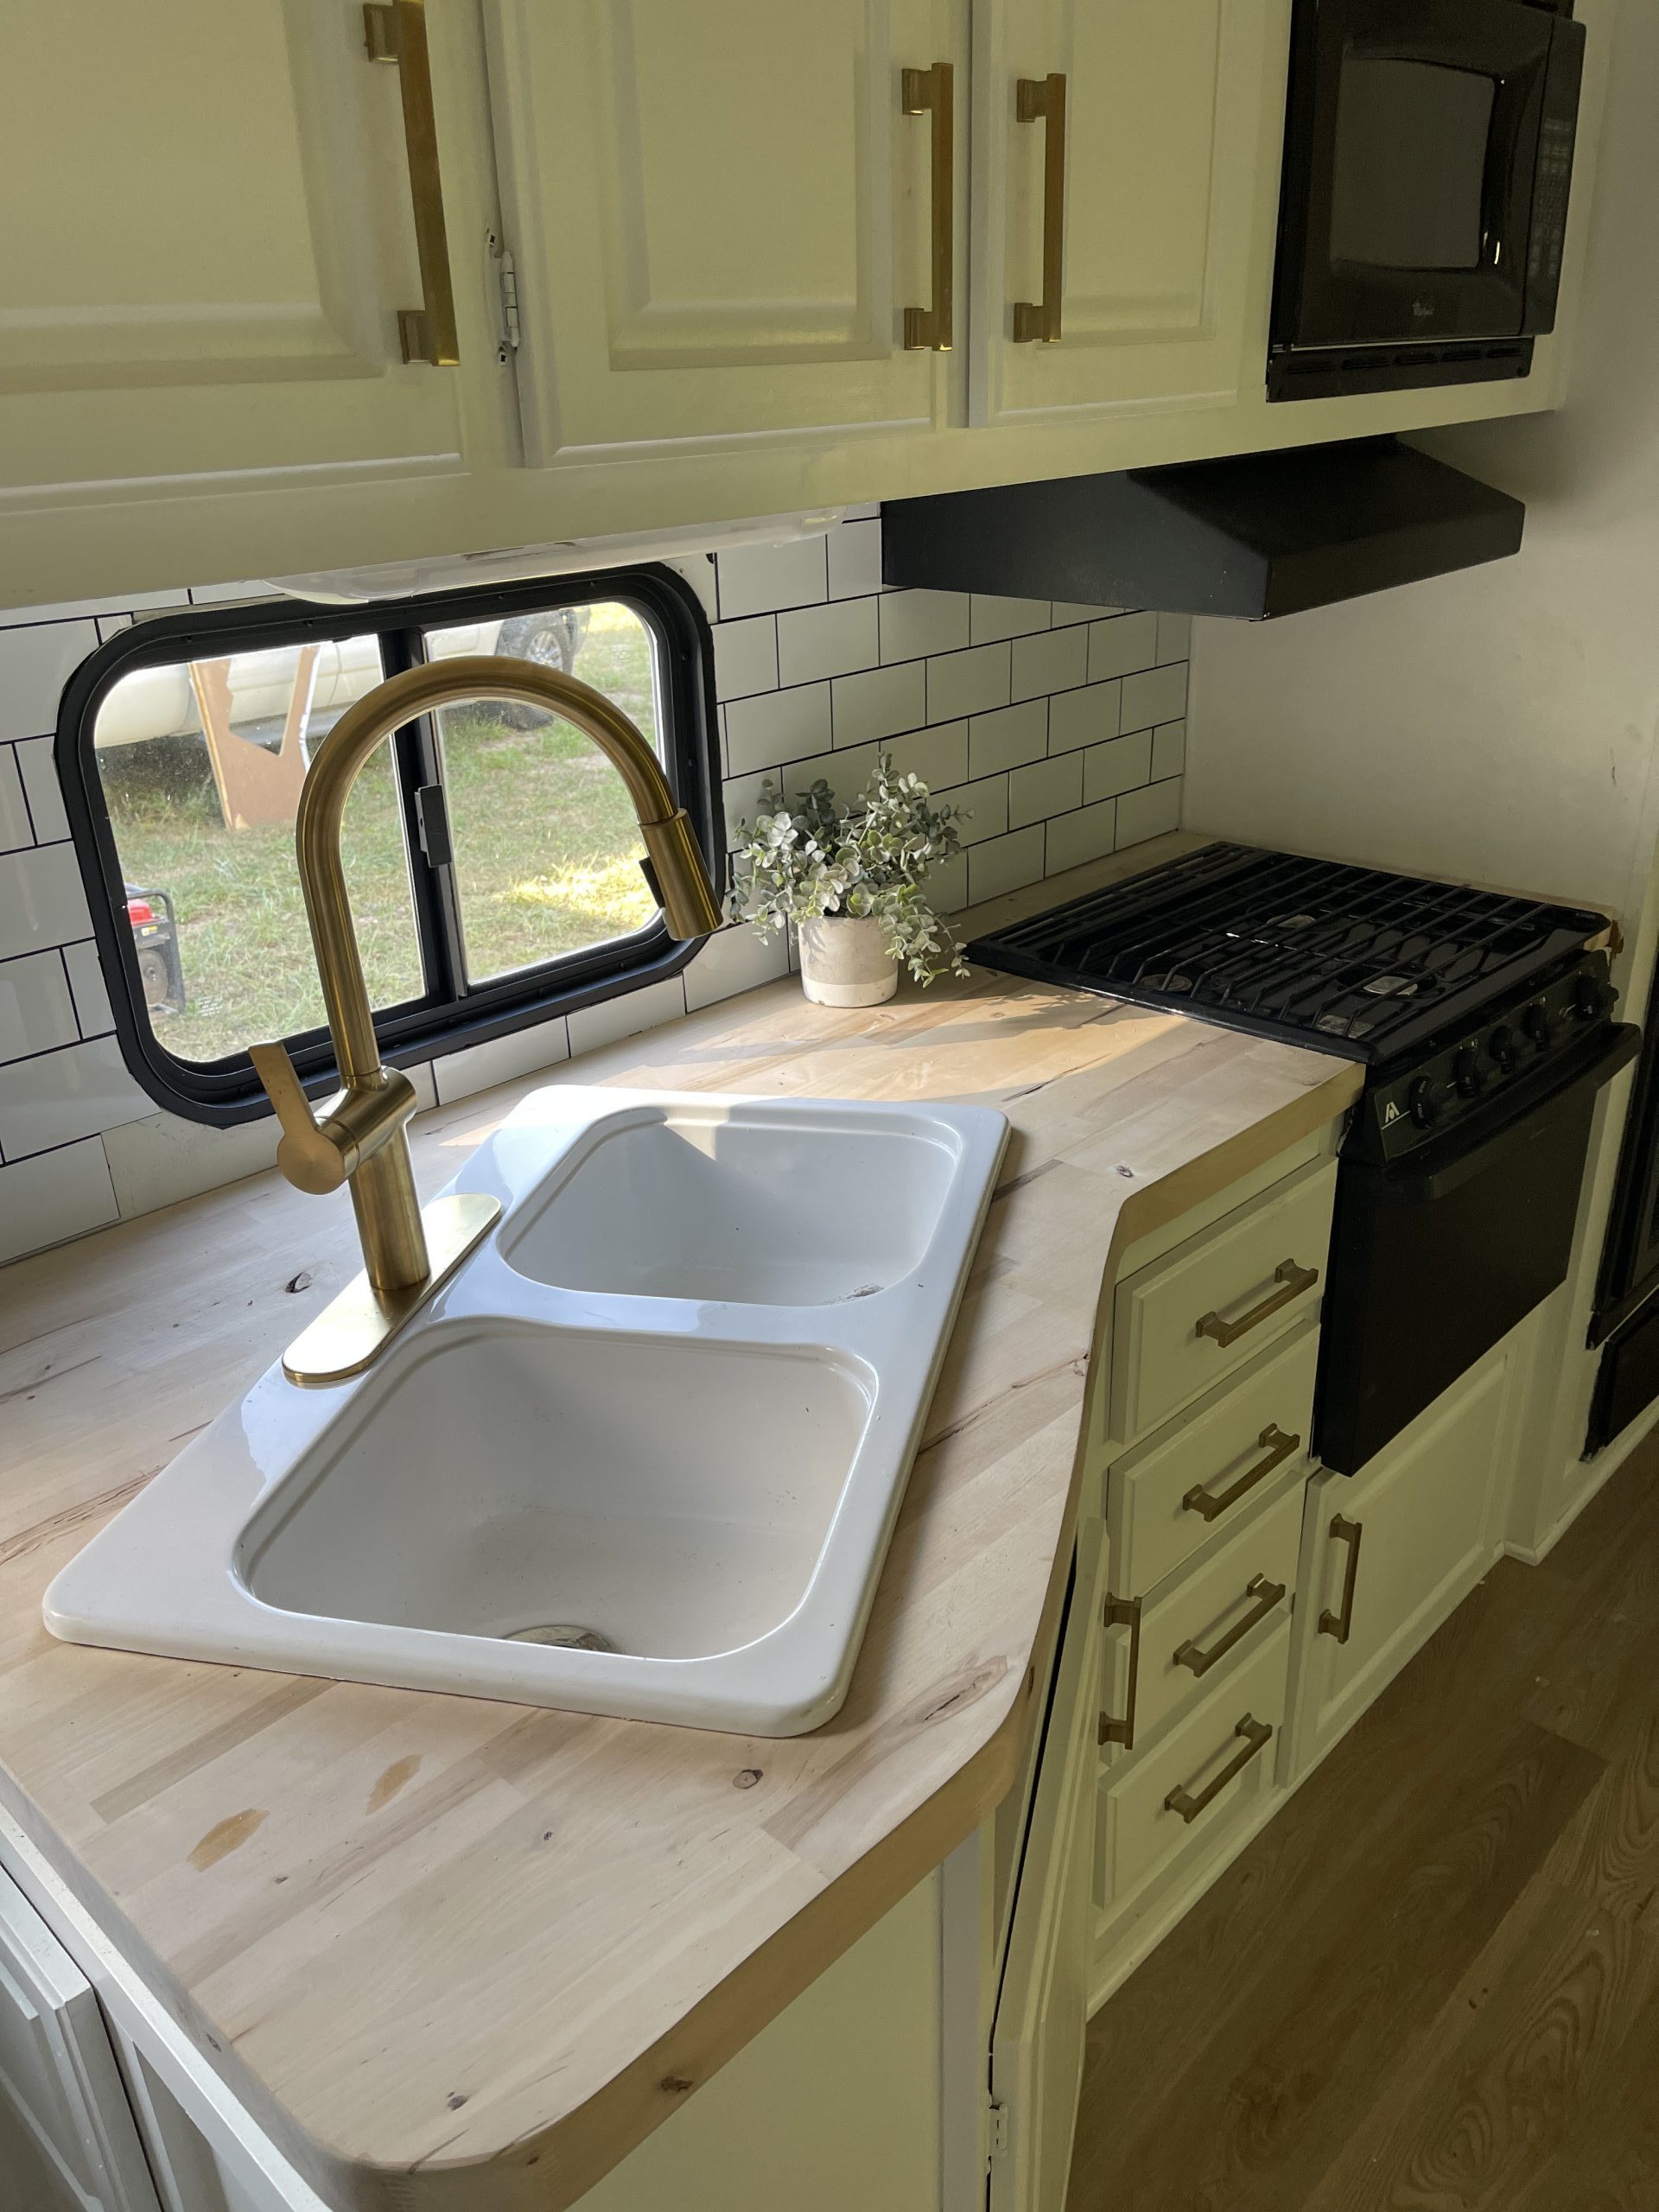
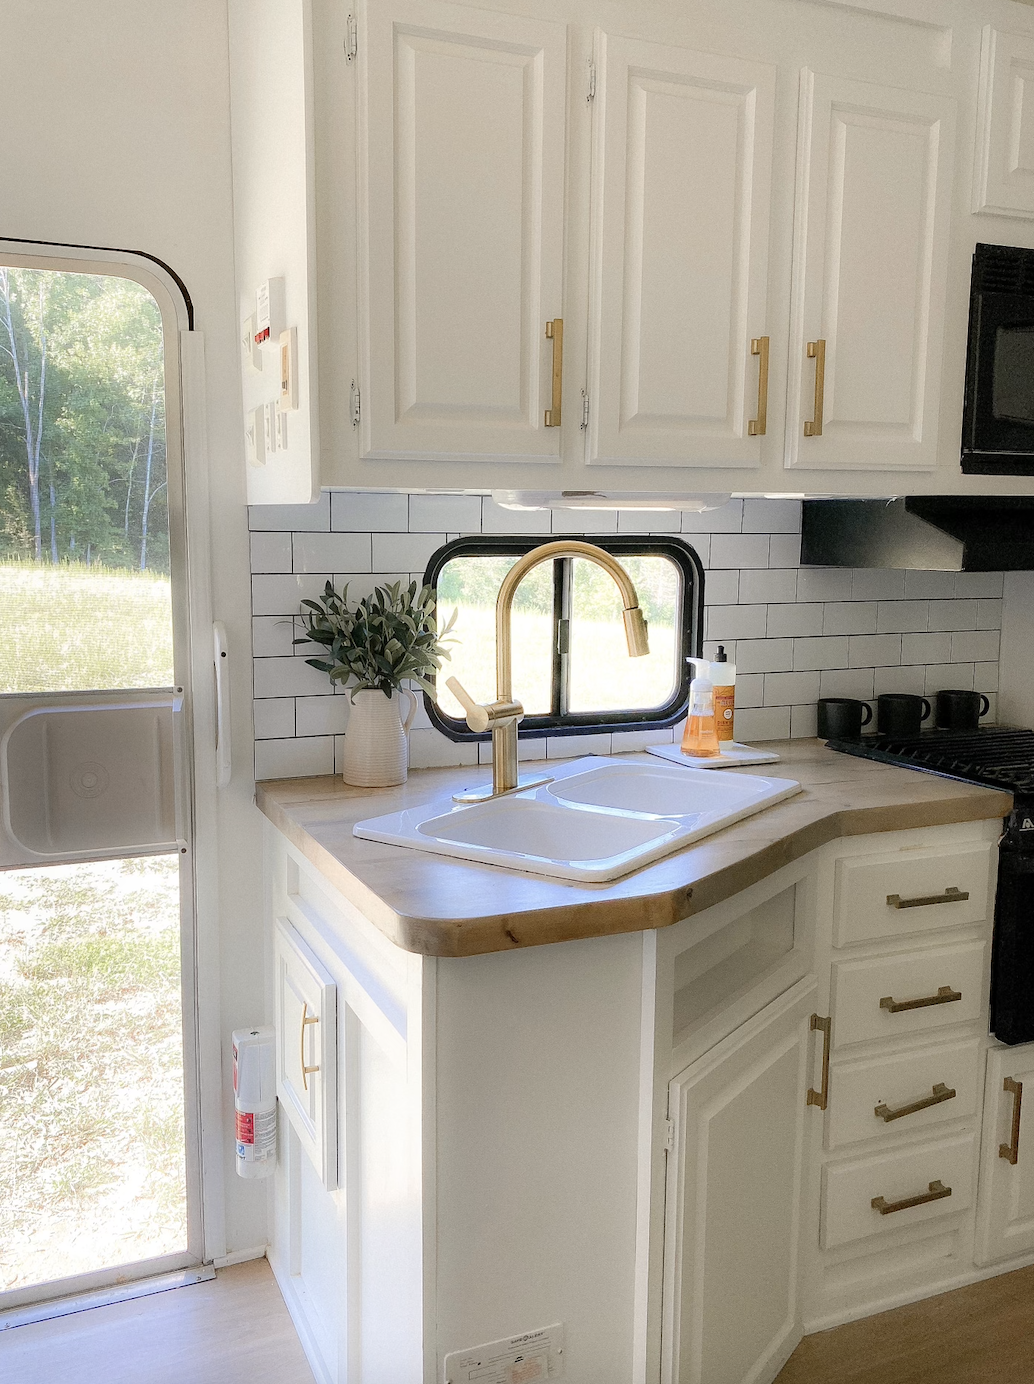
The butcher block made a HUGE difference in the look of the kitchen! We decided to use the same sink, even though it wasn’t in the best condition, but we had trouble finding a new one to fit the countertop. (We probably could have found a sink online if we had more time, but we were trying to find something in stock somewhere we could pick up quickly, and we couldn’t find anything.
Cy installed this pretty gold pull down faucet from Lowes…

That’s when the kitchen really started coming together!
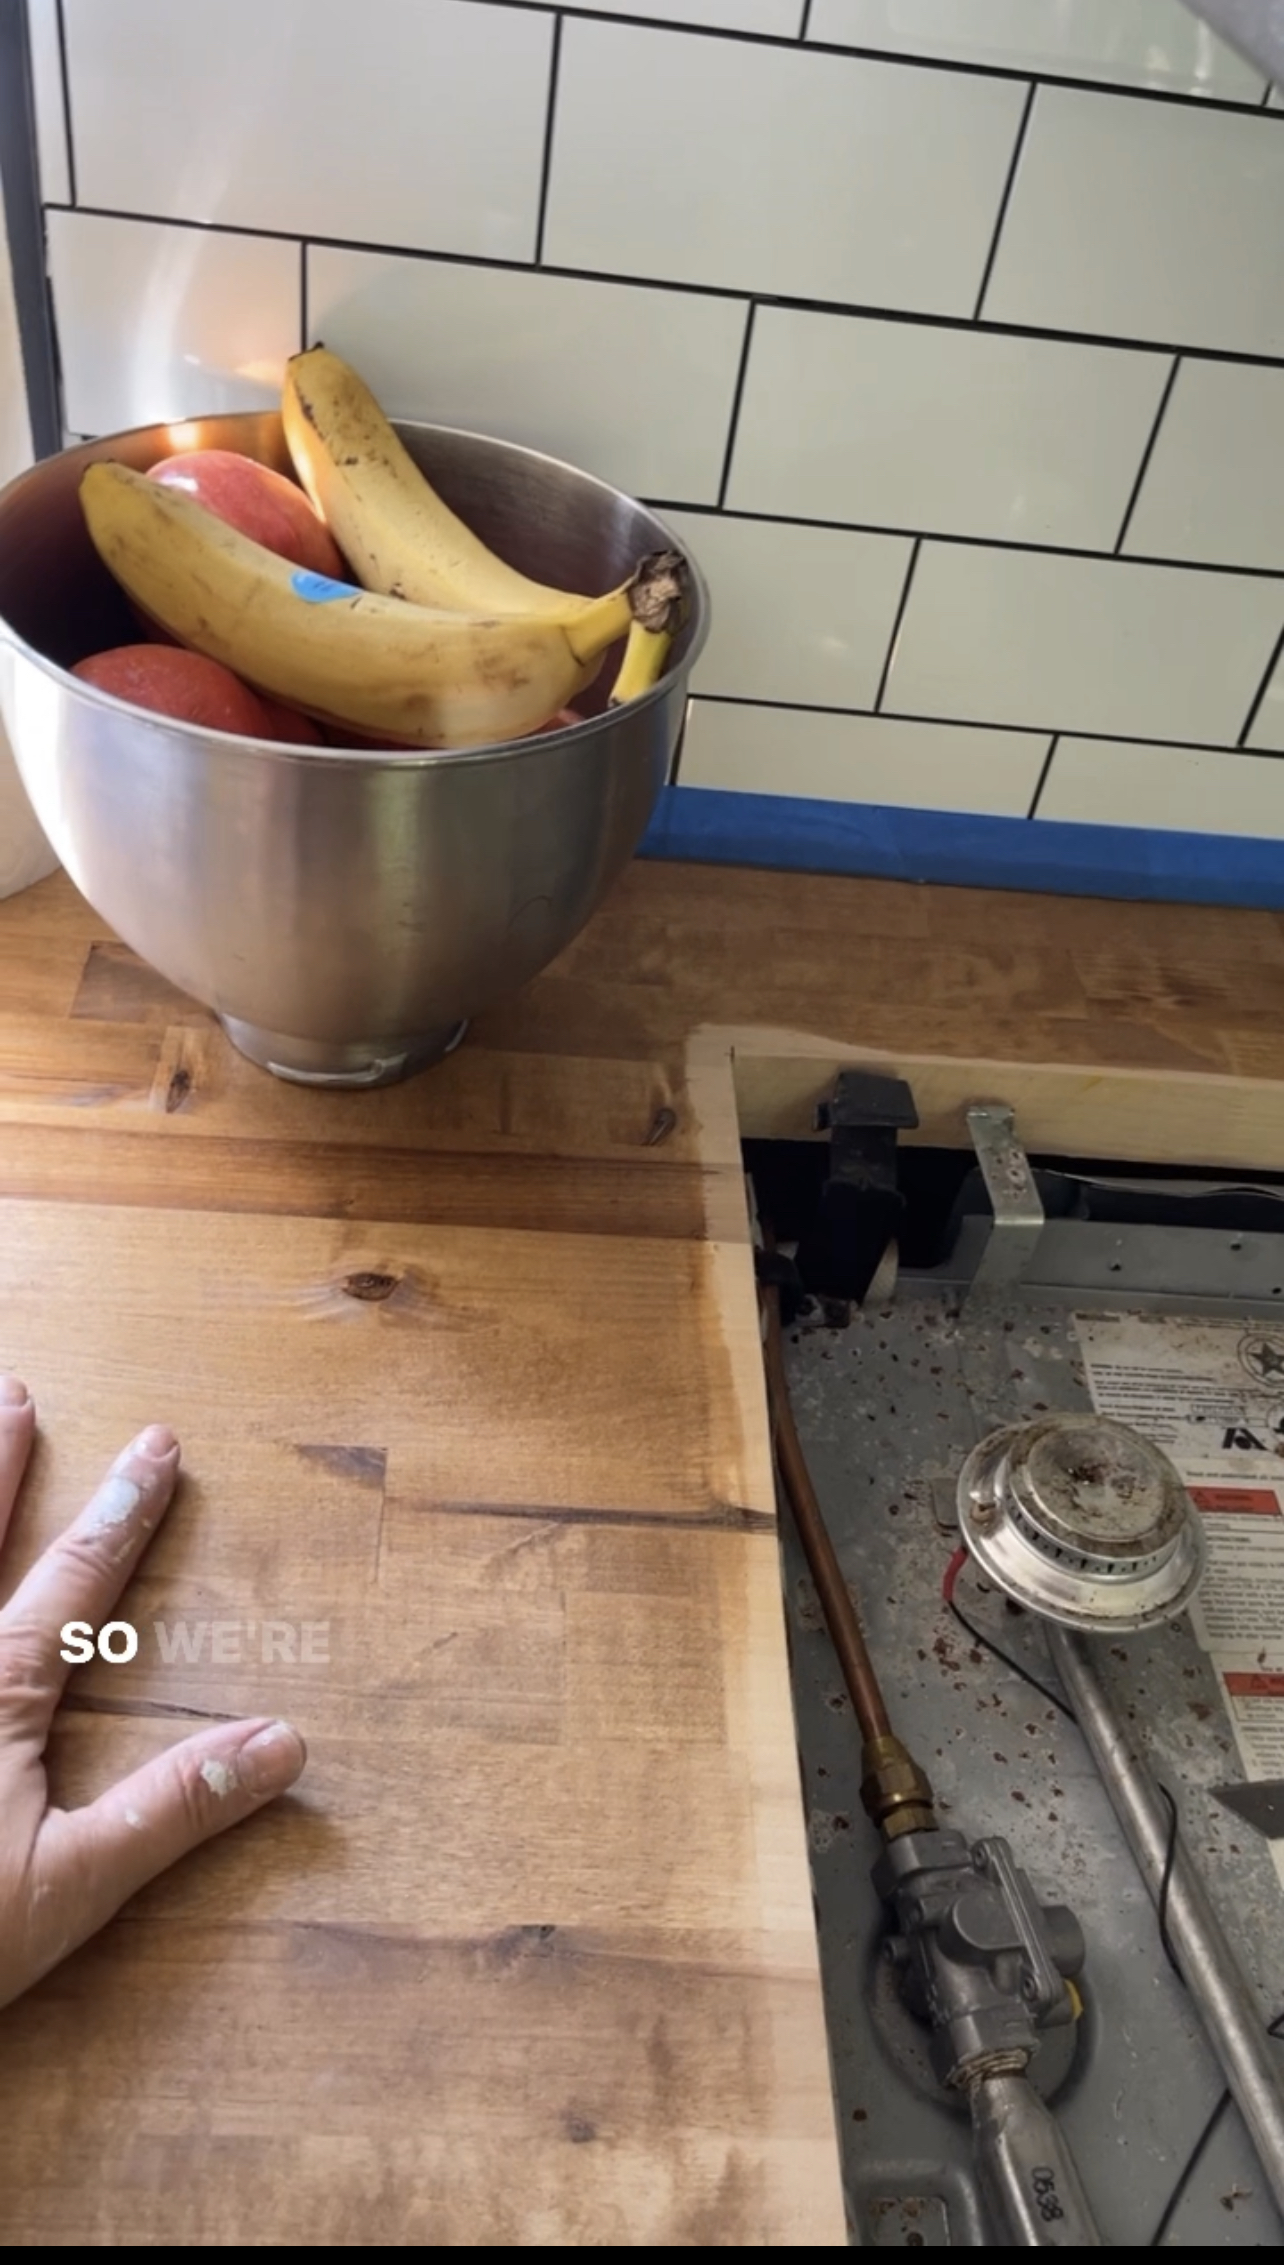
My plan was to stain the butcher block, but when I did, I immediately didn’t like it. #ugh. It was MinWax’s Early American, which I’ve used before and like, but it did NOT look good in this kitchen. Too orangey brown.
I was so frustrated at this point, I did not take a lot of pictures, but here are a couple screenshots of a video I shared on instagram…
Thankfully, it was another happy accident because it forced me to make a new discovery to get a look I love! I ended up sanding off most of the stain with an electric hand sander. Then I “gray washed” the wood with a mixture of SW Dorian Gray paint and water. It was mostly water, with just a little dorian gray paint. I used a paint brush to apply the graywash, then wiped it off with a paper towel. This process took the orangey look out of the wood and gave the butcher block a grayish tone.
Then I sealed it with a satin polyurethane which allowed the beautiful wood grain to peak through….it was perfect!!
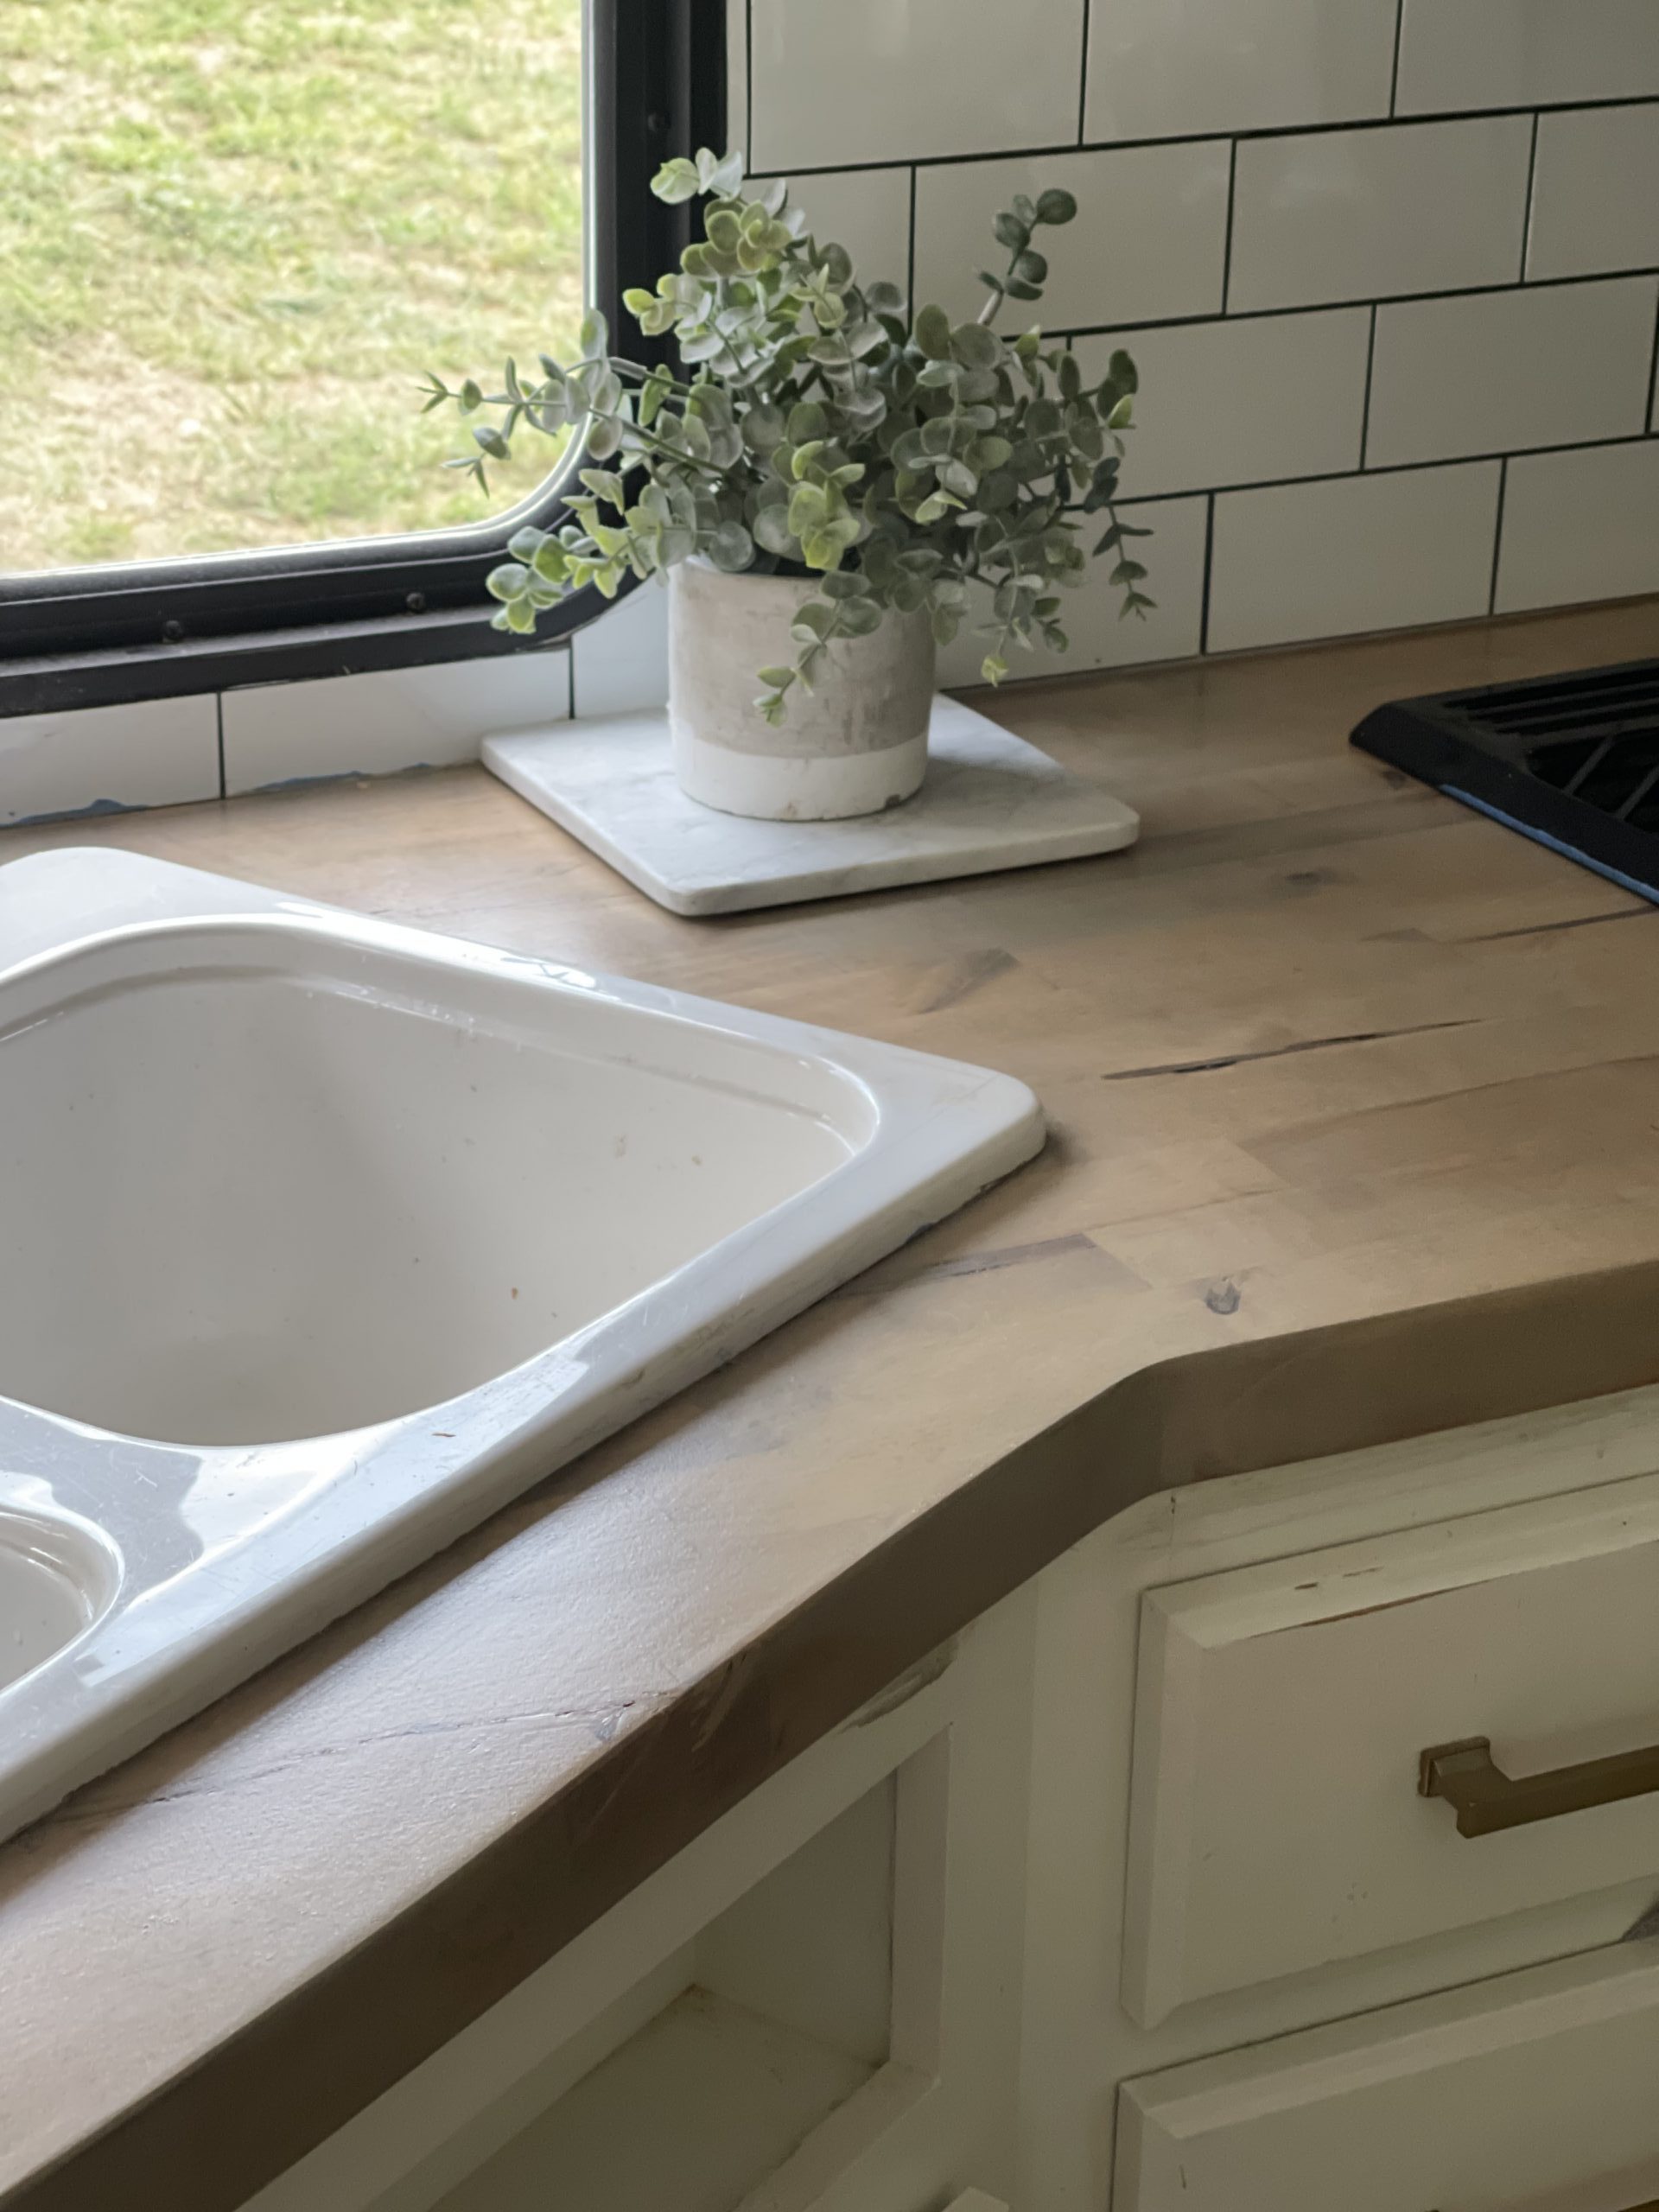
Isn’t it pretty?!!! I was so excited it turned out the way it did, and I couldn’t believe how good it looked with the flooring. you can find the flooring HERE.
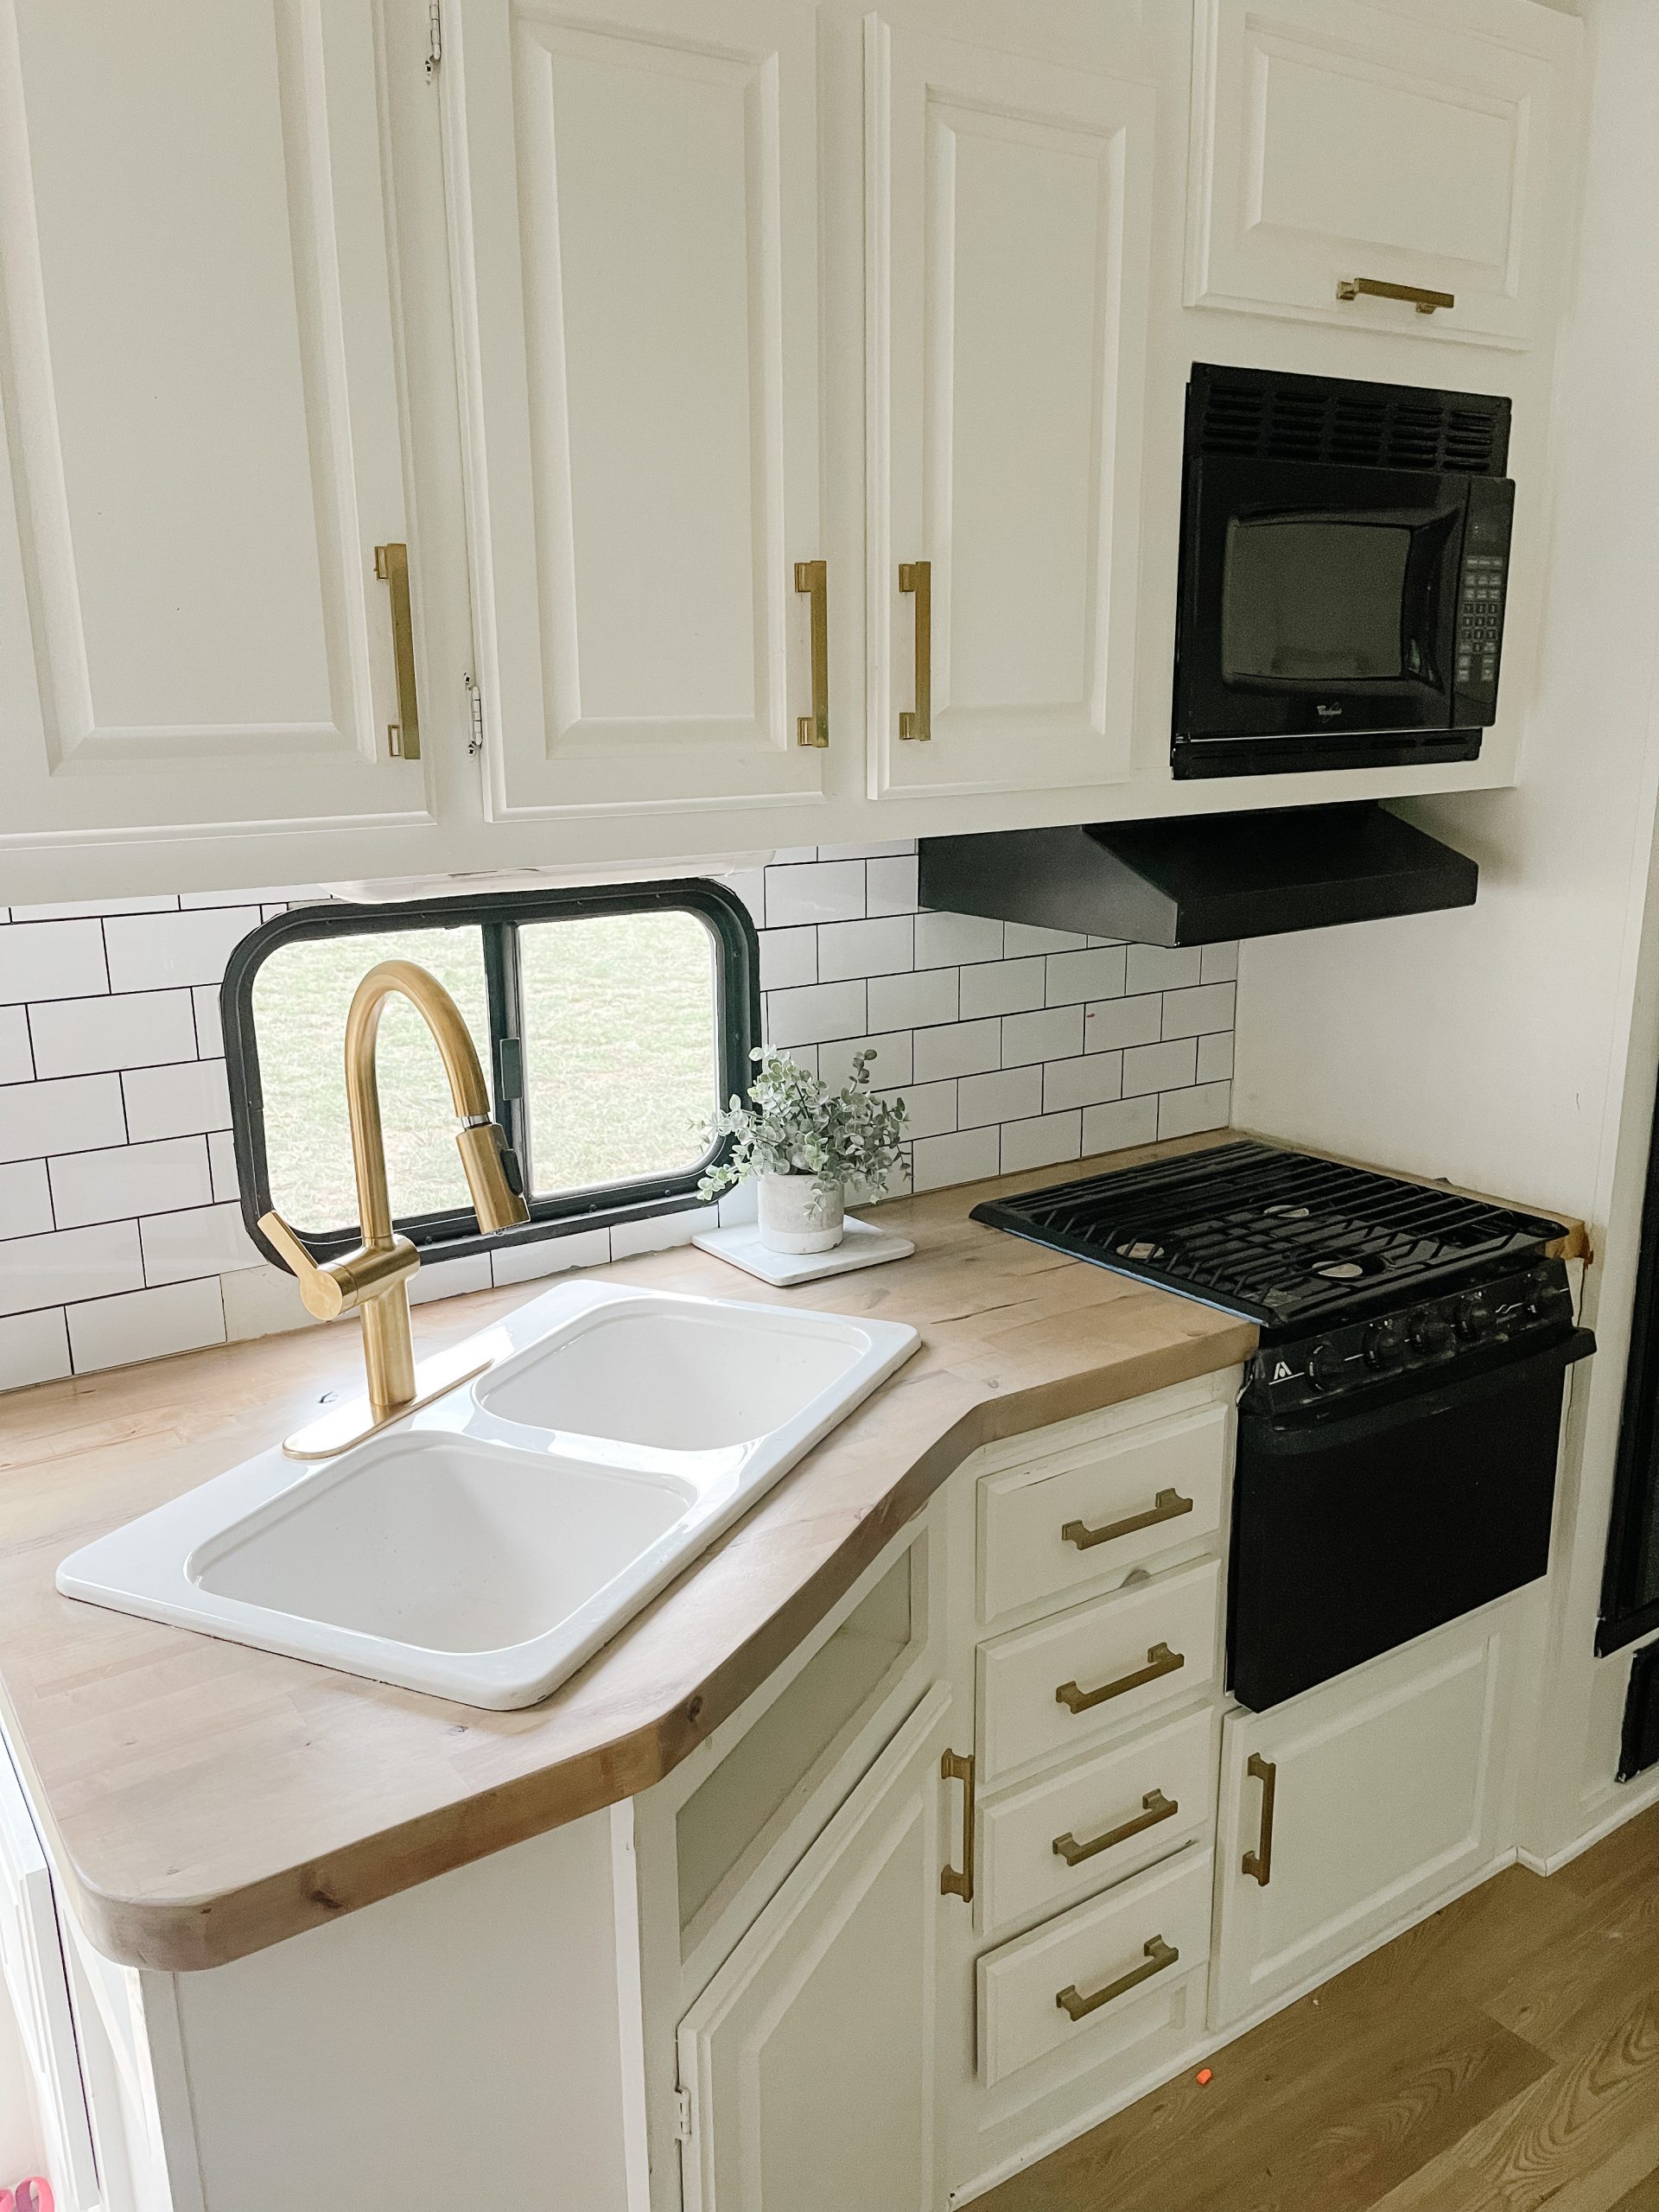
You can also see that we added a peel and stick subway tile backsplash from Lowe’s. It was an easy process and looks amazing! You can find it HERE.
Here is a little reel that we made of the kitchen makeover…
View this post on Instagram
Your little kitchen reno turned out perfect! It’s so lovely!!
Thank you, Briana!
Looks sooo good. Y’all should really be happy with the results. I love using something from one project jazz up another one!
Thanks, Judy!
Wow…….you did a great job. If you lived in the NW, I’d hire you both to redo my house. We don’t even know where to start. You both have such a good eye for design etc. I listened to Jonathan’s new song. He is great. I’m so happy for him. I know he’s going to go big.
hey girl- Love the kitchen!! Looks so good! Great job!!
It looks fabulous! Maybe you could help me with a decorating problem I am struggling with. We are building a new house and I can not figure out what tile to use in my foyer. Not hardwood, my front door will be painted black and it is 2/3 glass with full length side lights. Carpet coming off 2 sides of it into great room and dining room. Any help would be appreciated. Thanks Joan
Hi Joan! It’s hard for me to make a suggestion without seeing your area. If you want to, send me a couple photos of the space to [email protected], and I will see if I can help. Thanks!
Traci,
I’ve followed you for years! The counter top looks amazing. Do you mind sharing your best estimate for ratios on the paint/water combo you applied? Do you think it would look as good without having applied the stain first, then sanding, and applying the paint/water mixture?
You guys have done a great job living through construction phases. My family has had to endure the same over and over again…with eleven kids in tow! I feel your “pain”! LOL
Hi Selena! Thank you for your comment and questions. My best guess for the paint/water ratio is maybe 10-20% paint to 80-90% water. I don’t necessarily think I would have had to stain it first to get the same result? On my recent dresser makeover, I sanded down the stain off the drawers, then bleached them out in the sun, so all the stain was gone, and then I gray washed just like I did in the RV and added poly and got the same result. Truly, I was just experiment in both scenarios. haha! I knew if I didn’t like either, I could always just sand it back off and start over. Nothing is permanent. :). Hope that helps a little.
I laughed when you said the contact paper! I had a difficult time with that same paper covering a box for storage :)
Your countertop turned out so much more beautiful.
I listened to the video, he is maturing in his voice and style. I LOVED IT! You must be overwhelming proud.
It looks so lovely. You are a wonder woman! You and Cy are an incredible couple, not afraid to work so hard.
LOVE the kitchen reno and I LOVE Jonathan’s new music video Blue Collar….his music/songs speak to me as being so real and relatable. I watched several videos that came up after Blue Collar was done and before I knew it I had spent over an hour watching/listening to his music….VERY TALENTED young man. Can’t wait to see more!
Aw, thank you, Jan for your sweet words about Jonathan. xoxo