Painting our Kitchen Cabinets (Supplies and Process)
Happy Tuesday!
I am still trying to answer a lot of the questions we had about our kitchen renovation.
Many of you were wanting to know how we painted our kitchen cabinets.
I had planned on doing a detailed post about the process while we were working on it, but things were happening so quickly, I just couldn’t fit it in.
Painting kitchen cabinets is not difficult, it’s just a pain in the wha-toosey! (How do you spell that?)
But it is sooooo worth it!
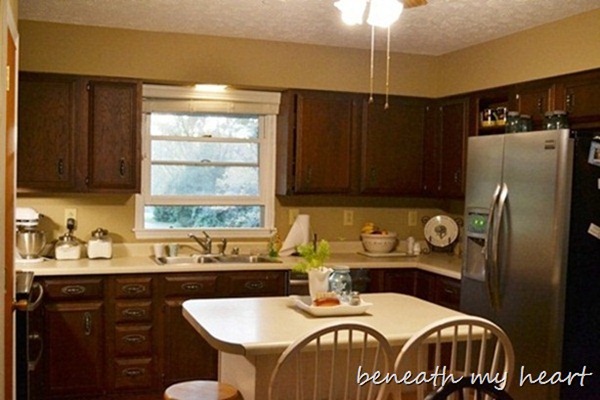
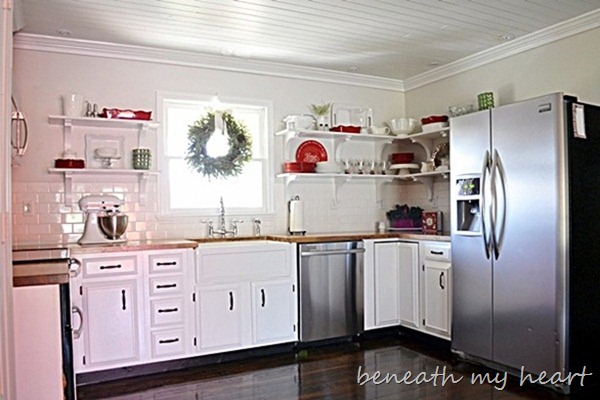
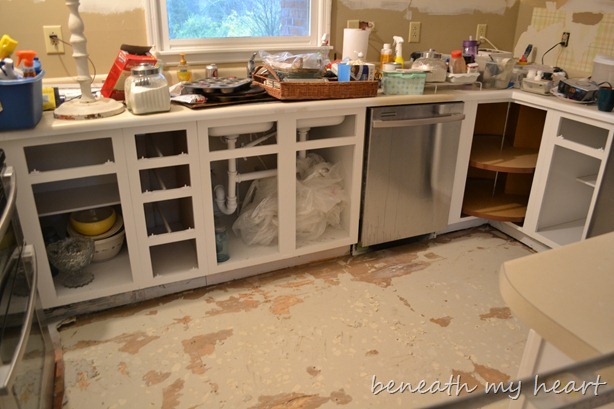
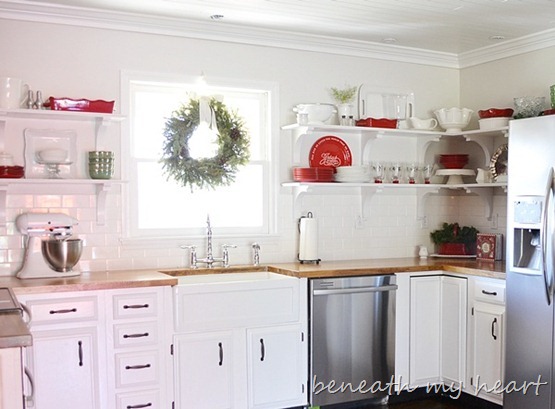
Remember what they used to look like?
Painting your cabinets is one of the quickest ways
to update the look of your kitchen!
We basically did three things:
1. Cleaned/Prepped the cabinets.
2. Primed the cabinets.
3. Painted the cabinets.
Now let me break it down a little further.
1. CLEANING/PREPPING
We removed the cabinet doors and drawer fronts before we cleaned them.
We also removed the hinges and the handles from the cabinets doors/drawers and threw them away because we knew we wouldn’t be reusing them. If you will be reusing your hinges or handles, keep them (along with the screws) in a bowl to use again later.
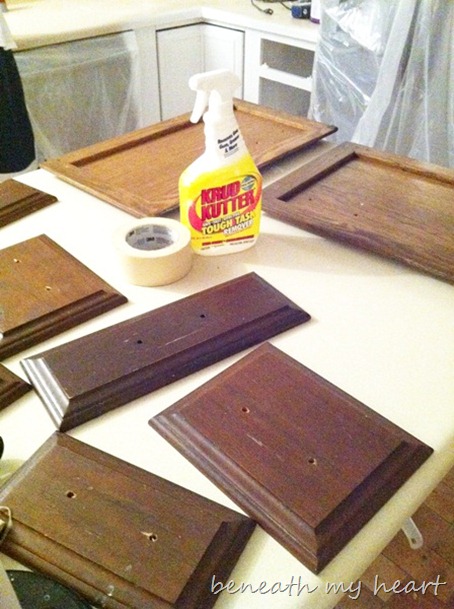
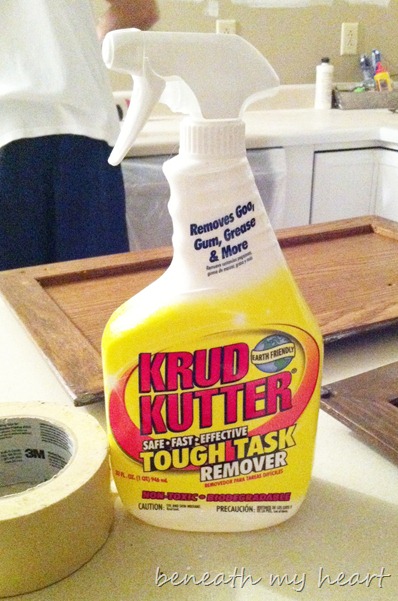
Then I laid the doors out and cleaned them with Krud Kutter.
This stuff worked great! I just used an old rag to clean the doors and the cabinets frames. I also cleaned inside the cabinets since I knew we would be painting those too.
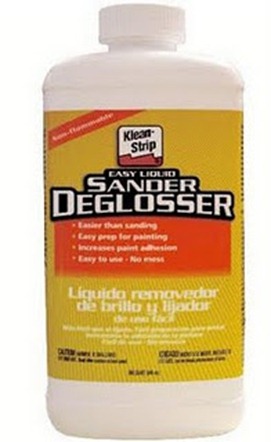
Next, we prepped the cabinets by applying this Liquid Sander/Deglosser.
This stuff is the best invention ever! Instead of sanding all of the cabinets with a sander, all you have to do is wipe them down this this deglosser, and they are ready to go!
2. PRIMING:
Next step is to prime the cabinets.
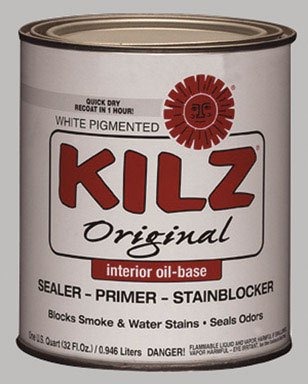
We almost always use KILZ primer. It has always worked well for us.
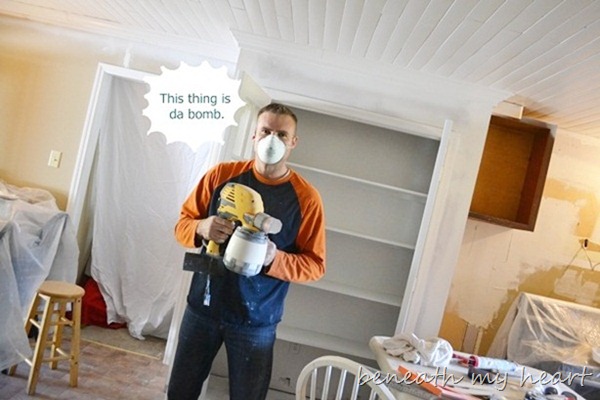
We covered up our appliances and used our paint sprayer to apply the primer.
We didn’t have to cover our floors or our countertop because we knew we were going to be ripping them out soon. Yay!
When using a paint sprayer, be sure to clean it out thoroughly (and according to the instructions) between each use.
3. PAINTING:
Last step is to paint!
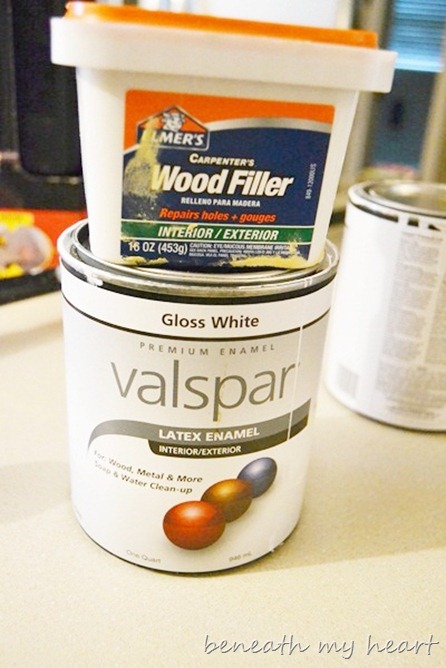
(If you are getting new hardware for your cabinets, you may need to put some wood filler in the old holes, let it dry, and sand it before painting.)
Here is the paint that I always use on my kitchen cabinets:
It is by Valspar and is usually located over by the spray paint at Lowe’s.
It only comes in a quart size, and I think it took us 2 or 3 quarts to paint our cabinets with the paint sprayer.
I used this same paint during our kitchen re-do at our last home:
This paint goes on so smooth and is extremely durable! And it is also easy to wipe clean.
I use the “gloss” finish to give the cabinets a little shine.
Cy used the paint sprayer again to paint the cabinets.
We were thrilled with the results of the paint sprayer, and it saved us a ton of time!
However, if I didn’t have the sprayer, I would have just painted the cabinets with a paint brush and roller.
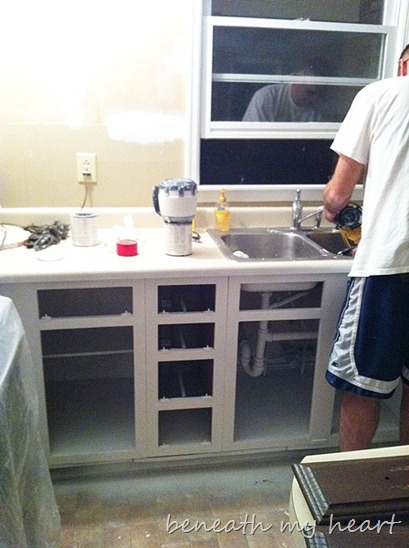
On our previous kitchen, I used the paint brush to paint around the edges of the cabinets or around the parts with “grooves”, and I used a small paint roller (like 4 or 5 inches) with a low nap to paint the smooth parts of the cabinets.
Looking at the above picture gives me hives! I really did not think those days would end!
But they did! Halleluiah!
When you are finished painting, all you have to do is attach the hardware and put the cabinets back on. Voila!
And then you will look (and feel) like you have a brand new kitchen!
If you have any other questions about how we painted our cabinets, please be sure to ask me in the comments, and I will shoot you an email back. ![]()
(Because I feel like I am forgetting something.)
Have a blessed day!

![IMG_4223_thumb[3] IMG_4223_thumb[3]](http://www.beneathmyheart.net/wp-content/uploads/2012/01/IMG_4223_thumb3.jpg)
I would love to paint our oak cabinets white but we have the matching oak trim throughout our entire house. Is that okay to still have white cabinets and oak stained trim everywhere else? or is that like a home decor no no? I’ve always wondered this! Your kitchen looks wonderful by the way:)
Your kitchen looks fabulous!! Did you apply a polyurethane to the cabinets as well?
Where did you buy your paint sprayer? Thanks!
Thank you for the helpful information. Your kitchen looks amazing!
Lovely! I just love your new and improved kitchen.
Vanessa
Yes. I’d like to know the brand and specs on your spray painter as well. My husband and I have just bought a 3,000 sq foot house with 4 bedrooms. Thats like 25,000 sq feet of walls to paint. Do you guys have a certain type of compressor. Details please.
Traci,
Your kitchen is just amazing, gorgeous, beautiful, sparkling, updated and life changing! You and Cy are “da bomb”.
Love, Aunt Pat
What do you do about the undereath of the wall cabinets when you are painting? I have oak cabinets, but the underneath looks like cheap presssed wood. Do I paint that too?
Thanks, Gina
We are thinking of painting our kitchen walls and cabinets. I have never done this before and am a little scared of it! But is that paint easy to wipe off, you know when the boys spill? Because you know they will! (I am talking about mine, by the way.) We live in a house of spillers! I somehow have chocolate milk on my ceiling. No idea how or when that happened!
Good question!!! What about under the cabinets!!!
Your cabinets (and your kitchen) looks so good!! We bought our house in ’85. The kitchen/dining room/family room (all one big room) was finished in barn siding straight from the barn, cow poop and all. That came out as soon as we could get it out. But the cabinets, and there are lots of them–51 cabinet doors is wood that looks like barn wood. I can live with it, and have for 30 years but I’d surely like to see some smooth white on those cabinets! Guess it will stay like it is, because we had a cabinet maker make us a new pantry a couple of years ago and he matched the other cabinets exactly! Love yours though!
I still cannot get over the amazing transformation! I promise you Traci, those after pictures look like catalog/magazine pictures (and I mean that as a compliment). You guys did such an amazing job!
Wow your kitchen looks awesome!! Such an inspiration!
I also have the sames questions as Lisa, Ayisha and Gina. Plus a couple more…how did the oil based primer work in the sprayer? Did you have to thin out the primer or the latex paint? And how did you clean the primer out of the sprayer?
Your new kitchen is absolutely beautiful! Crisp, bright and inviting. It says to me,
“Please come in and stay a while.”
Your kitchen looks amazing, I kept going back and forth between the pics to see if it really was the same space! Good job, wanna’ come tackle mine next?! :)
Hey! I love the kitchen and your hubs and his sprayer! And you too, for being so inspirational!
Did you take the doors outside or just spray them in the kitchen? I dont see any laying around.
How long did it take to dry?
I saw OIL Primer,….and Latex paint?????
Keep the good stuff coming! Huggers!
love this post. I am in the midst of a kitchen remodel right now and I am painting my cupboards white too….I hope I survive the mess although I know it will be worth it in the end! LOL
Great post Traci! I love love love the white :) we painted ours last summer white but put a glaze over it , this makes me want to repaint them all glossy white! ha….. I DID NOT JUST SAY THAT! …..no I did not! :)
Traci,
The kitchen transformation is nothing short of AWESOME!! It looks like Sandra Lee’s kitchen on her show with the shelves flanking the window. Love, too, your white items with the pops of red. LUV, LUV, LUV!!
My favorite part of the whole makeover? The butcher block countertops. Oh how envious I am of those counter tops! My husband is on board (get it?!) with them once we re-do our kitchen. Our handmade plywood cabinets are from 1946 and need to GO! Once we can afford new ones I will get my pretty wooden countertops. Who needs granite?! In the meantime, I will dream of those puppies!
Thanks for sharing your makeover. It truly is remarkable.
Jenny
Please tell – What brand/type of paint sprayer do you use. We are getting ready to paint cabinets and ceilings – Ack – Dread it – but so worth it in the long run, and will save mucho moola doing it ourselves (as you know). :)
I have a funny story for you. My hubs is 61 – I am 58 and we still go strong on DIY – and we still make boo-boos – last year, we were redoing (or should I say the hubs was redoing) the floor tile in our 2nd bathroom – the crazy nut tiled himself into the tub – I was in the kitchen painting the texture he had just a couple of days before put on the walls (had wallpaper on it before) and I hear this feeble “Honey, can you go outside on the side of the house and get that tile from the ground under the window’…I went into the bathroom, saw him standing in the tub, and he explained that he got mad and threw the tile out the open window. I almost wet my pants – and wouldn’t ‘cha know – he lacked ONE tile being done with the floor and we had NONE left and HD had already closed for the night. Thank Goodness that one tile he threw out the window was still perfect!! Ha. He was so mortified that he had done that – he was on redo overload and just lost track of what he was doing. Oh well…it happens and thankfully, sometimes we can make our boo-boos work in the long run!
Anyhoo–would love to know the type of sprayer you used.
Thanks!
Laura in Lubbock
A-M-A-Z-I-N-G!! Love it!! I love decorating and this turned out amazing. Looks so clean and just beautiful :)
Thanks for answering all of the questions but I too would like to know what kind of sprayer you used. We have one but it gets clogged all the time..
My cabinets are pickled and I want antique or bone white paint. Would I necessarily have to use a primer like kiltz?
The kitchen looks amazing. I love the countertops and maybe would have had the open shelving shelves the same color so they would stand out against the pretty white walls and subway tiles. Really inspirational.
Awesome tutorial and beautiful results. I’ve pinned you and I’m so grateful for the time you invested in this share. Thanks much!
Smiles,
Lesli :)
I am also curious as another commenter that you pictured oil based primer and latex paint. Can you please explain this? I have a kitchen remodel approaching quickly! Thank you!
Great job! Whats the sprayer, and, i’m leary about the deglosser instead of sanding. Did you use it for your first cabinets too?
Great job on your kitchen! I love it! (Very inspiring.) Can you tell me what color you used on your walls? Thanks!
We are finally ready to paint our oak kitchen cabinets. I have been researching paint and was wondering if you are still pleased with the valspar you used? Is it easy to clean spills off of? I have 2 boys, so spills are inevitable as you well know! Also, how durable is it? For instance, if my son would happen to run a toy into it, will it need touched up immediately?? Any help you could give me would be greatly appreciated!!
Have oak cabinets I want to paint, you showed Kilz interior oil base primer and Valspar interior-exterior latex enamel paint……..can you use the oil base and latex paint together on the same project………….. Thanks
Traci,
Your kitchen is beautiful! My husband and I are having a house built and the builder doesn’t offer the kind of cabinets I want at a price I am willing to pay. We opted for the standard cabinets with plans to paint them. It is very nervous-making to think of taking a sander and paint to perfectly good, brand-spanking-new cabinets, but I’m gaining confidence from blogs like yours! Thanks for sharing your experience on both your kitchens! Both make my heart beat fast. :)
Hey , great work on that kitchen. Was interested no the specks/information of the paint sprayer ??
What paint color did you use on your kitchen walls? I looked all over your site and couldn’t find it. Thanks!
I am looking to paint my kitchen cabinets and my fireplace mantel. I would like to buy a paint sprayer and do it myself. Can you tell me what sprayer you would recommend? Also I was wondering if you needed to sand between priming and painting? Thanks! Your kitchen turned out beautiful.
My husband just used a HomeRight sprayer to paint my brother’s kitchen cabinets, and he said it was his favorite. You can find the link to it in my sidebar. Or click on this link:
http://www.amazon.com/Home-Right-C800766-Command-Sprayer/dp/B003VKFDEO/ref=as_li_tf_mfw?&linkCode=wey&tag=benmyhea-20
You want to lightly sand before you prime, and then you can go ahead and paint.
Hope that helps. Thanks!
I’m curious…did you lay your subway tiles as well? And what type of shelving did you use overhead? I am wanting to redo our kitchen and think shelving on top would really look fresh! Love how you have the red dishes mixed in for Christmas! Beautiful kitchen!
Jessica
How long did it take you to paint all the cabinets?
About three days total, I think. :) We let each coat dry over night.
Traci, can you please tell me the paint color and brand on your kitchen walls? Thanks!
Hi, I see you removed the outside of a lazy susan, painted it, and replaced it. How on earth did you do it and get it back on? We want to paint our cabinets, and I actually found new inside rotating shelves at IKEA, but wonder how we will get the pieces off and back on. Anything you remember about doing it would help. Thanks! Anna
Hi Anna! Actually, we did not remove the door for the lazy susan. In the picture you saw, we had just spun the lazy susan around, so the doors are in the back and you can’t see them. :) I have need taken apart a lazy susan, or I would help you out. We actually need to replace ours but haven’t done it yet.
Good luck!
Fabulous job! Question: I’ve read several construction/painting blogs where they advise against caulking the seams on the panels mainly because of the wood expanding/contracting. Have you experienced any cracking/settling on your panels?
Enjoyed your instructions-very helpful! However, hardware would be more beneficial if they were donated to Habitat for Humanity, or other like groups. Remember- one man’s trash is another man’s treasure, especially when it comes to the little things that help make life more bearable.