
RV Bunkroom Makeover Reveal! {with Beddy’s}
Over the next week or two, I am going to be sharing posts about each room of our RV as we renovated it. I think you will enjoy this series. :)
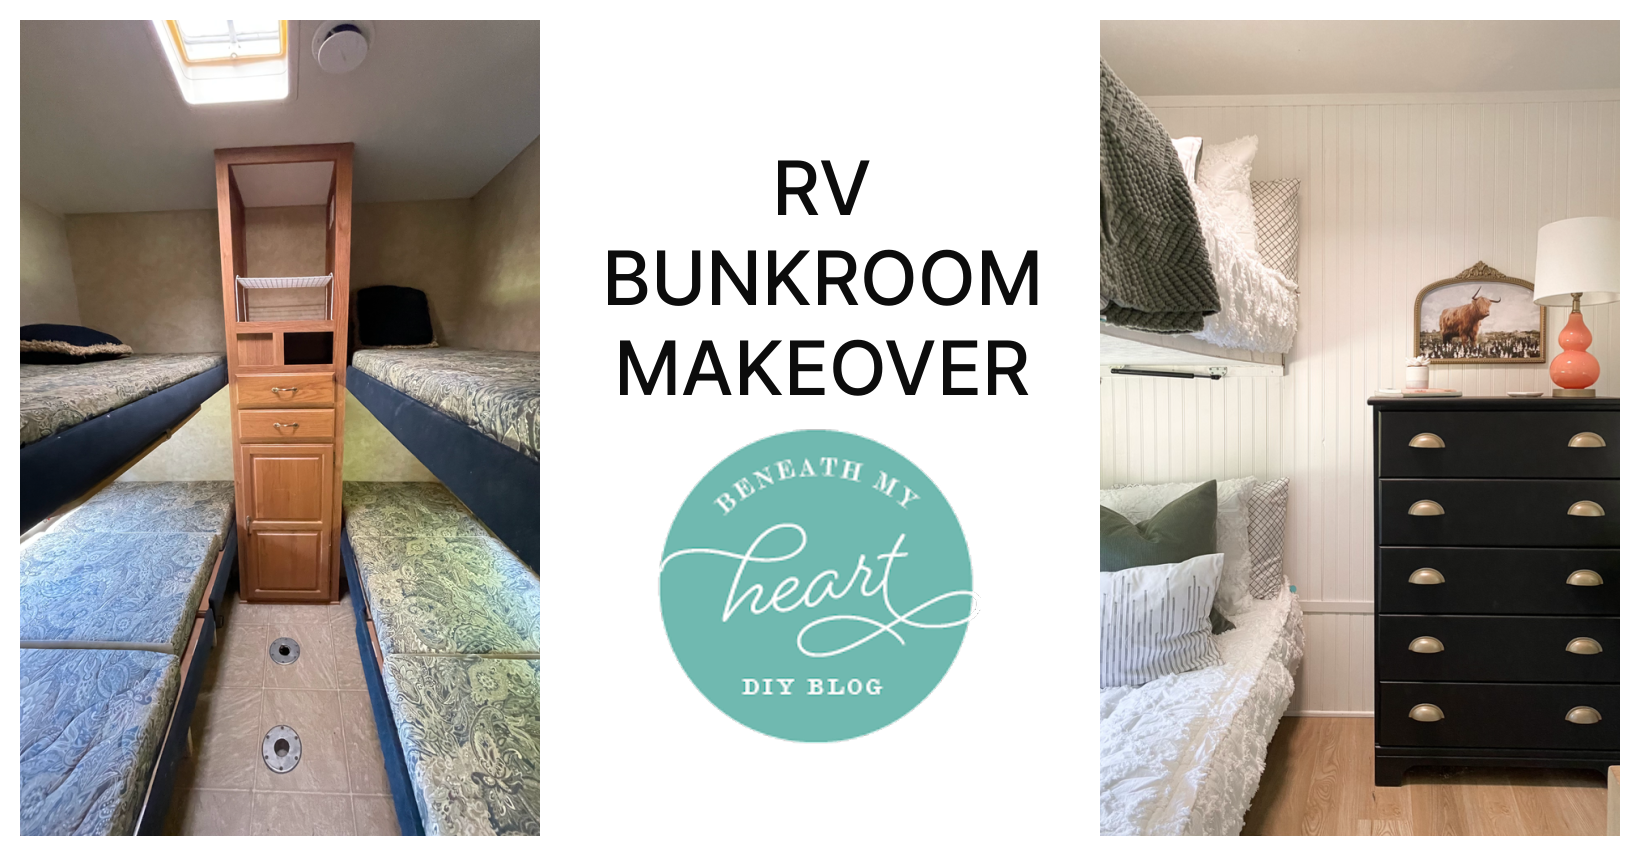
Today, I wanted to start with one of my favorite rooms, the bunk room!
Let’s remember what it looked like when we bought it…

It was such a small, tight-feeling space. The bunk beds on the left were wider than the bunk beds on the right. The mattress “pads” were kind of plastic-y feeling, and I didn’t want to keep them.
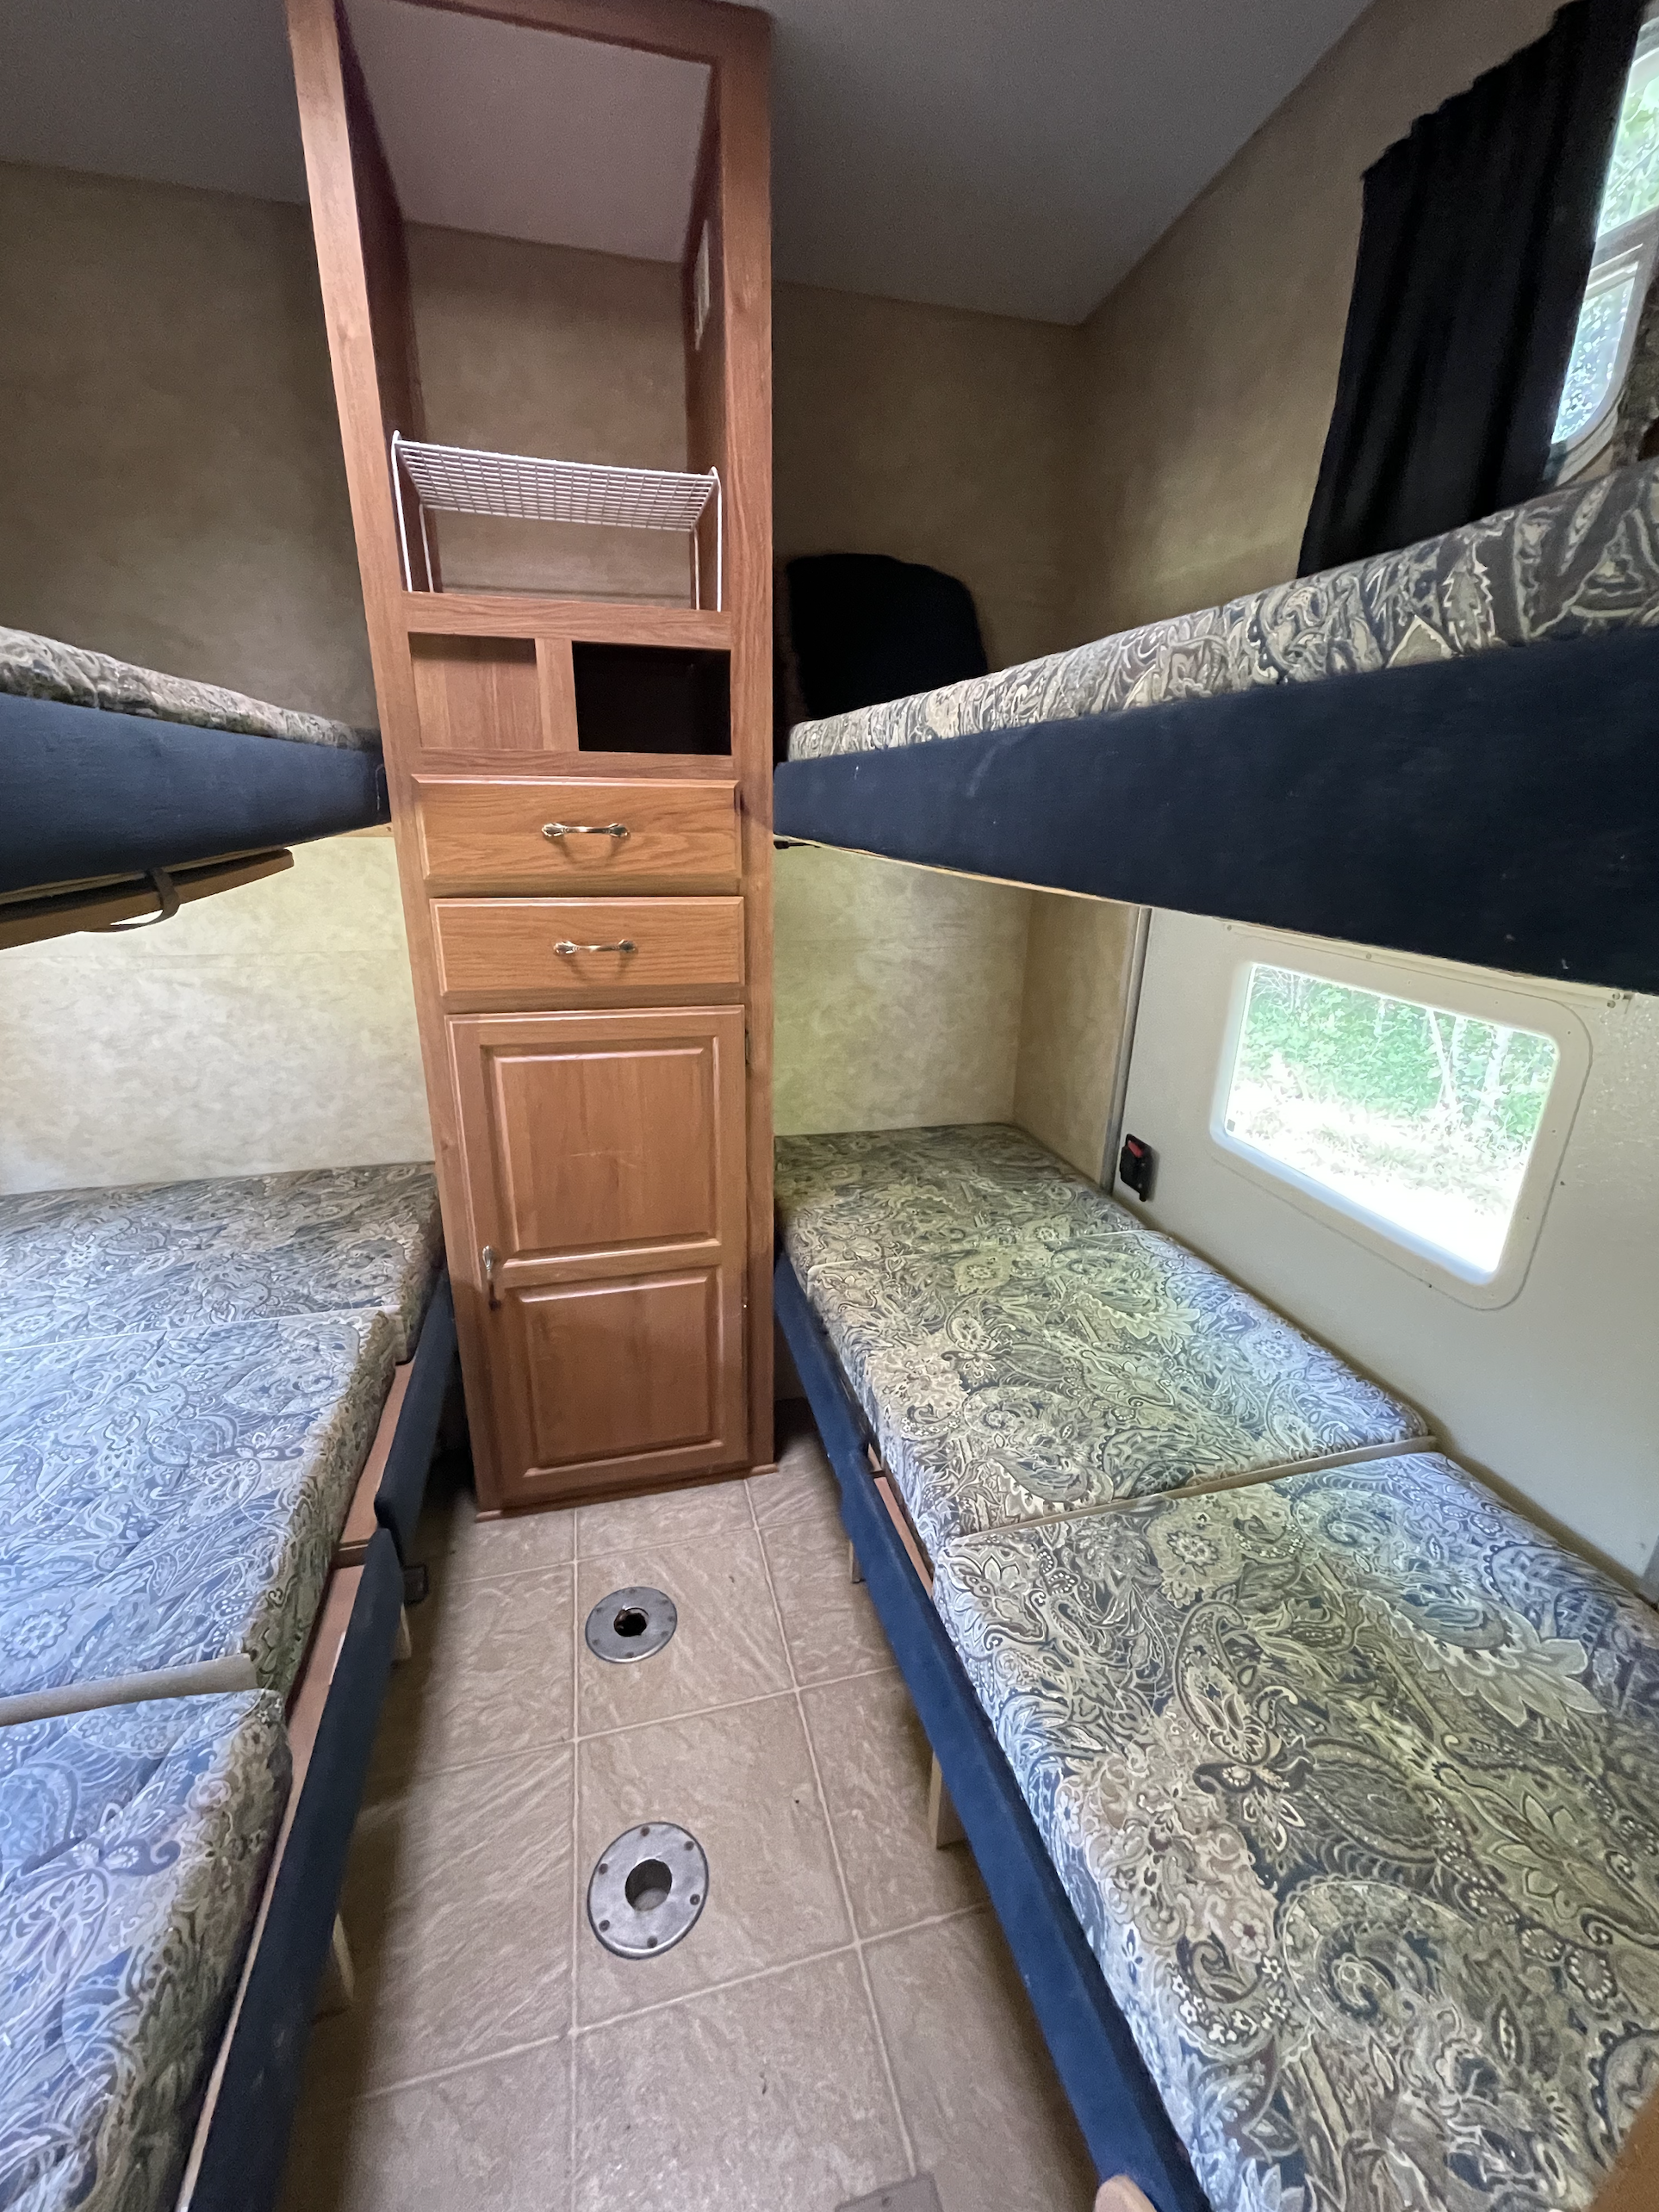
The bottom bunk had three separate mattress pads that could be removed to lift up the bottom bunk beds to make the doors on each side usable.
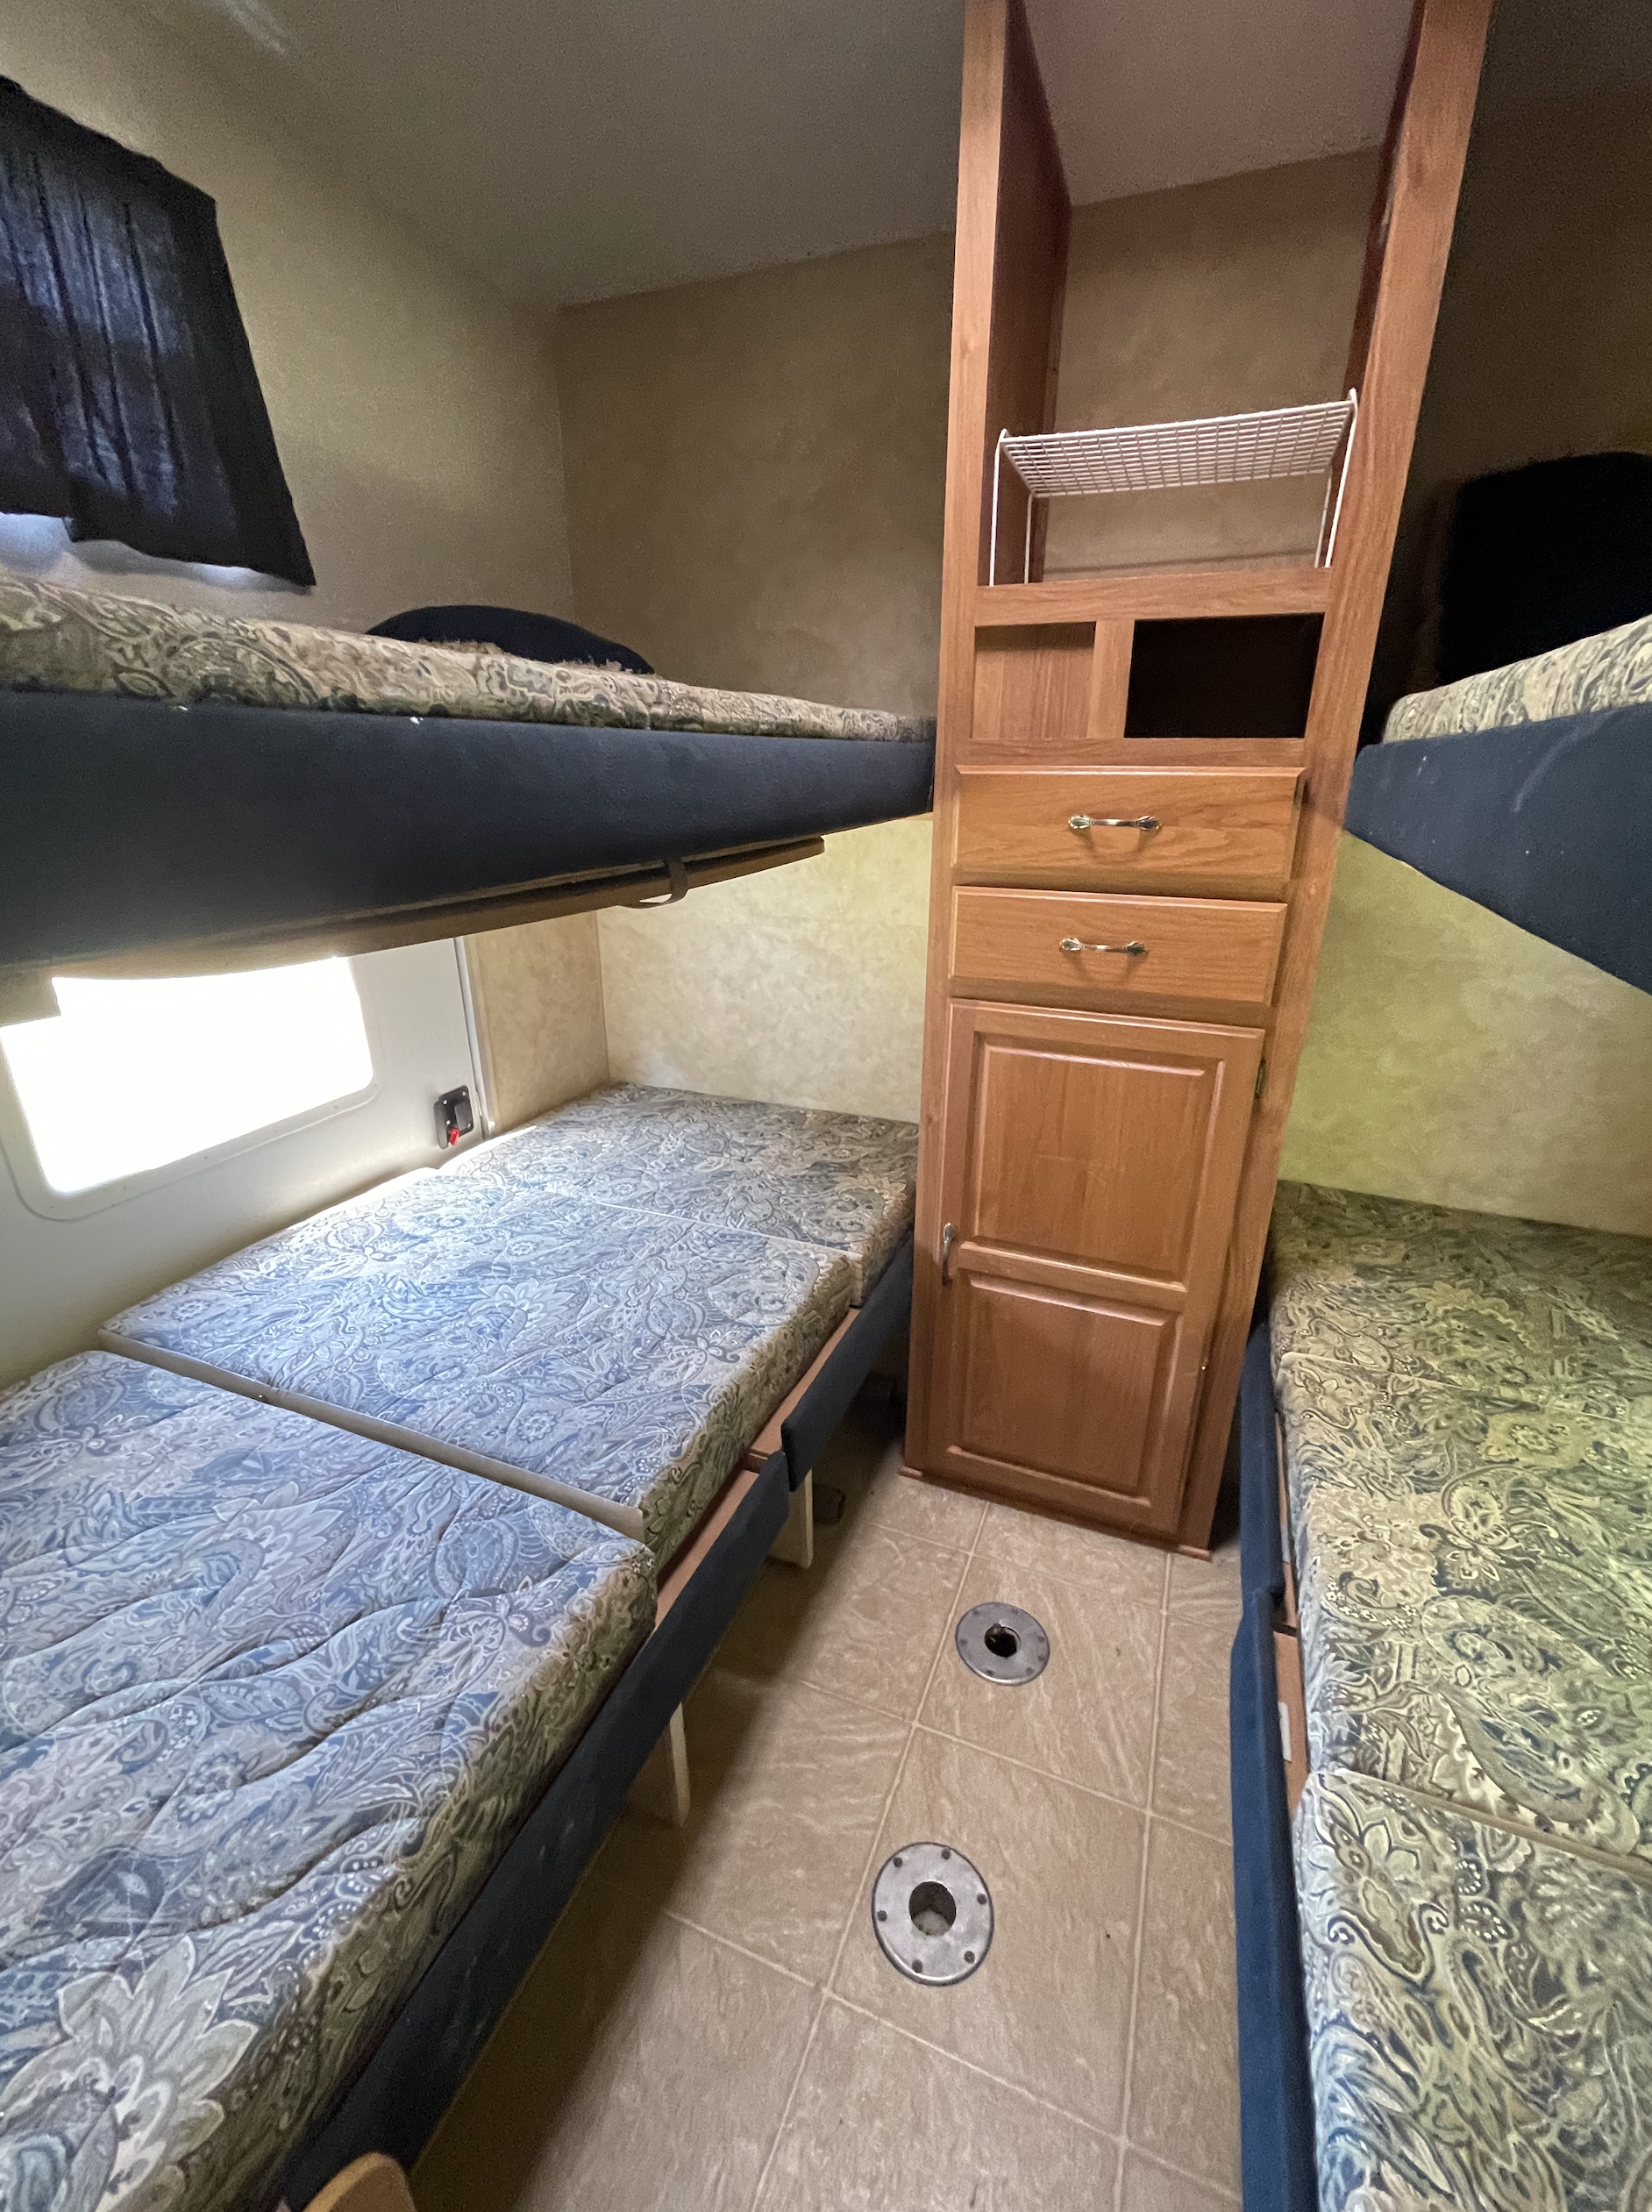
The cabinet in the middle had storage, but not a ton. And it was wired for a tv, but there wasn’t one in there. I didn’t want a tv in this room, because to be honest…I’m not a fan of television. haha! And there was a tv in the den and main bedroom, so I think that is enough. ;)
There were holes in the floor to put legs of a small table that was stored under the top left bunk, but I knew we would not be using a table back there either.

The first thing we did was to remove the bunk beds on the right side. We did not have electricity up on the hill yet for the RV, so it was SO HOT trying to renovate in the southern humidity with temps close to 100 degrees.
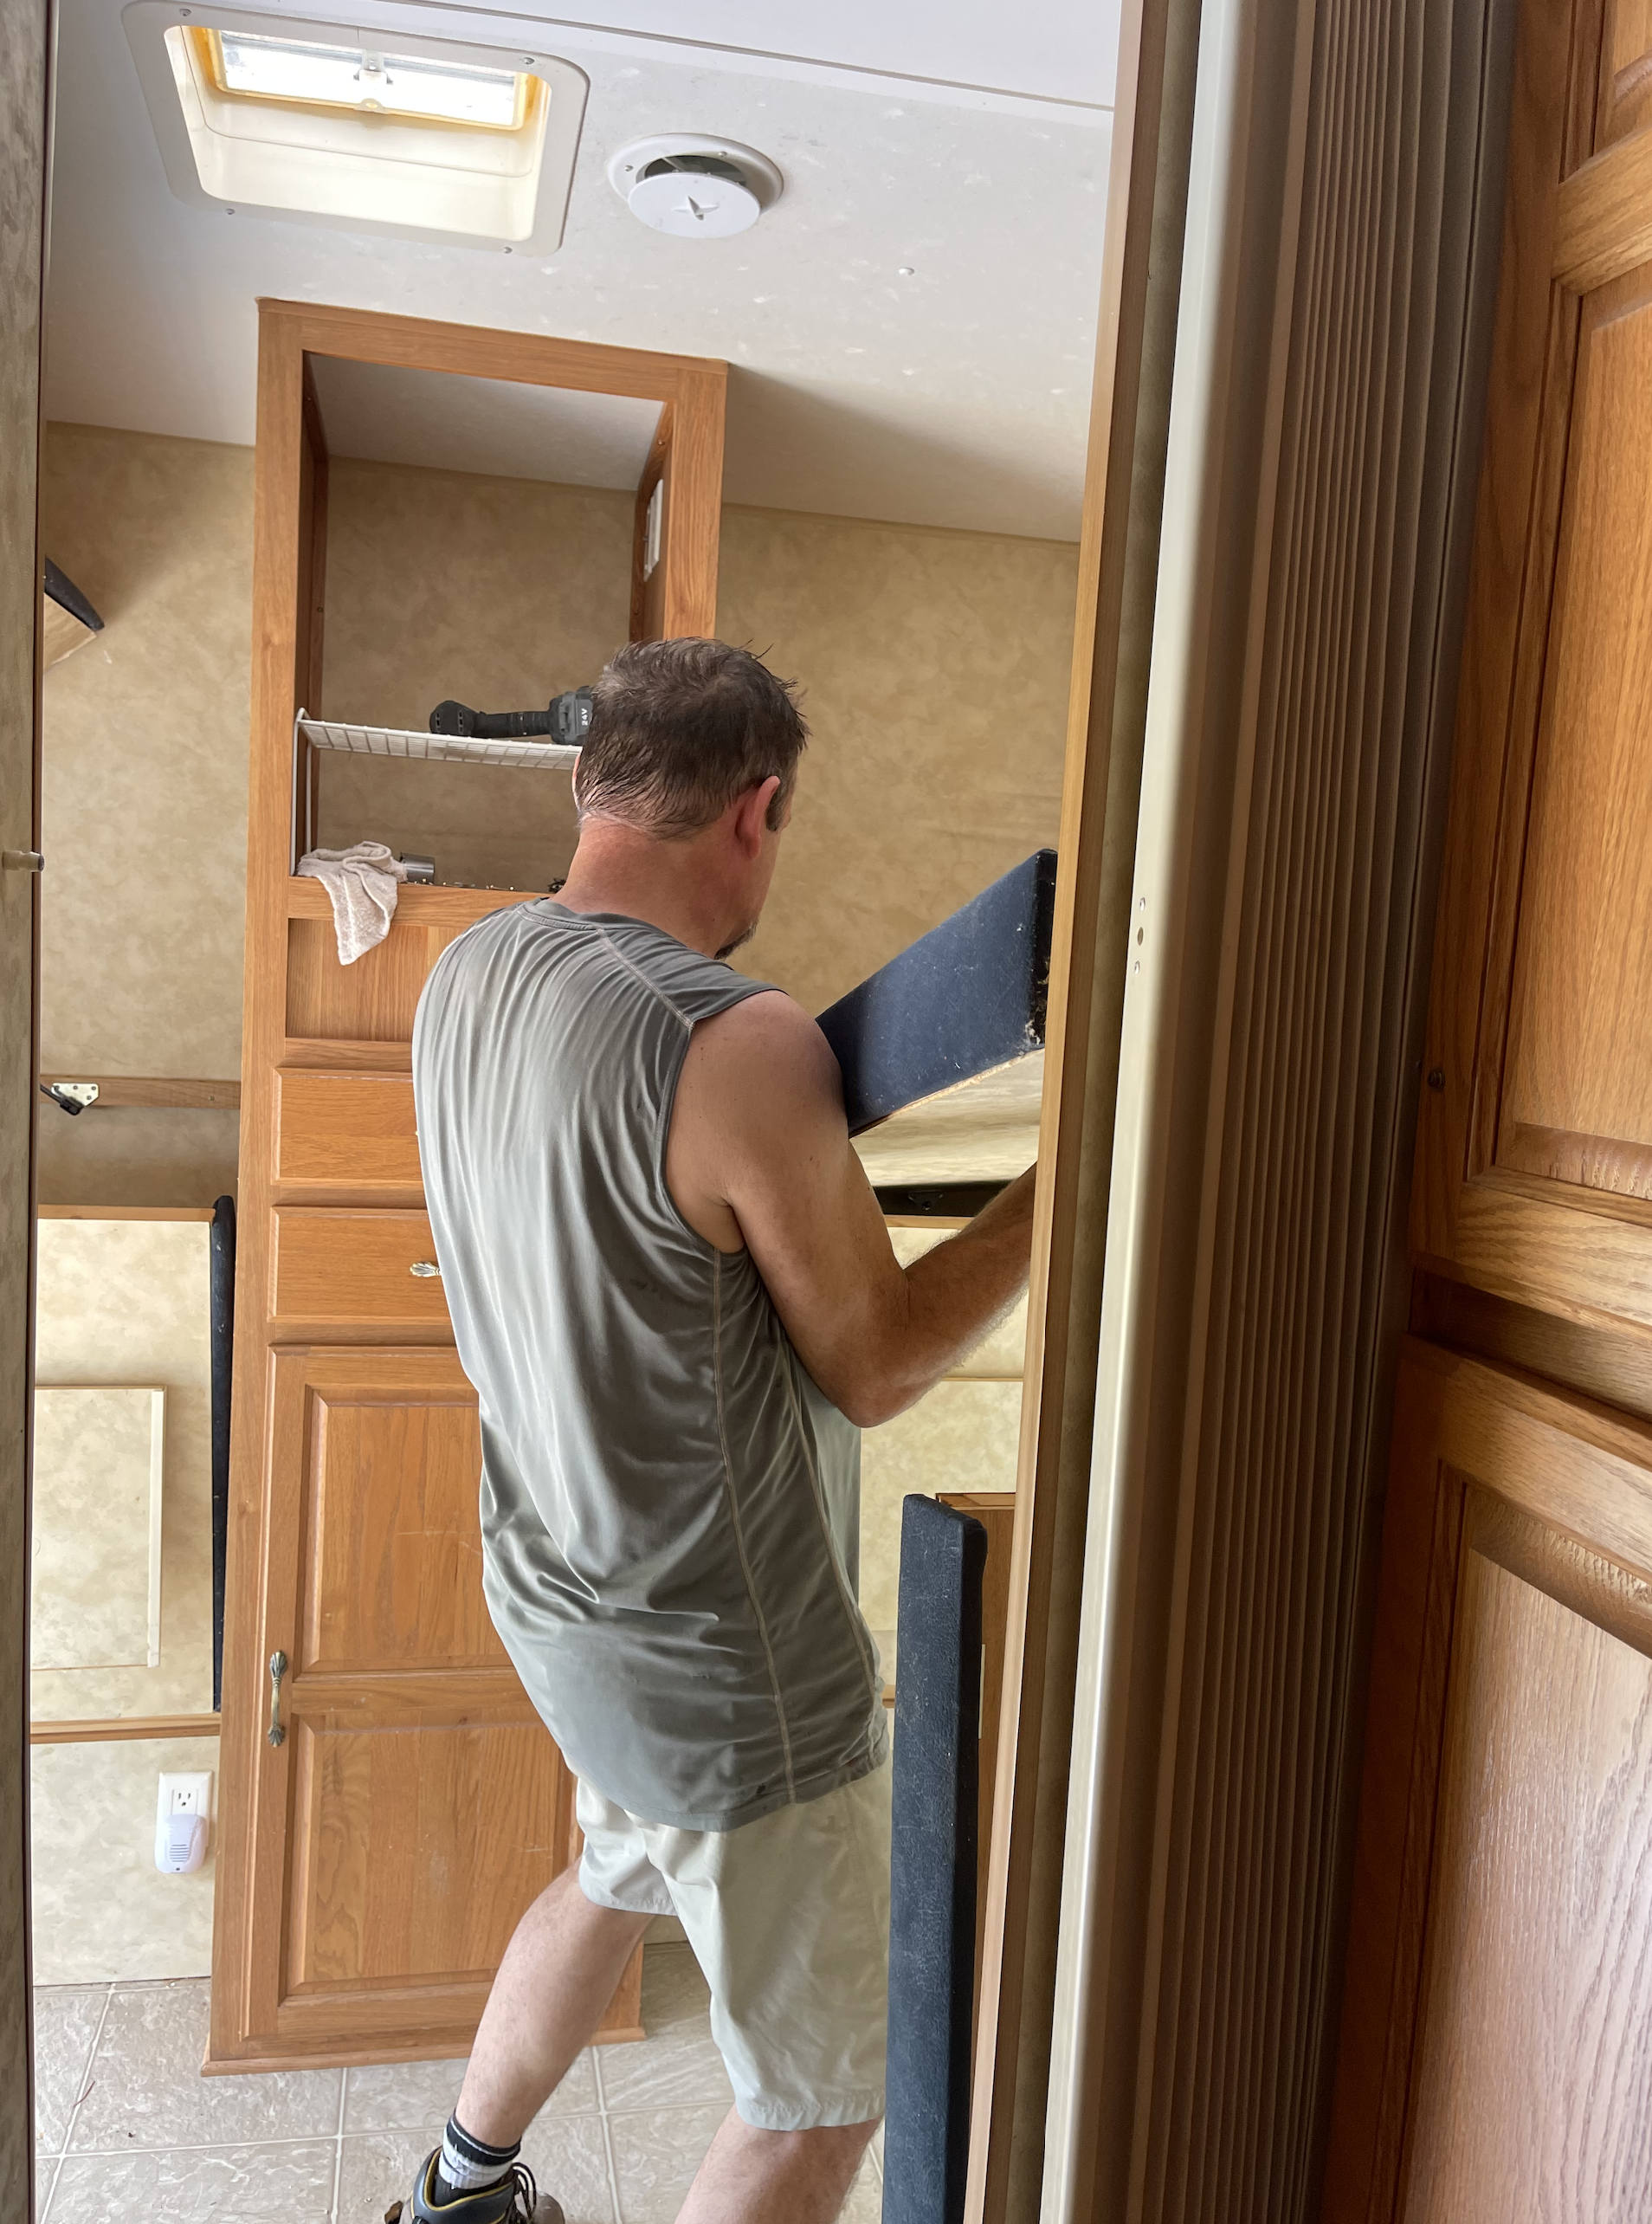
It was literally a LOT of sweat equity! Once we removed those bunk beds and the middle cabinet, we installed new flooring throughout the RV. I’ll share more about that later.
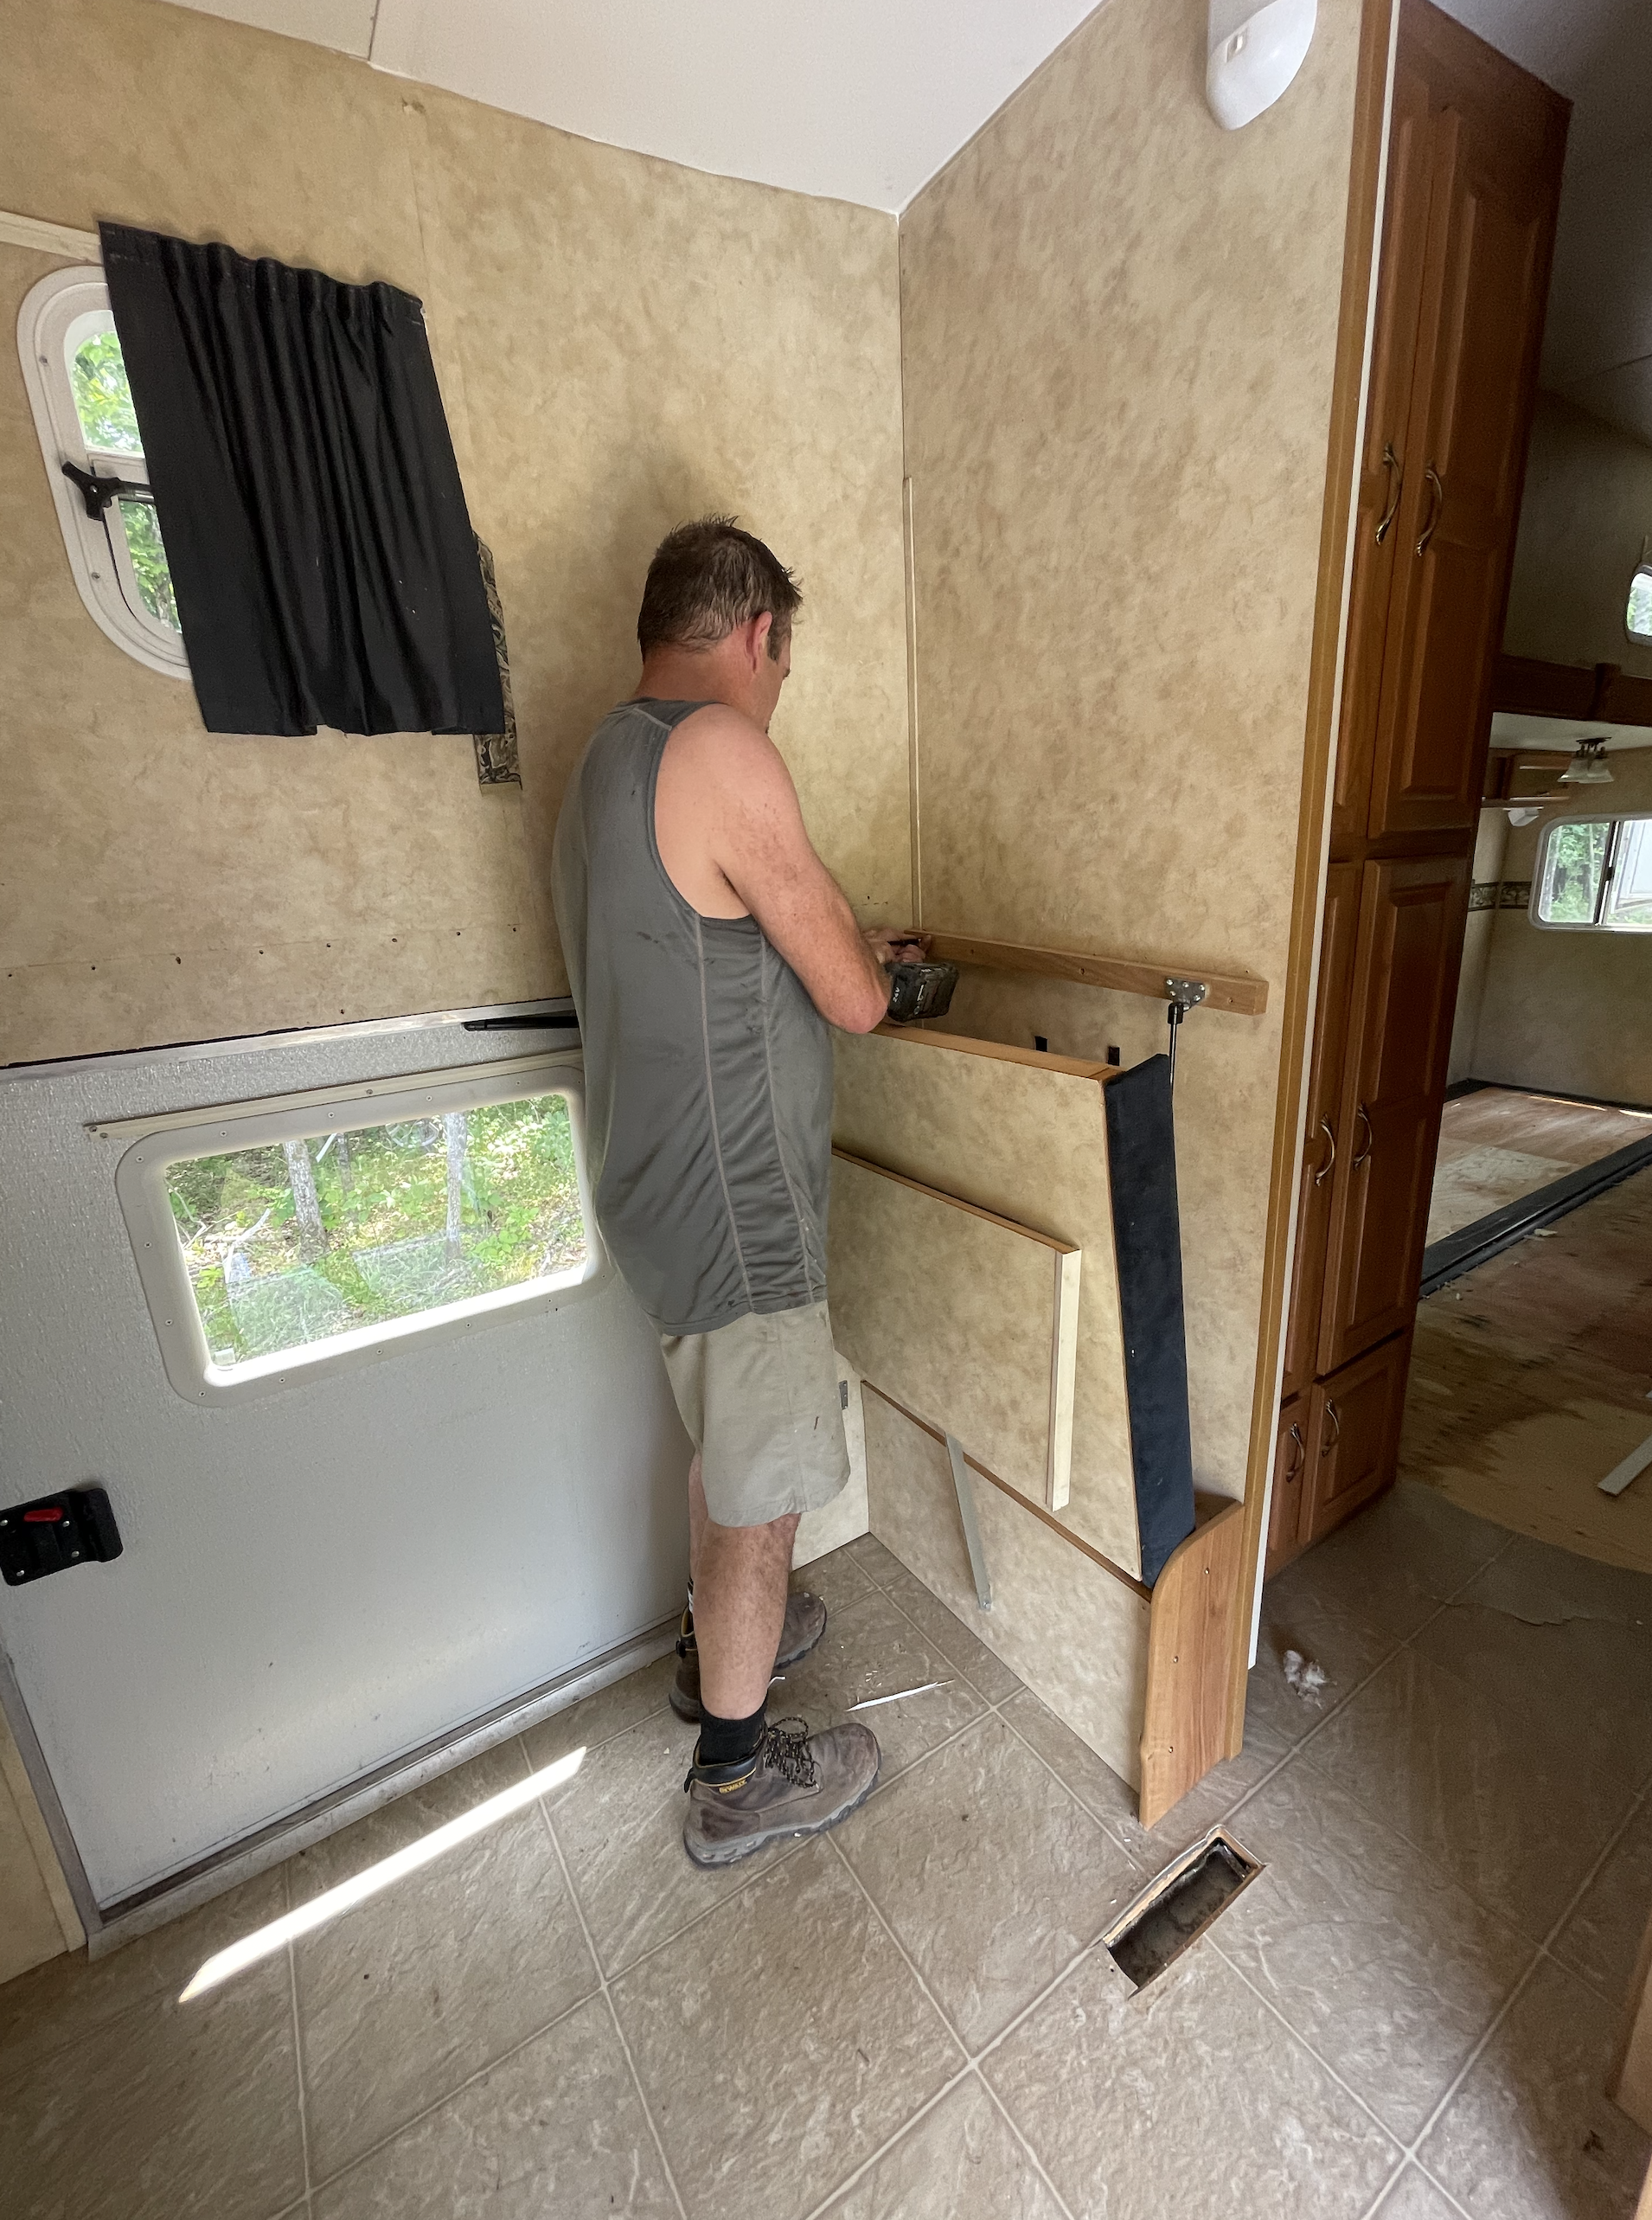
Once the flooring was installed, we decided to cover the back wall with bead board.
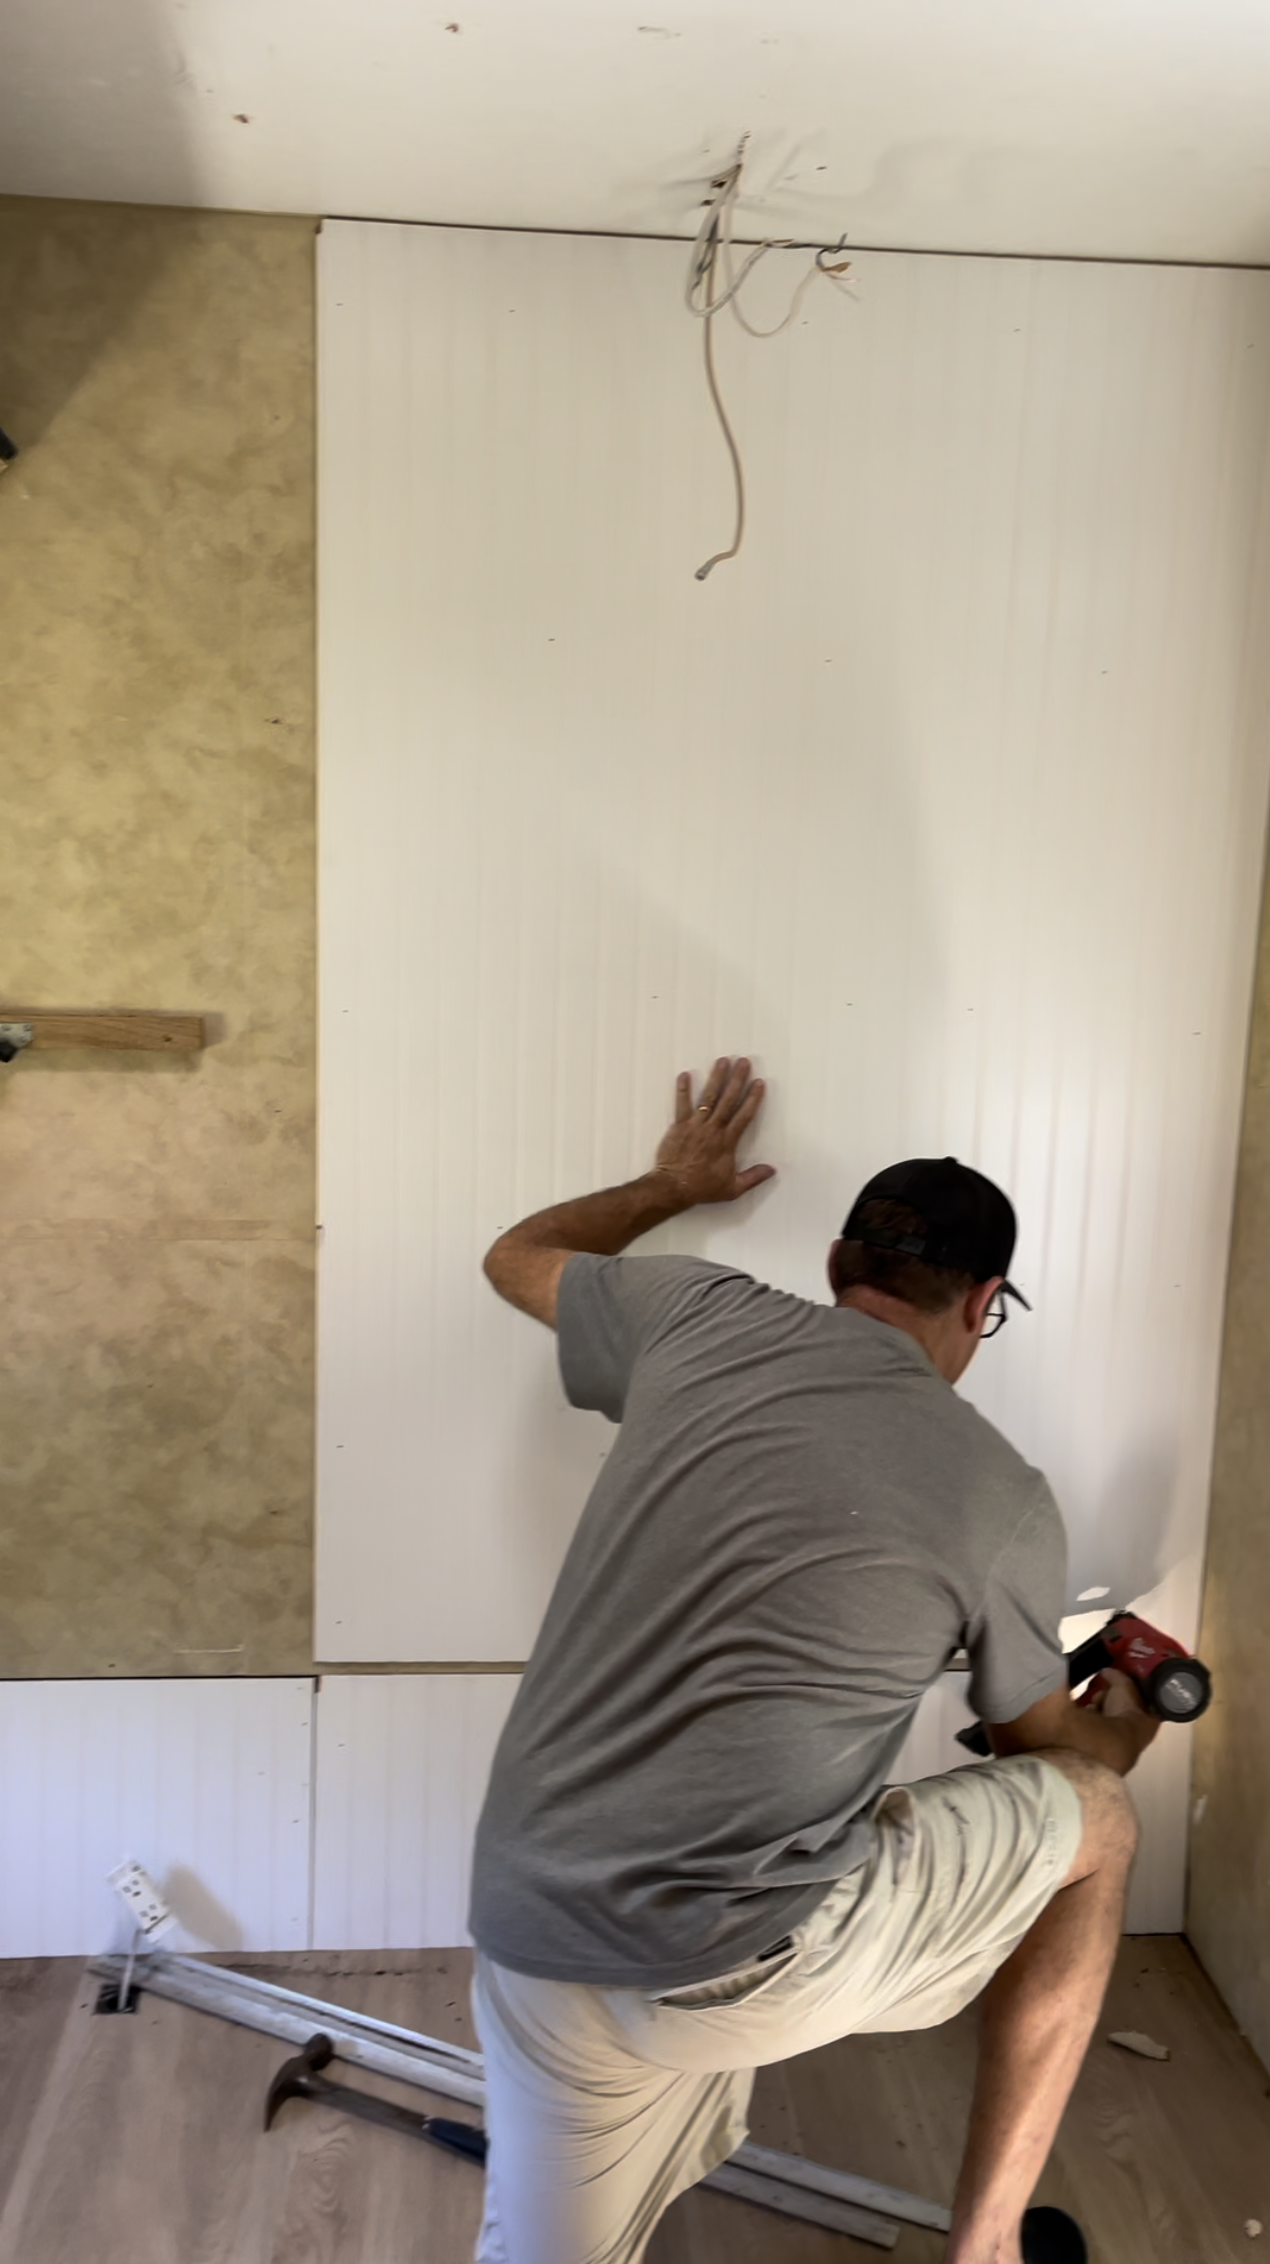
Cy did this with his nail gun and Loctite (panel adhesive like “liquid nails”.)
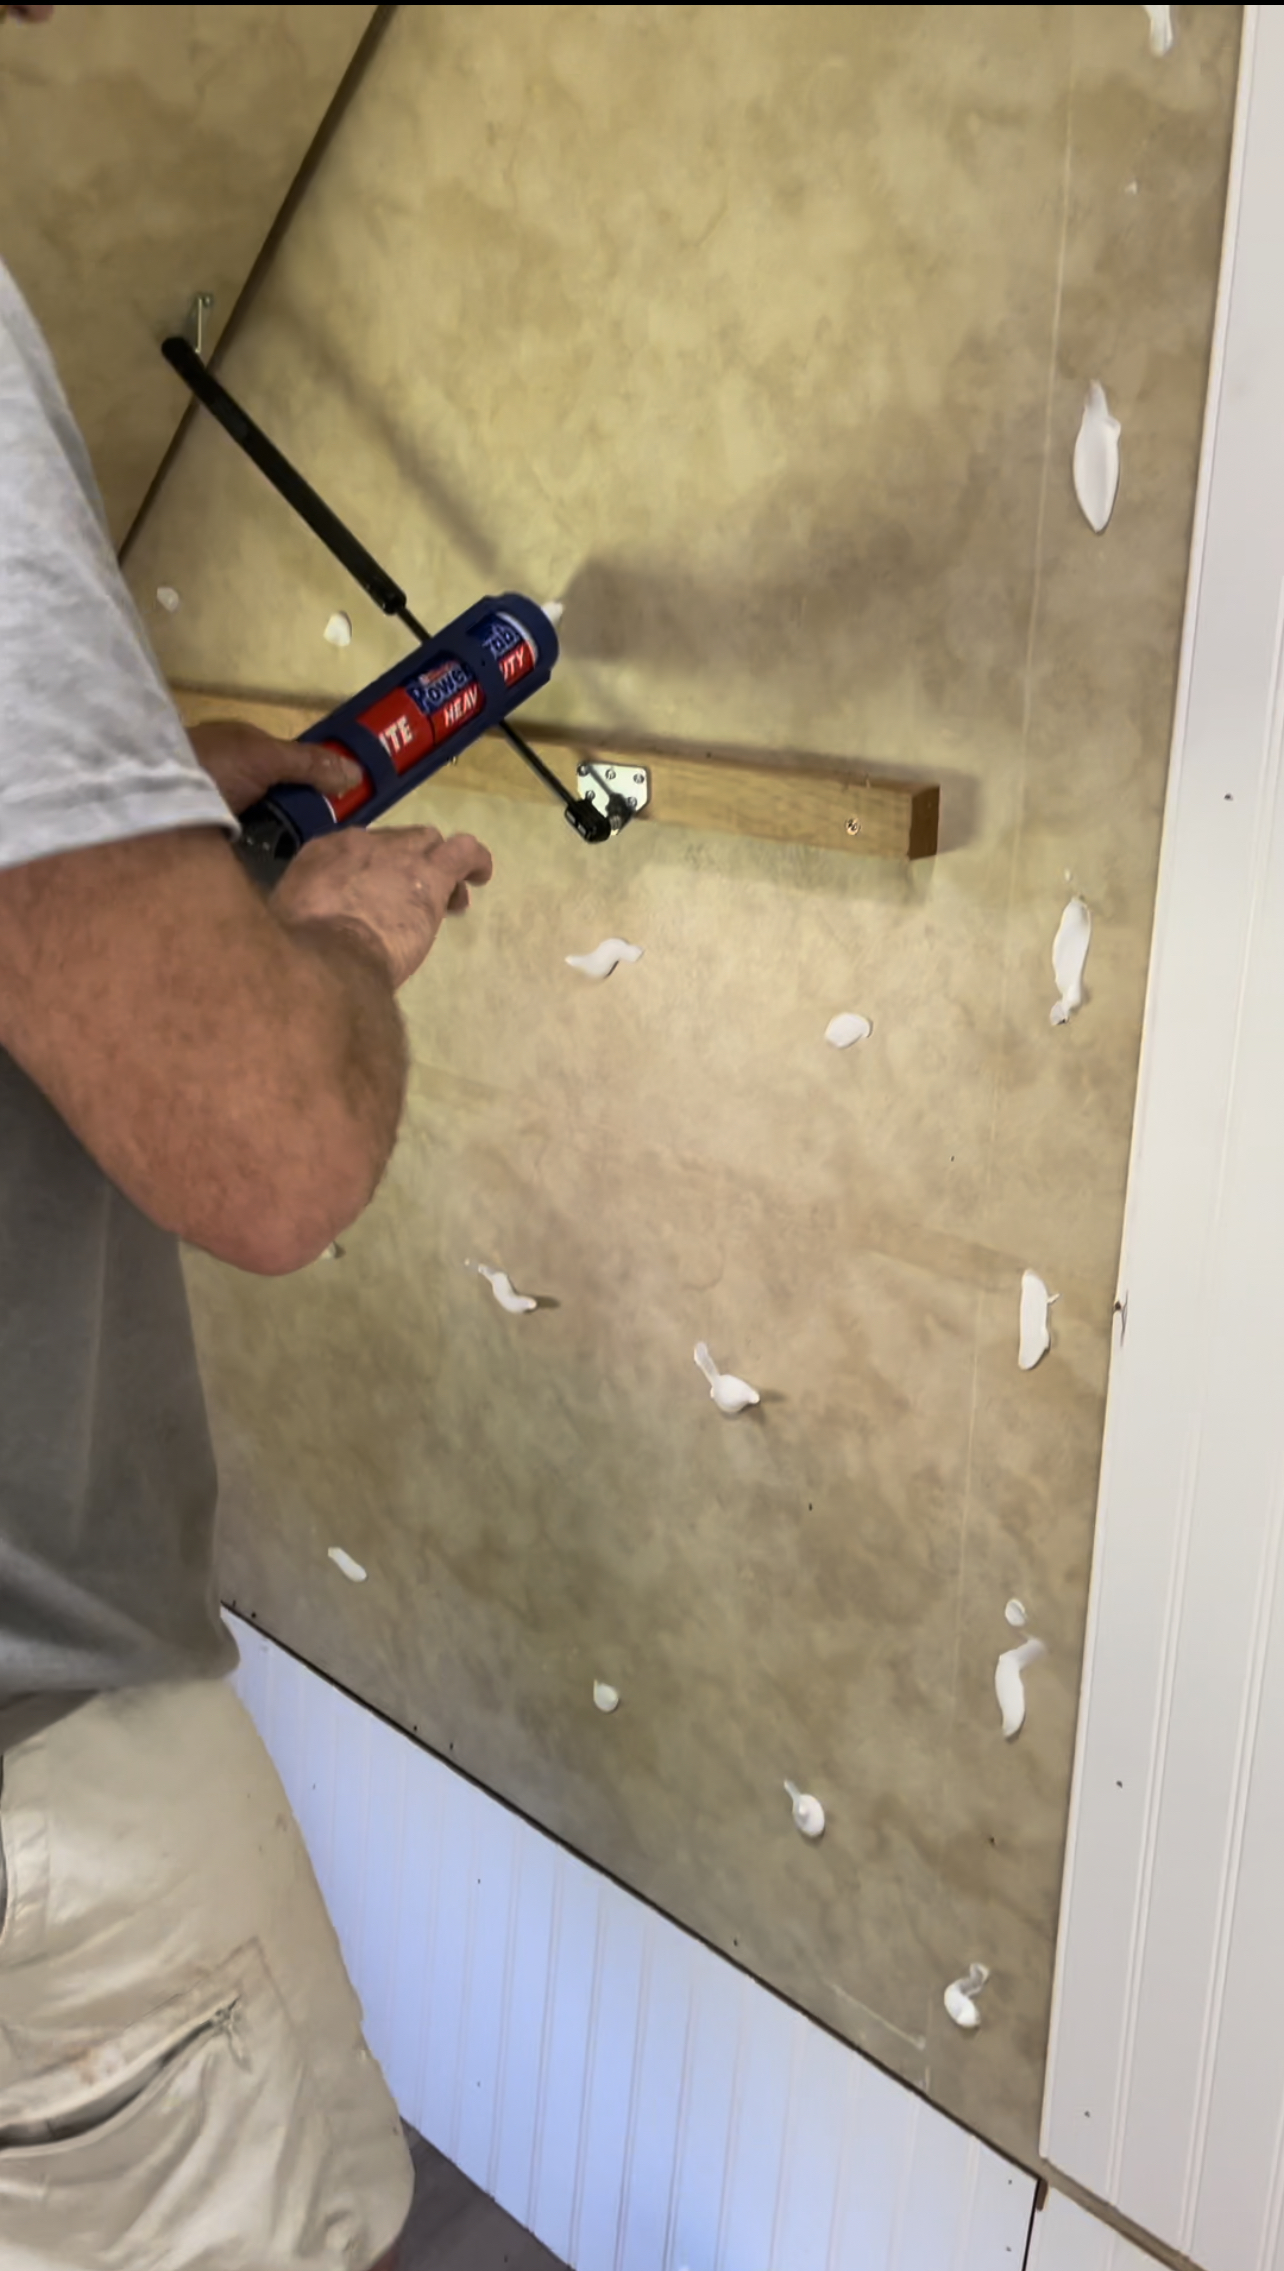
As you can see below, we also decided to remove the bottom left bunk from the wall as well. (I decided to use twin bed rails instead.)

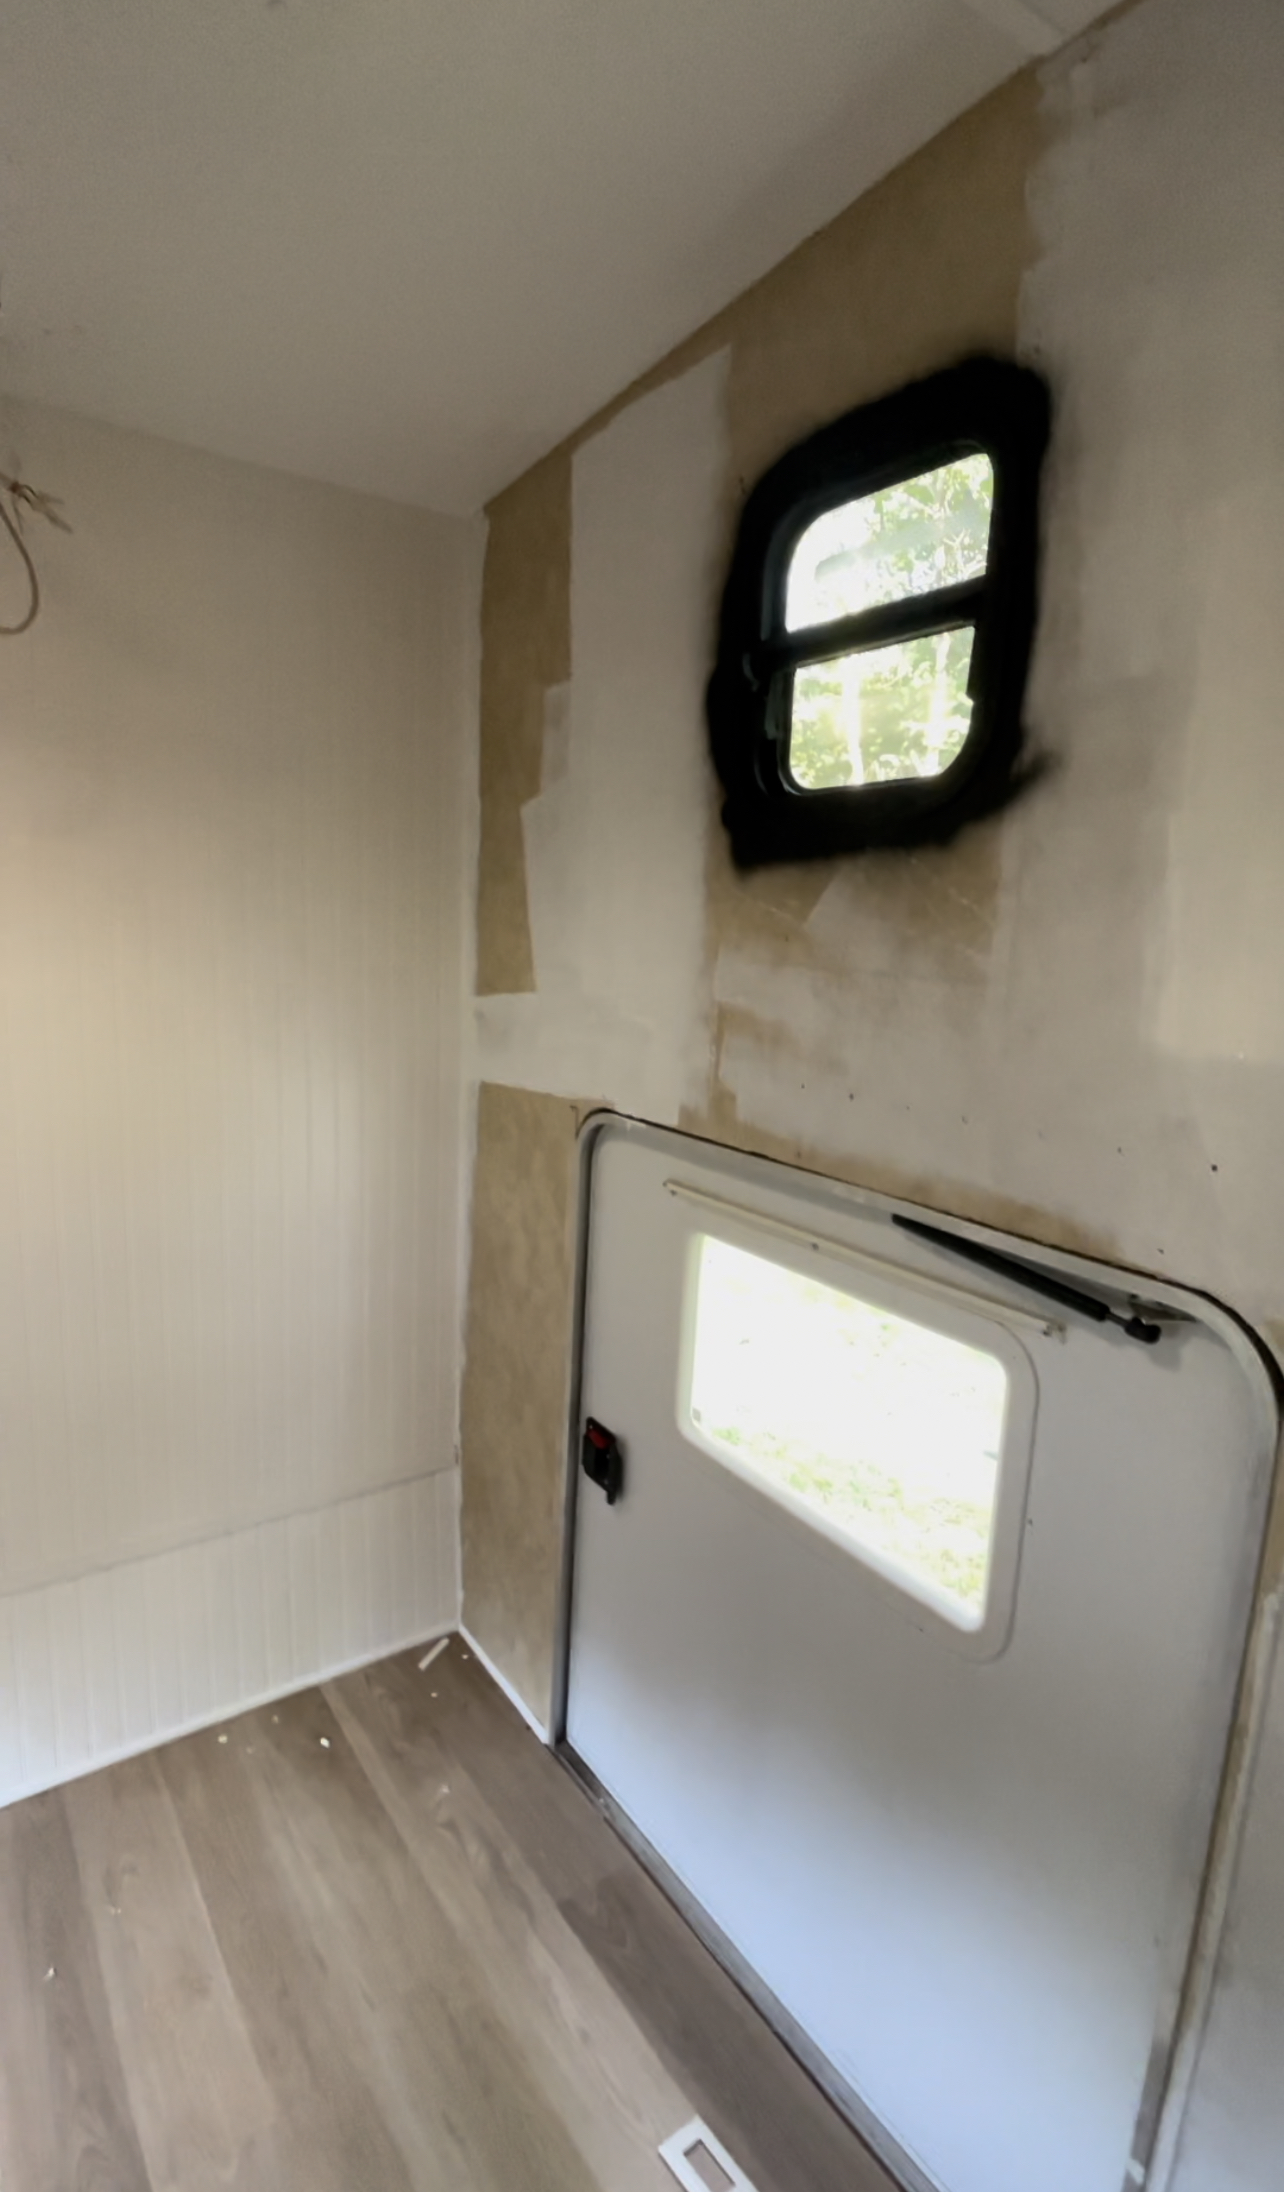
Once that was done, I spray painted the frames of the windows black, and then primed and painted the walls. This felt like it took forever! Well, painting the entire RV white DID take forever! haha! The color I used on the walls and cabinets throughout the RV was Greek Villa by Sherwin Williams.
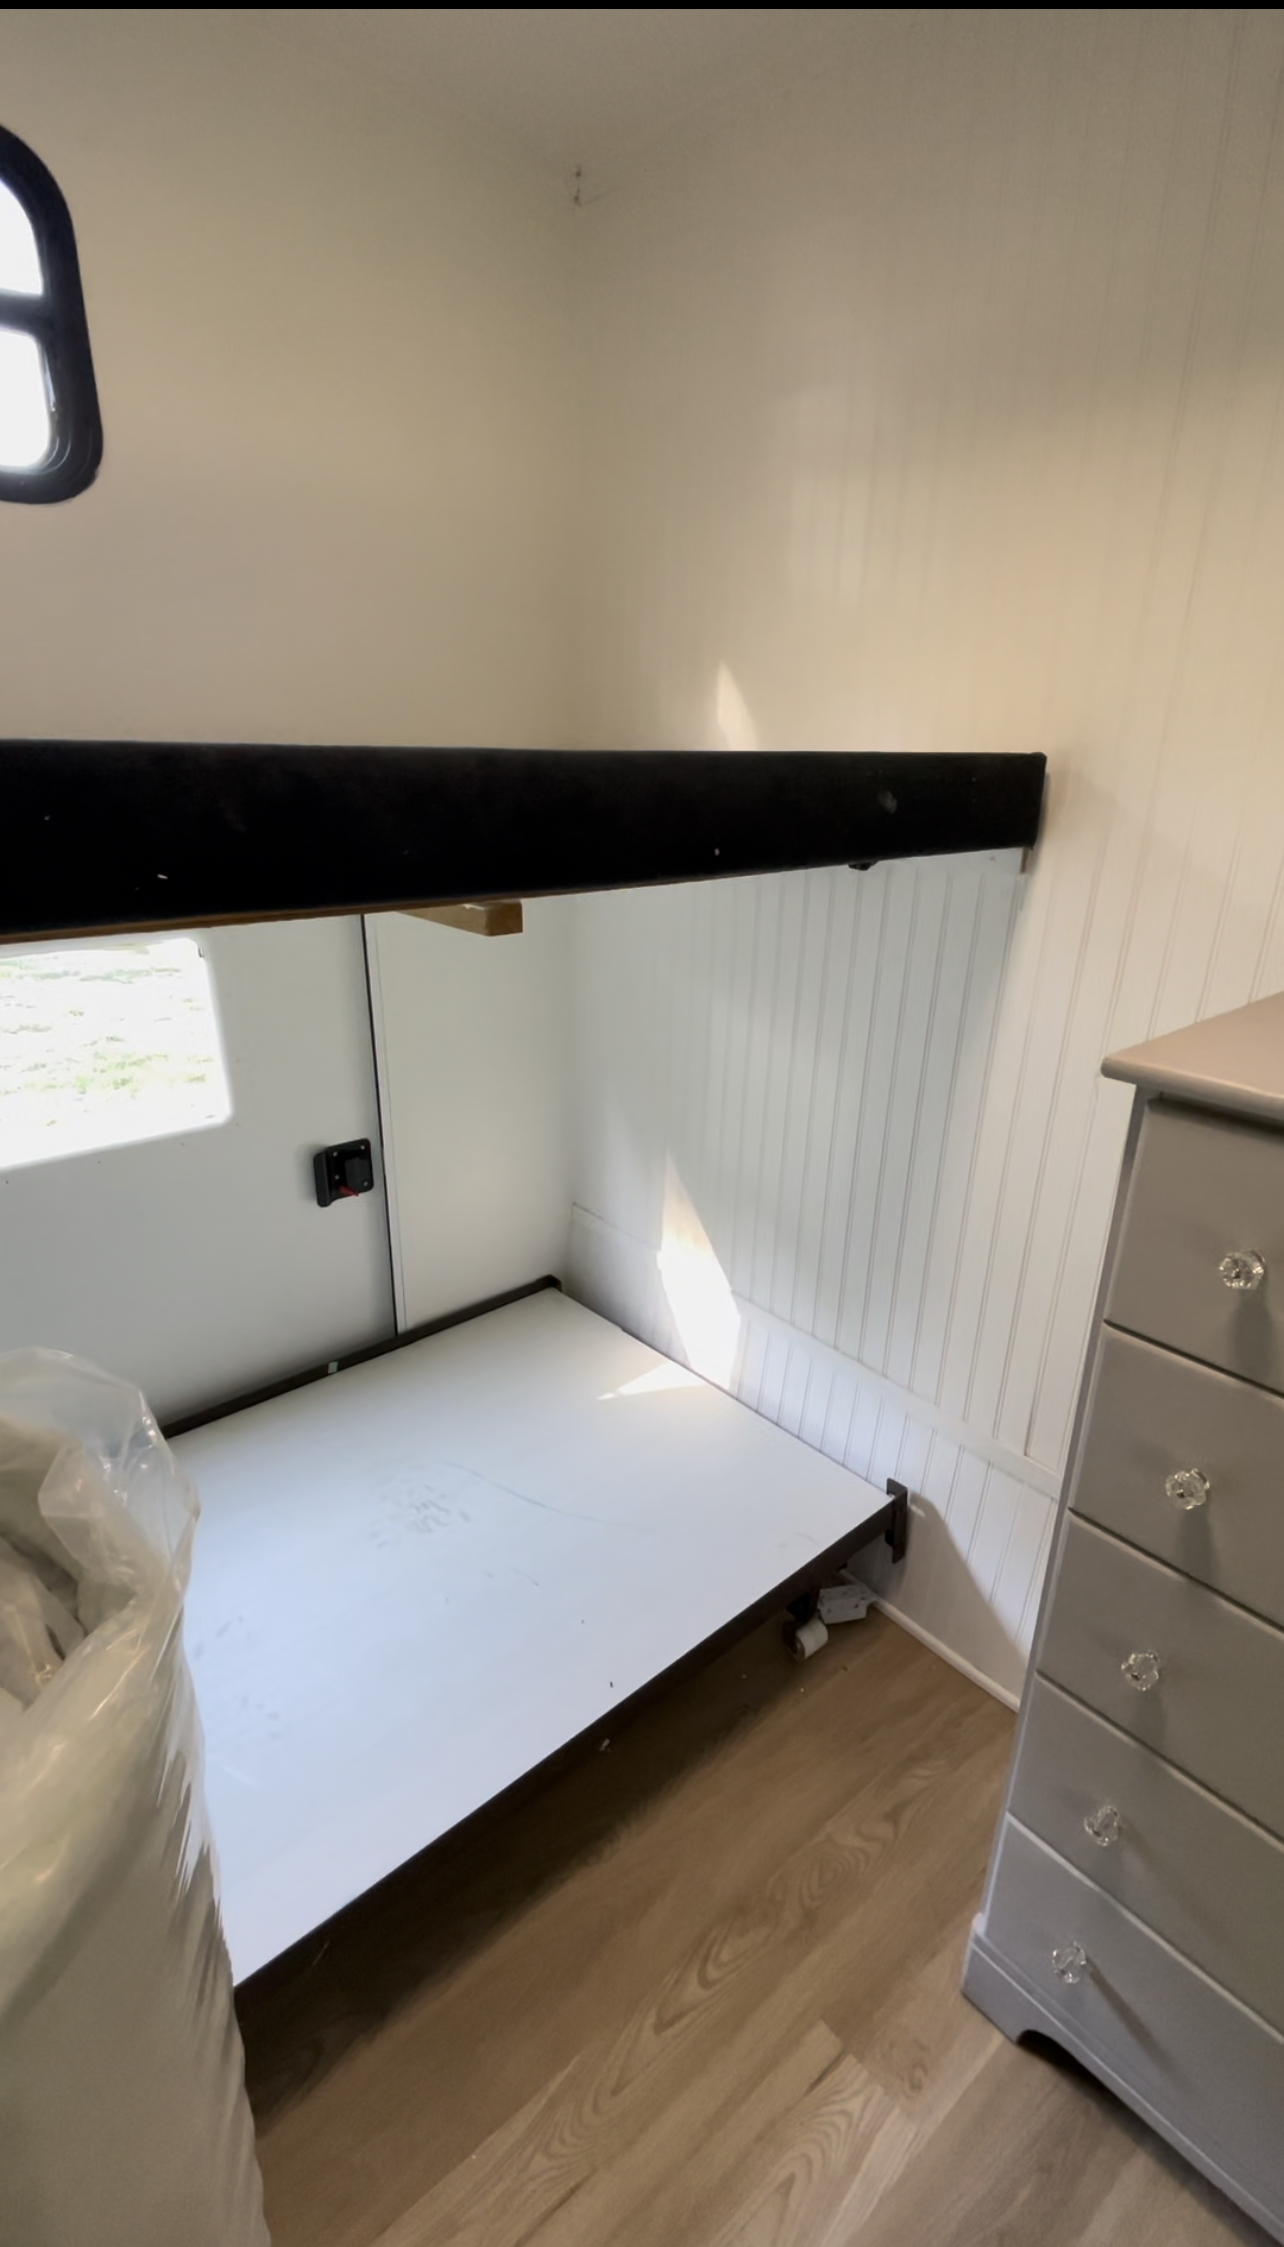
Once everything was painted, I added mattresses to the bunks. I bought these mattresses from Amazon. (I was able to buy regular twin mattress for those bunk beds because they were regular size bunks on the left of the room. The bunk beds we tore down on the other side of the room were more narrow and would require a more narrow mattress.)
You can see below that I still had the navy blue board on the top bunk, but we decided to take that off.
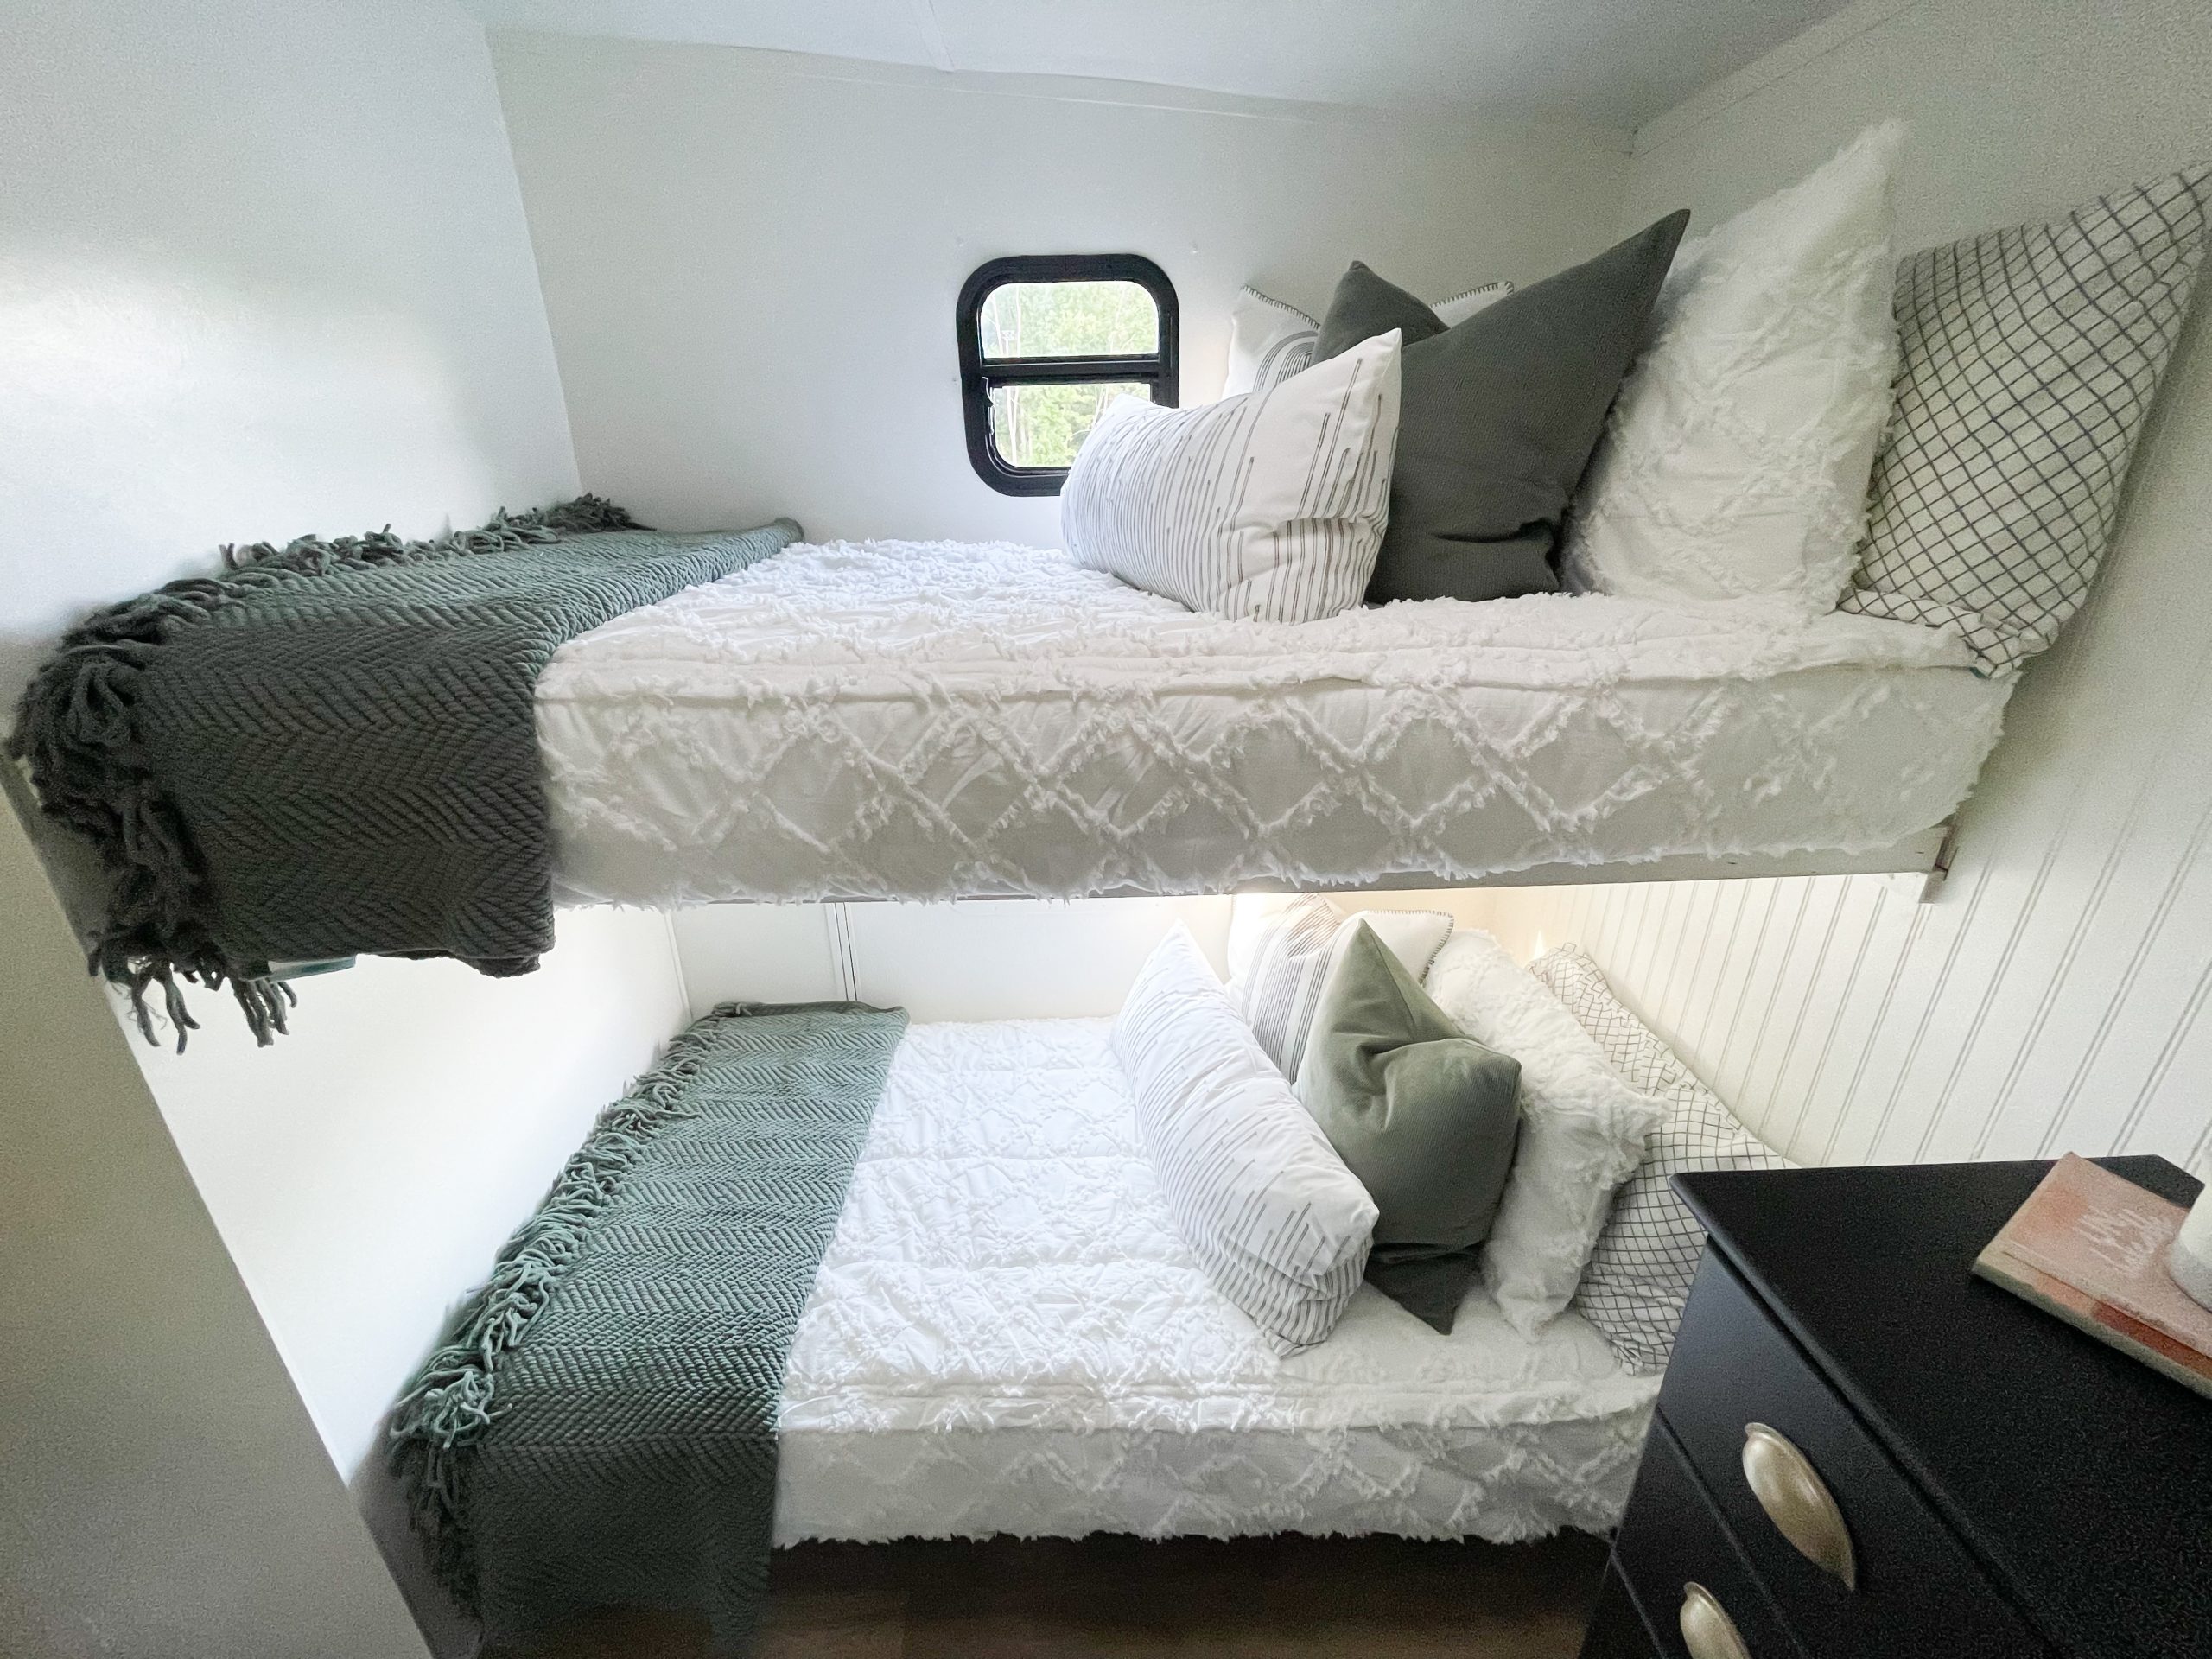
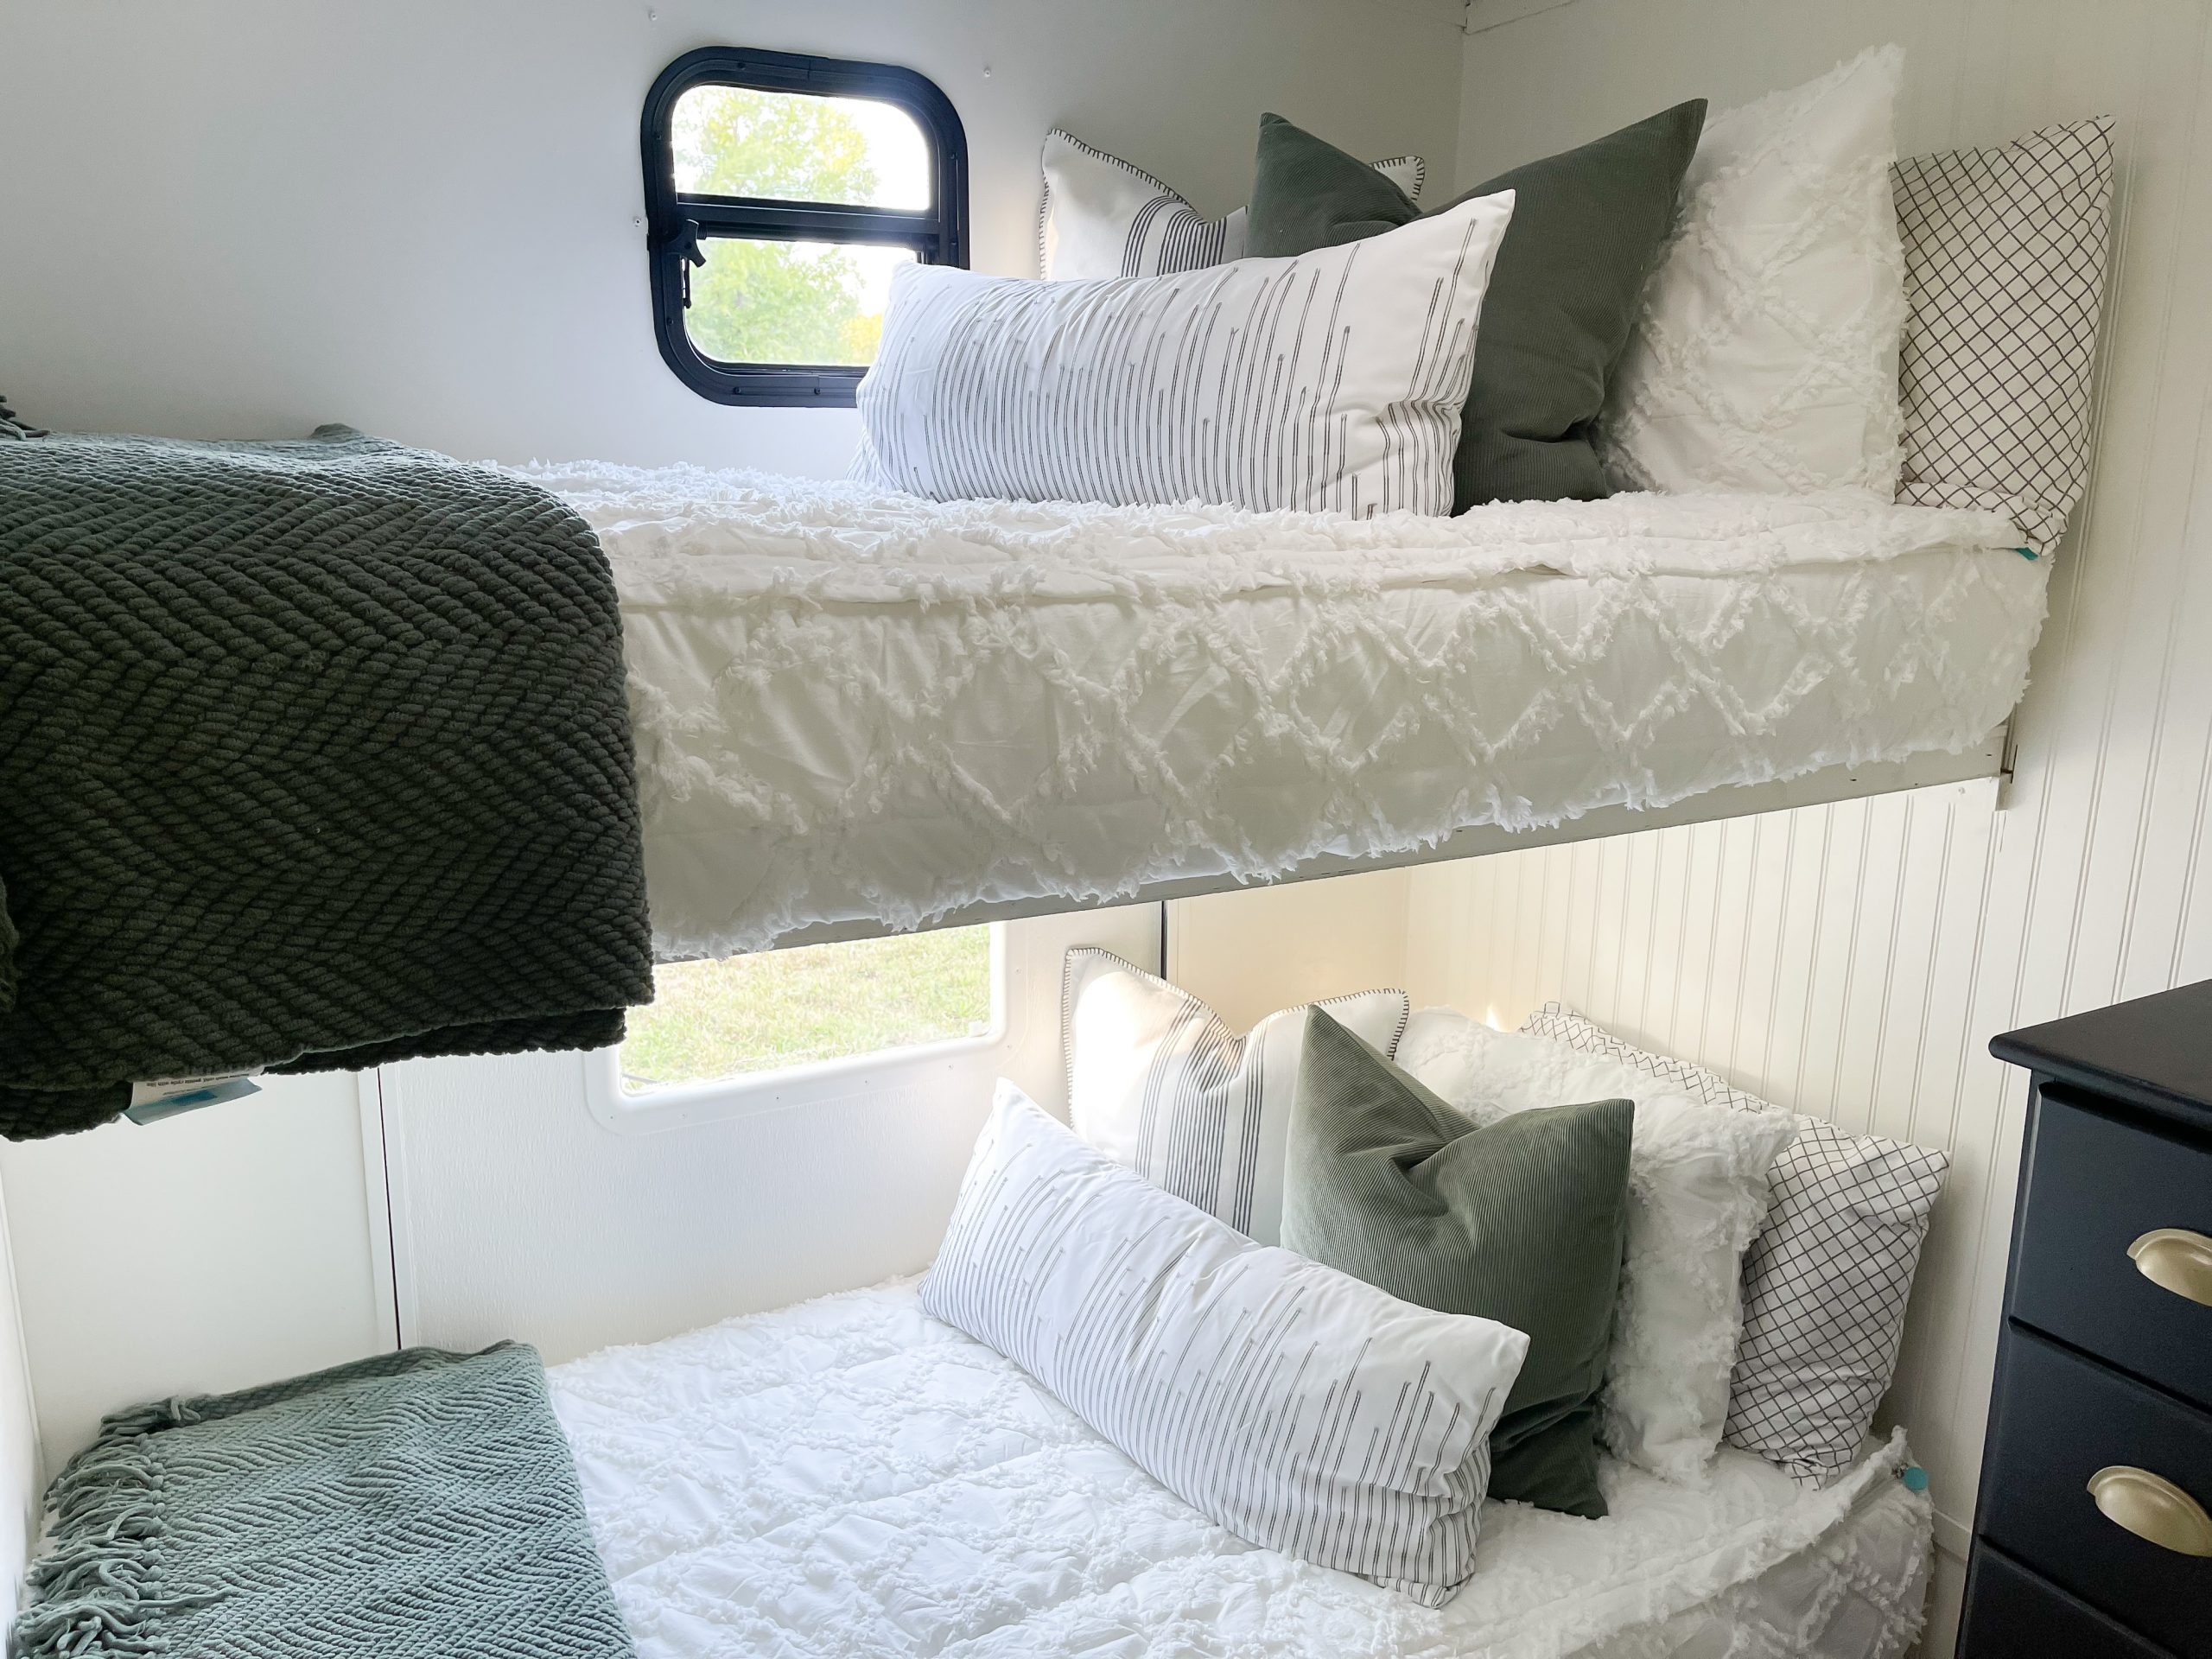
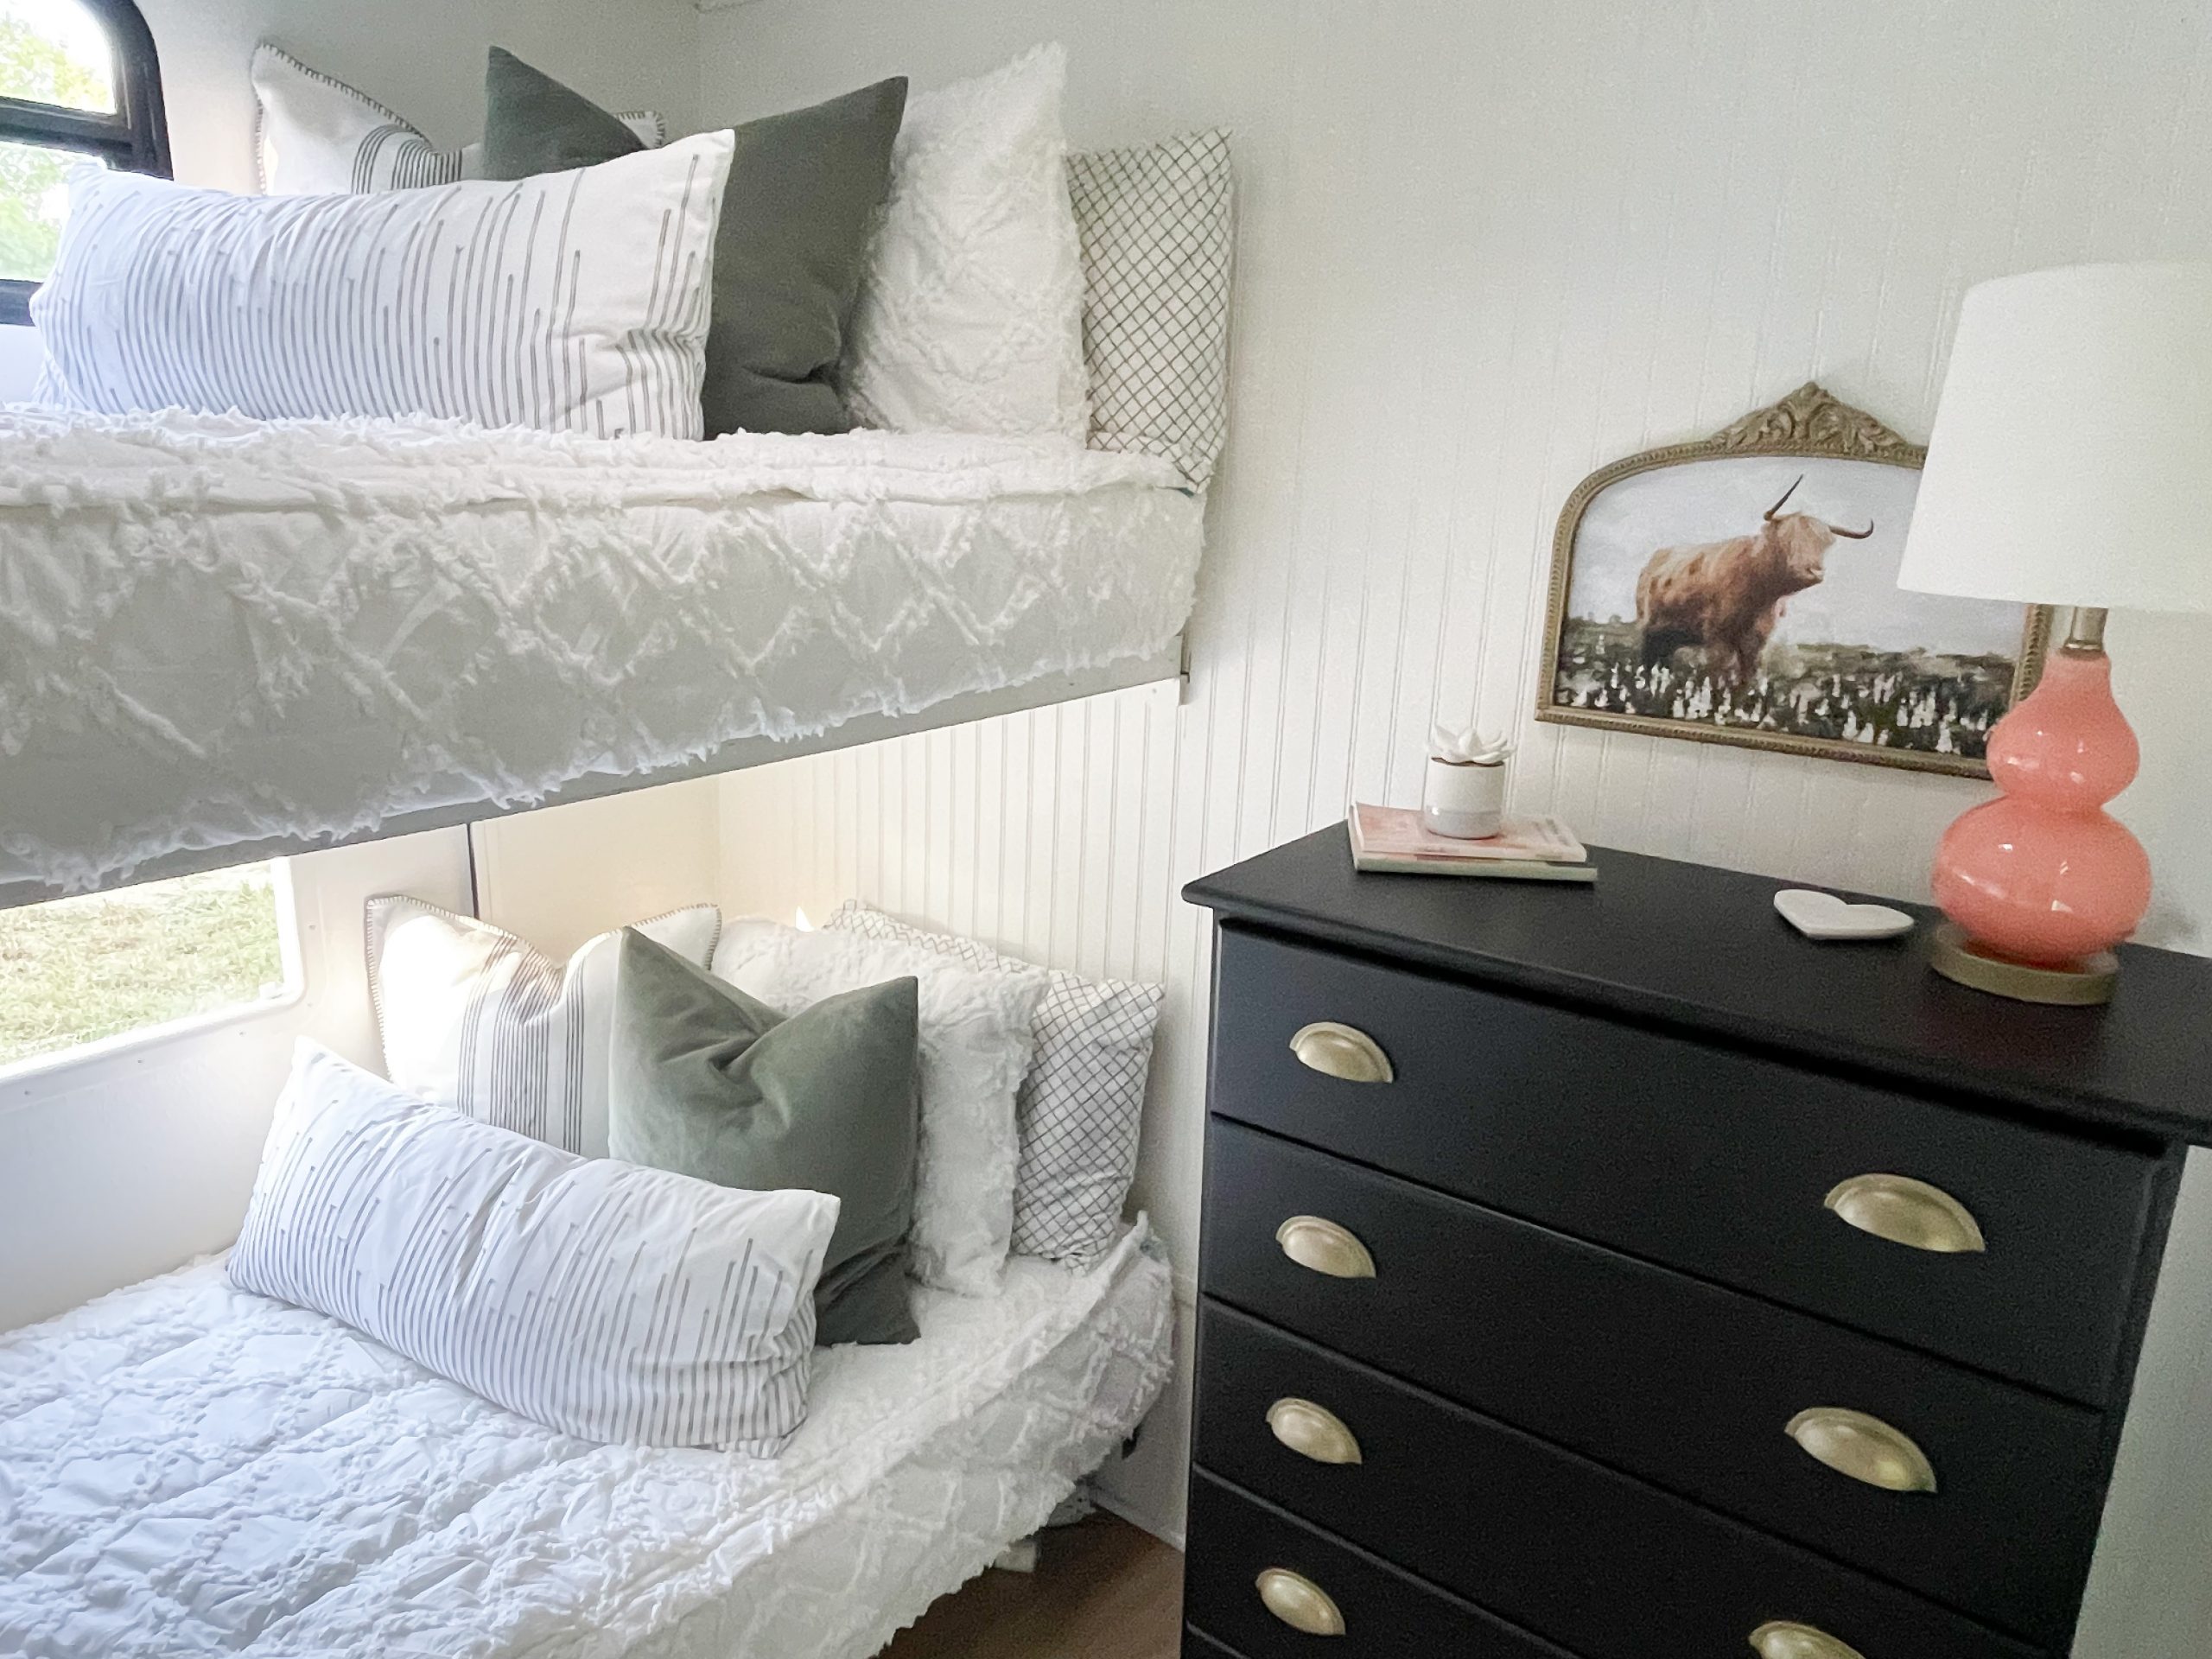
FINALLY, we were at the place were I could DECORATE!!! So enjoy these “after” photos of our RV bunk room makeover!….
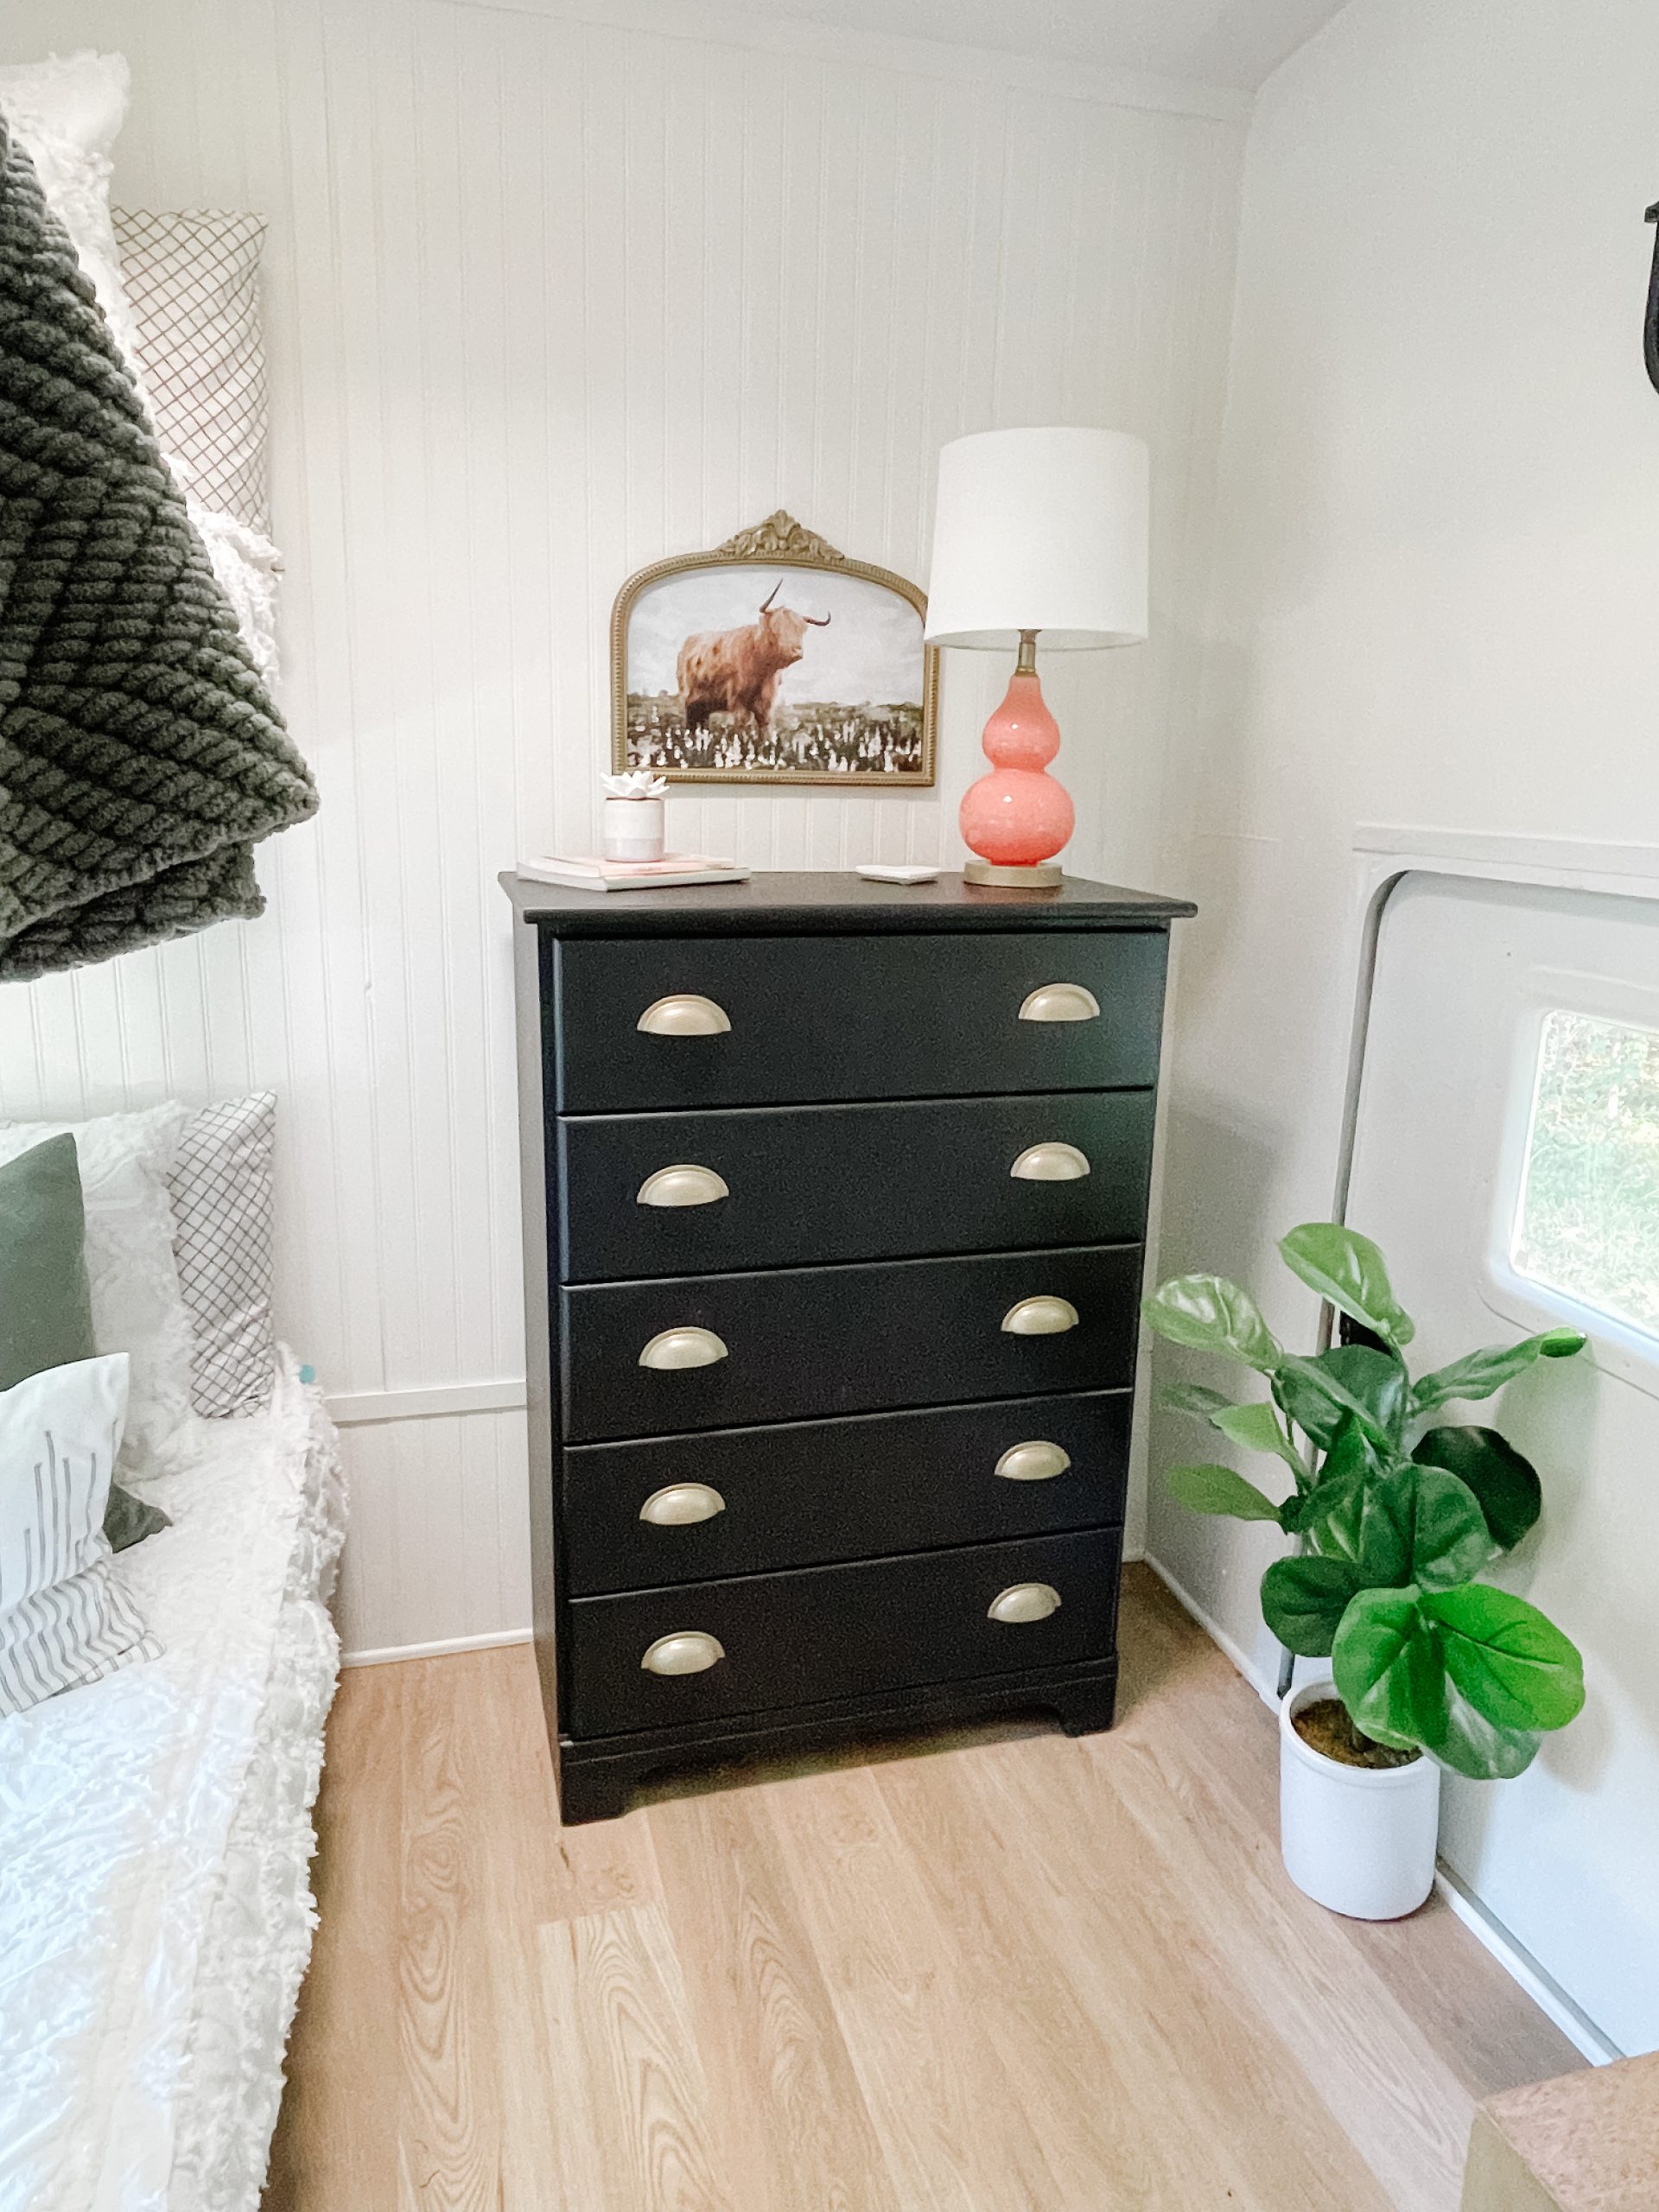
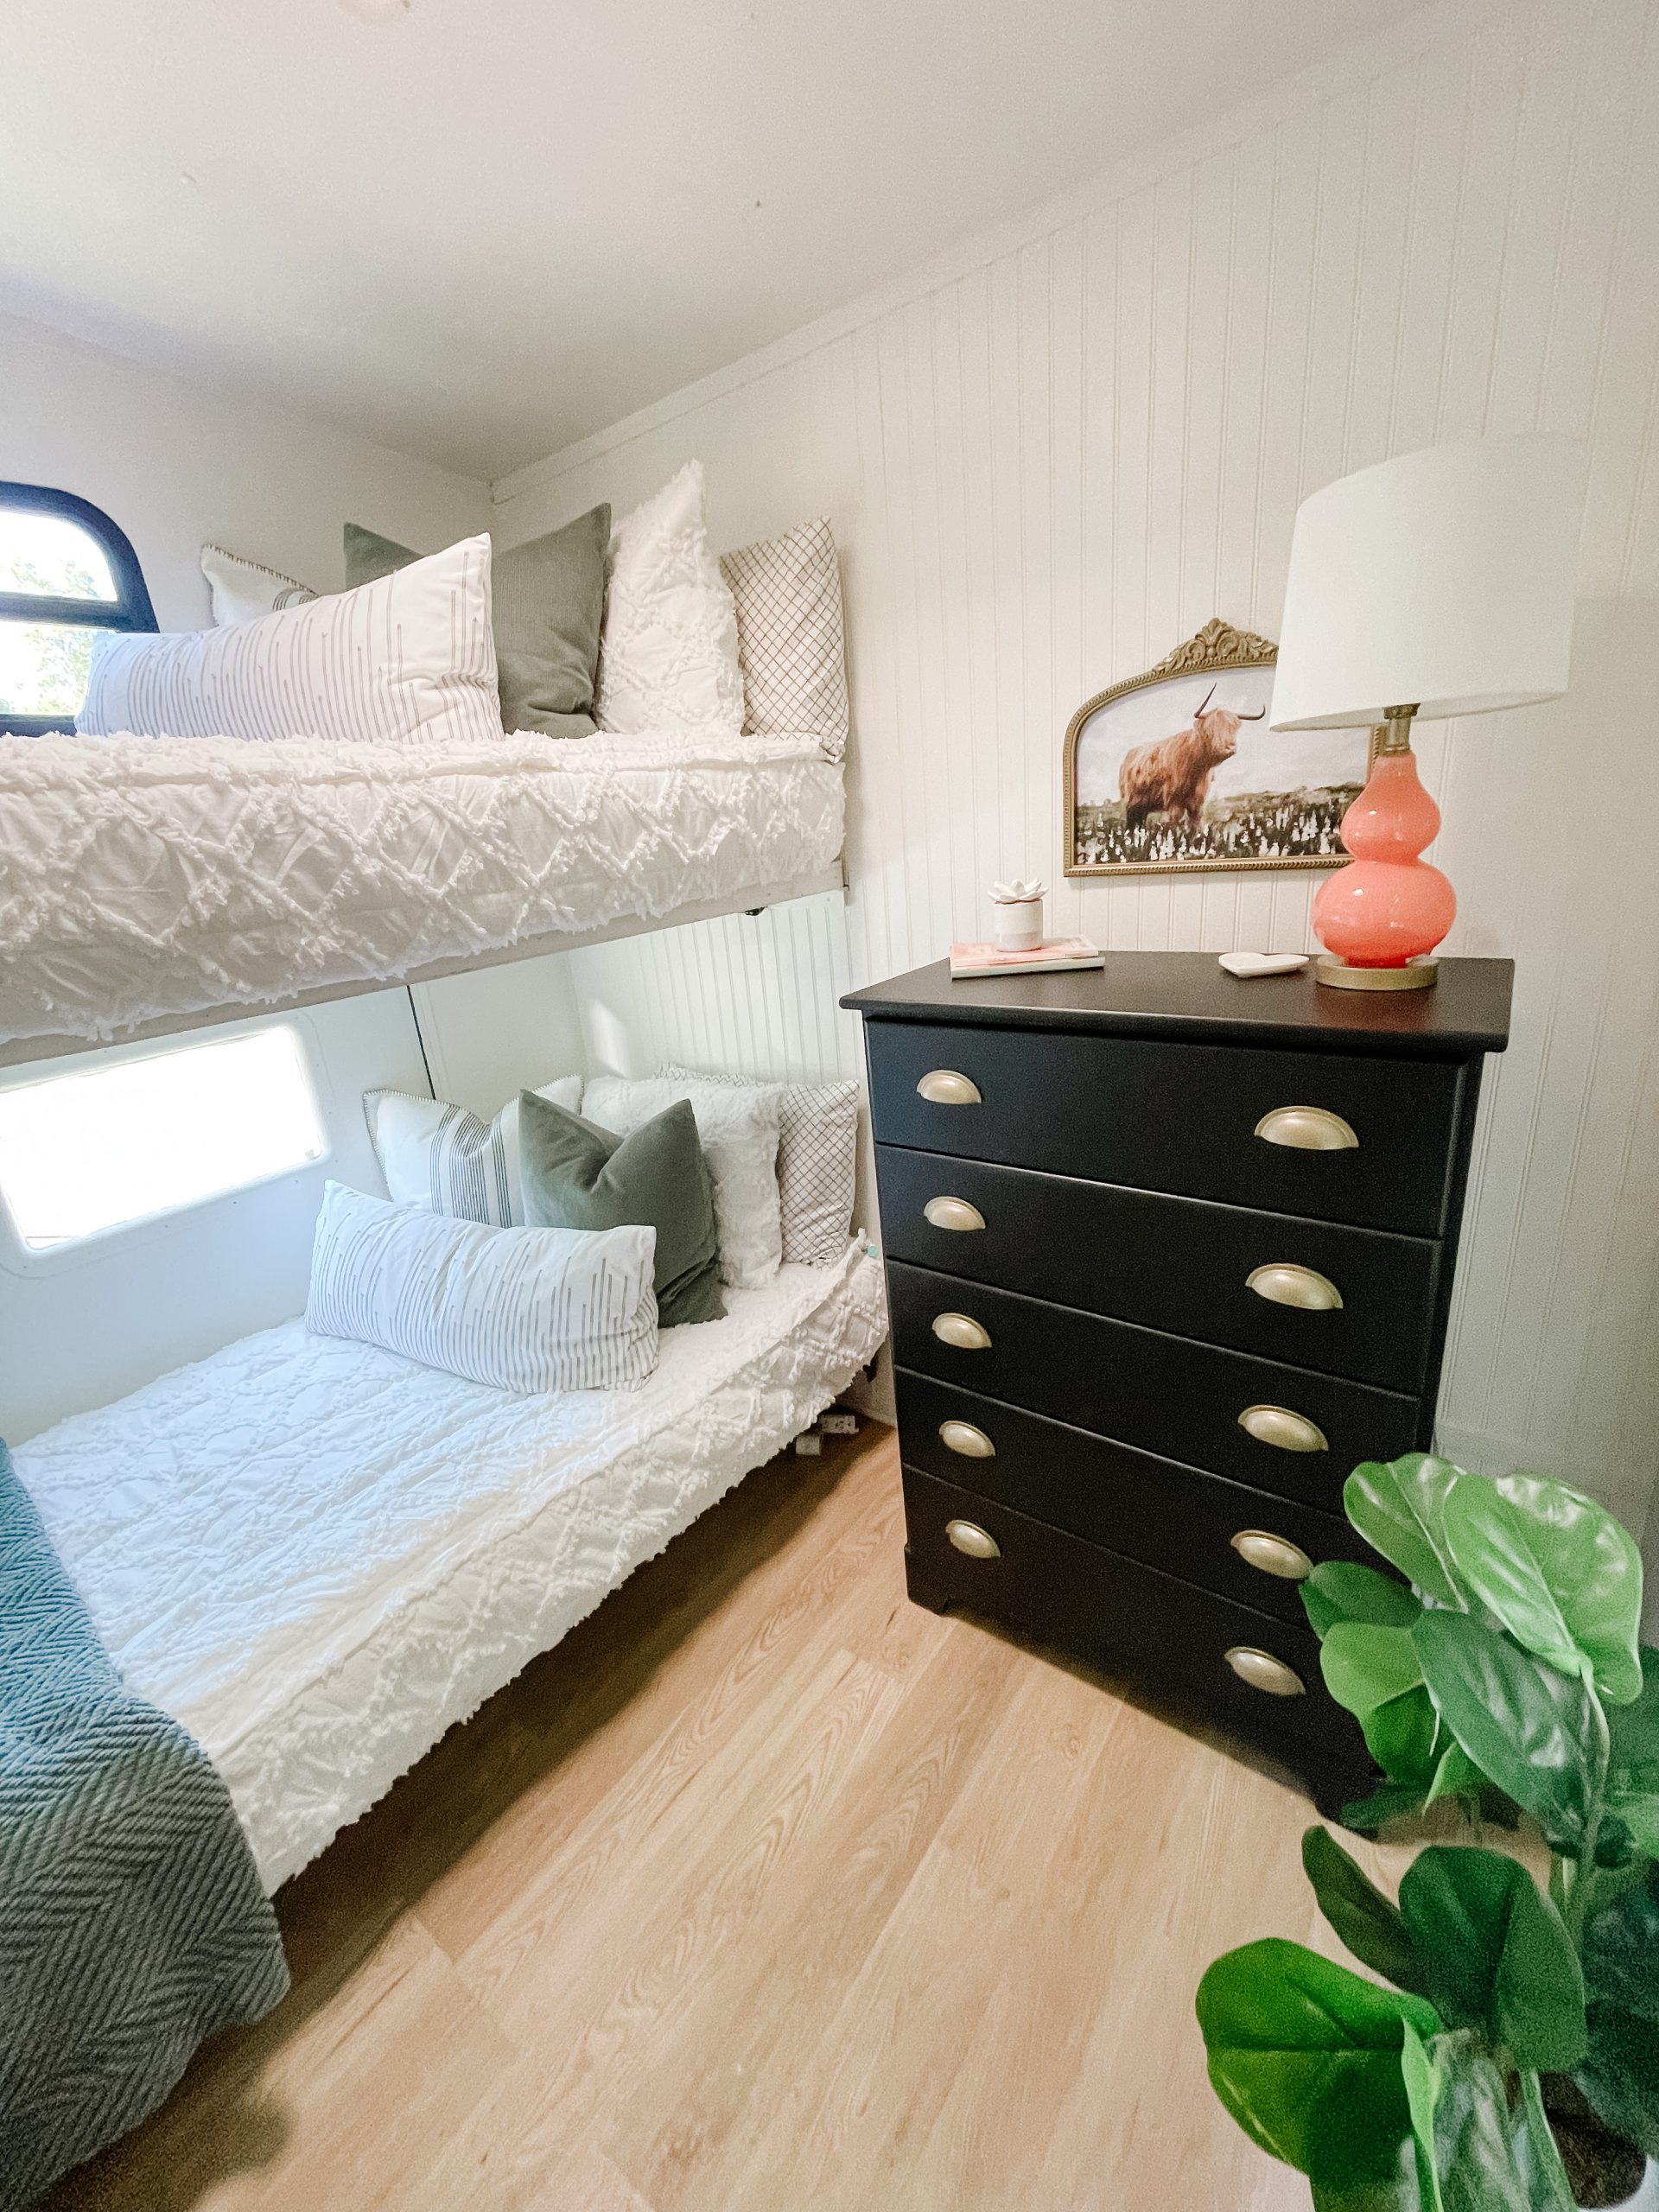
For storage, I did a makeover on a gray dresser I was gifted and painted it black. I shared that makeover with you last week, and you can see it again HERE.
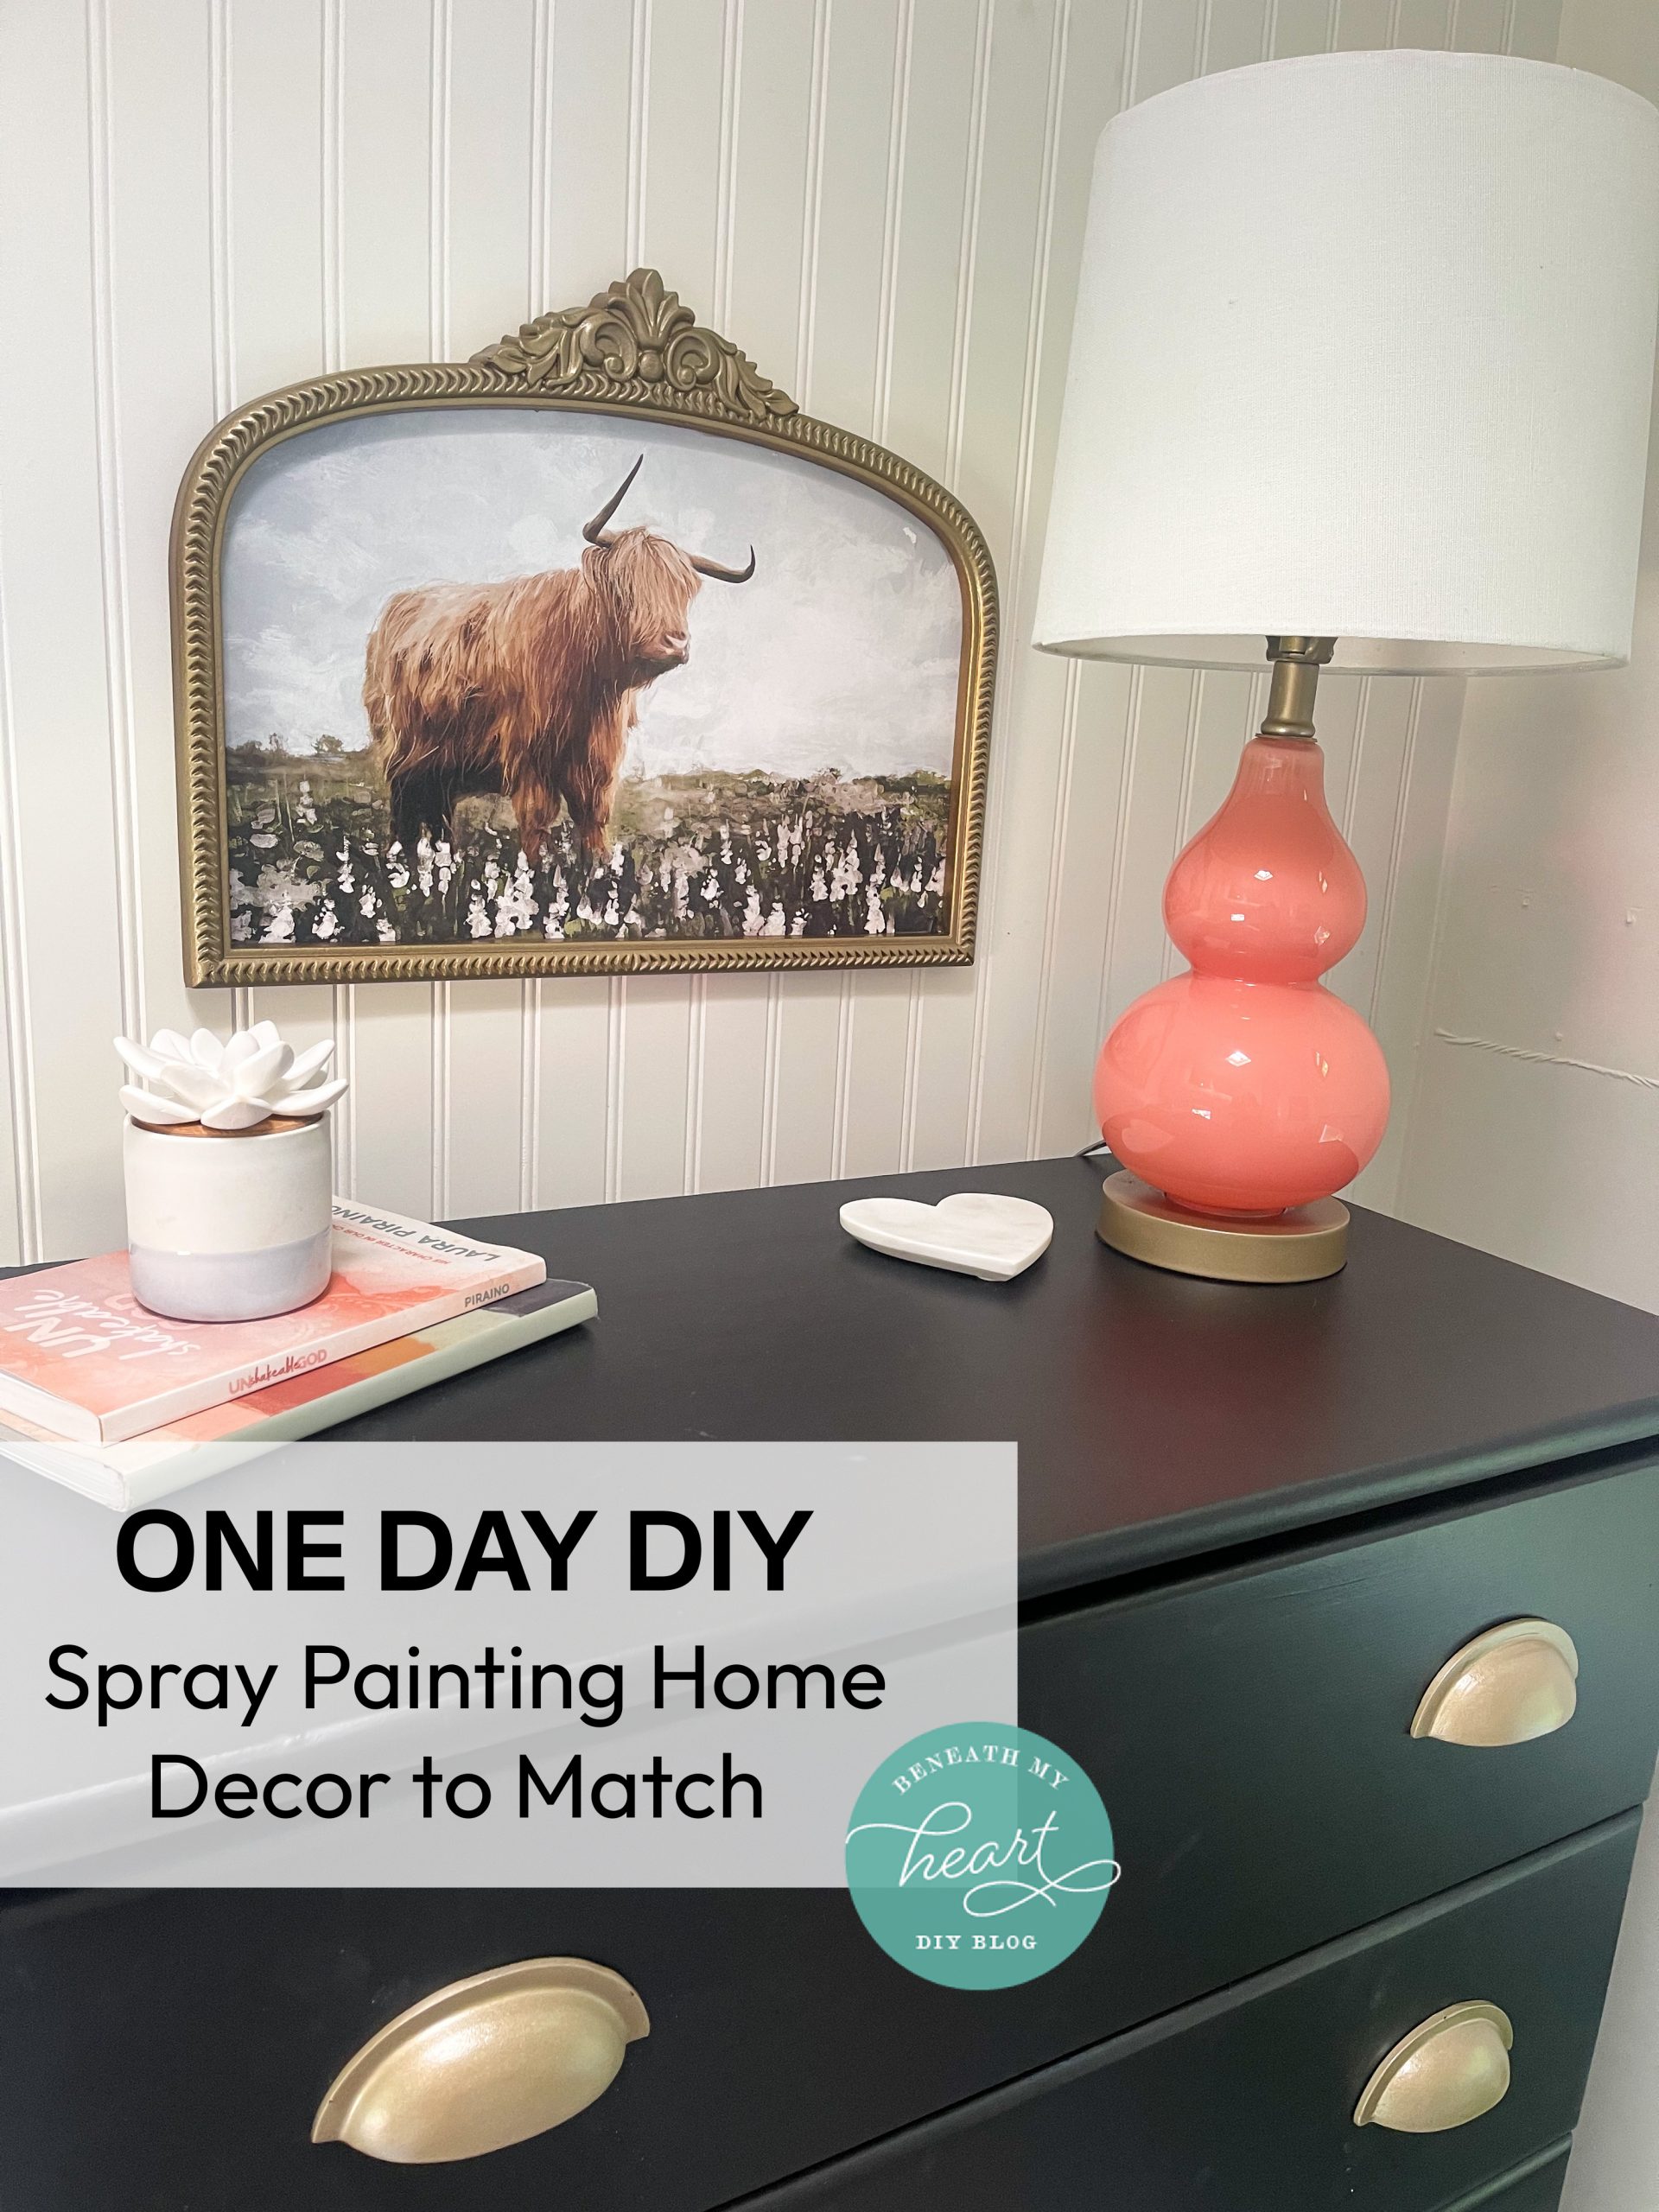
I love how this dresser turned out SO MUCH!!! The cow print above the dresser is from Hobby Lobby. You can find it HERE. And the faux fiddle leaf plant is from Target. You can find it HERE.
For the bunk bedding, I used Beddy’s!!!
I have been DYING to try Beddy’s because I have listened to my friends and influencers online RAVE about them for years! They are basically everything you need for a bed in one piece. The sheet, blanket, and comforter are all one piece, and it zips down both sides like a sleeping bag, but it’s sooooo much better!
People love to use them on bunk beds because they are so easy to make, but people also use them on their beds in the regular rooms at home. I love them so much, I would like to do the same.
Here is a graphic of all the details of Beddy’s..
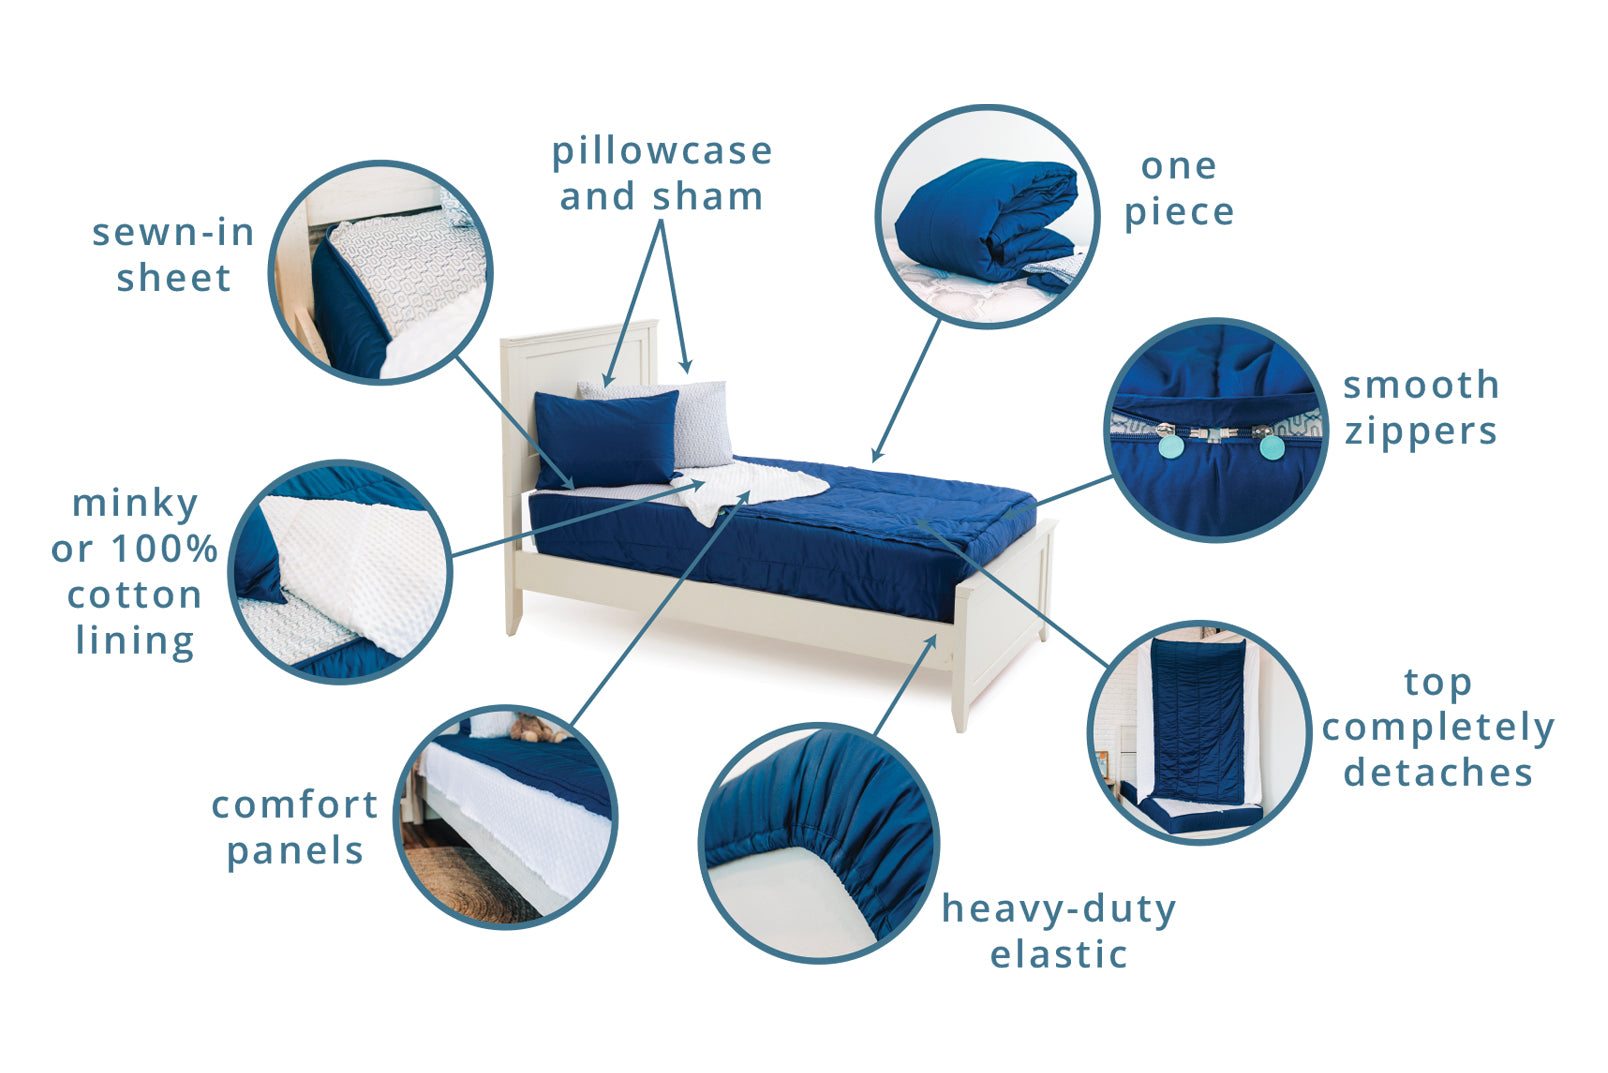
I got the LENNON LUXE beddy’s. You can get it by itself, or buy the bundle, which comes with the throw blanket, and two Euro Pillows, and a Lumbar Pillow. I love how it all coordinates!
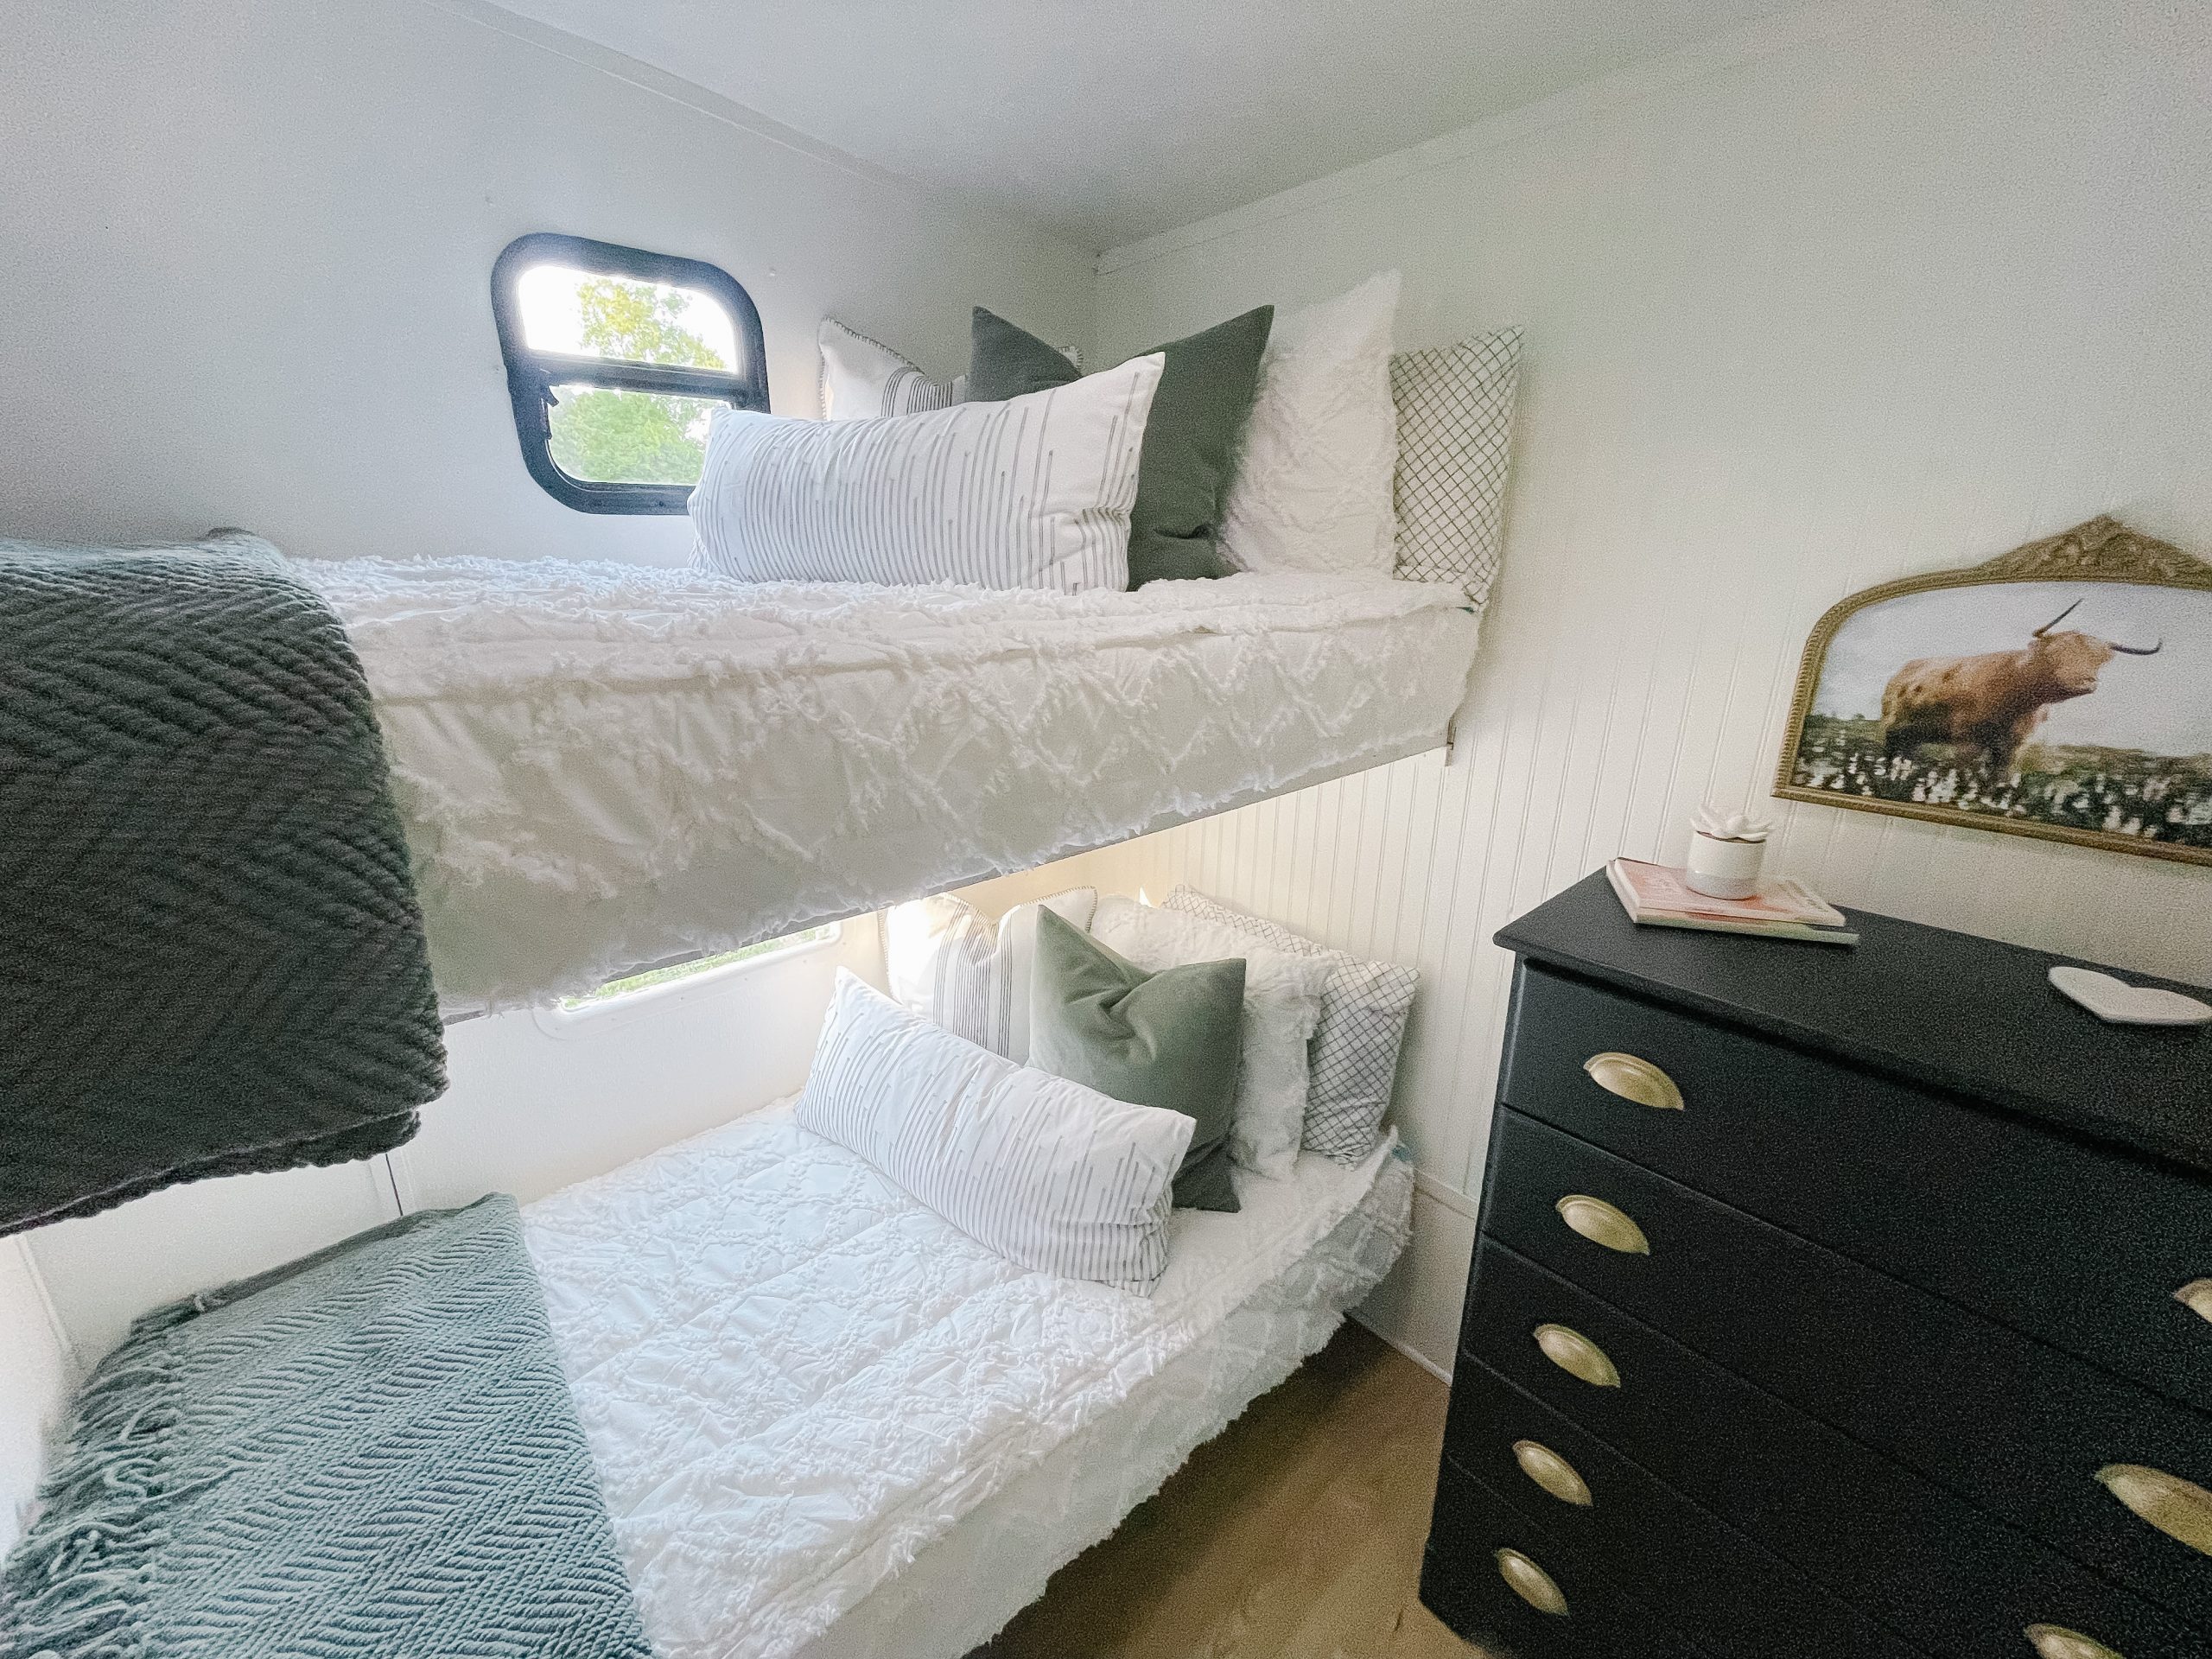
The Lennon Luxe looks so good in the bunk room. We got the “minky” option which means it has the soft, silky blanket on the inside, and oh my goodness! It feels AMAZING!
The quality of the extra shams in the bundle is so nice too! They send you feather pillows to put inside the shames, and everything is so well made.
They have Beddy’s in all shapes in sizes, from Twin to King size beds. I actually just bought two more Beddy’s for my boys’ bunk bed. I bought the Morgan (but didn’t purchase the bundle.) I bought them last night. Today is the last day to get $90 off any Beddy’s on their site right now, so I save $180!! :)

If you want to browse all the choices of Beddy’s, click HERE.
I hope you enjoyed my RV Bunkroom Makeover! I can’t wait to share the rest of the RV makeover with you soon!
View this post on Instagram
It’s lovely. I already love this series. You have such a great design talent. Thanks for allowing us to enjoy this journey with you. The Beddys linen looks terrific.
Looks so good! I have never heard of Beddy’s but they sound amazing. Love the one you got for this room. So pretty!
So amazing. What a great job. I’ve never heard of Beddy’s. Perfect for your space and the colors you chose are so pretty. I love the pop of color in the lamp on the dresser. You are sooooo talented. Wish I had some of it. Have almost been using DIME beauty products now for a month and LOVE them. Thanks so much for the recommendation.
PS Do you ever rest? Like just sit and read a book or something. :)
I absolutely love the green!!!!! Beautiful……
Absolutely beautiful, love going on this journey with you and your family! Can’t wait to see what you do in your new home!♥️
This came out amazing! Another wonderful transformation!
It’s studding!! You and Cy are very creative and talented!! I enjoy this series!
Thanks for sharing this journey with all us!!